Upgrade to paid plan
This section explains the procedure for customers who are currently using a free plan to order a new paid plan.
Select Order Details
01. Open the order screen
Click on the "Upgrade" button at the top of the screen.
02. Items
The order screen will open.
Each item will be presented in detail.
Please note that grayed-out items cannot be selected.
*For more information, click here.Pricing.
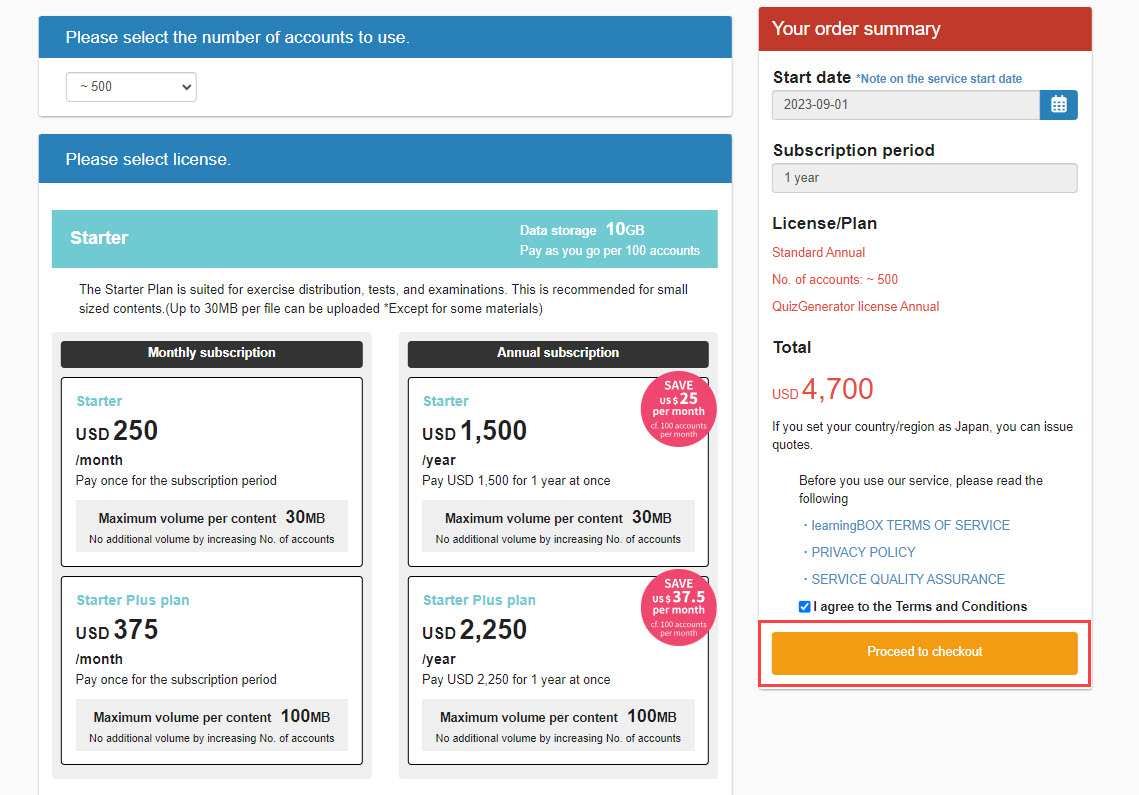
▼ Number of accounts used
Please select the number of accounts you wish to use from the pull-down menu.
▼ Licenses
Select a plan.
Plans can be either monthly or annual contracts.
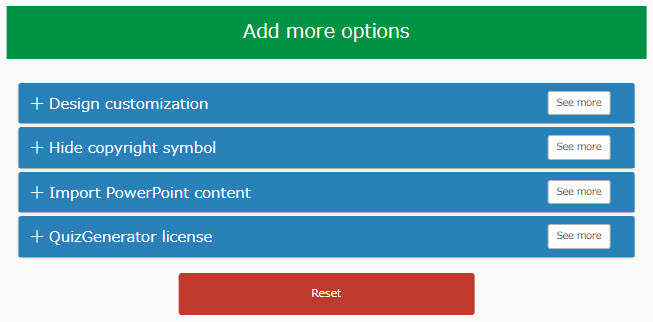
▼ Options
Then select your options.
Click on each option to view the contents.
If you do not want to use the option, select "Do not use this option".
To reset your option selections, click on "Reset Options".
Please be sure to make your selections for all options.
Start Date of Use
Click on the calendar icon and select a date.
If you do not select any particular date, the earliest available date will be displayed.
*Please note that if you select "Bank Transfer" as your payment method, your service will begin after payment is confirmed.
▼Display of selections
Your selections (contract term, license/plan, and total amount) will be displayed.
03. Confirmation of Terms and Conditions
Check the "Order Summary" and, if the information is correct, review the terms and conditions.
If you agree to this, please tick the "I agree to the Terms of Use" box.
04. Order Confirmation
The procedure varies depending on the selection you make.
▼ For regular license
When you click the "To Settlement Procedure" button, the "Settlement Procedure" screen will appear.
▼ For shared servers
Clicking the "To Payment Procedure" button will open the "Customization Request" pop-up.
After completing the settings, click the "Proceed to Payment" button.
*For more details, refer to Customized orders.".
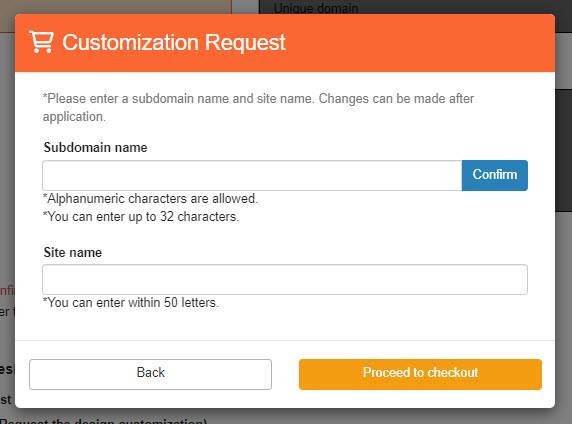
Please set the following items.
- Subdomain name: Set the subdomain portion of the URL
- Site Name: Set the name of the site to be displayed in the browser bar or search screen
▼ For dedicated servers
You cannot complete the procedure yourself via the Web.
If you wish to apply, please contact us.
About the payment procedure screen
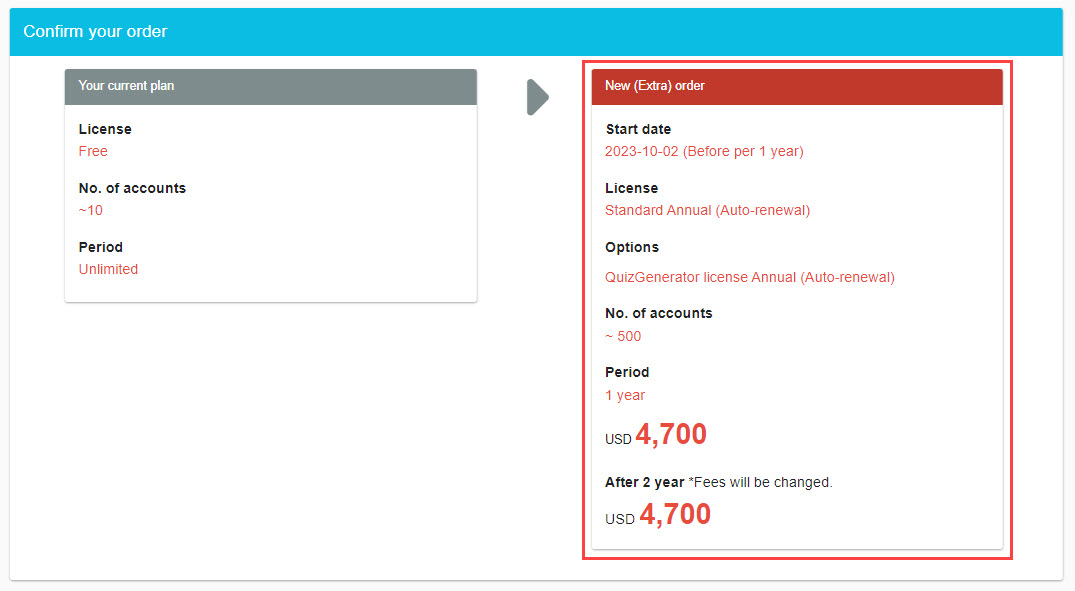
01. Display of order details
Your order details will be displayed at the top of the screen.
Please make sure that the contents are correct.
02. Select payment method
Please continue to select a payment method.

You can choose from the following four methods
- PayPal payment - PayPal one time payment
- PayPal Payment - PayPal Subscription
- bank transfer
- bill payment
*For more details, refer to Tell me about your payment options..
Note on PayPal Subscription Purchases
- If you wish to cancel your membership while under contract, please cancel your PayPal contract first, and then cancel your learningBOX membership.
- Order historyPlease be sure to turn ON the toggle for "Automatic continuation of your contract" that appears in the
- If you have more than 90 days until the start date of your contract, you cannot choose PayPal subscription
Issuance of Quotations
We can issue a quotation before confirming your order.
01. Open the screen to upgrade.
Click the "Upgrade" button at the top of the screen.
02. Items
The order screen will open.
*For details on each item and operating procedures,Select Order Details".
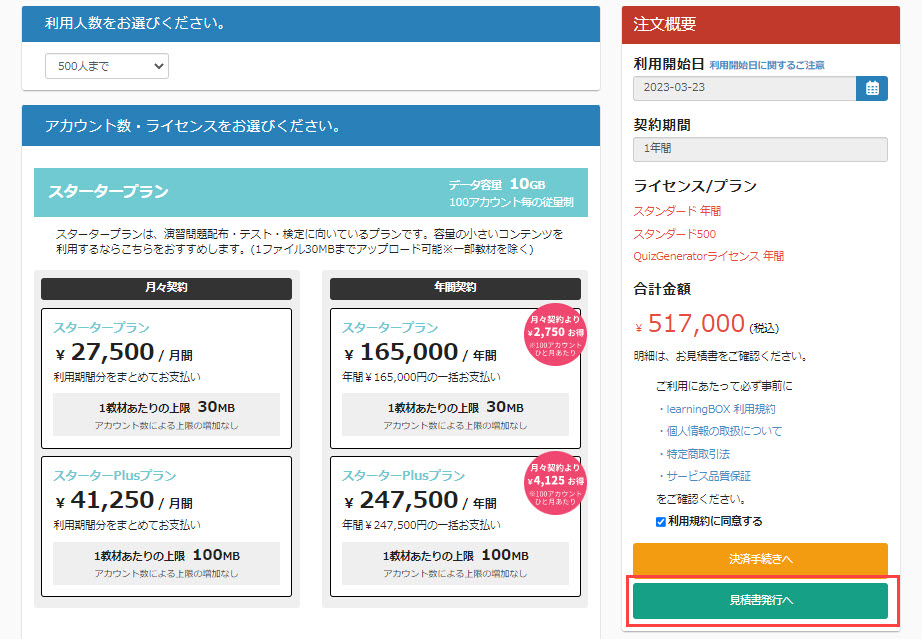
03. Open the quote issue screen.
After completing the settings, click the "Go to Quotation" button.
04. Display of order details
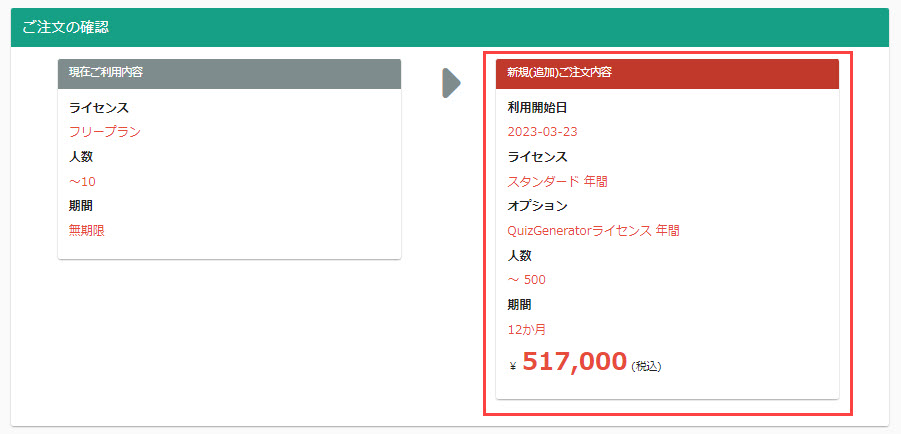
The "Issue Quotation" screen will open.
Your order details will be displayed at the top of the screen.
05. Enter items
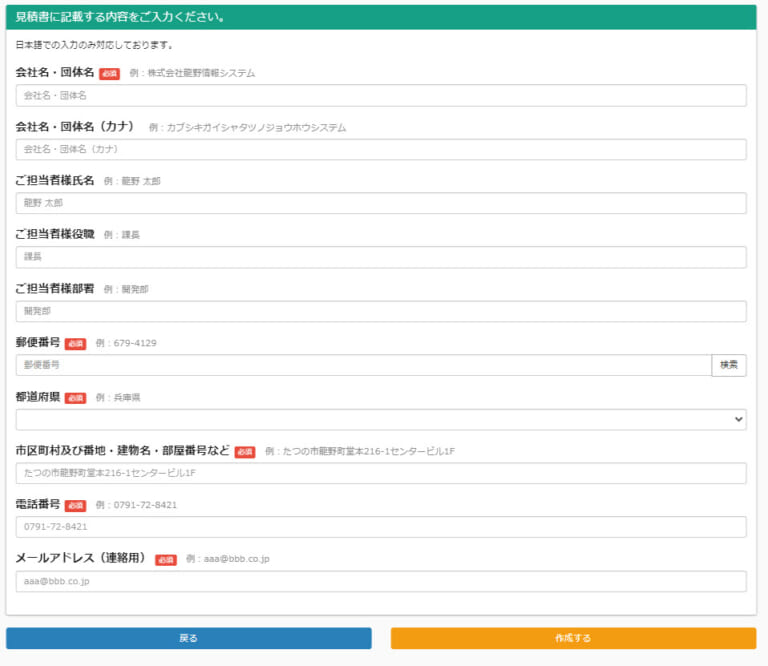
Please enter each of the items you would like to include in your quotation.
Please be sure to fill in all required fields.
After completing the settings, click the "Create" button.
A preview screen will appear.
06. Order history list screen
When you create a quote, you are automatically taken to the "Order History List" screen.
Here you will see the quotation you have created.
This screen can be accessed from "Contract Status" > "Order History List" in the side menu.