Access period
Required
Management role of Content manager (Edit/View + Assign)
Select group and period
01. Go to the Access period page
Select Manage contents in the side menu.
Right-click or click the "︙" icon on the target content, and select Access period.

02. Add Access period
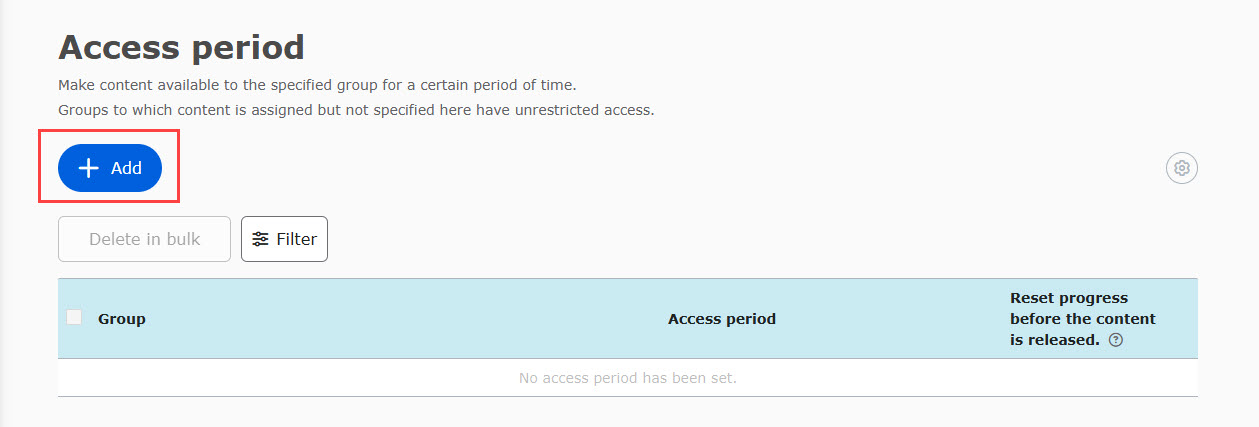
Click +Add to add an Access period.
03. Settings
Set each item in the window.
Save your changes once all settings are complete.
Group
Groups will be listed when you click the Select group window.
Tick the group(s) to set the period.
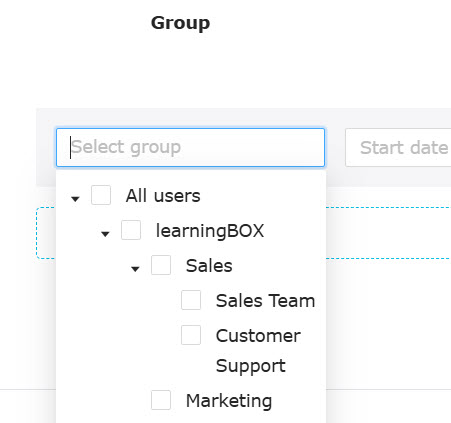
Untick or click the X button to unselect the group.
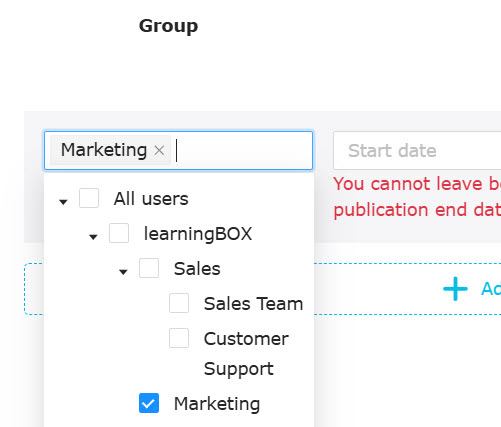
Access period
Set the Access period to open the content to the selected group(s).
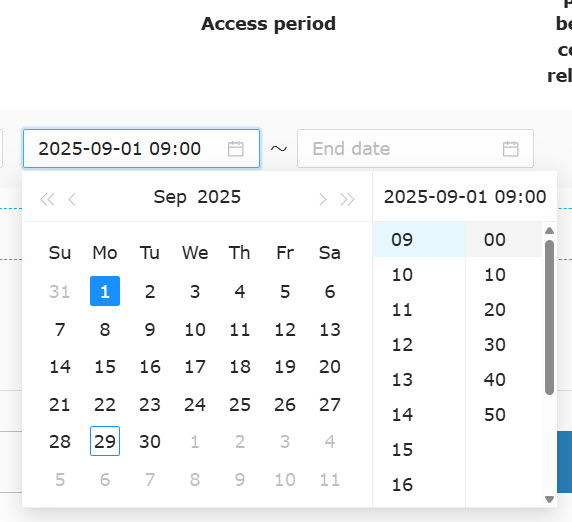
Click on the calendar bar to select the start/end date.
*When only the date is selected, the current time is automatically entered.
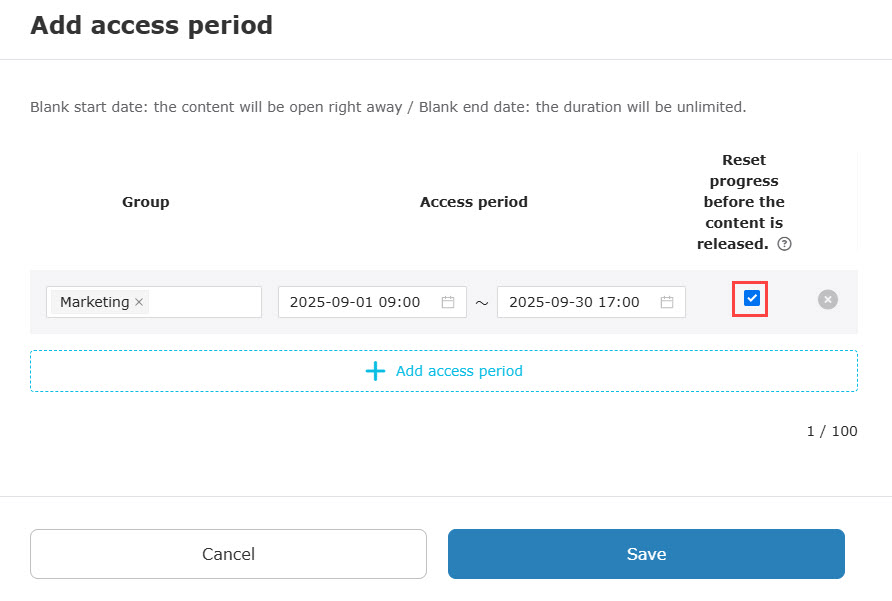
Reset progress before the content is released
This function is applicable when multiple publication periods are set for the same group for a certain content.
Ticking the checkbox will reset the completion status on the user interface to "Not attempted" before the beginning of the next Access period.
*You cannot set this option to headings, prerequisites and selective content.
You can manually edit the completion status to "Not attempted" for individual grades after the attempt is completed.
*For more details, refer to By contents, Batch operation.
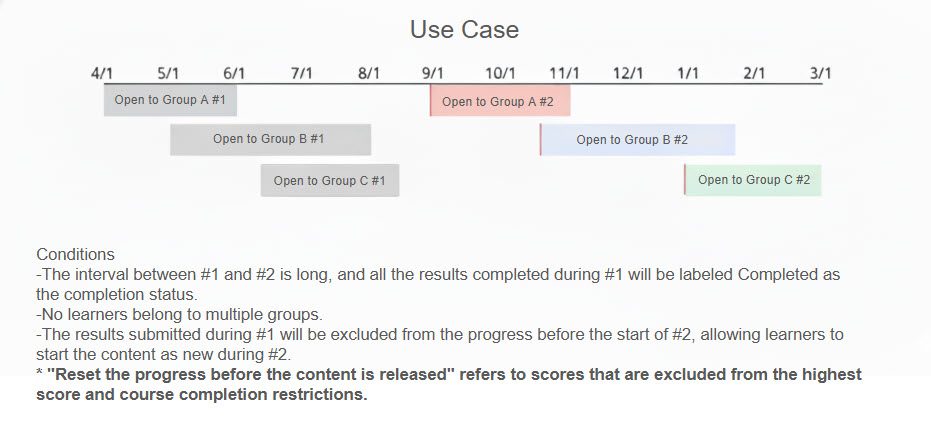
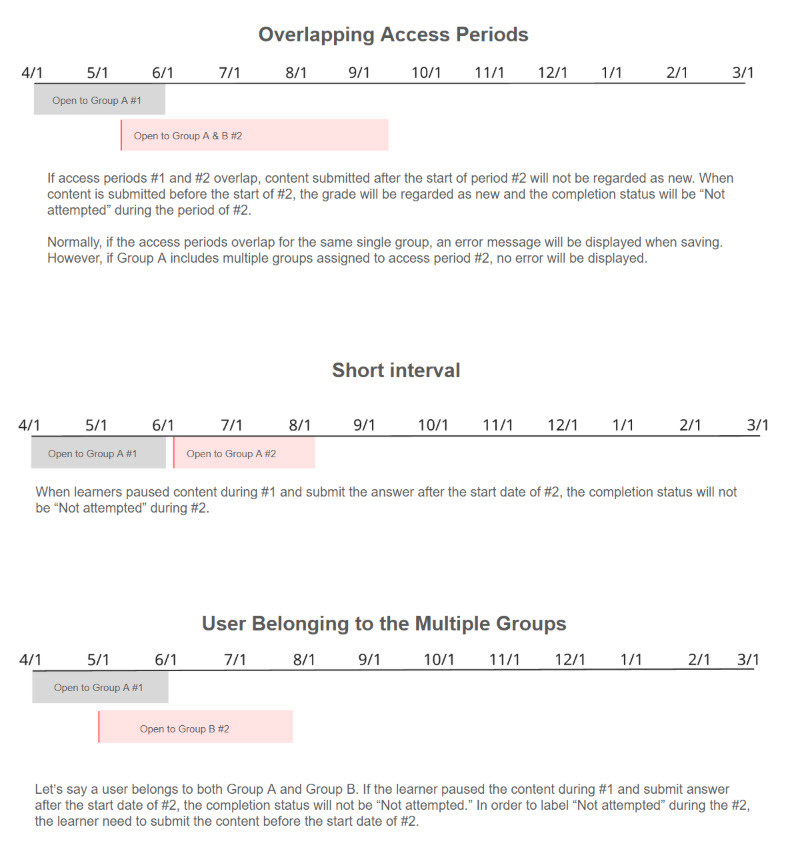
After an Access period expires and before the next one begins, the content's completion status on the start page will be 'Not attempted.'
However, depending on the conditions set, this may not apply.
The following explain some exceptions.
▼Applied
▼Not applied
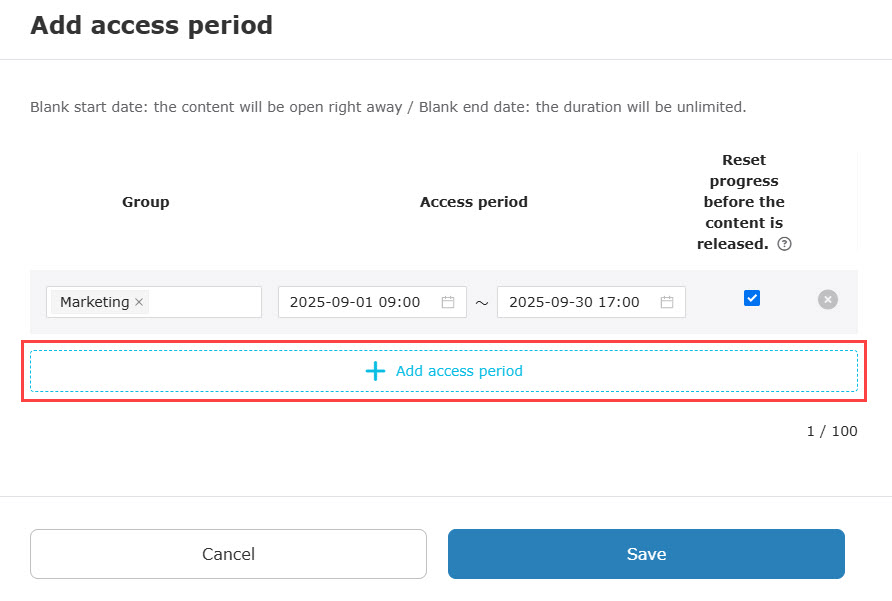
04. Add another Access period
To add another Access period, click "+Add access period."
Refer to the above Step 03. Settings to veiw how to apply the settings.
05. Delete Access period
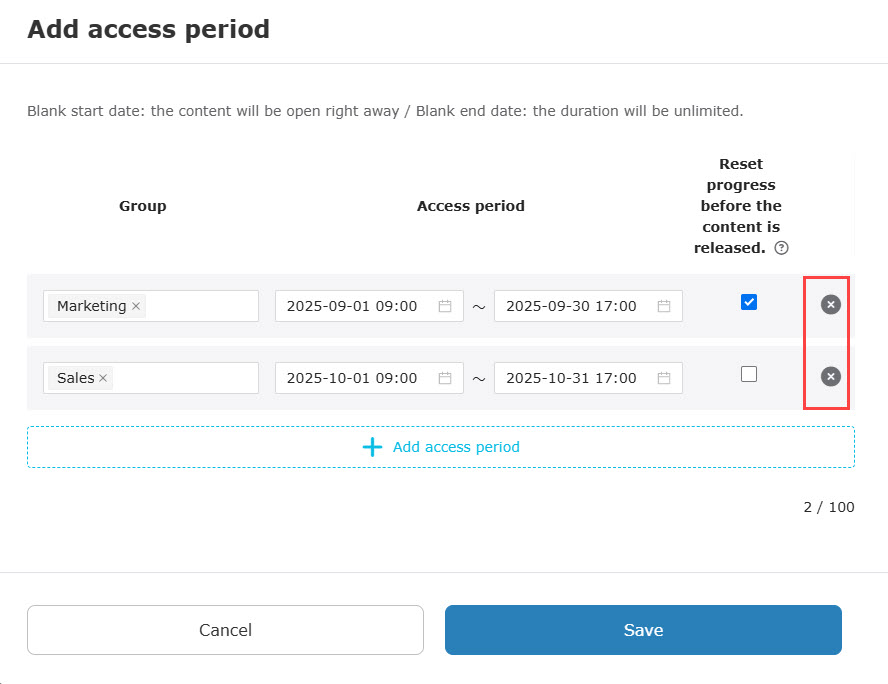
To delete a set Access period, click the X button.
06. List
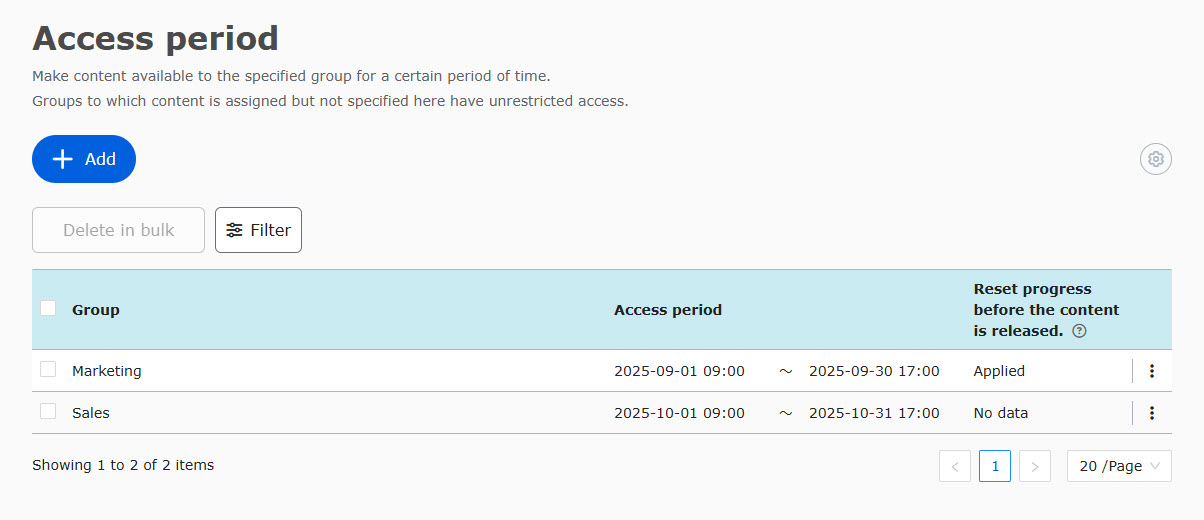
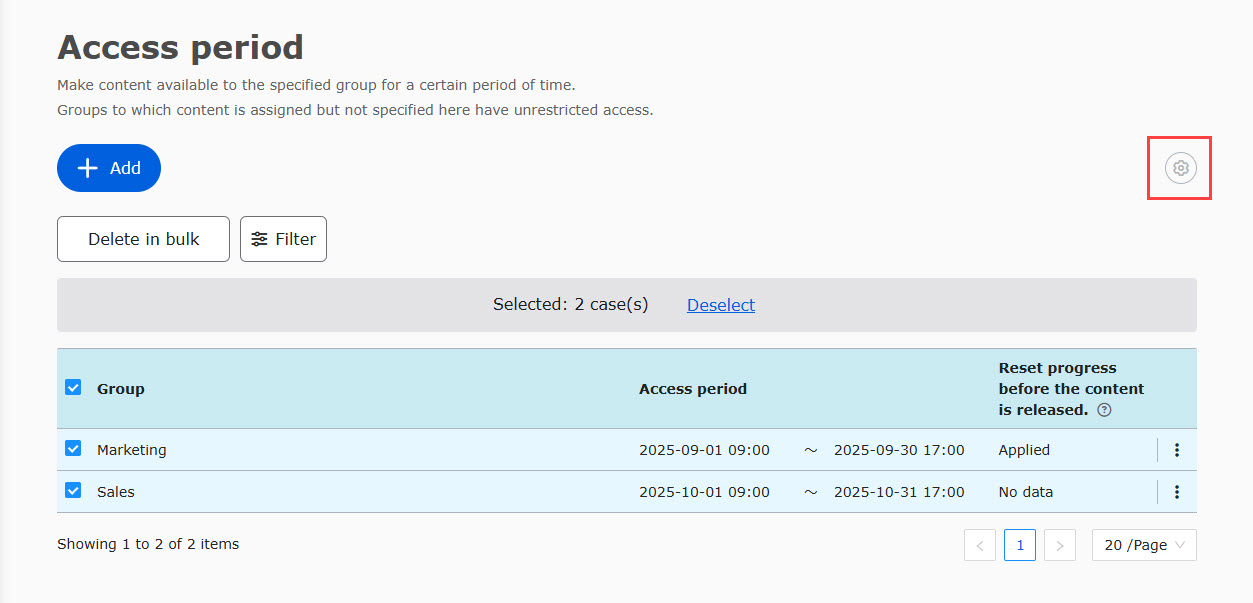
The Access period you have created will be listed as follows.
07. Filter
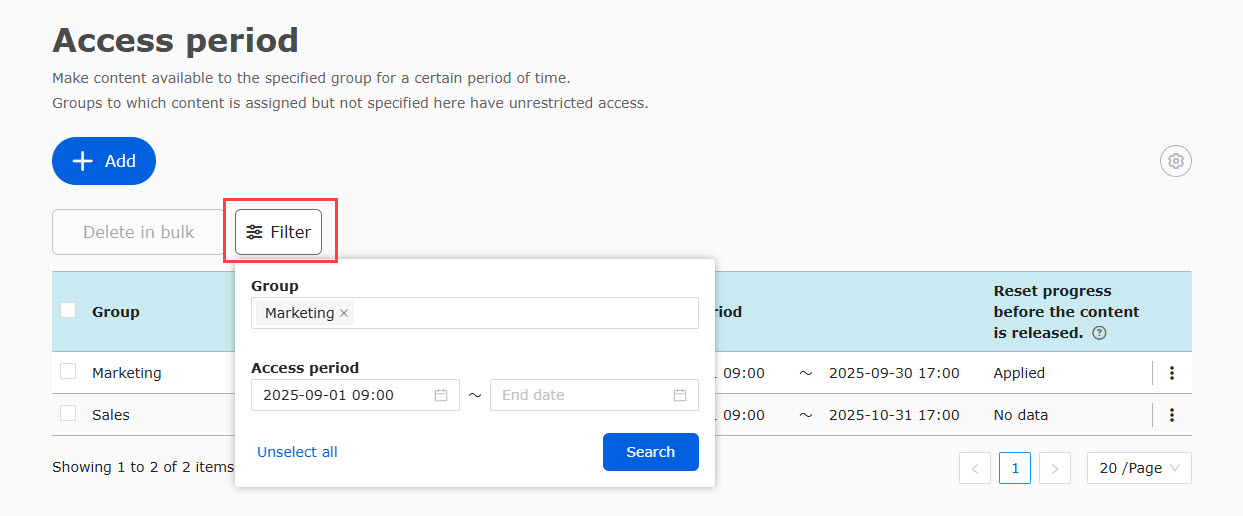
Click "Filter" to specify registered Access periods.
Select groups and duration.
Click the X button to delete an item.
Click on Unselect all to reset the conditions.
08. Edit/Delete
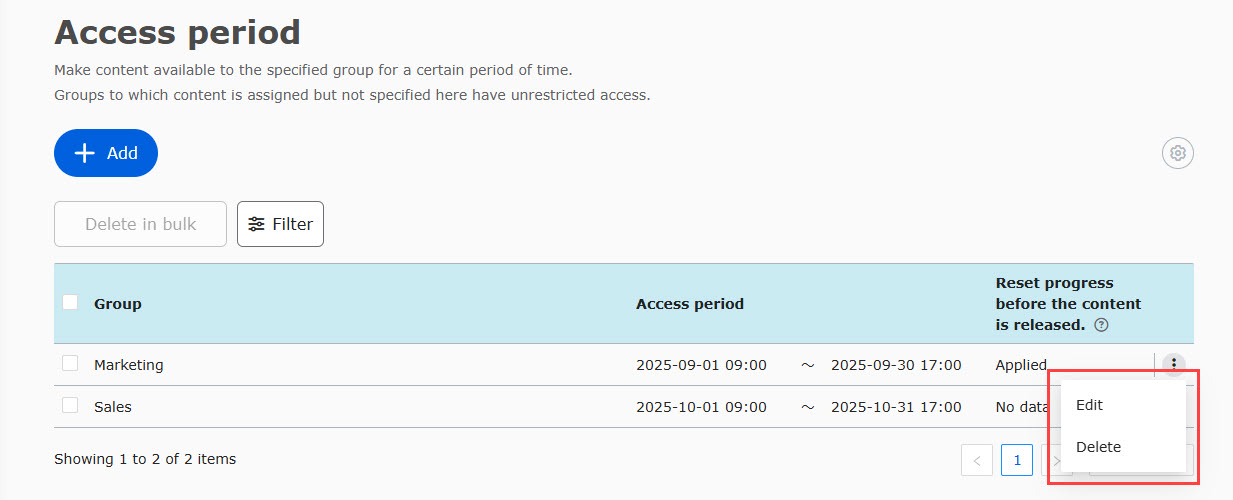
To edit the setting, click on the "︙" icon.
Refer to 03. Settings to find how to edit the settings.
Also, you can delete the setting from the icon.
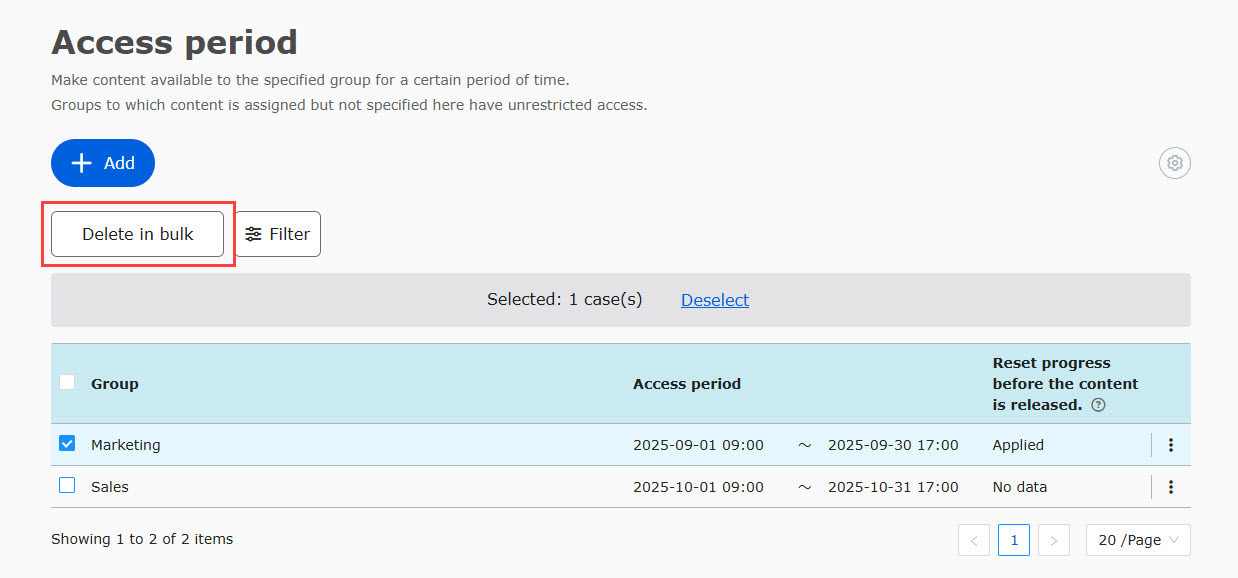
To delete multiple settings at once, tick each setting and click "Delete in bulk."
To deselect, click the checkbox again or click "Deselect."
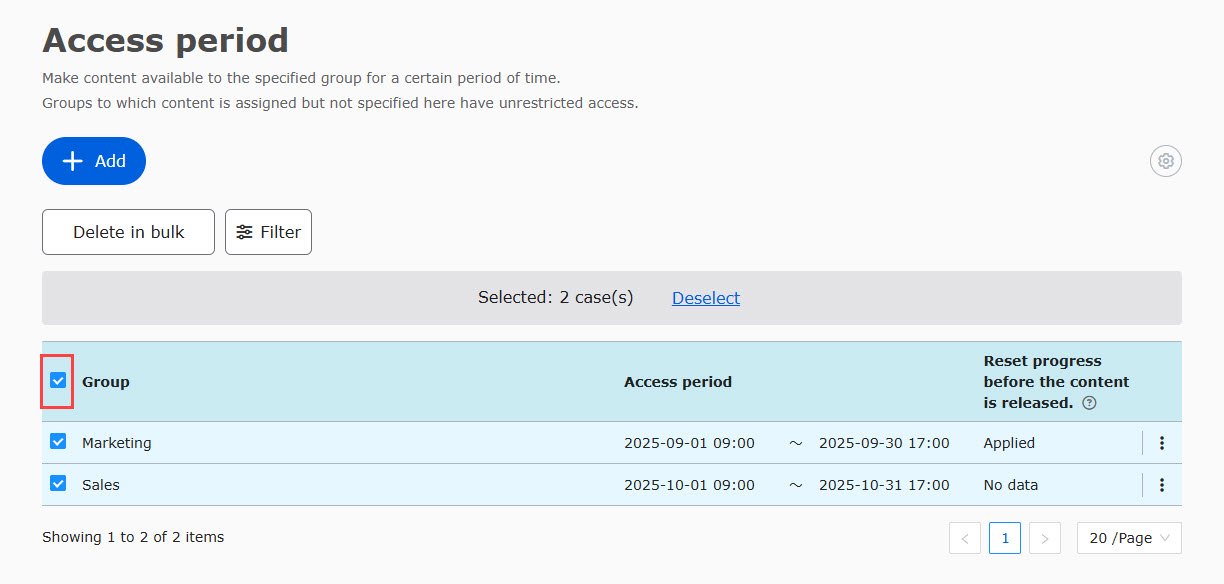
You can select all items by clicking the box next to the Group.
If you set a large number of Access periods across pages, a check box will appear to allow you to select all of them at once.
Tick the box to select all items at once.
Advanced settings
You can show/hide the course when it has not started yet or already ended.
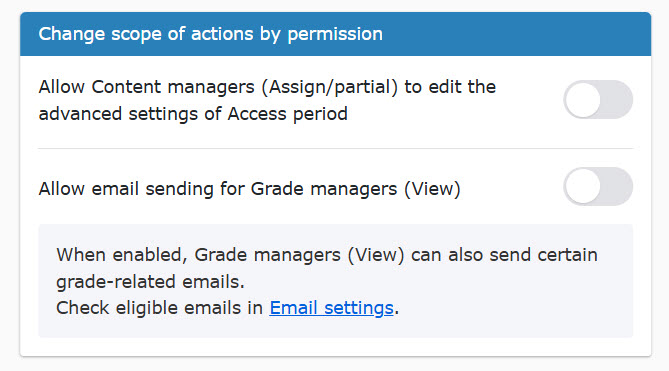
SettingsOn the "Change Scope of Operations by Permission" screen, you can toggle the "Allow users with Content Assignment Permissions (Partial) to change advanced publication period settings" option on or off to select one of the following two types of administrative permissions that allow users to make changes in the advanced settings.
The default setting is Off.
- On: Content manager (Edit/View) + Content manager (Assign partially)
- Off: Content manager (Edit/View) + Content manager (Assign for all users/all content)
01. Advanced settings
Click the gear icon shown below.
Choose either to show content in grayed out or Hide.
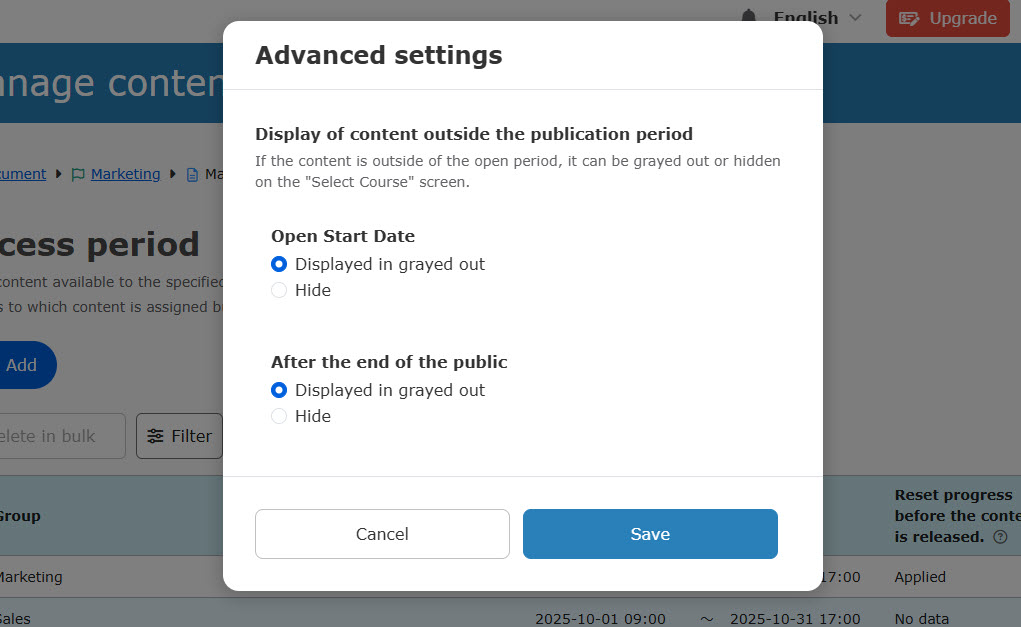
Headings/Selective content/Prerequisites will always be hidden during the unscheduled Access period.
After the settings
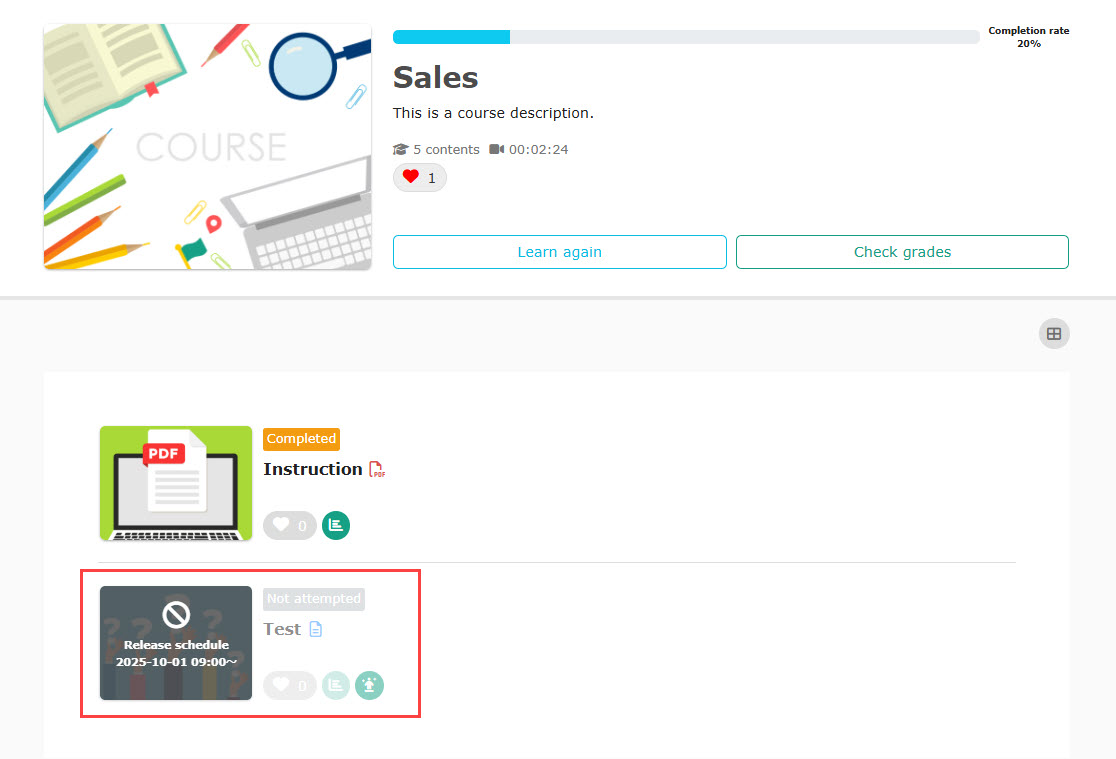
On the Select a course page
▼If set to grayed out
The content is displayed in grayed out and learners cannot select it.
▼If set to hide
The content will not be displayed.