Adding and editing collaborative tools
Various applications compatible with LTI 1.3 can be added.
By specifying the URL of the application, access to a specific system is possible.
Steps
01. Open the LTI Linkage Tool Management Screen
In the side menu, select "System Settings" > "LTI Linkage Tool Management".
02. Add a tool
Click on the "+Add" button in the upper left corner of the screen.
The following window will be displayed.
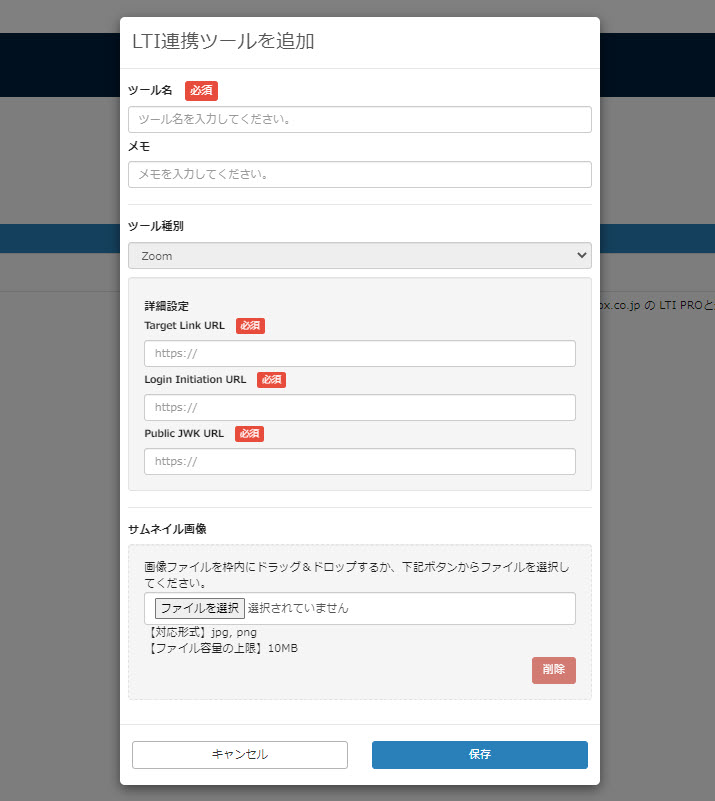
Set the following items.
- Tool name: Enter the name of the tool to be linked.
- Notes: You can enter any notes about the tool
- Tool type: Only Zoom can be selected.
- Advanced Settings: Enter the "Target Link URL/Login Initiation URL/Public JWK URL" of the Zoom you wish to configure.
- Thumbnail Image: You can set a thumbnail image for the tool. Please upload from "Select File".
Save the settings.
03. Editing Tools
To edit a tool, click on the "︙" to the right of each tool and select "Edit".
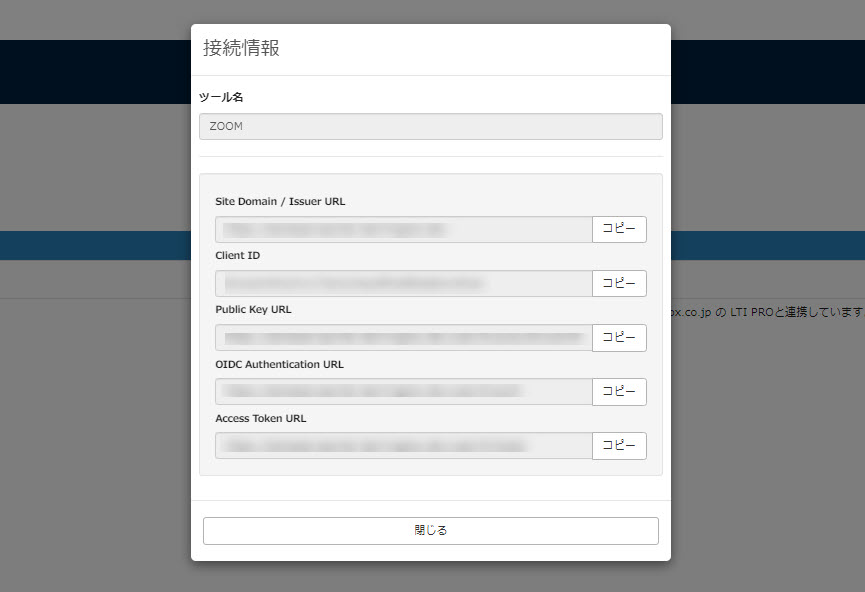
04. Confirmation of connection information
You can check the connection information of the tool.
Click on "︙" to the right of each tool and select "Connection Information".
05. Delete tool
To remove a tool, click on the "︙" to the right of each tool and select "Remove".
*If the tool is set up to work with educational materials, it cannot be deleted.
In that case, the image below is displayed.
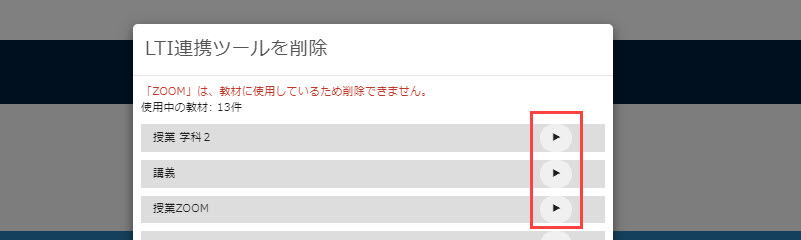
Click on the arrow icon to the right of each material to access the respective content management screen.
*To remove the linkage between the teaching materials and the tool, right-click on the target teaching material or click on the gear icon and select "Delete".