SCIM provisioning with Microsoft Entra ID
*Please note that this may differ from the latest settings.
This section explains how to set up SCIM integration with Microsoft Entra ID.
This setting is done on the Microsoft Entra ID side.
If you have not yet registered for an account, please click here "Azure Free Account FAQ will help before you add a PDF fiile.
Entra ID settings
The first step is to create an enterprise application.
01. Open Enterprise Application
Log in to Microsoft Azure with an administrator account.
Go to the "All Services" in Azure and select "ID" > "Microsoft Entra ID" on the left side of the page.
In the Overview page, click on "Enterprise applications" on the left side of the page.
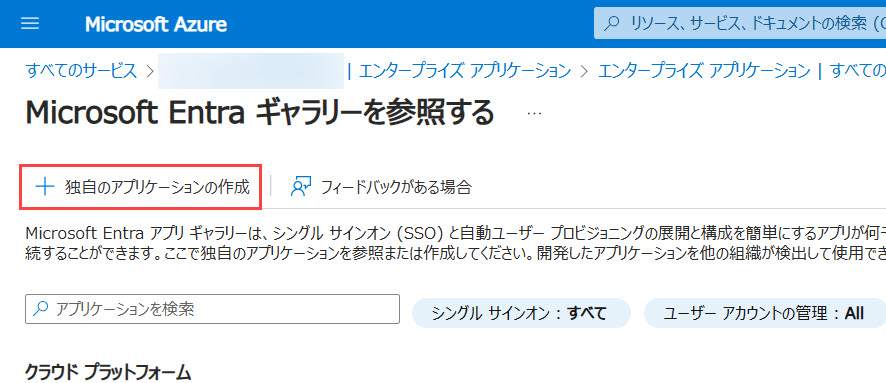
02. Select new application
Click on "All Applications" > "New Application."
03. Click on "Create your own application"
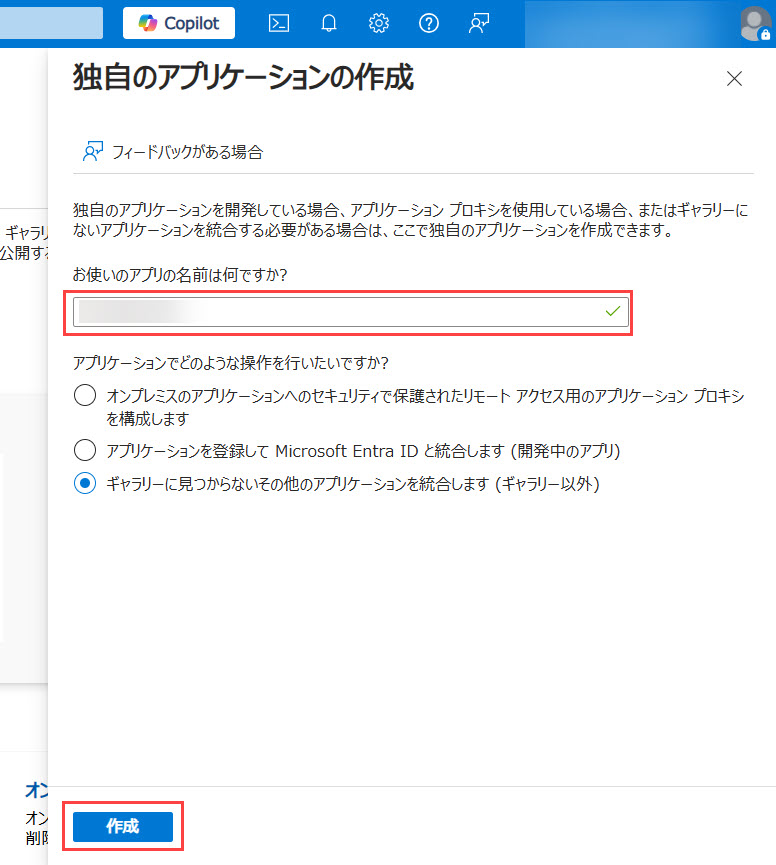
04. Create your own application
First, in the "What is the name of your application?" field, enter the name of the application to be connected.
Then, under "What operations would you like to perform with the application?" select "Integrate other applications not found in the gallery (other than the gallery)".
When completed, click "Create."
provisioning
The next step is to configure provisioning settings.
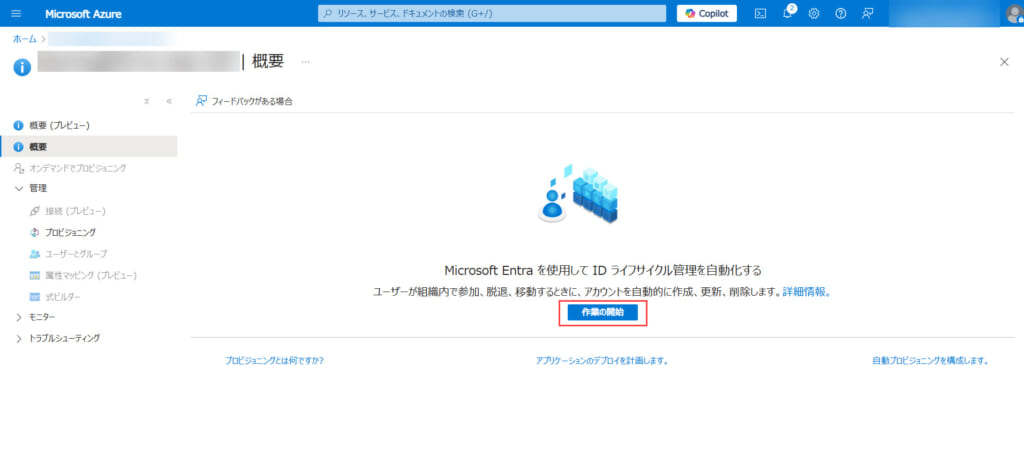
01. Provisioning Selection
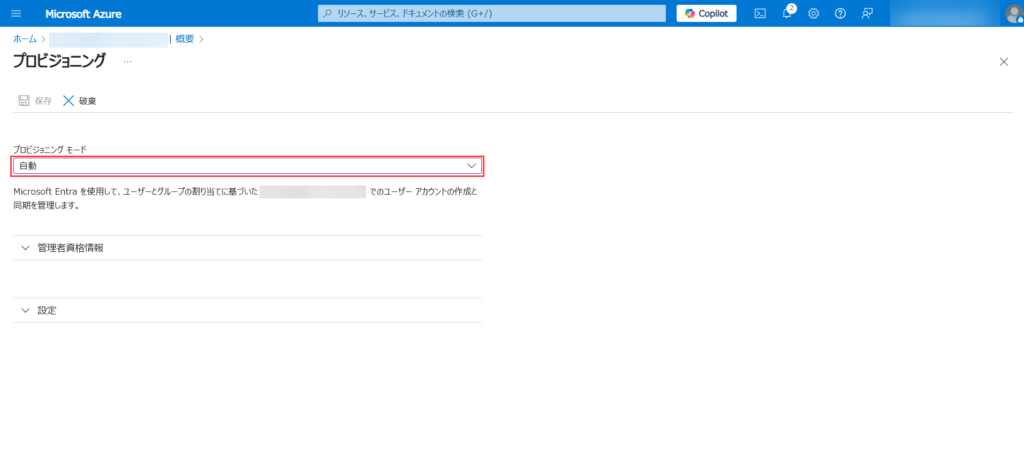
Configure provisioning settings.
Click on "Provisioning" on the left side of the application or "Provisioning User Accounts" in the center.

Next, click on "Start Work.
Then, under "Provisioning Mode," select "Automatic.
02.Entra ID and learningBOX linkage
As the administrator credentials are set up, Entra ID and learningBOX will be linked.
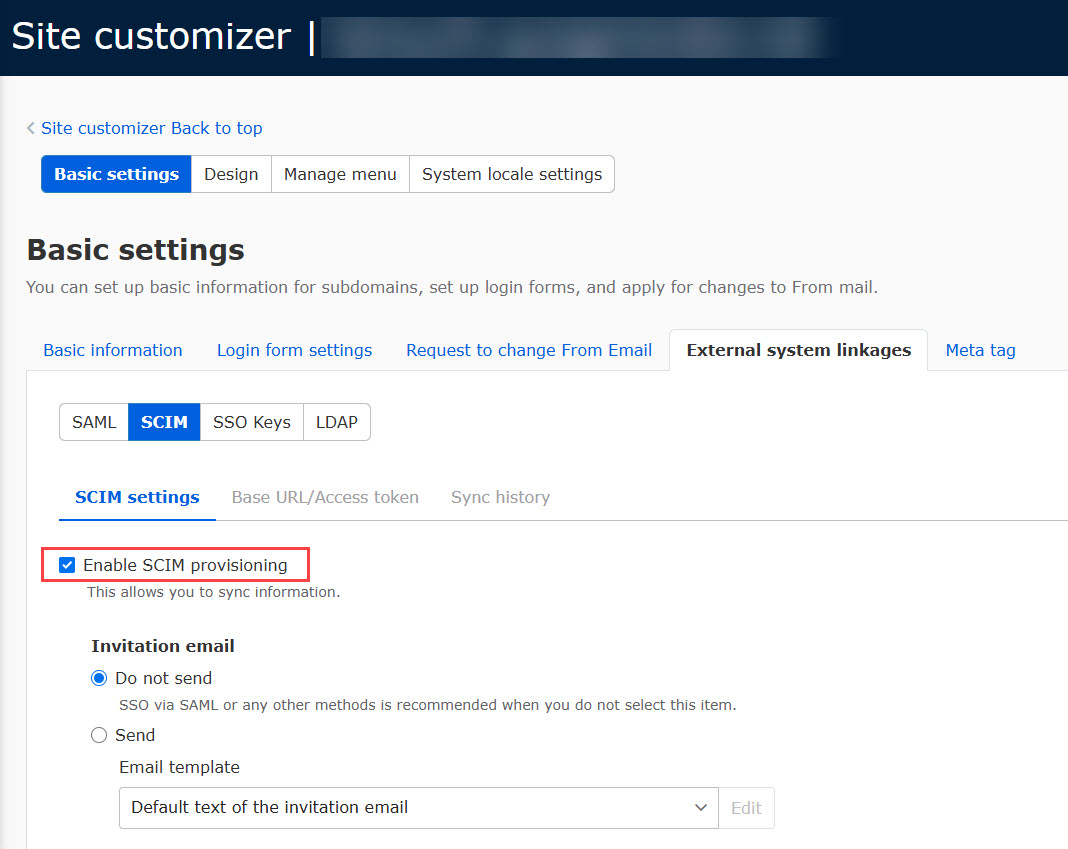
First, log in to learningBOX.
Select "Site Customizer > Basic Settings > Integrate with External Systems > SCIM Usage" and under the "SCIM Usage Settings" tab, tick "Enable SCIM Synchronization" and save.
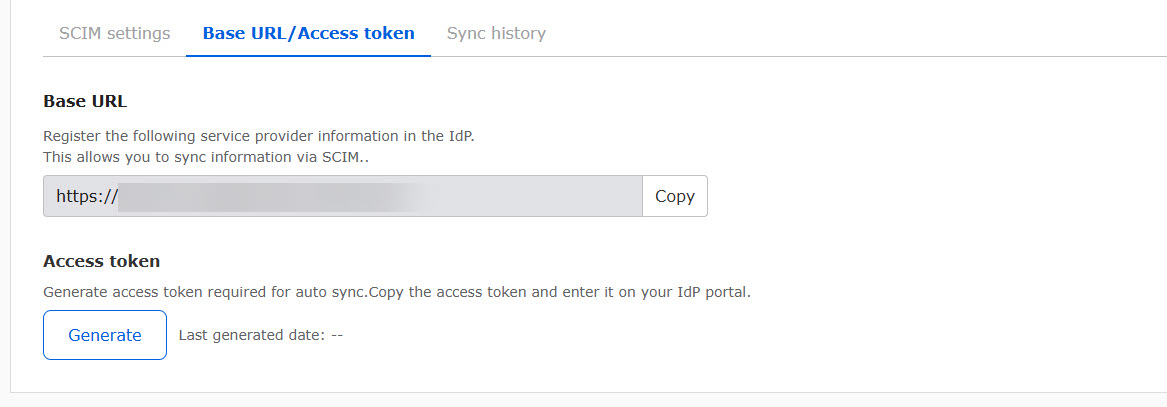
On the learninBOX side, open the "Base URL/Token" tab, copy the "Base URL" and "Token" and enter this on the Entra ID side in the next step.
▼ Base URL
Copy the base URL from "Copy.
▼Token
Click "Publish" and copy the token in the pop-up that opens.
Return to Entra ID and enter the following to complete the connection setup
Tenant URL: "Base URL" copied on the learningBOX side
Secret token: "Token" issued by learningBOX

If the token is reissued after the linkage with Entra ID is completed, it must be reconfigured.
Make a "test connection" and confirm that a successful connection is indicated.
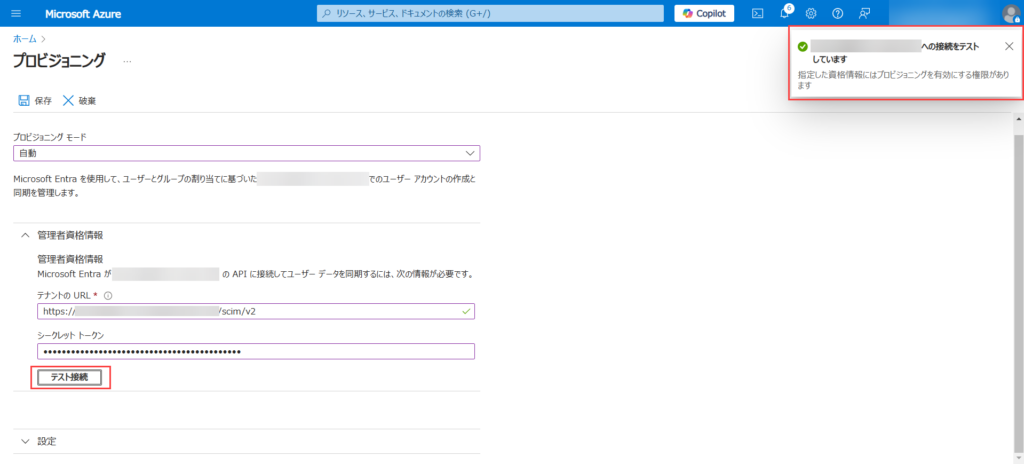
Click "Save" to complete the connection setup.
03.Group and User Settings
To provision groups, set "Provision Microsoft Entra ID Groups" to "Enabled: Yes".
The next step is to configure the settings to use user provisioning.
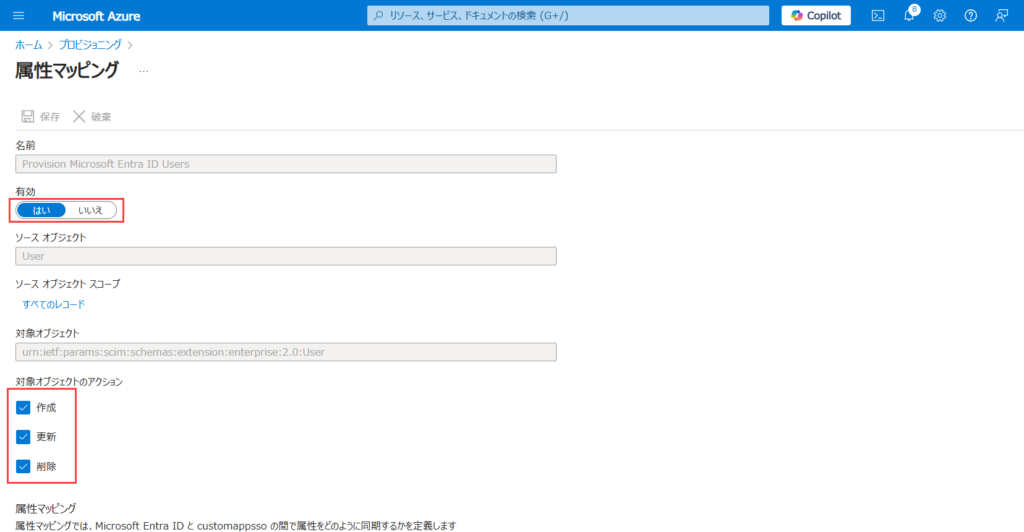
Click on "Provision Microsoft Entra ID Users.
Set "Enable" to "Yes" and tick all under "Target Object Actions".
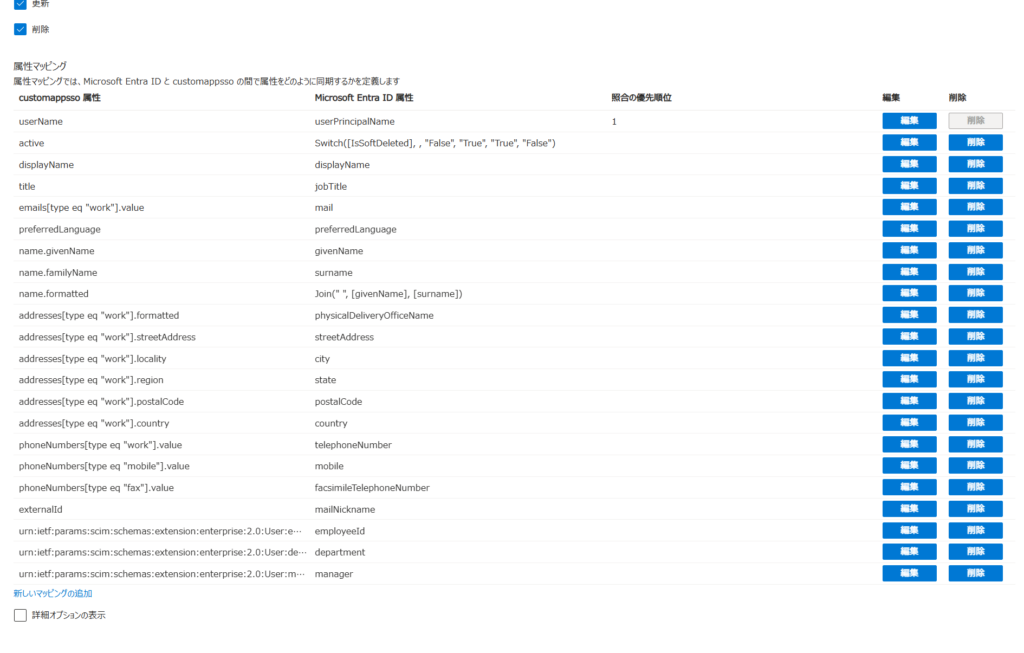
Next, please set up "Attribute Mapping".
The "login (login ID)" field key of learningBOX corresponding to "userName" must have at least 5 characters.
e.g.)
Append("prefix_", [mailNickname]), Append([mailNickname], "abc"), etc.
Please enter any characters in *"".
login (login ID)" can be made up of one-byte alphanumeric characters and the following symbols.
! " # $ % & ' ( ) * + , - . / : ; ? [ ] ^ _ `
In the "name" field key on the learningBOX side, if the corresponding "name.formatted" has the default value "Join(" ", [givenName], [surname])" as the Microsoft Entra ID attribute, the user's first and last name will appear reversed when synchronized. When synchronizing, the user's first and last name will be displayed in reverse order.
To avoid this, set the following in the attribute mapping edit
Join(" ", [surname], [givenName])
When settings are complete, click "Save" in Attribute Mapping.
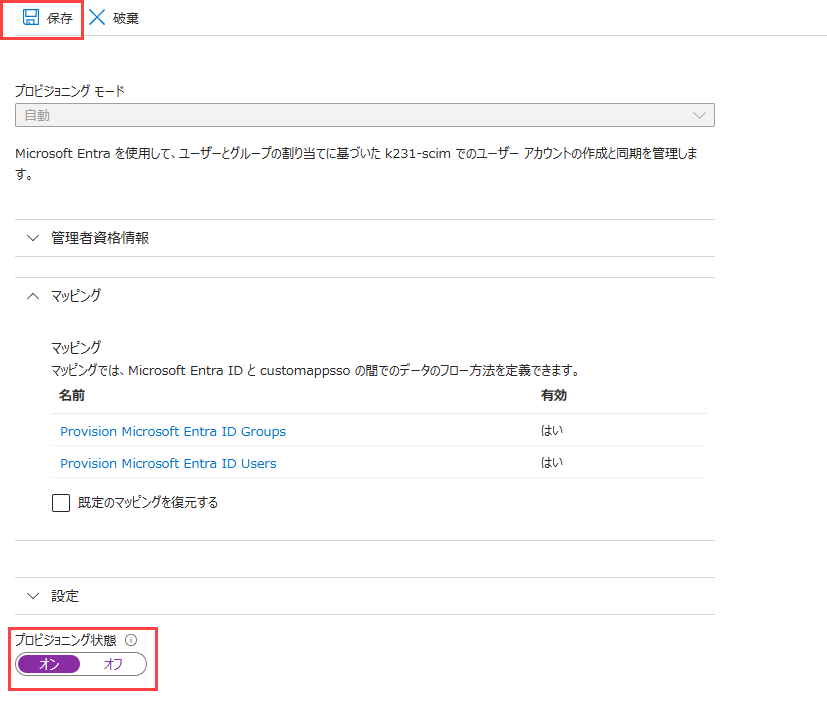
Finally, set "Provisioning Status" to "On" and click "Save".
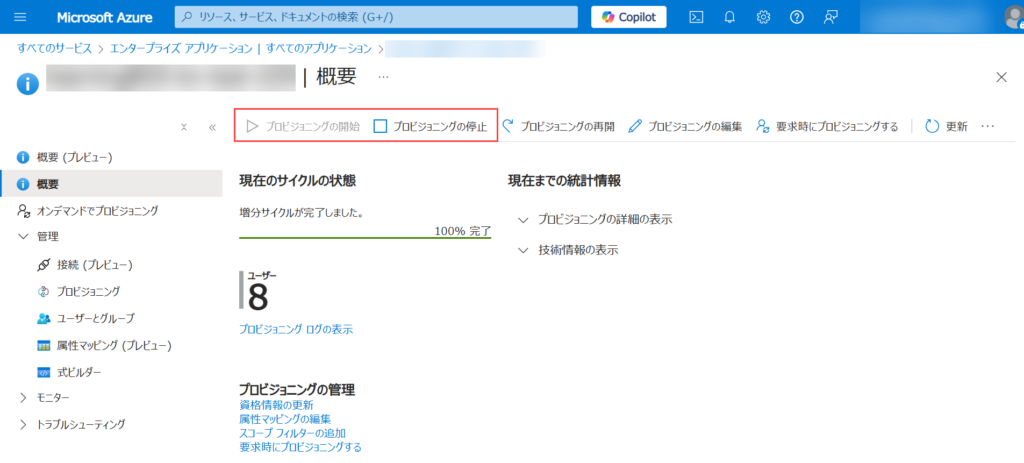
04. Start provisioning
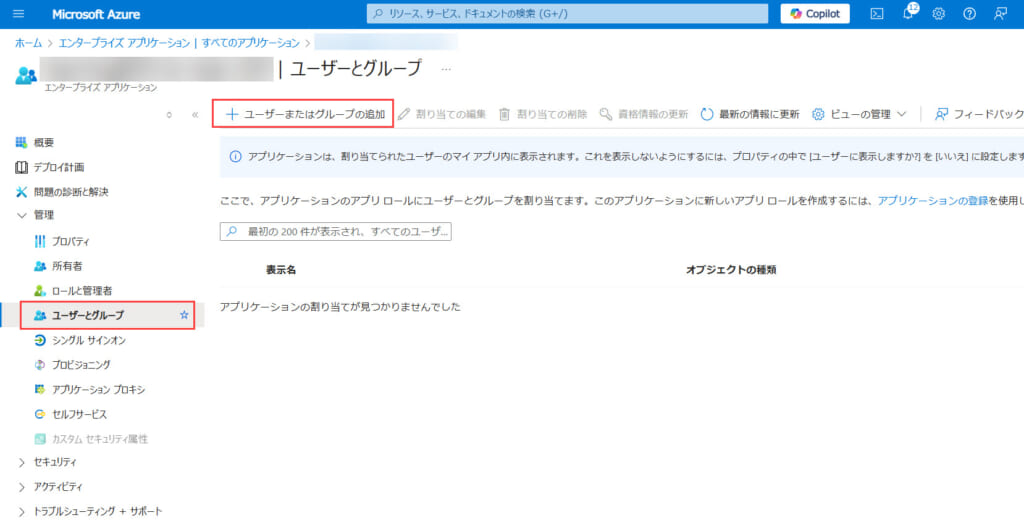
This section explains how to add users for provisioning.
Go to Users and Groups > + Add User or Group to add a user or group to be provisioned.
By default, automatic provisioning occurs approximately every 40 minutes.
Note that manual provisioning can be stopped/started.
Once the results of provisioning are confirmed, the setup is complete.
If the group displayed in "Users and Groups" is set as the first level, groups/users displayed in lower levels are synchronized to the second level on the learningBOX side.
Since synchronization is not performed after the third level, it is necessary to take measures such as allocating to the first level.
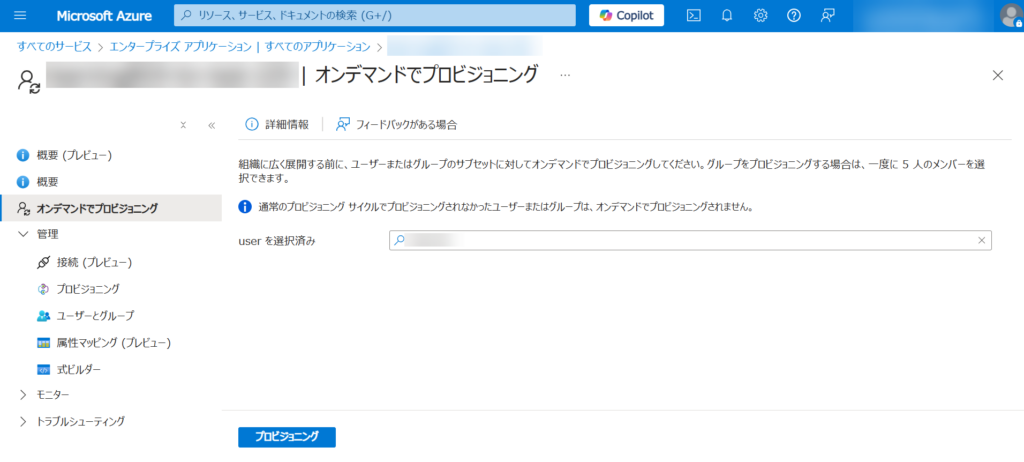
Note
Immediate manual synchronization is available instead of automatic synchronization at 40-minute intervals.
Select a user or group from "Provisioning on Demand" and provision it.