Sent/Scheduled emails
You can check the sending history of e-mails created by specifying the recipients, such as invitation e-mail notifications and grade management notifications.
Sent and scheduled emails will be separated in one page.
Required
Management role of Group manager(Edit), Grade manager(Editing/View), Notification manager
The following permissions are required to check e-mails set up by other users, respectively.
- Email invitation notification: User management editing privileges (for all users)
- Grade Control Notification: Grade Control Edit Authority (for all users/all content)
- Study progress notification: Grade management editing privileges (for all users/all content)
- Notification notification: Notification management authority (for all users)
Check logs
You can check the history of sent e-mails.
01. Go to Sent/Scheduled emails
In the side menu, select the Notifications > Sent/Scheduled emails.
02. Sent emails
Click the Sent tab.
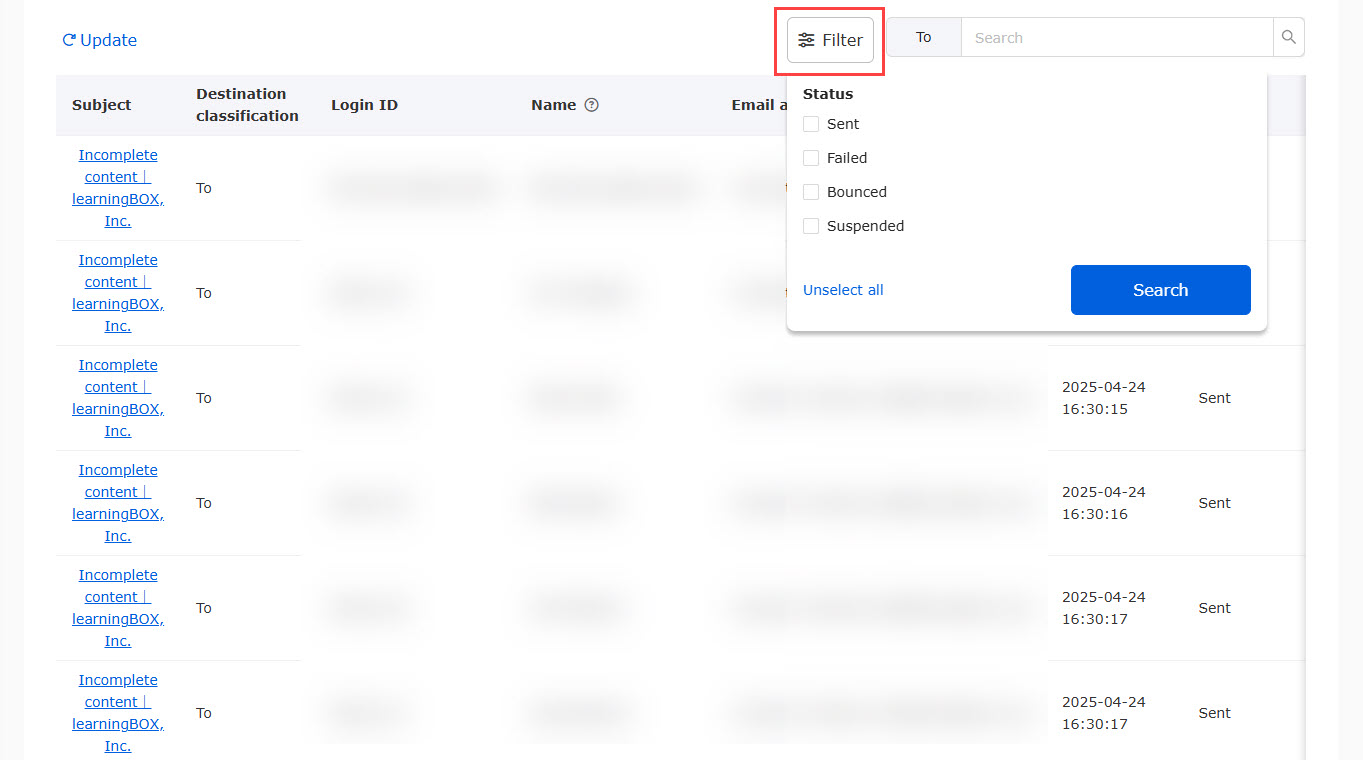
The following items will be displayed:
- Subject: Category and subject of the email
- Sent at: the date and time the e-mail was sent
- Sent: the number of emails that have been sent
- Failed: the number of items that failed to be sent due to an incomplete e-mail address, etc.
- Bounced: the number of emails failed to be delivered
- Suspended: the number of emails suspended due to a high bounce rate
- Registered by: The login ID of user who registered the email
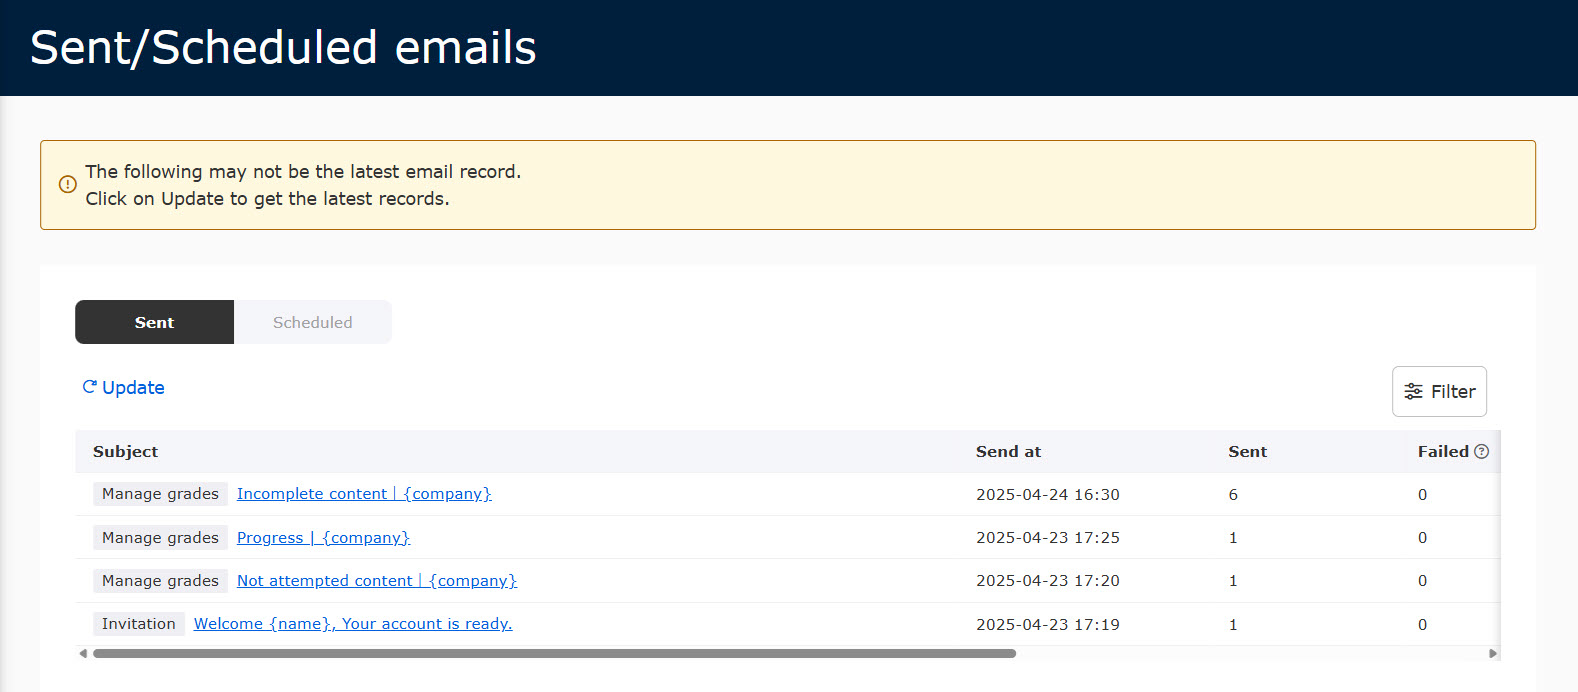
To filter emails, click on the Filter.
Specify the conditions, and click on the Search. (*Multiple choices available)
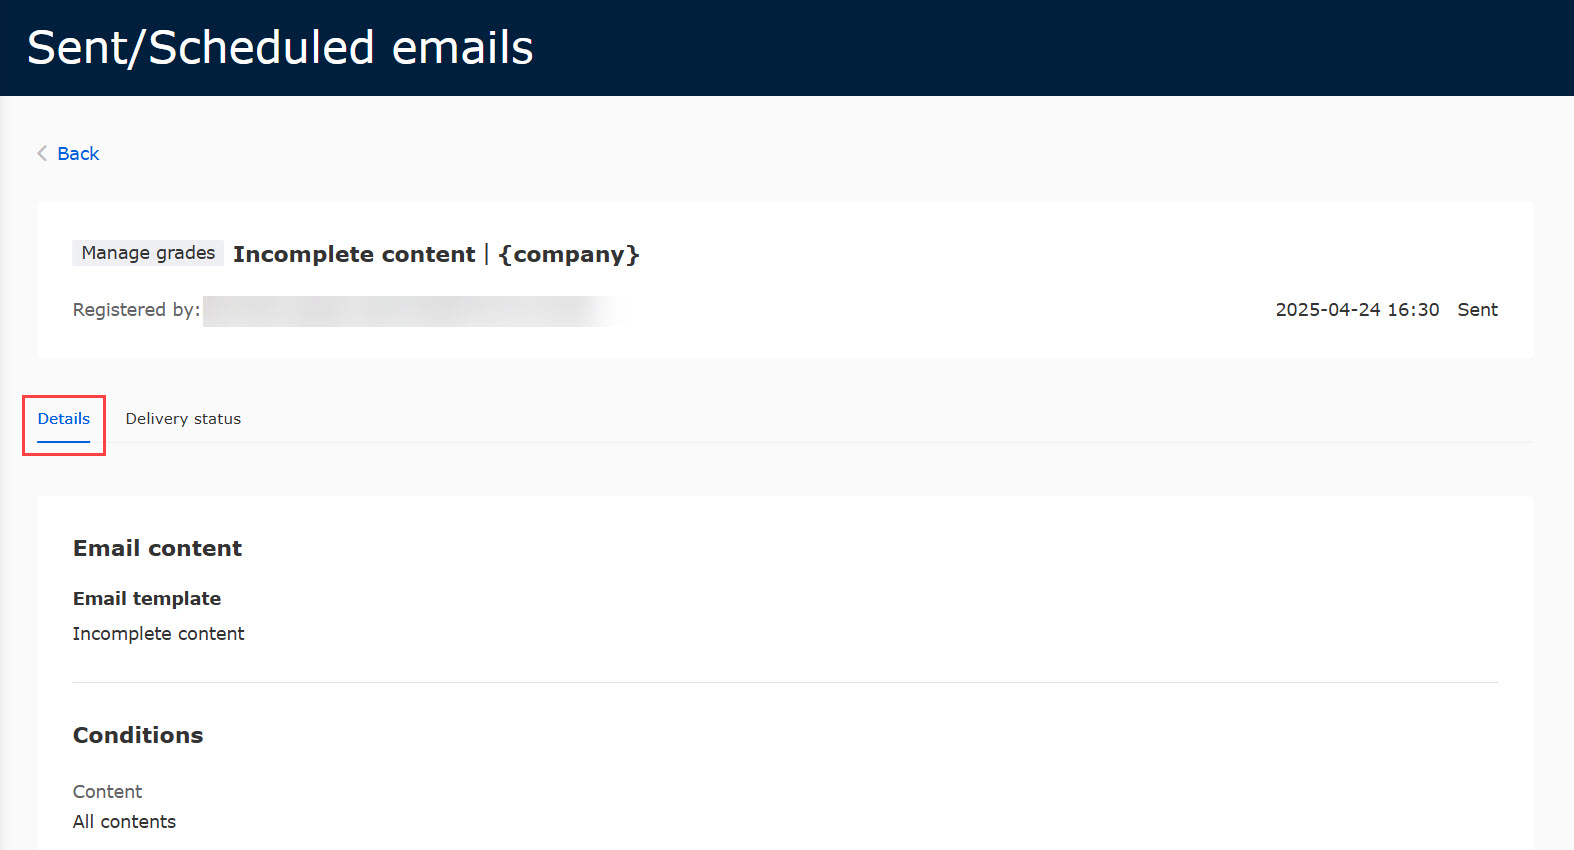
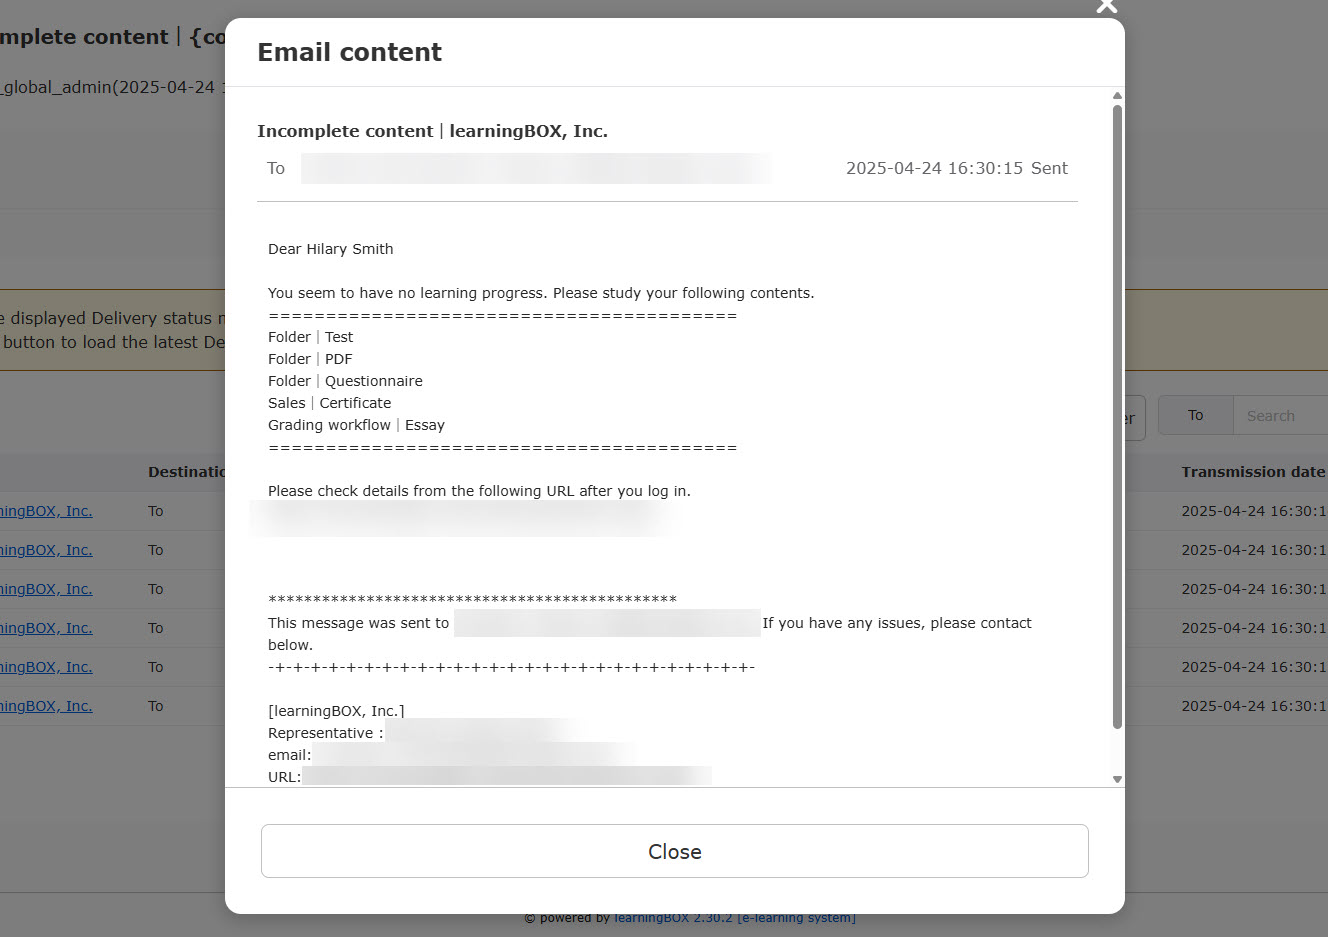
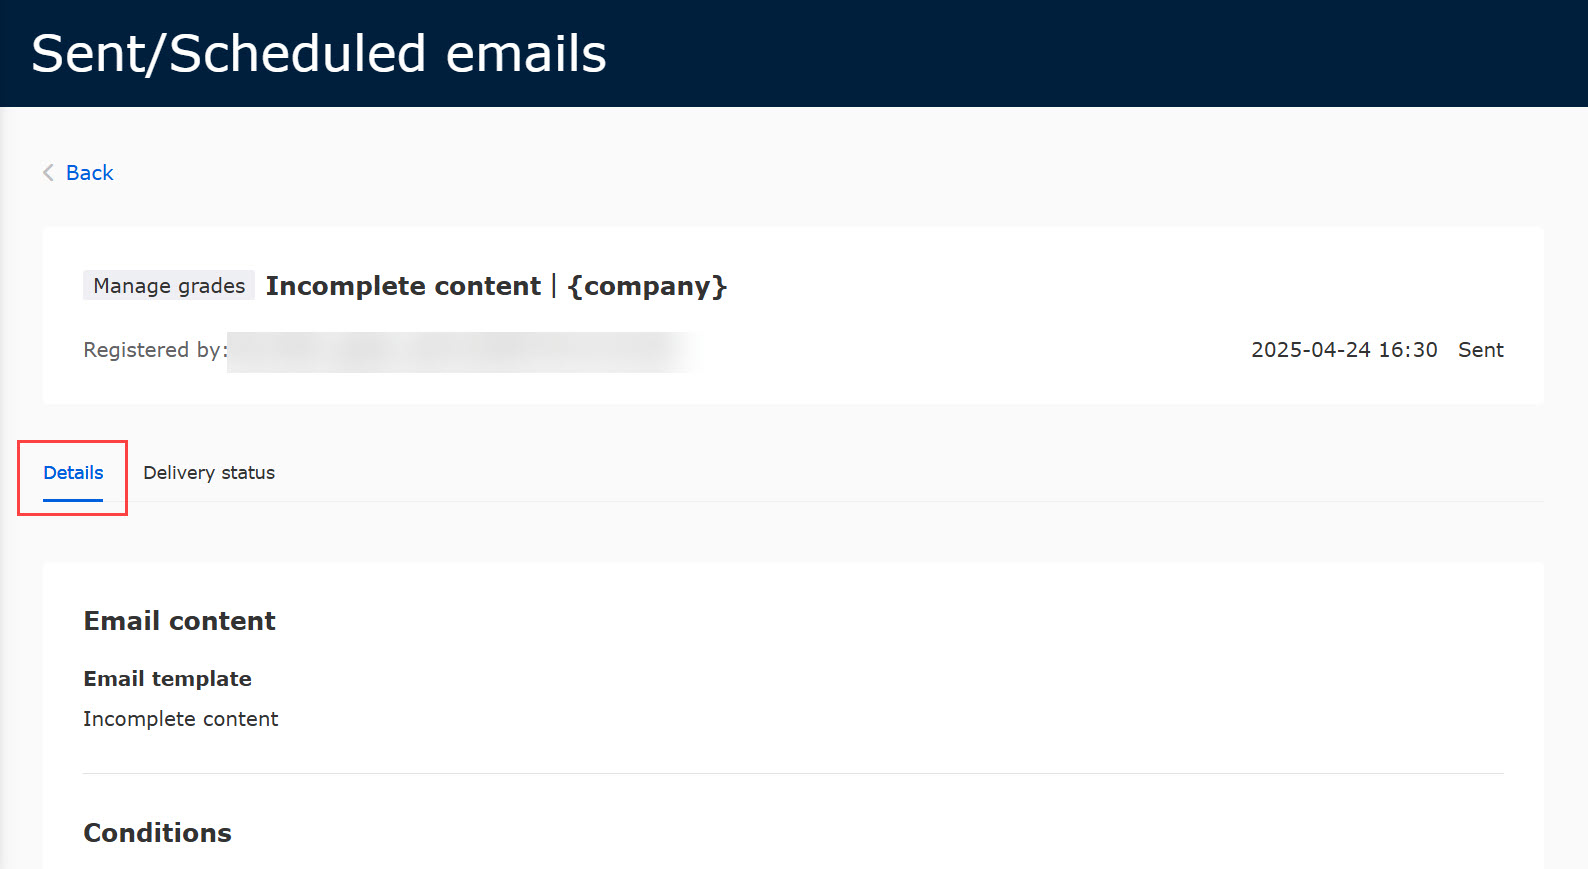
03. Email content
To check the content of each email, click on a subject.
Select the Details or the Delivery status tab.
The following explain the two tabs displayed in the page.
Details
The content and conditions will be displayed.
Delivery status
You can check the status and other information for each destination.
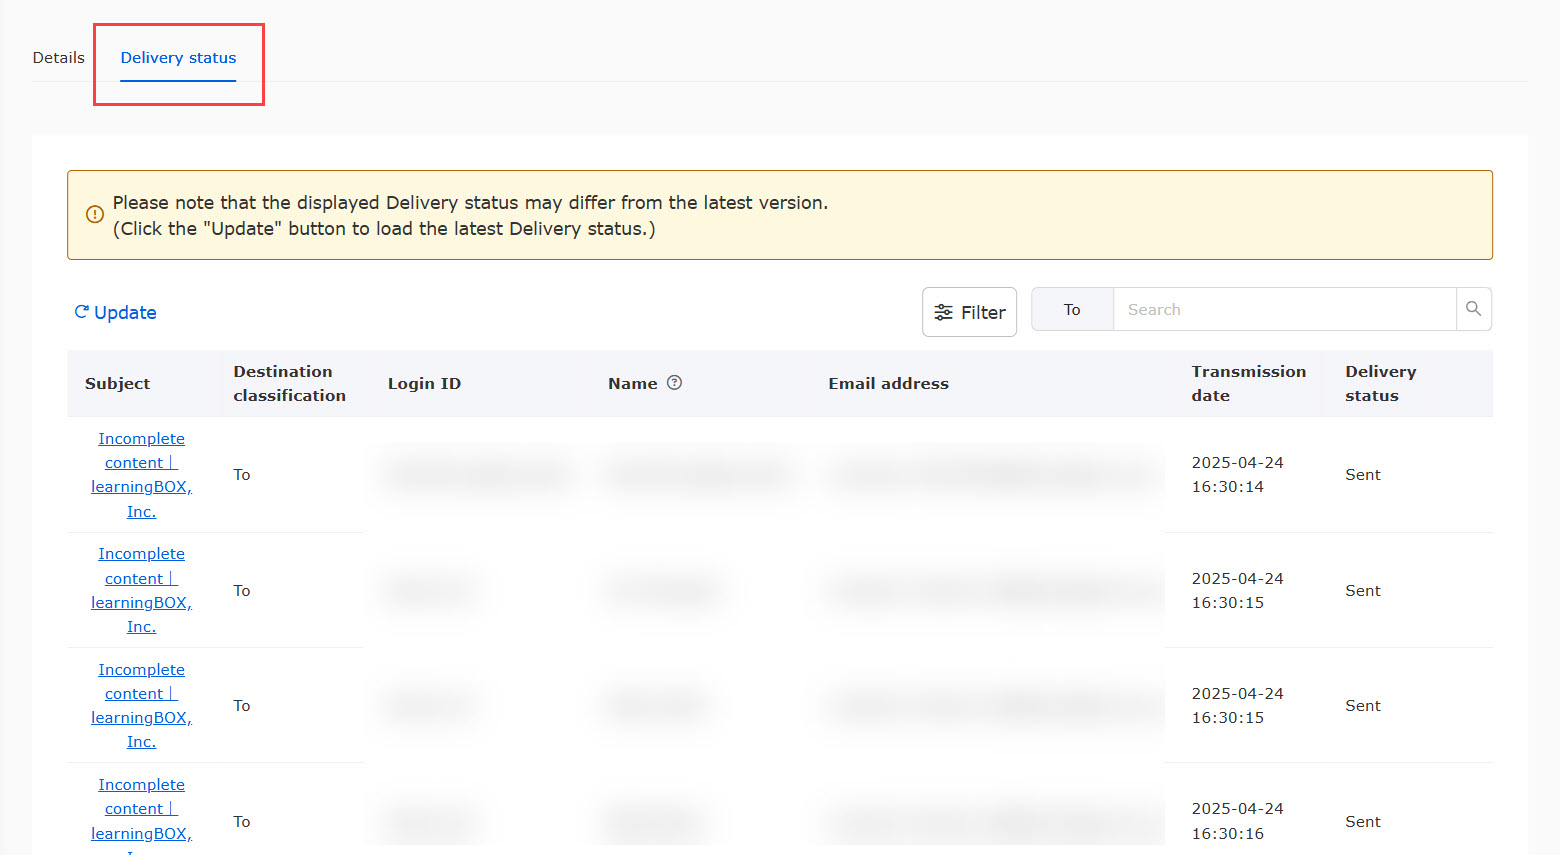
To filter the emails, click on the Filter.
Tick the box to specify the status. (*Multiple choices available)
04. Email content
You can check the email content by clicking on the subject of each email.
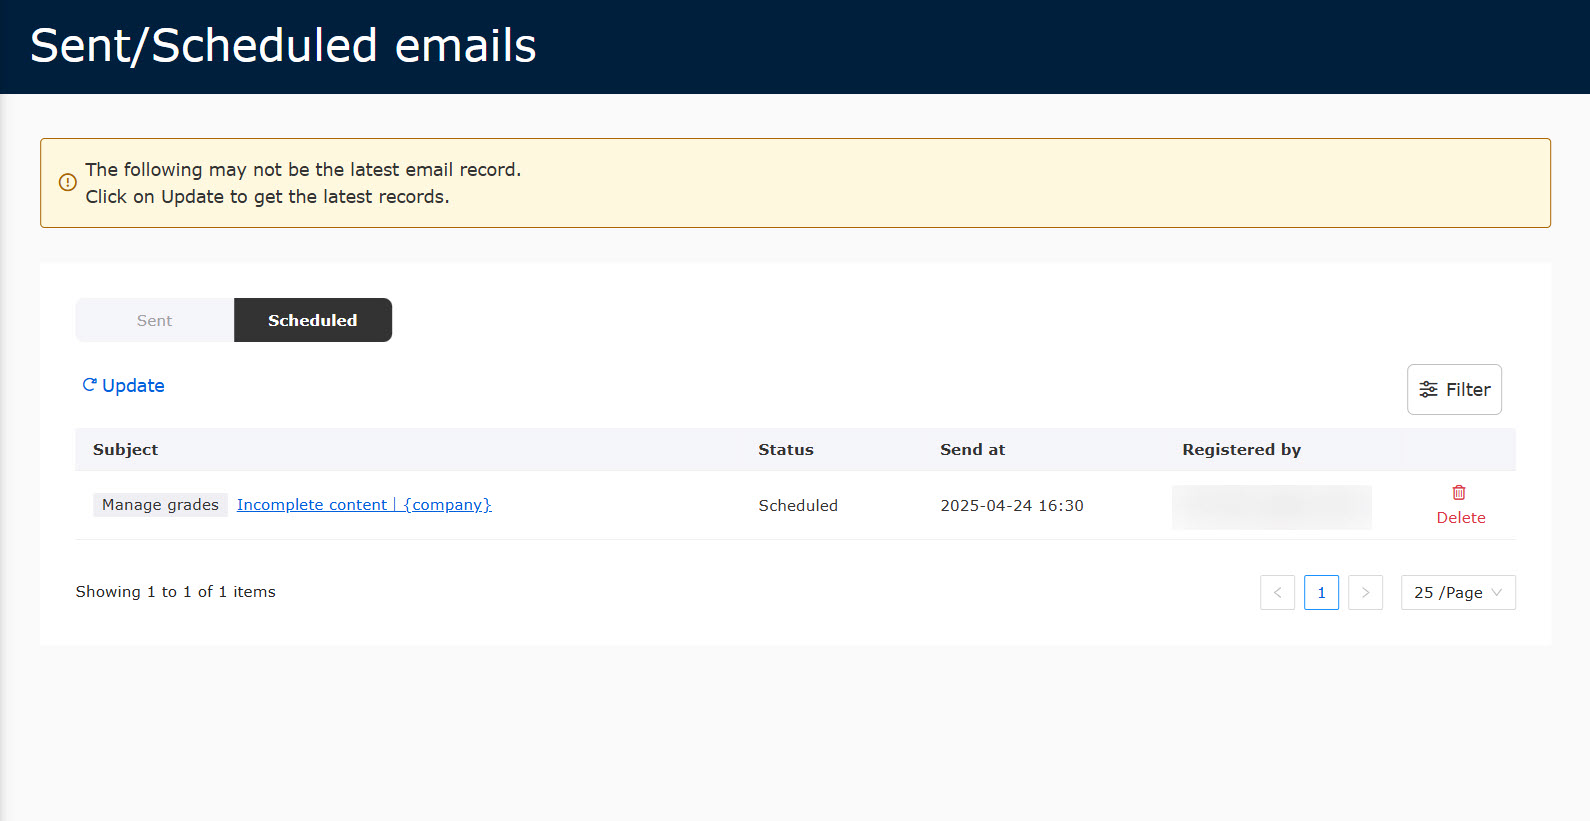
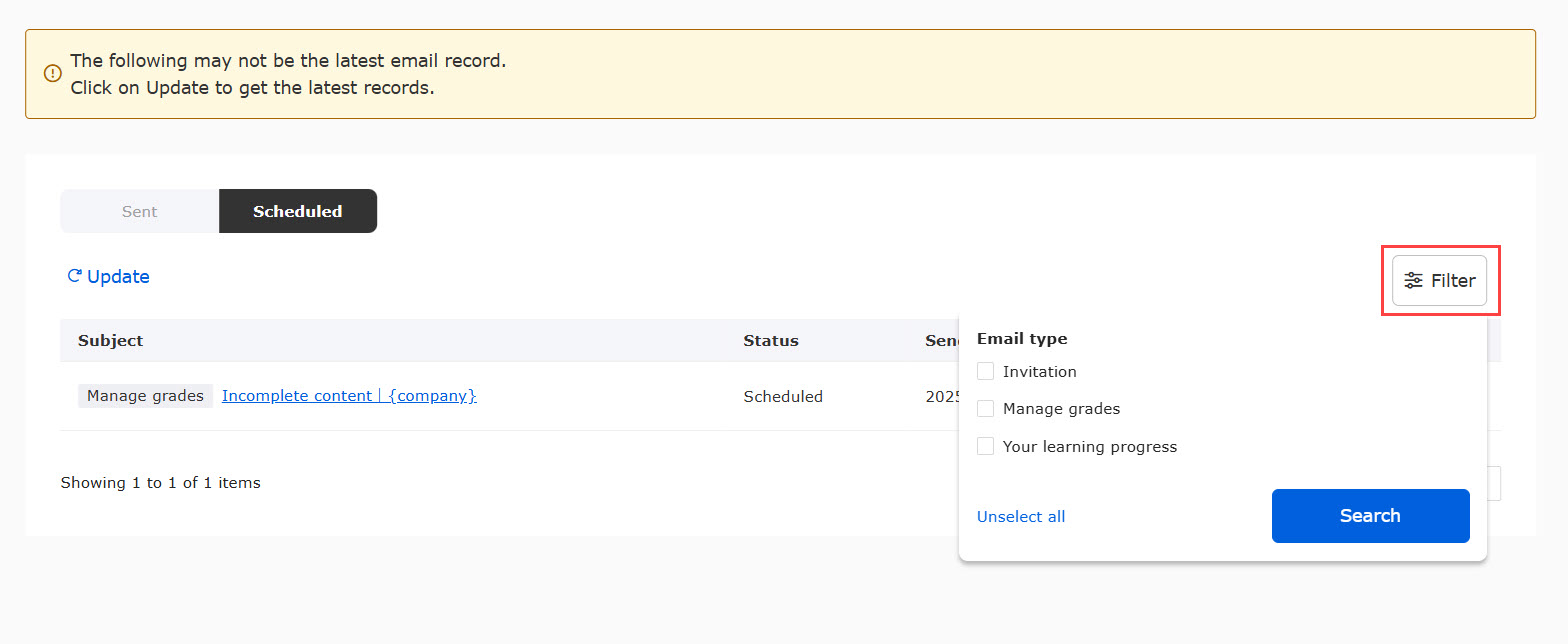
Scheduled emails
You can check the e-mails that are scheduled to be sent.
*"Notices" are not displayed on the "Scheduled to Send" screen.
01. Go to Sent/Scheduled emails
In the side menu, select "Notification" > "Sent/Scheduled emails"
02. Click on Scheduled
Click on the Scheduled tab.
The following items will be displayed:
- Subject: Category and subject of the email
- Status: Delivery status
- Send at: Scheduled date and time to be sent
- Registered by: The login ID of user who registered the email
- Delete: You can delete a scheduled email
You can filter the emails by the email type.
03. Email content
Click on the subject of an email to check the details of the scheduled one.
Select the Details or the Delivery status tab.
The following explain the two tabs displayed in the page.
Details
The content and conditions will be displayed.
Sending schedule status
You can check the status and other information for each destination.
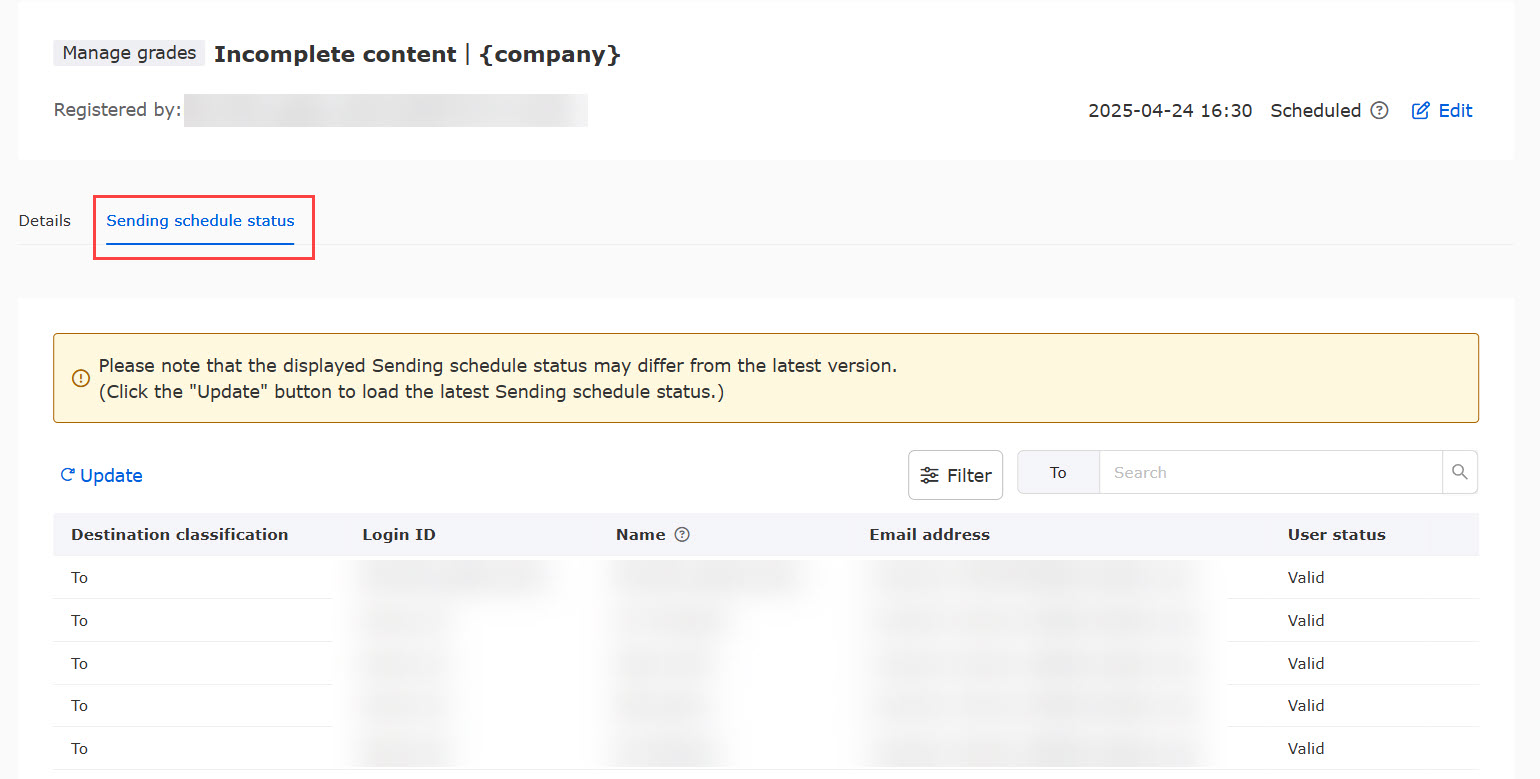
You can filter the emails by selecting the User status.

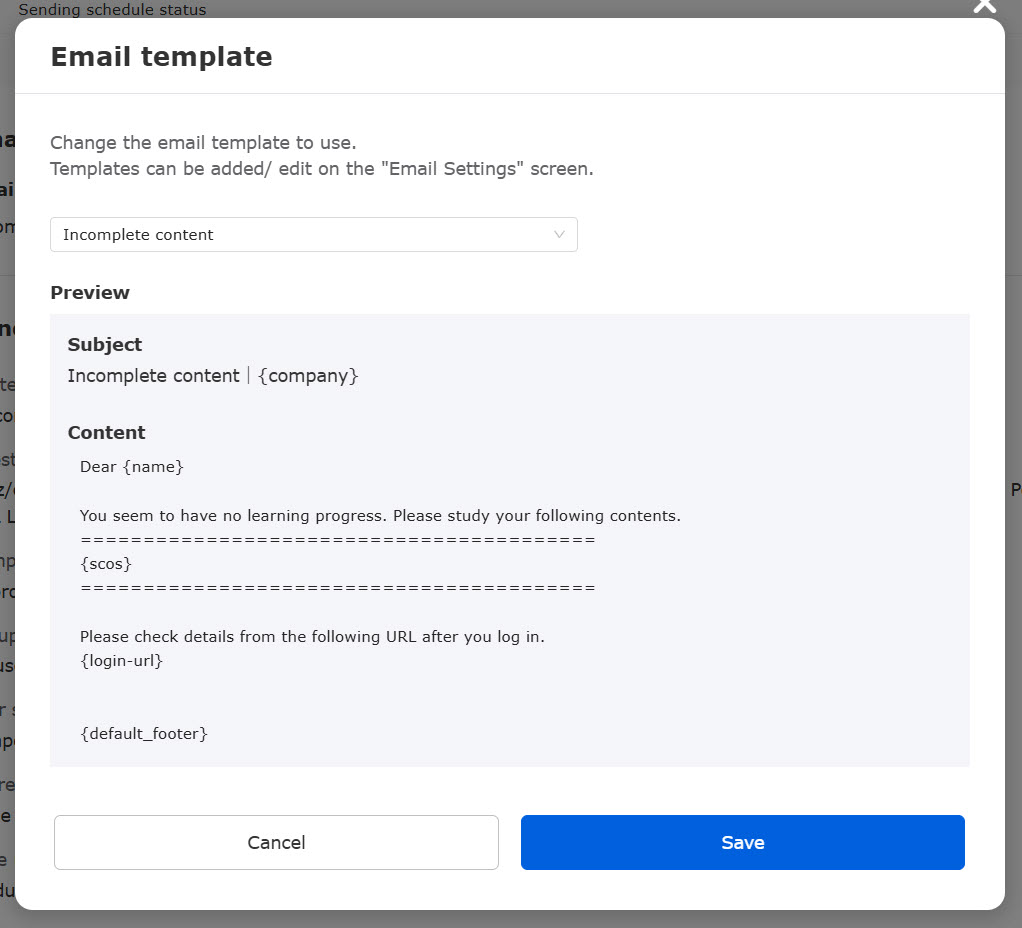
04. Change email template
On the email details, click on "Edit" in the mail template.
You can chenge the template from the list.
Save the settings.
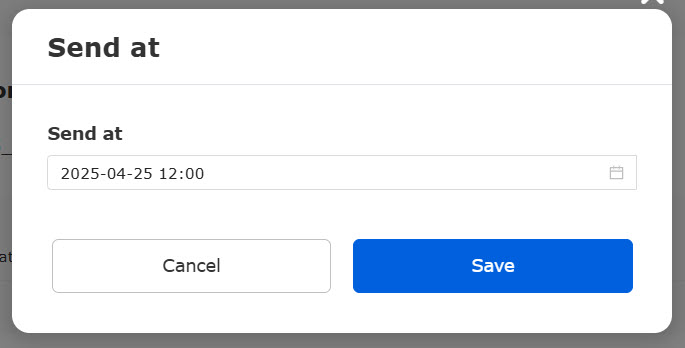
05. Change of transmission start date and time
On the email details, click on the Edit in the upper right corner.
Select the date and time from the calender.
To reset the date and time, click the ✖ button.
Note
If you have added recipients in the email template, a "+" icon will be displayed to the right of each recipient, and when clicked, the added recipients will be displayed.
*For more information on setting the recipients of emails in the email template, please refer to "Email settings by adminPlease refer to "Invitation Email Notification" in the "Invitation Email Notification" section.