Self-registration
The Self-Registration function allows users to apply for their own accounts, bypassing the standard process where admins manually register and invite them.
This feature is highly recommended for B2C e-learning scenarios where user-driven registration is required (e.g., public online certification exams or open enrollment courses).
Required
Customization options, Admin
Management role of Group manager (Edit)
*Group managers (Edit) can manage user applications but cannot alter the registration system settings.
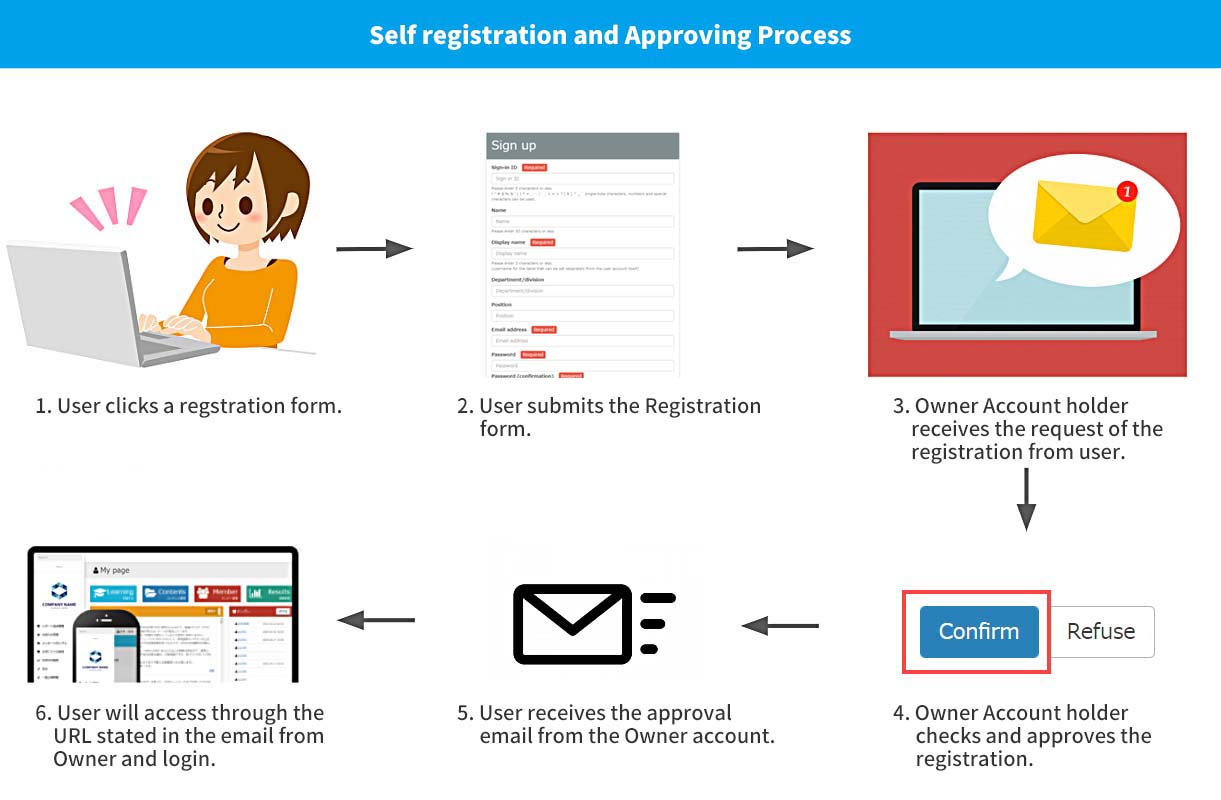
General workflow
The diagram below illustrates the standard end-to-end journey from a user submitting a new membership application to successfully starting their studies.
How to configure self-registration
Only the owner Admin can modify these global self-registration settings.
01. Open the settings page
Log in to learningBOX.
In the side menu, click Manage users .
Select the Account sign-up settings.
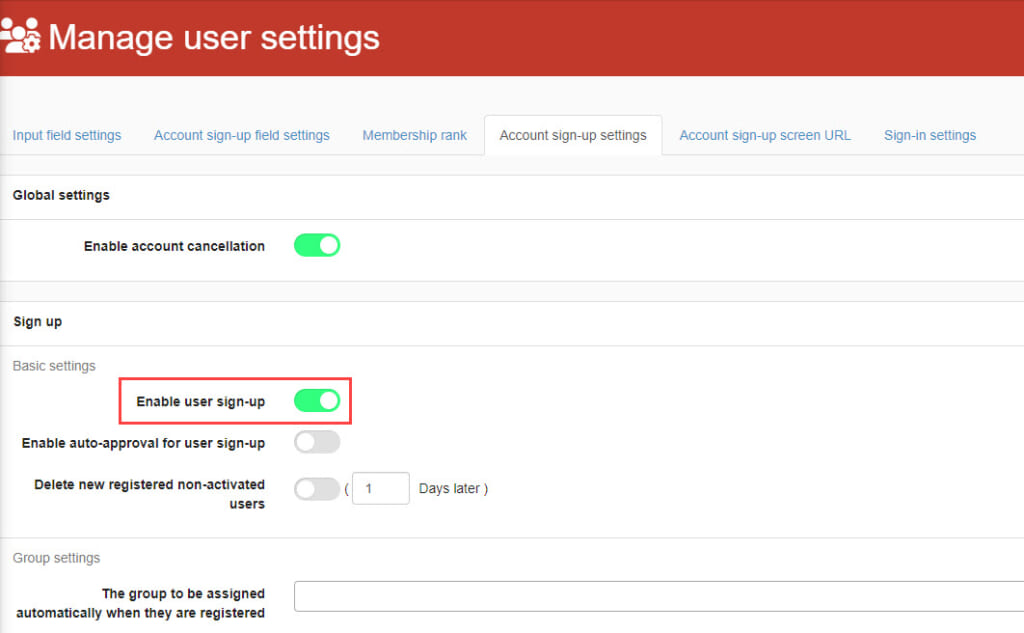
02. Activate membership registration
To allow users to apply for accounts, switch the Enable user sign-up toggle to ON.
03. Automatic approval settings
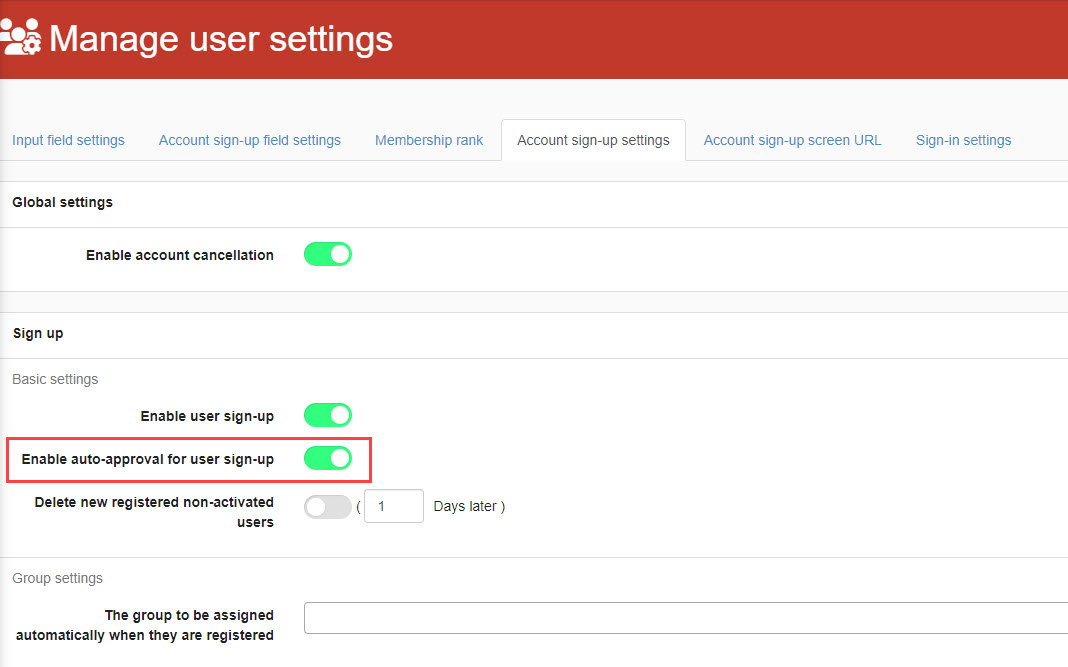
If you want user accounts to be activated instantly without requiring manual administrator confirmation, switch the Enable auto-approval for user sign-up toggle to ON.
04. Automatically remove unactivated users
You can automatically purge abandoned registration attempts (i.e., users who filled out the form but never clicked the verification link in their email).
Turn the Delete new registered non-activated users toggle to ON and specify the number of days after which unverified applications should be deleted.
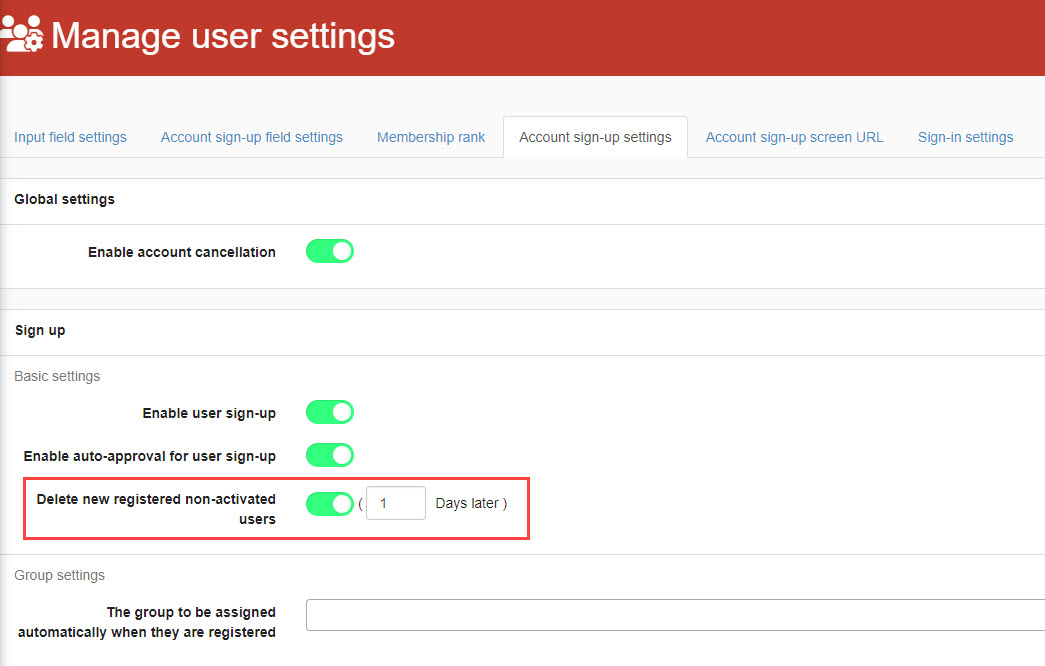
05. Automatically assign groups at registration
You can set new users to join specific groups automatically upon registration.
Select the target group(s) from the dropdown menu.
If you select multiple groups, users will be added to all of them simultaneously.
To remove a group, click its X button or click it again in the dropdown menu.

06. Display Terms of Conditions
You can force users to review and agree to your specific terms before completing their registration.
Activate Show Terms of Conditions and type or paste your legal text into the input field.

07. Use authentication code
To restrict registration to specific individuals, you can require users to enter an access code on the registration page.
Turn the Use authentication code toggle to ON and define your code in the entry field.

08. Apply expiry date for new accounts
You can automatically apply the account expiry date for self-registered users.
Select from three configuration types:
- Unlimited: The account remains active with no expiry date.
- From the first login: Sets a dynamic validity window starting when the user first logs in. (Enter the number of valid days).
- From the registration: Sets a fixed validity window starting the moment the account is registered. (Enter the number of valid days).

Click Save at the bottom of the page.
User-side registration process
This section outlines how the registration process appears to an applicant.
01. Access the registration page
Click Sign up in the side menu.
*"of the group to which the user is registered.divideWhen using the "+" option, the user goes directly to the new member registration screen from the URL.

02. Fill in account details
Applicants fill out their name, desired Login ID, password, and any other required custom profile fields.
They then verify their details, and apply with the above information.
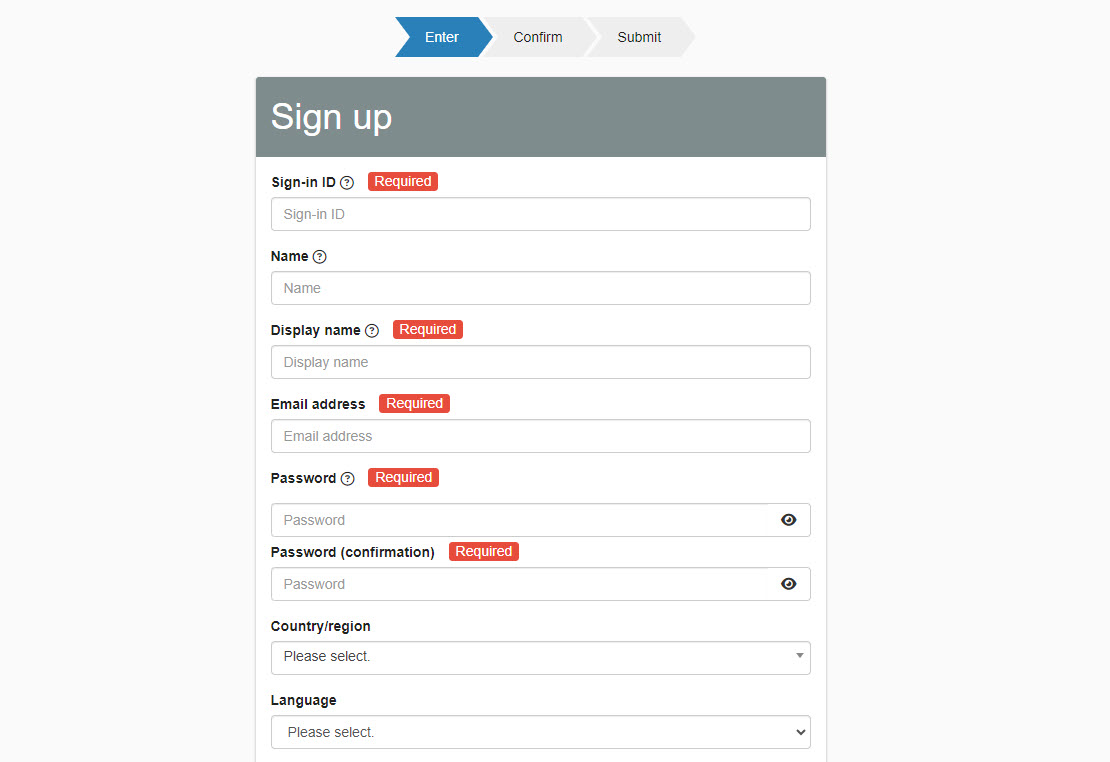
03. Complete email authentication
Upon submitting their application, the system sends an automated verification email to their registered address.
The applicant must click the URL for member authentication inside the email to verify their identity.
*If manual approval is enabled, the user still cannot log in at this point until an administrator authorizes the account.
Manage user applications
This section covers how administrators process pending user requests.
*Users holding Group manager (Edit) permissions can also perform these actions.
01. Go to the approval page
Go to Self registrations in the side menu > Manage self registrations.
02. Approval/Disapproval
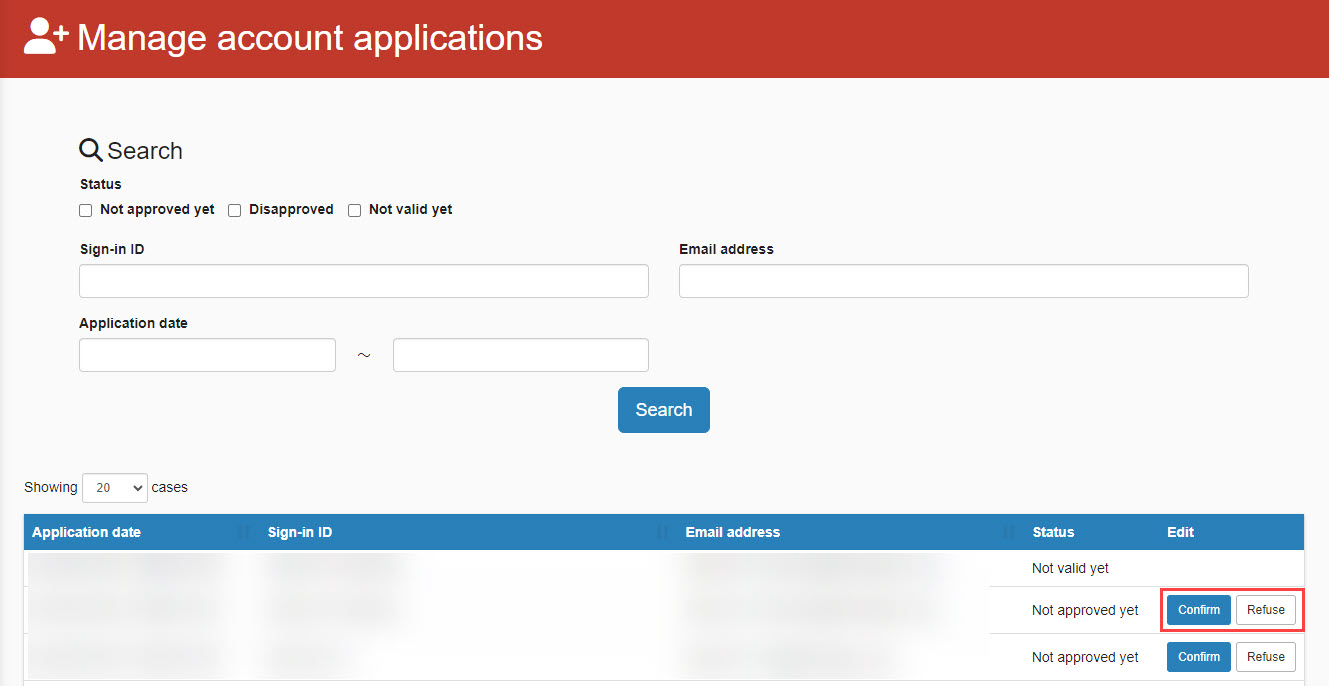
Pending requests are listed at the bottom of the screen.
You can use filters at the top (Status, login ID, email address, or application date) to narrow down the list.
Click Approve or Reject .
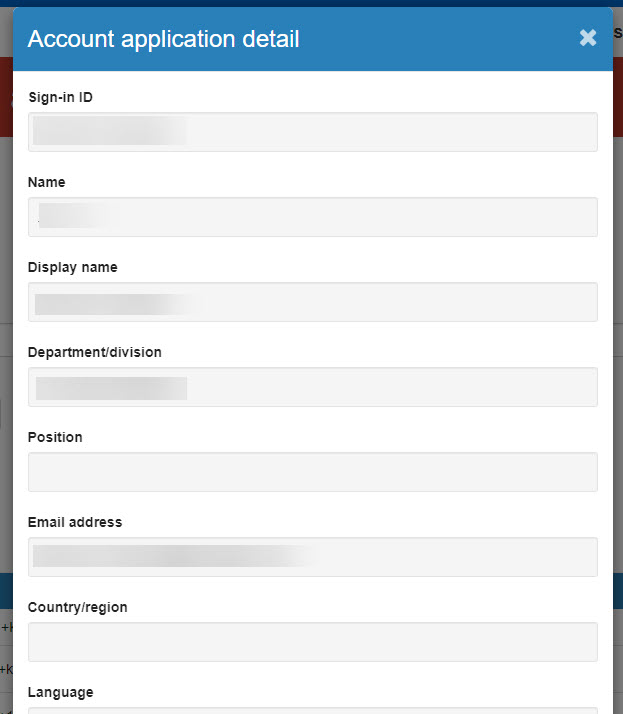
The Account application details pop-up will appear.
Review the applicant's info and click either Approve or Reject.
*To update the applicant on your decision, check the Send email notification at the bottom of the pop-up before finalizing.
About Status
There are three types of application statuses
- Not approved yet: The user has verified their email address, but the administrator has not yet made an approval decision.
- Rejected: The admin rejected the user's application.
- Not activated: The user filled out the registration form but has not clicked the authentication link in their verification email.
03. Auto approval
If auto-approval for user sign-up was enabled during setup, users will completely bypass this dashboard and gain immediate system access upon email verification.
*For information on settings, refer to Automatic approval settings.
Assigning groups to register users
Instead of routing all users to a generic landing page, you can generate unique registration links for individual groups. Users signing up via these custom links are automatically sorted into their respective groups.
Please note that if administrative privileges are configured for the group to which you are registering, learners may inadvertently be granted administrative privileges.
01. Open the settings page
Select Manage users in the side menu > Group URL.
The target tab will appear.
02. URL Issuance
Click Issue URL on the right side.
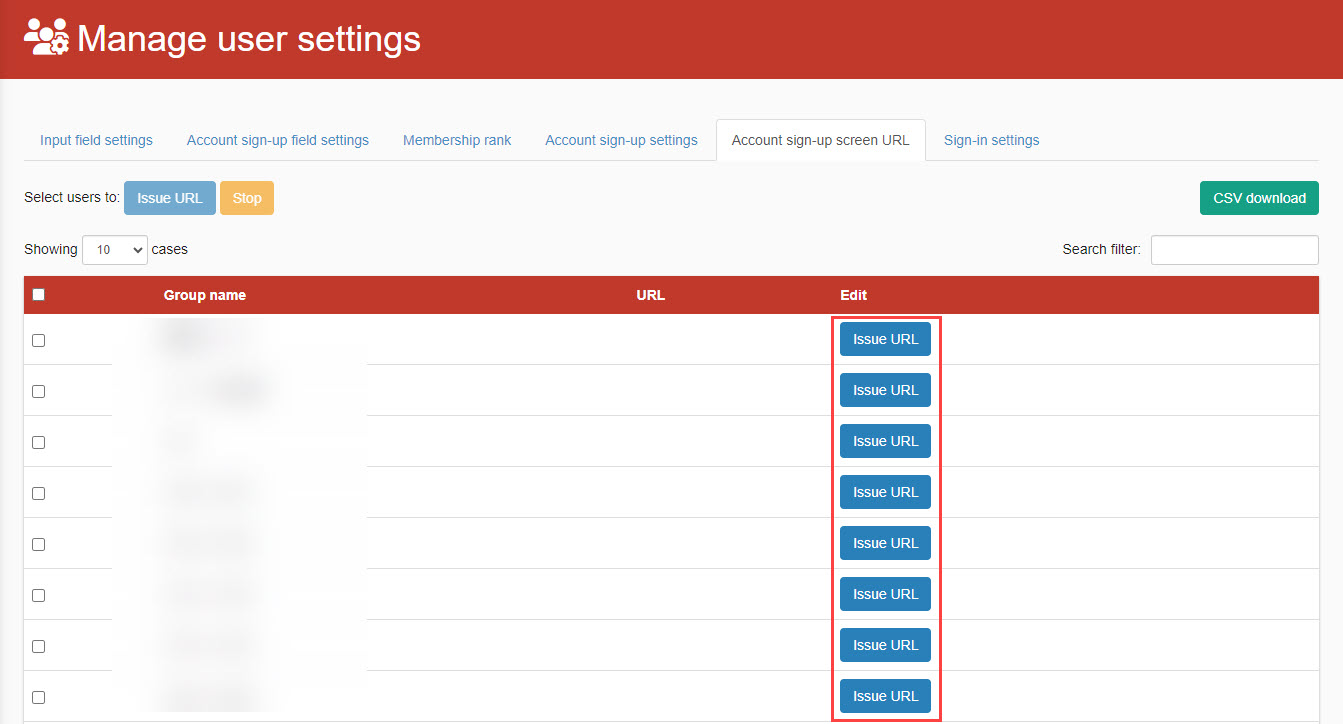
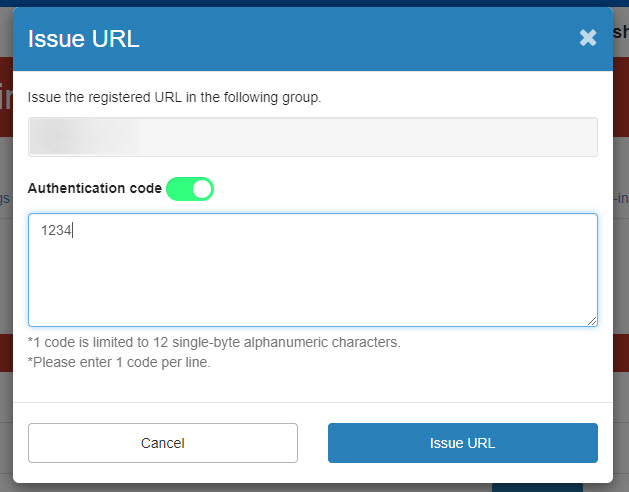
A pop-up window will appear. Click Issue URL.
[Optional]
Authentication code: Turn on the Authentication code toggle to restrict this specific link.
You can assign up to 10 unique authentication codes to a single group URL.
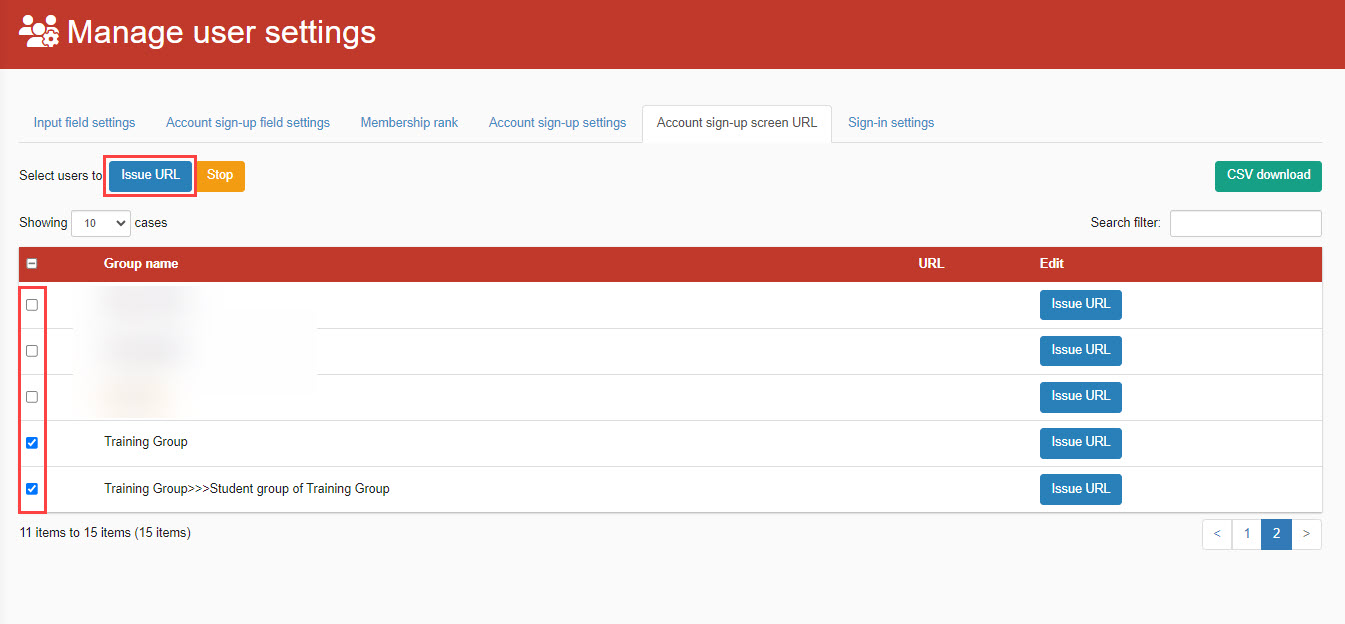
Issuie URLs in bulk
URLs can be issued to multiple groups at once.
Select the desired groups and click Issue URLat the top of the screen.
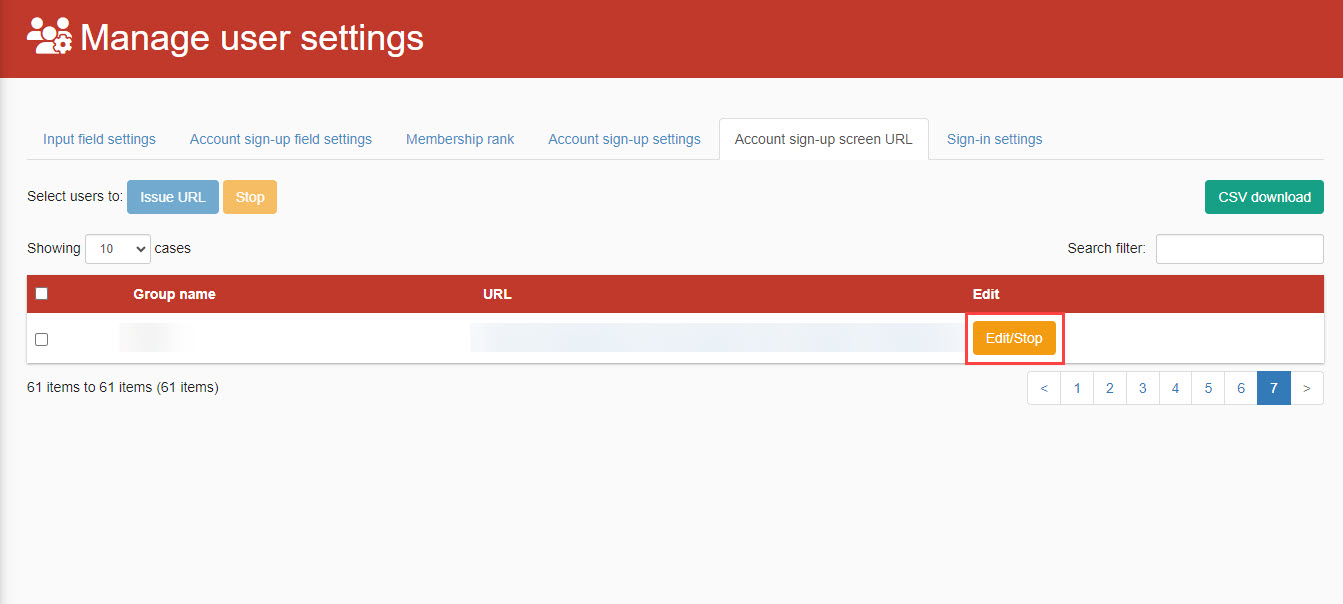
03. Edit/Stop URL
To update settings or turn off a link entirely, click Edit/Stop to the right of the group row.
*To deactivate multiple URLs simultaneously, tick the boxes next to the target groups and click Stop at the top of the screen.
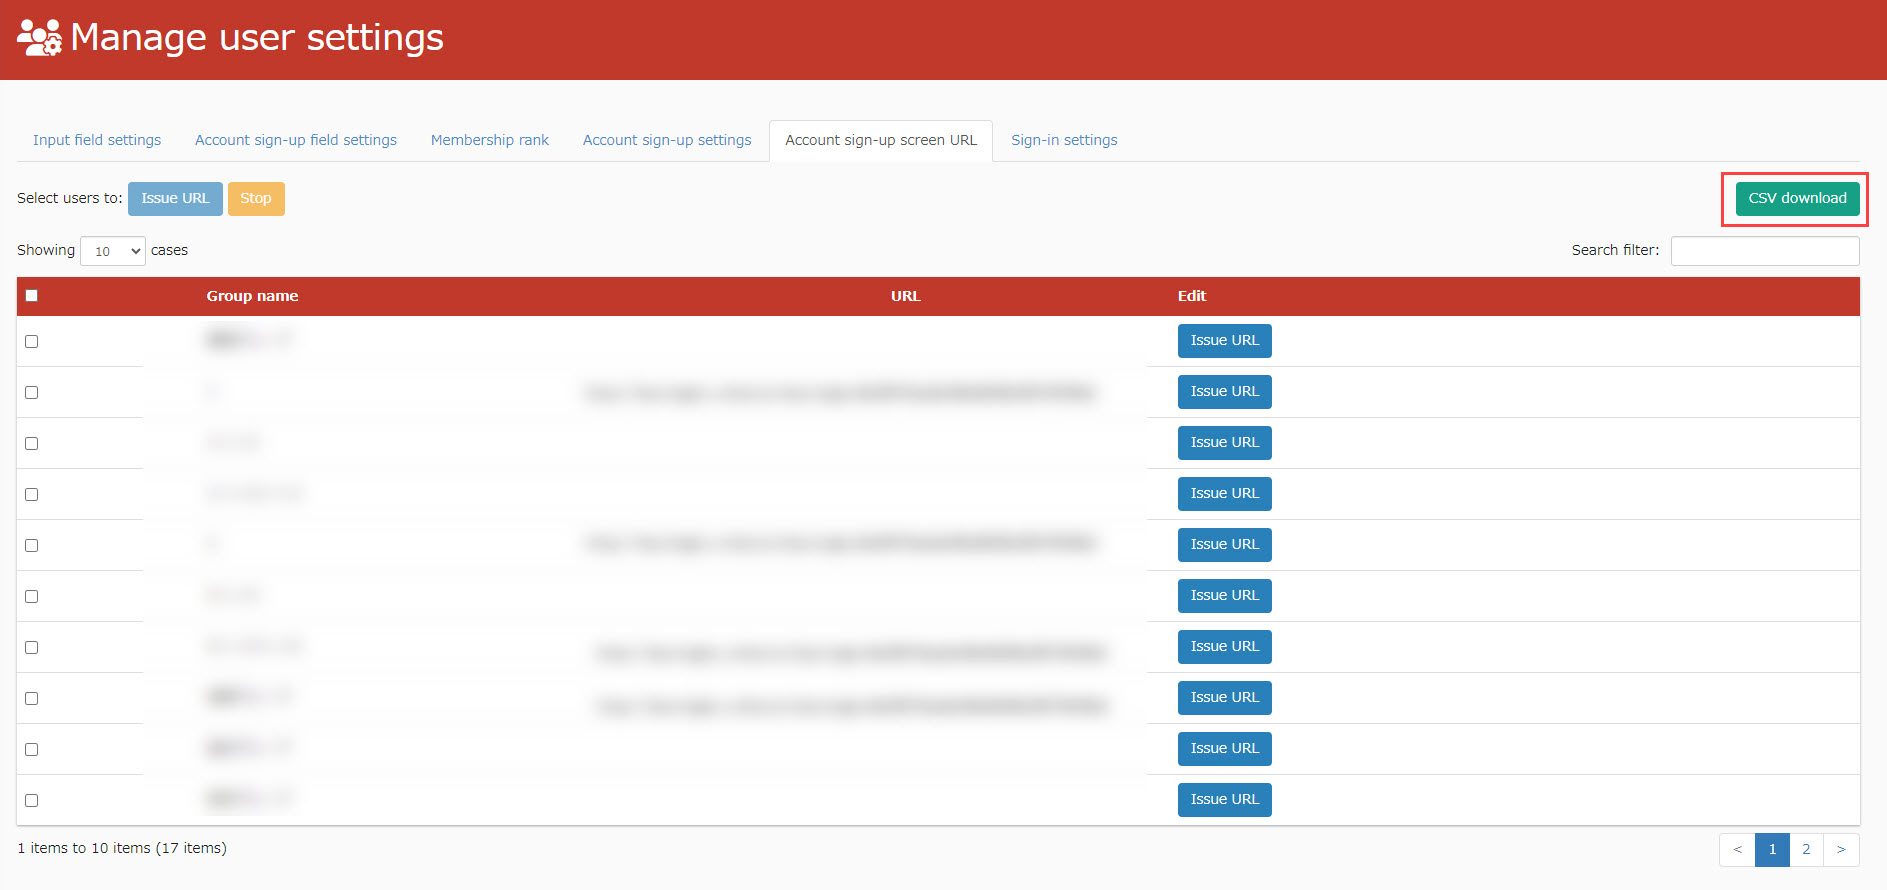
04. Download registration URLs
You can download a CSV containing all your groups and their corresponding registration links.
Click CSV download in the upper-right corner of the screen.
The registered groups and issued URLs will be downloaded in a list.