Certificate
The following explain certificates.
Create certificate
01. Create a course
First, create a course.
*For more details, refer to Course/Folder.
02. Open the creation form
Click on the course you have created.
Click the "+" icon > Certificate > Create certificate
03. Go to Manage certificate templates
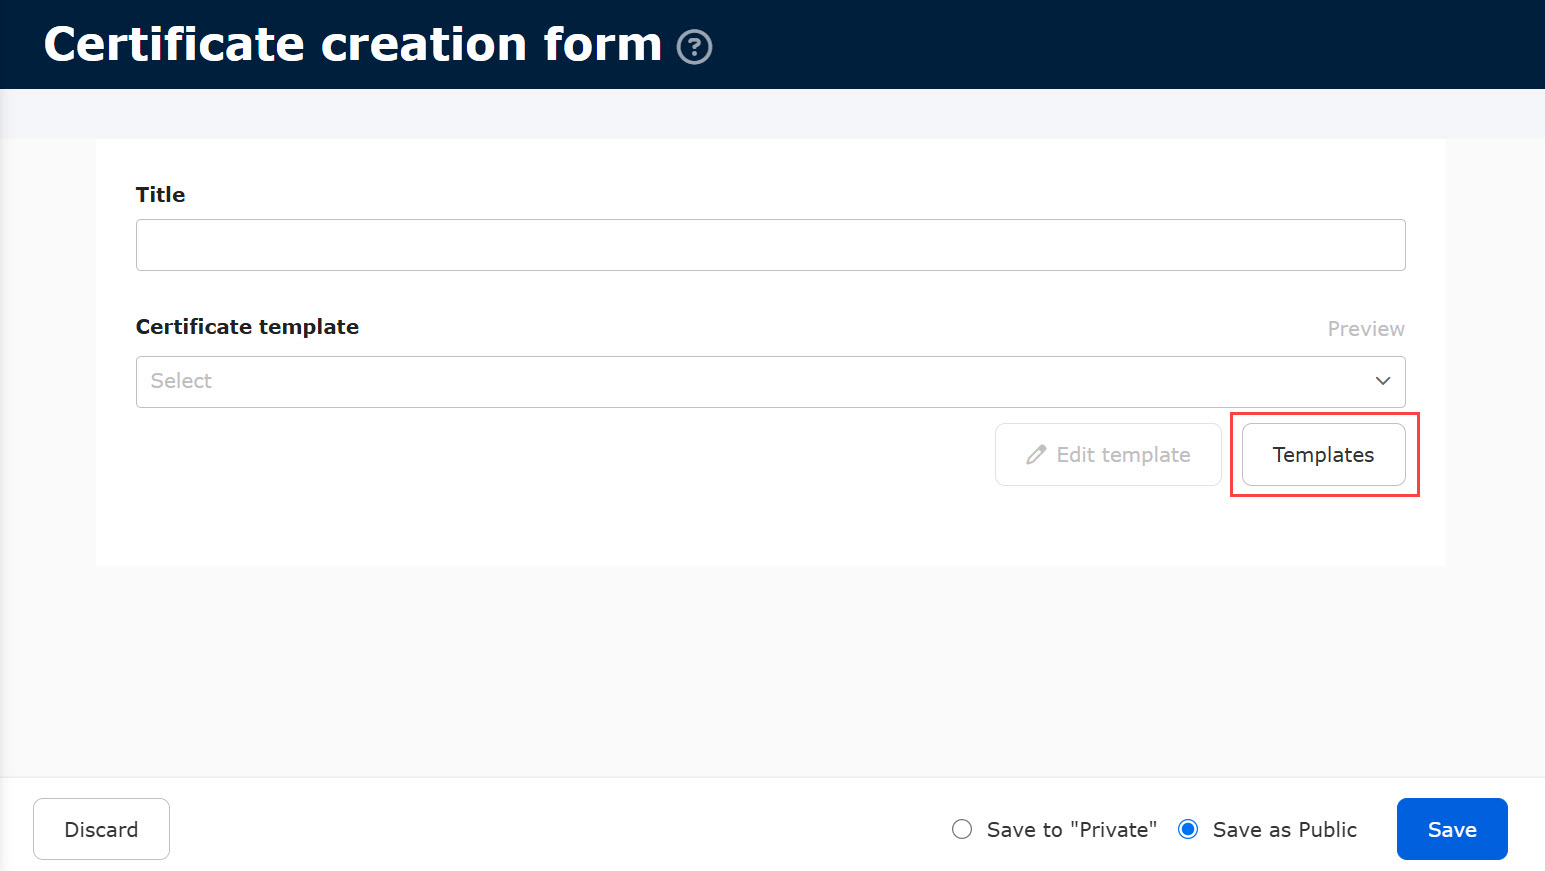
First, create a certificate template.
Click on "Templates."
04. Create template
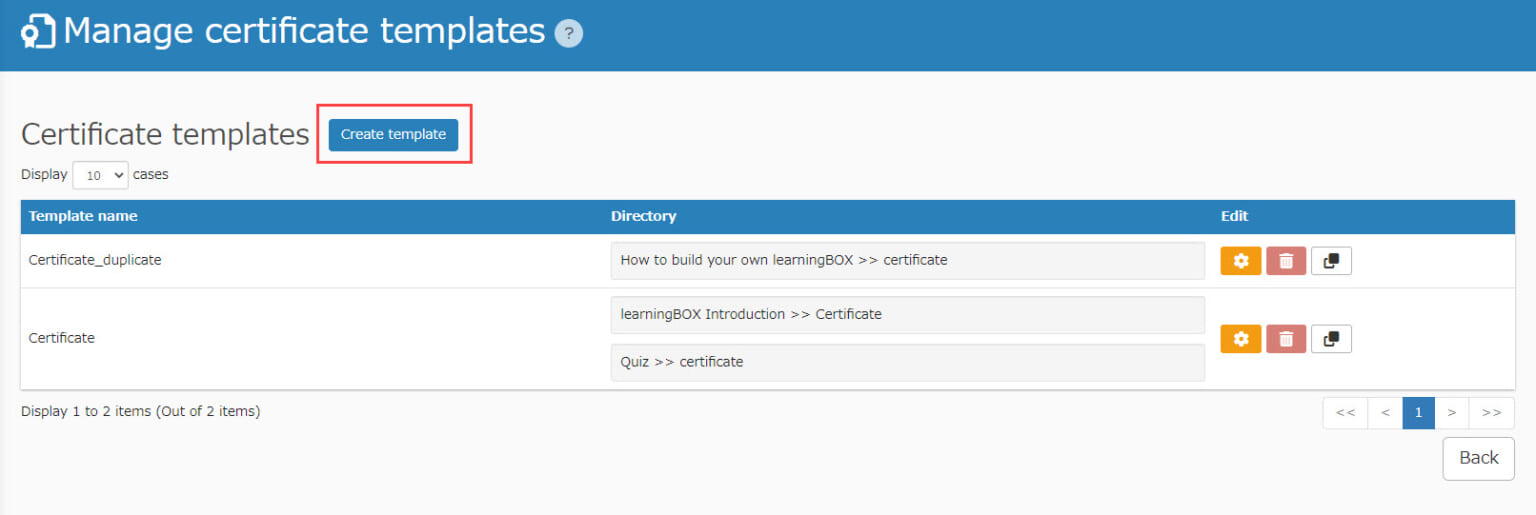
Click on "Create template."
*For more details, refer to Create certificate template.
05. Select template
Go back to the Certificate creation form.
Enter a title.
Select the template you have created from the list.
Specify report assignment
To insert the following items, "Submitted answer by text on report assignment" or "Submitted answer by handwriting on report assignment," you must specify the source content.
▼ Submitted answer by text
You can specify the report assingment for which the submission type is "Text only."
▼ Submitted answer by handwriting
You can specify the report assignment for which the submission type is "Handwriting."
Note that only Rectangle (3:1) for the handwriting frame is available.
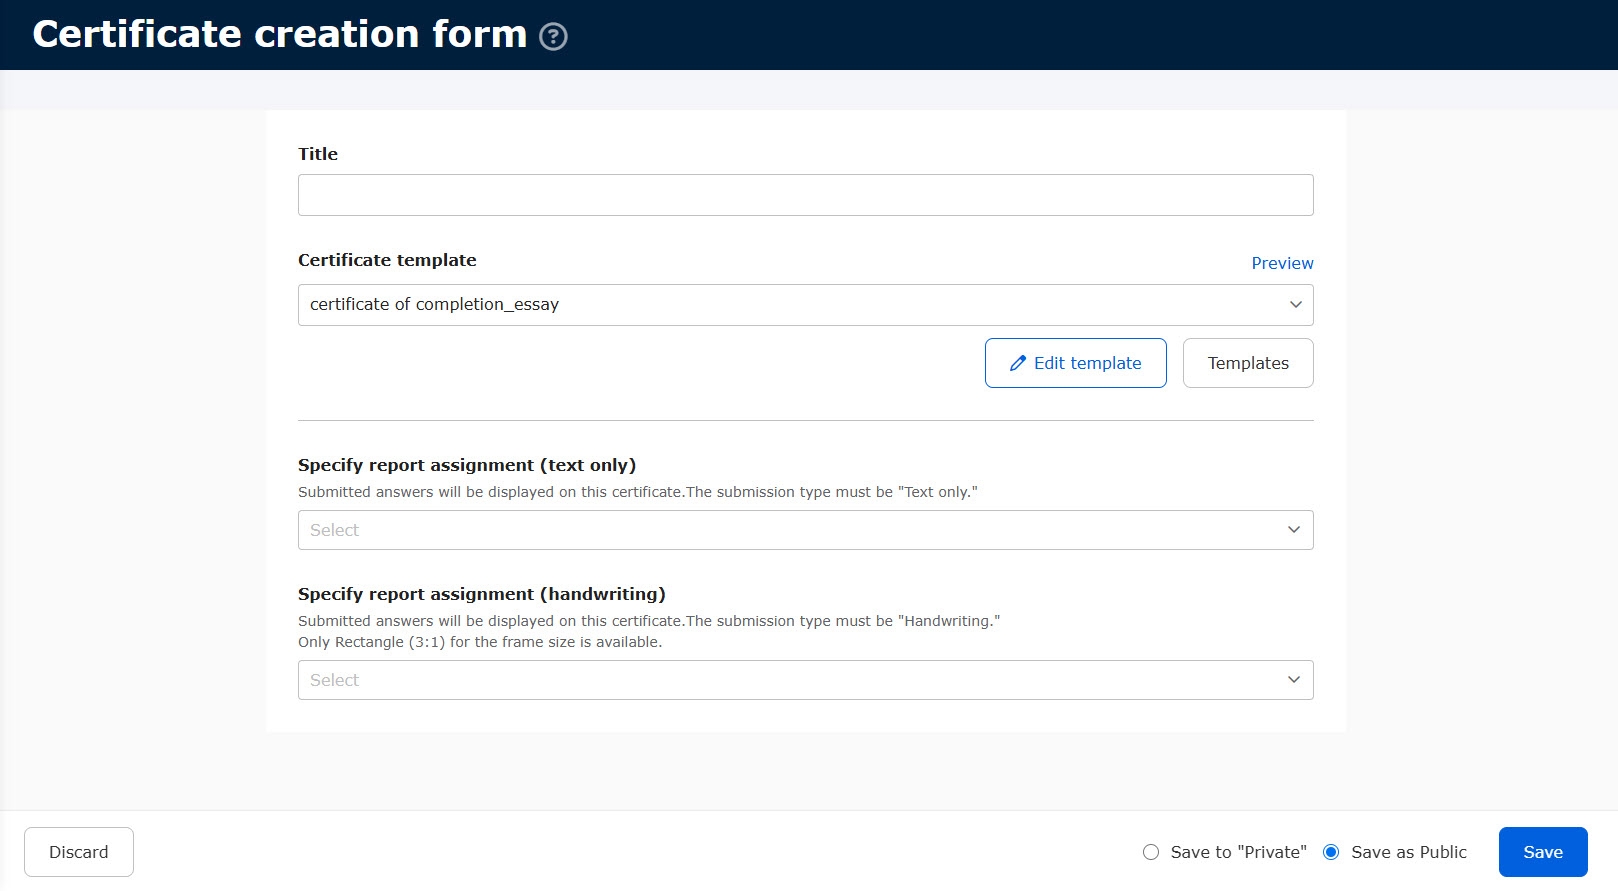
To display the answer of the report assignment on the certificate, the answer must be submitted.
06. Save
Select one from the following to save the settings.
- Save as Public: The content will be delivered to the assigned users once it is saved.
- Save to Private: The content will be saved, but other users cannot view it.
User interface
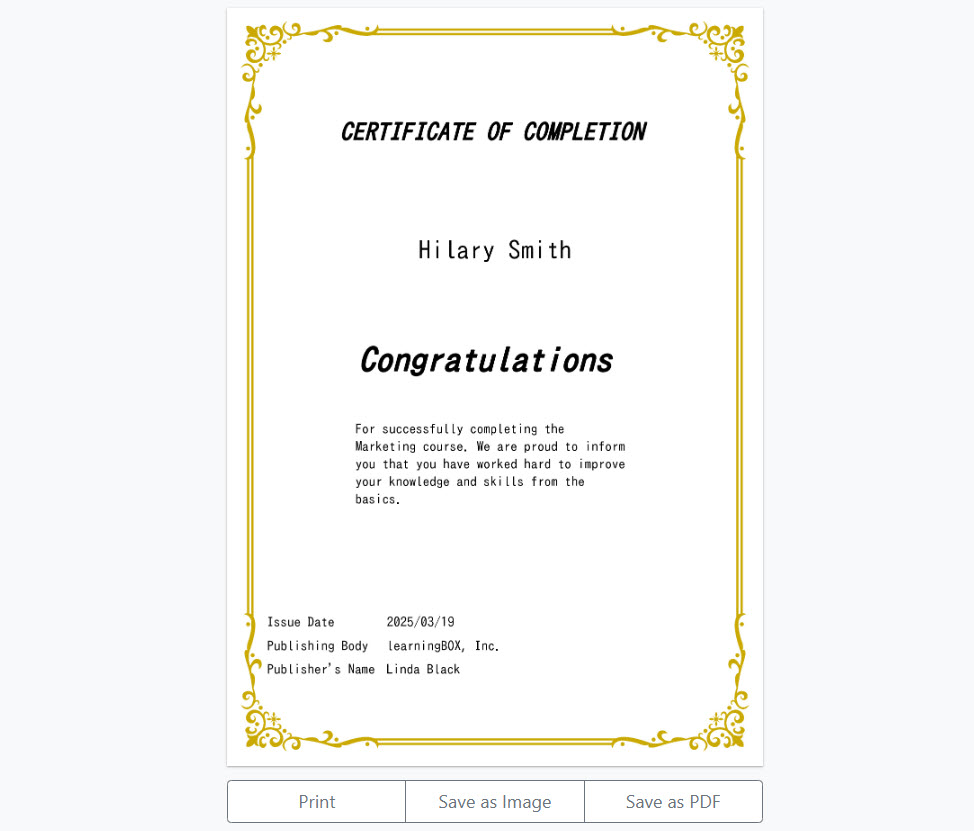
The following describes how the issued certificate looks like.
Learners can print, save as image/PDF.
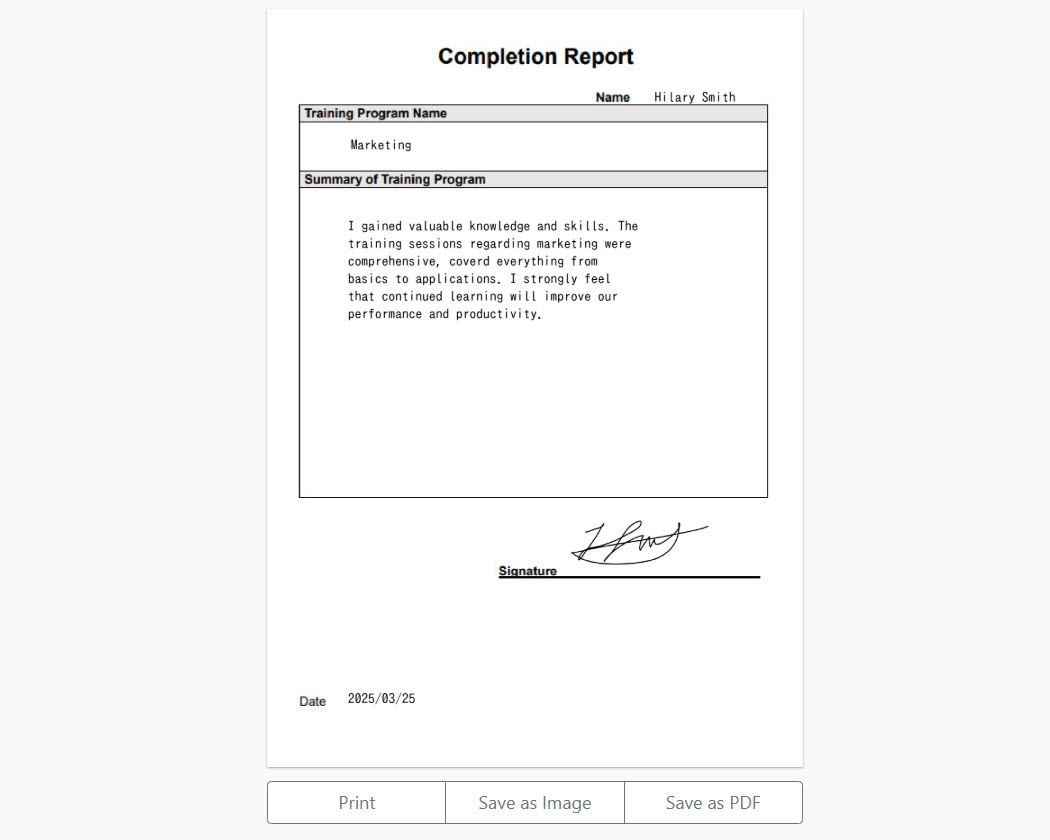
When you insert the items, "Submitted answer by text on report assignment" and "Submitted answer by handwriting on report assignment," in addition to uploading the image file as follows, the certificate can be utilized as the completion report for the training program as shown below.
e.g.)
・Insert "Submitted answer by text on report assignment" under the Summary of Trainig Program.
・Insert the "Submitted answer by handwriting on report assigment" next to the Signature
Edit certificate
You can edit your certificate.
01. Go to Manage contents
Click on the Manage contents in the side menu.
02. Edit
Right-click or click on the gear icon on the certificate > Edit
Manage certificate templates
You can manage certificate templates.
01. Go to the Manage certificate templates
Click on the "+" icon on the Manage content > Certificate > Manage certificate templates
02. Interface
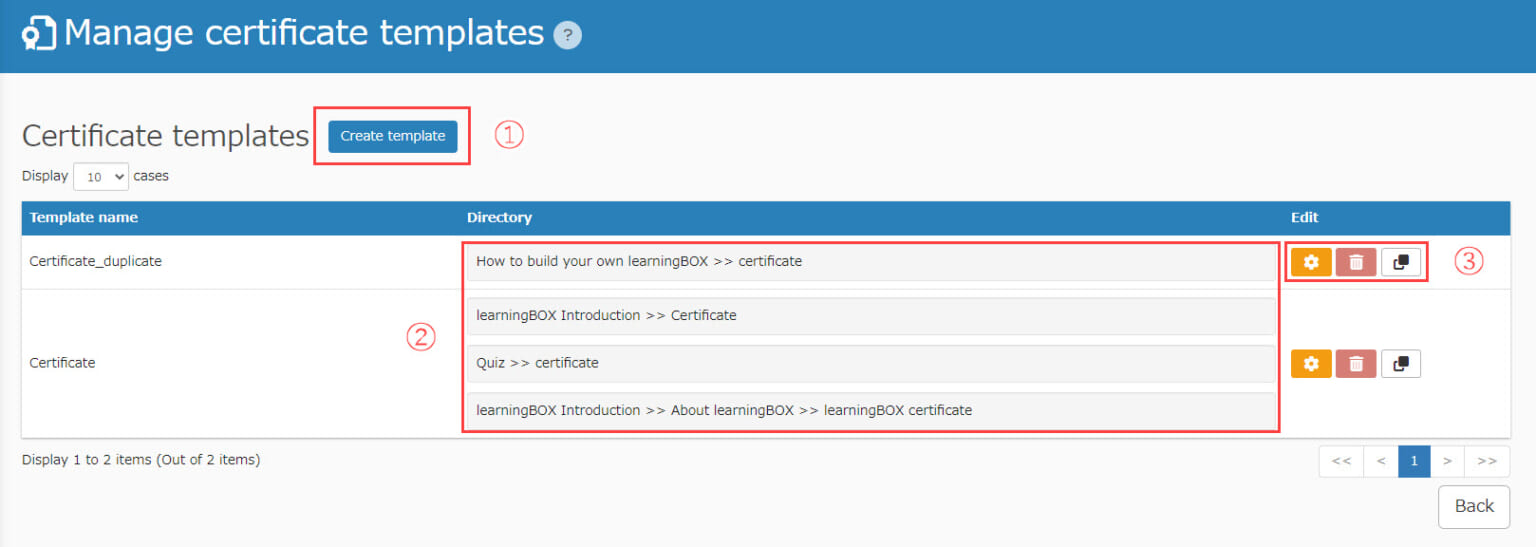
This page contains the following items.
- Create Template: you can create a new template
- Directory: you can check where the template is used and the template name
- Icons
- Gear icon: edit
- Trash icon: delete
*When you are using certificates as content, you cannot delete them. - File icon: duplicate
When you edit a template
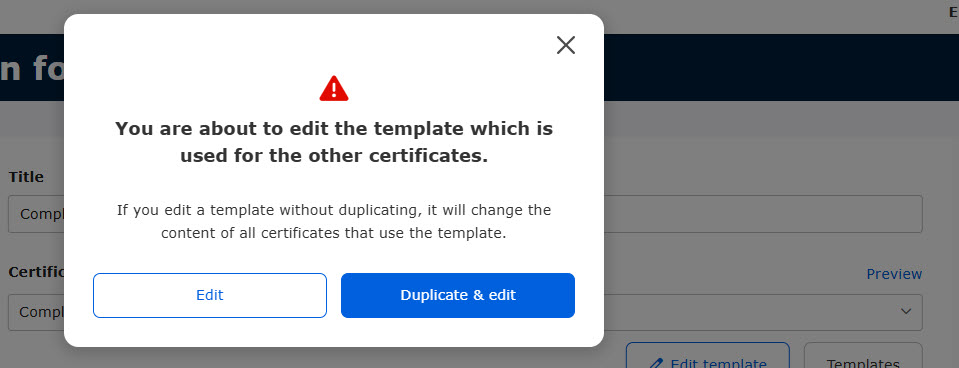
When the template is used for another certificate, the following pop-up window will be shown.
When you click "Edit," the certificates which the template applies to will be also changed.
To avoid the change, click "Duplicate & edit."
