Select curricula
Administrators can set up specific curriculum selections for users.
It is also possible for the administrator to deselect curriculum selections made by the user.
What is Curriculum?
A combination of several already created courses of study, selected to allow for planning according to the objectives and stages of study
Required
Customization options,
Content management editing privileges (for all content) + Group management editing privileges (for all content),
Related person (lecturer or organizer) + group management editing privileges
Selection / Release
01. Open the Curriculum Selection Management Screen
Select "Curriculum Selection Management" from the side menu.
02. User interface
The following page will be shown.
At the top of the screen, you can search by entering curriculum codes, titles, etc.
In addition, the curriculum subject to the authority is listed at the bottom of the screen.
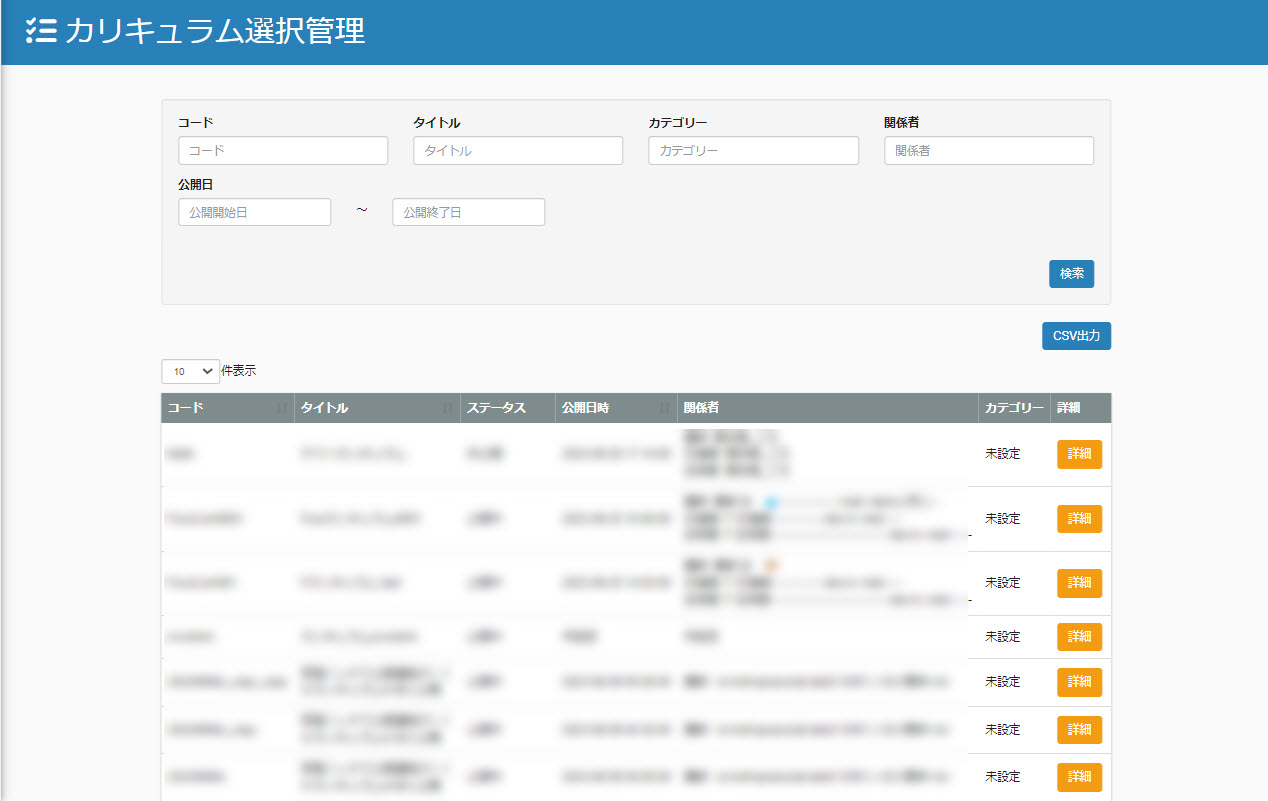
03. CSV Export
By clicking "CSV Output" on the right side of the screen, you can download the list displayed on the "Curriculum Selection Management" screen in CSV format.
04. Open Curriculum Selection History screen by curriculum
On the "Manage Curriculum Selection" screen, click the "Details" button to the right of each curriculum to open the details screen.
05.User interface
The following page will be shown.
At the top of the screen, you can enter a selectee name, e-mail address, or group to search.
It is also possible to specify the status of "All / Selected / Unselected".
In addition, the status of the selected/deselected user is listed at the bottom of the screen.
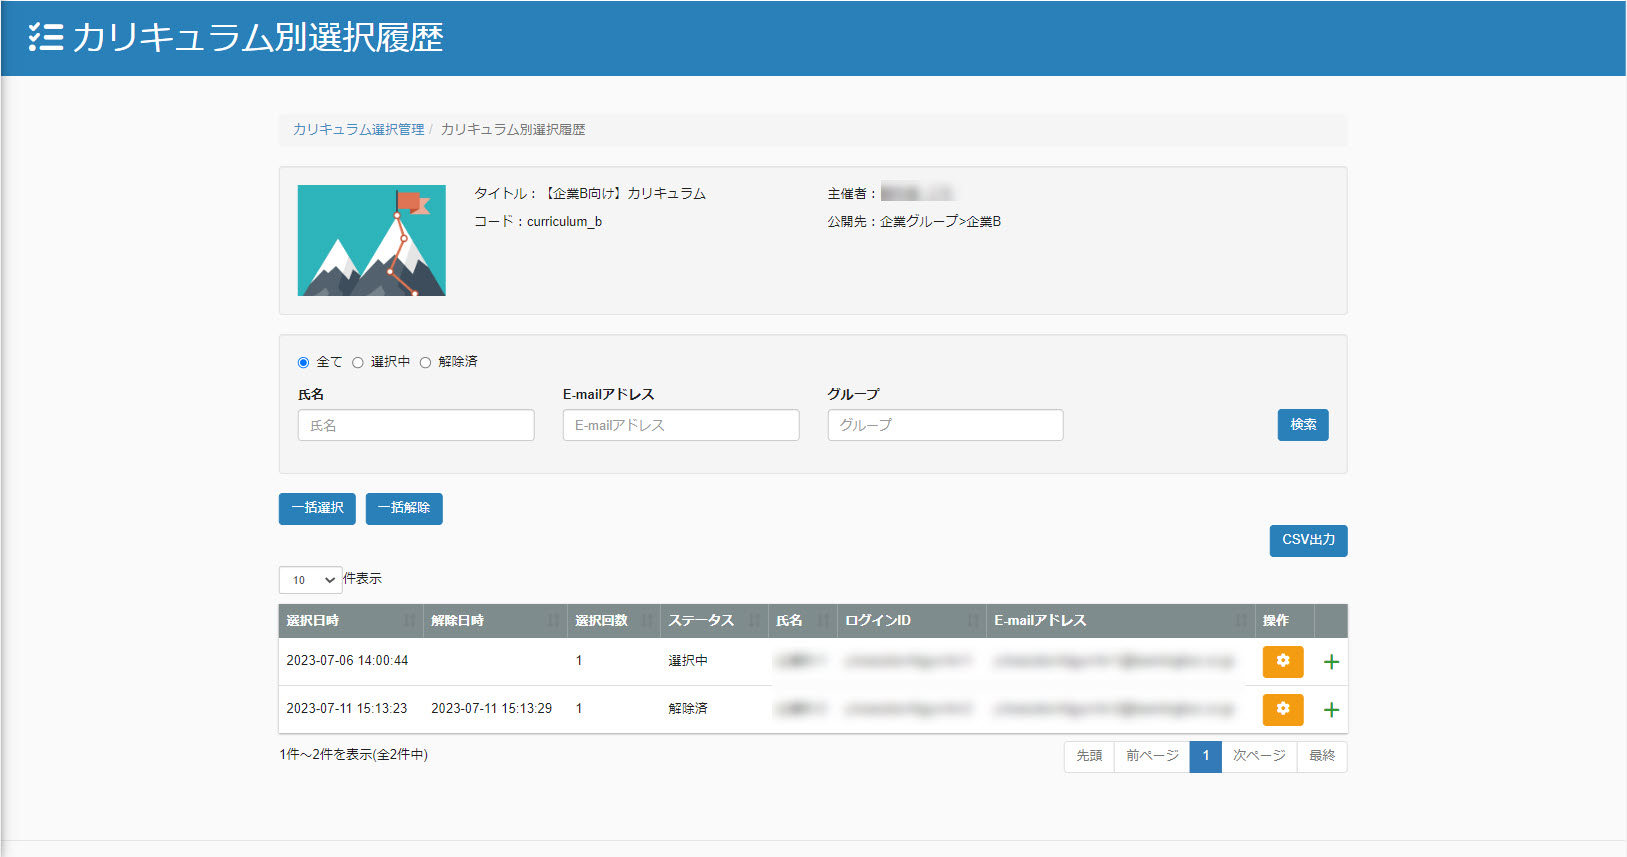
06. Display Items
The items displayed in the selection list at the bottom of the screen are as follows
Date and time of selection
Release date
Number of times selected
Status
Name
Login ID
E-mail address
The group to which the user belongs
Reason for deselection in case of deselection
07. Selection
There are two ways to set up the system: individually for each user or collectively for multiple users.
Individual Selection
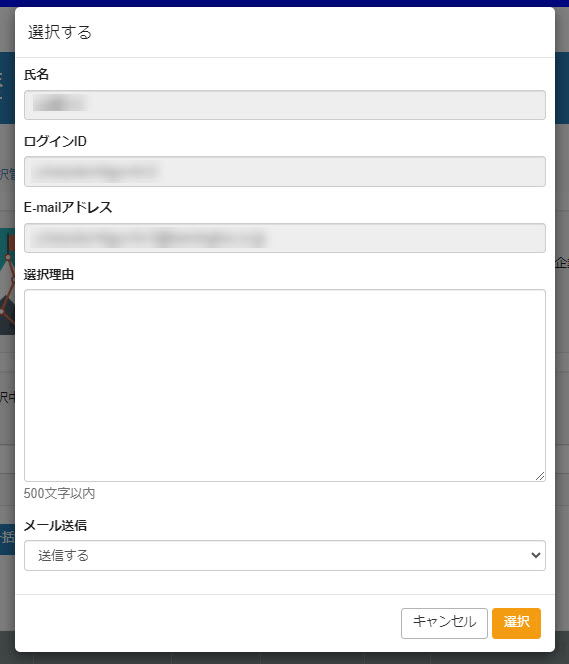
Click on the gear icon of the user for whom you want to set your selection.
The following pop-up will open. Optionally enter the "Reason for Selection" and select in the pull-down whether or not the user should be notified by e-mail.
After completing the settings, click on "Select".
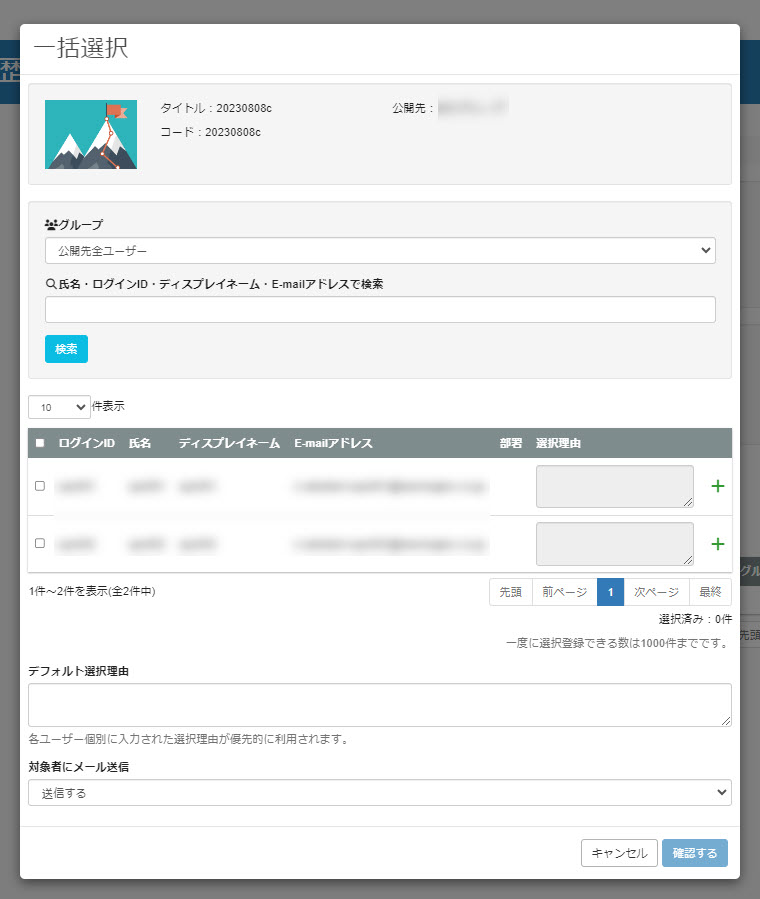
Batch Selection
Click on "Batch Selection" on the left side of the screen.
The following window will be displayed.
At the top of the screen, you can search by group or individual.
A list of users that match the search criteria will be displayed, so please tick the users you wish to set up and optionally enter a "reason for selection".
Note that the information entered in the "Reason for Default Selection" can be notified to all selected users (the information entered for individual users takes precedence).
Select from the pull-down menu whether or not to notify users of the configuration target by e-mail.
After completing the settings, click "Confirm" > "Execute Selective Registration".
08. Release
There are two ways to deselect individual users or to deselect multiple users at once.
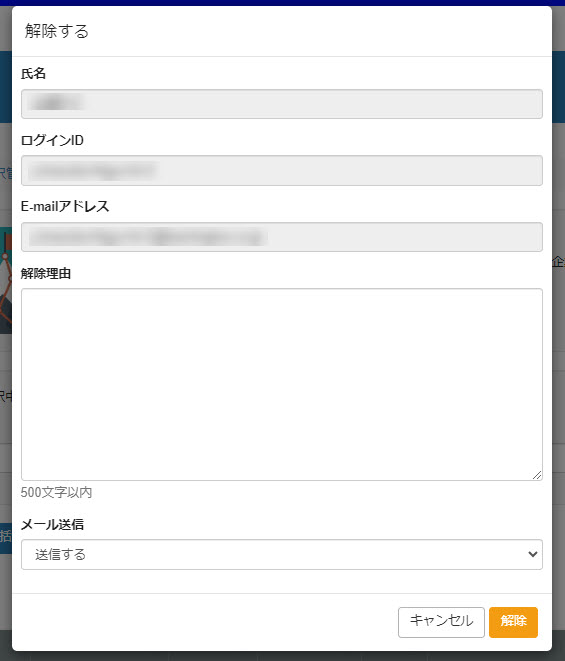
▼ Individual release
Click on the gear icon of the user you wish to deselect.
The following pop-up will open. Optionally enter the "Reason for Cancellation" and select in the pull-down whether or not the user should be notified by e-mail.
When you have completed the settings, click "Unlock".
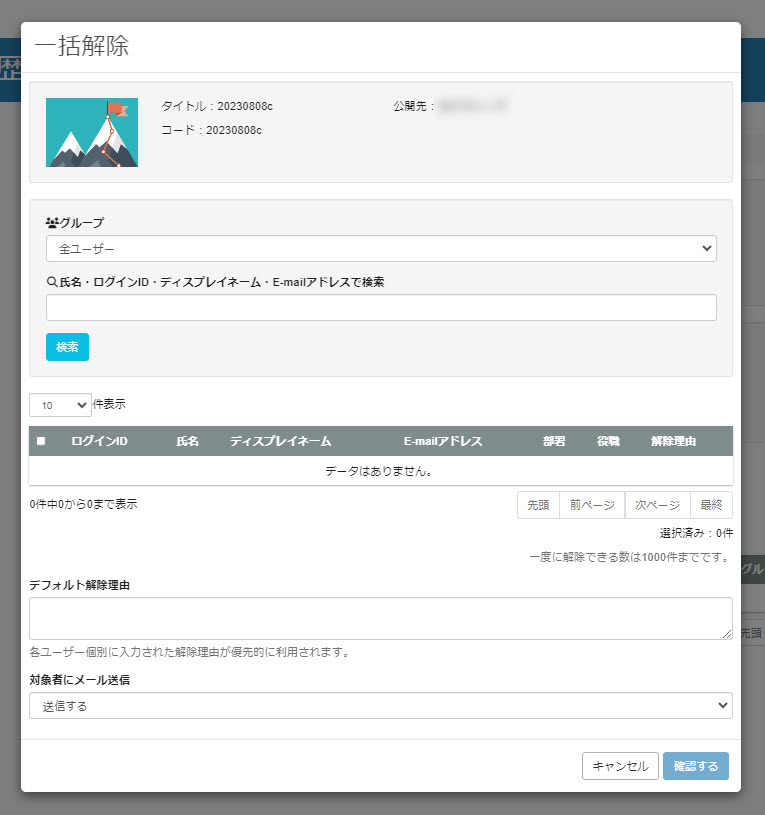
▼ Batch Release
Click on "Batch Release" on the left side of the screen.
The following window will be displayed.
At the top of the screen, you can search by group or individual.
A list of users who match the search criteria will be displayed, so please tick the users you wish to set and optionally enter a "reason for release".
Note that the information entered in the "Reason for Default Cancellation" can be notified to all selected users (the information entered for individual users takes precedence).
Select in the pull-down menu whether or not to notify the user of the cancellation by e-mail.
After completing the settings, click "Confirm" > "Execute Release".
09. CSV output
By clicking "CSV Output" on the right side of the screen, you can download the list displayed on the "Selection History by Curriculum" screen in CSV format.
Confirmation of selection on the user's side
Users can check the status of their own curriculum selections.
*For more details, refer to Curriculum Selection History.