Add/remove groups that users belong to by CSV
When registering users by a CSV file in batch, you can also add/remove a group(s).
The following explain how to edit the file.
Required
Management role of Group manager (Edit)
How to set
By adding items to a CSV file, you can add groups to users or remove groups.
The following explan how to edit the file.
Add new group
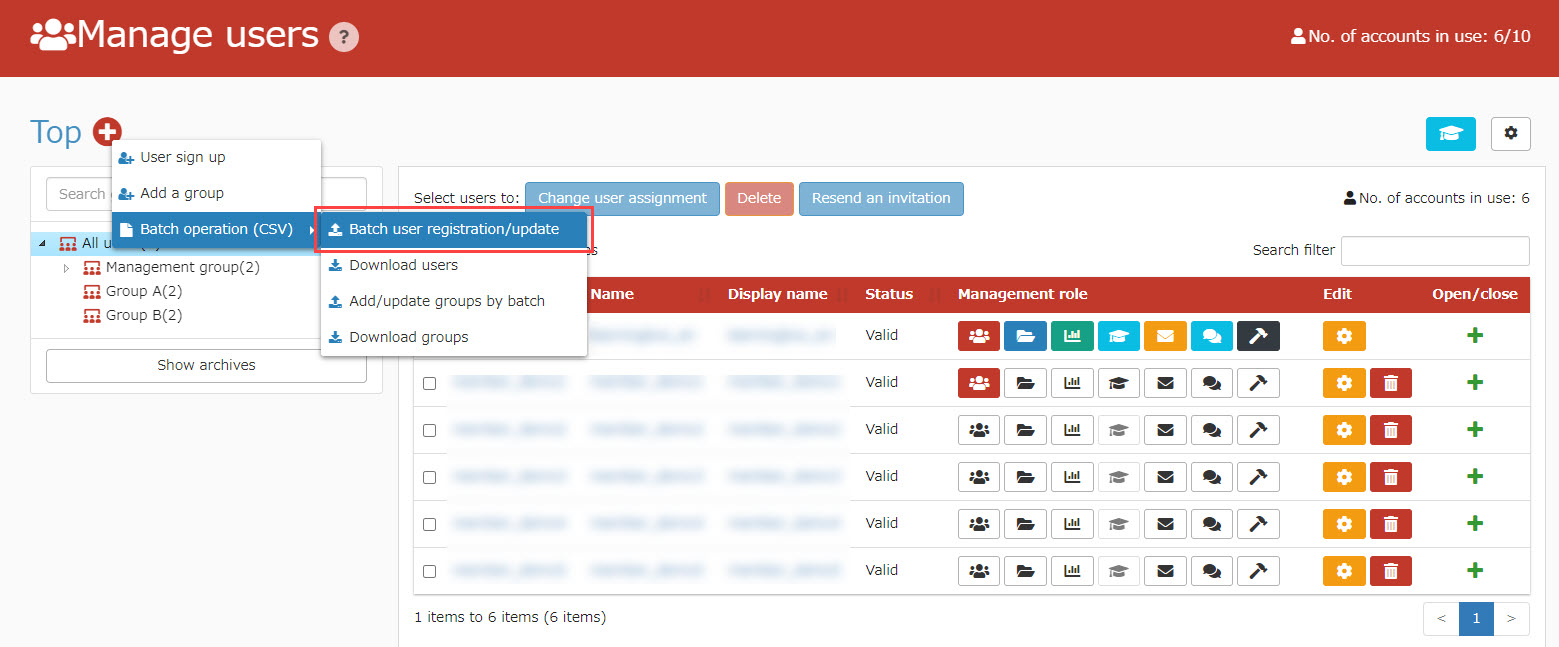
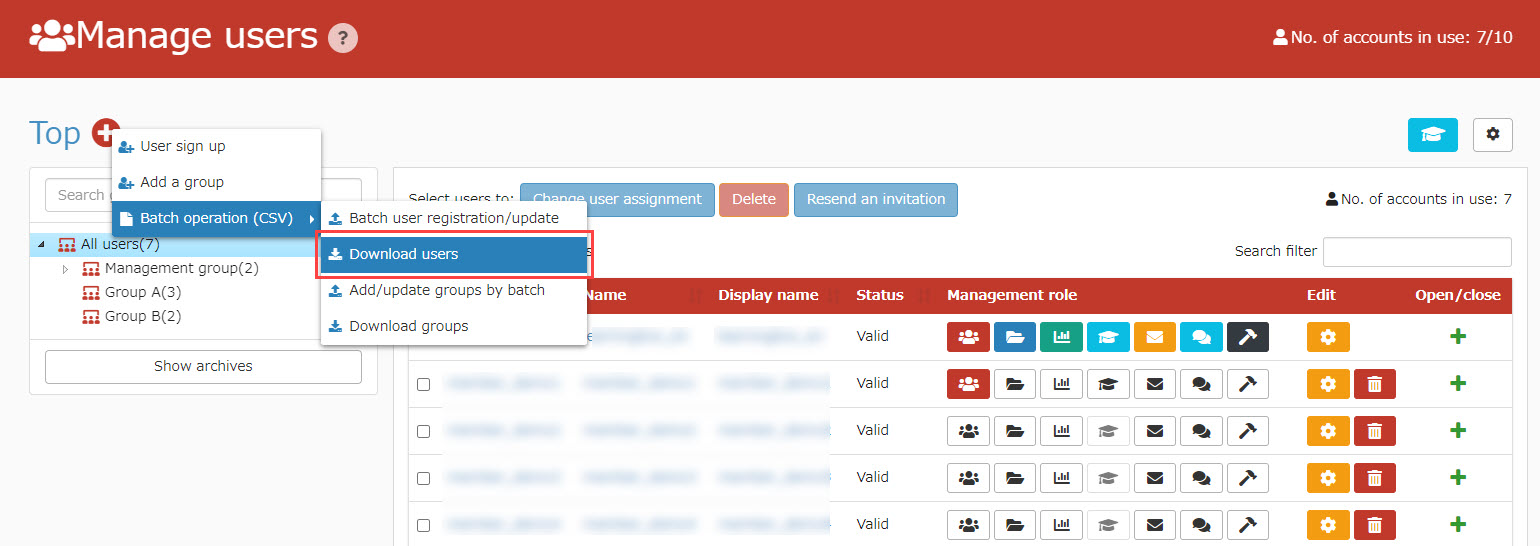
01. Go to Manage users
Click on the "Manage users."
02. Go to Batch registration/update
Click on the "+" button > "Batch operation (CSV)" > "Batch user registration/update"
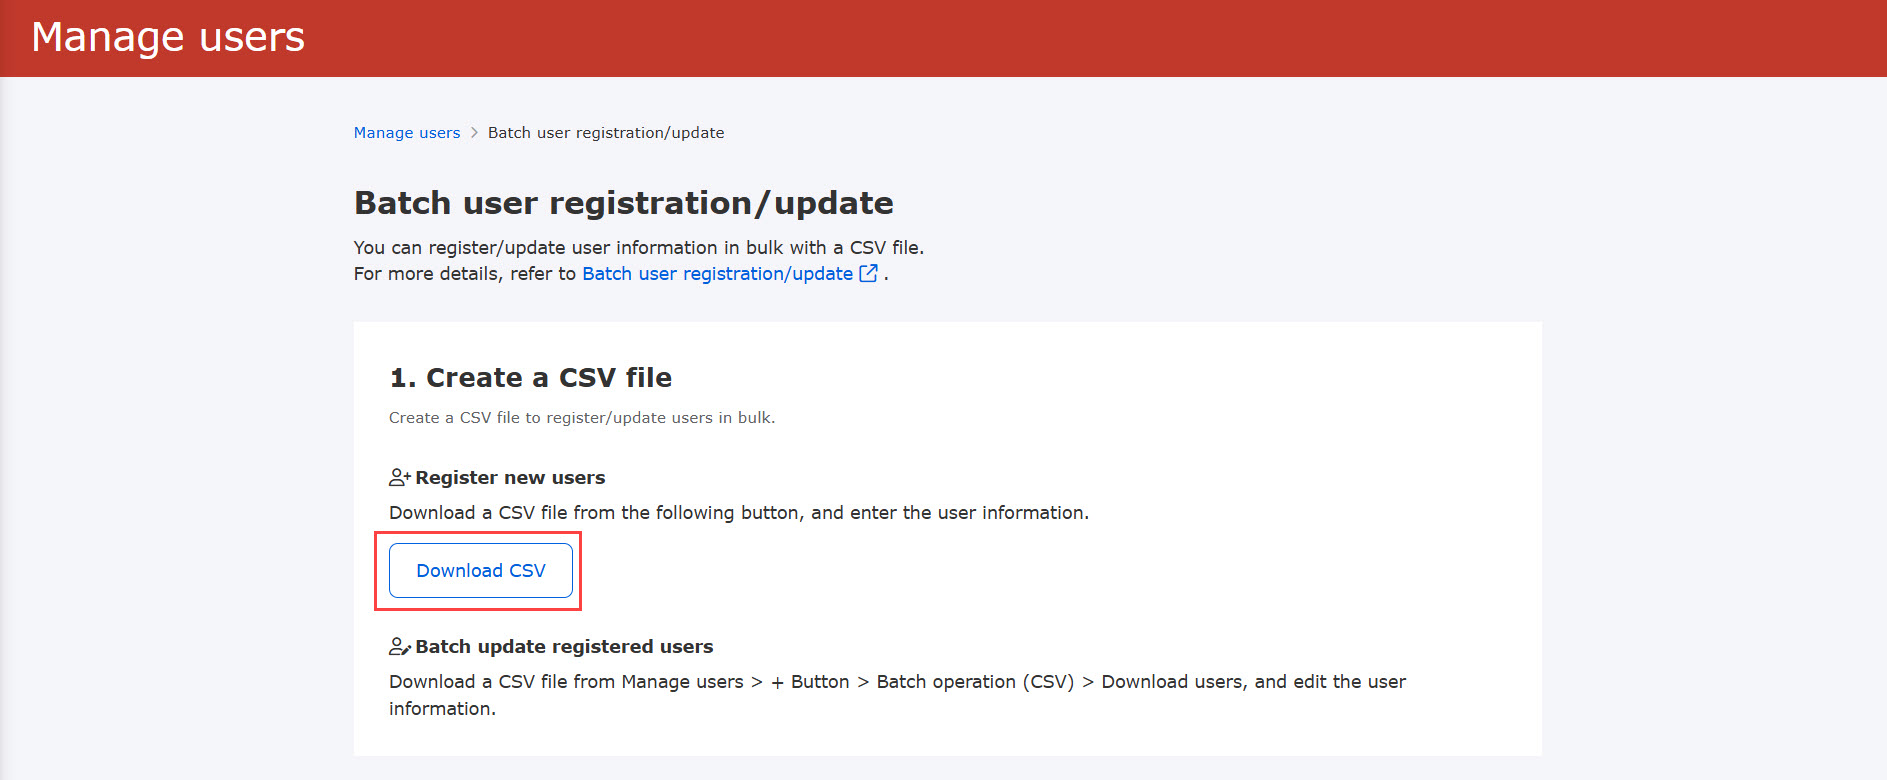
03. Download CSV
Click on "Download CSV."
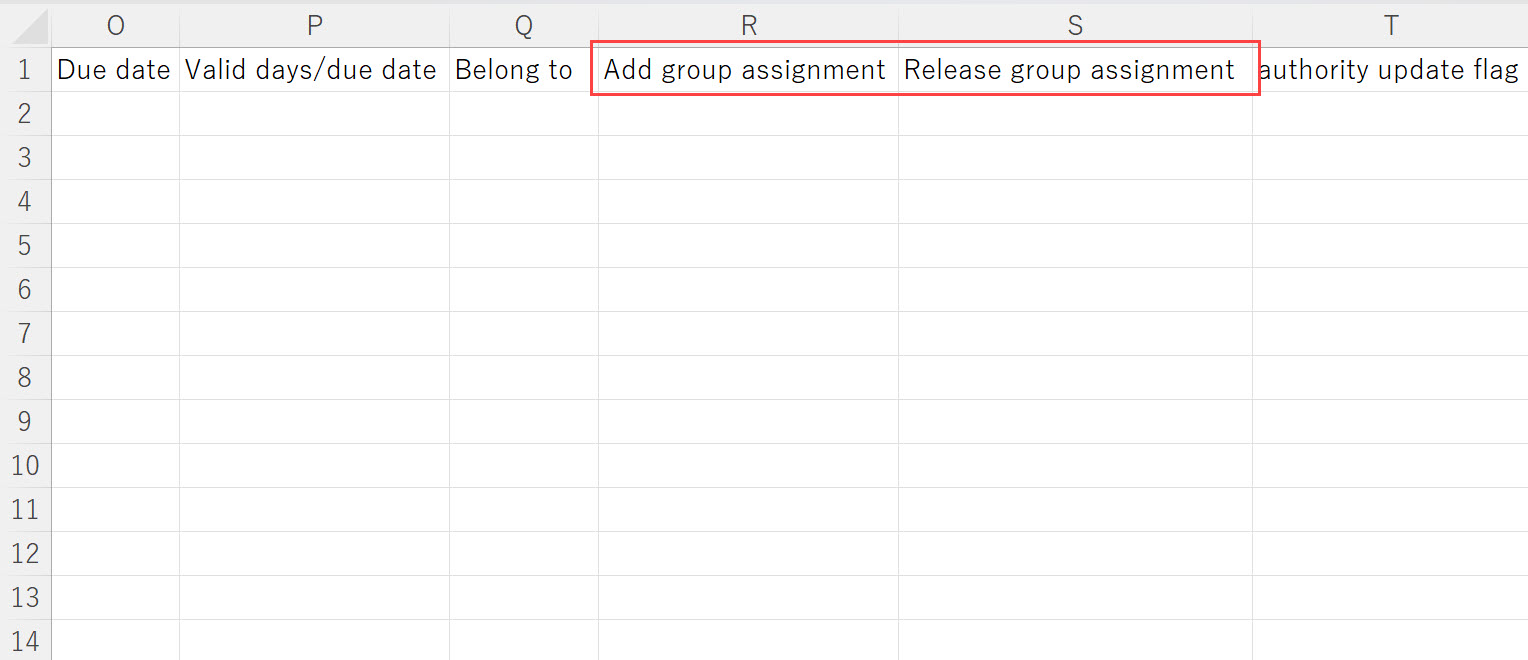
04. Add an item
Open the downloaded CSV file.
"Add group assignment" and "Release group assignment" can be added.
Enter a group in each of these columns.
Save the settings.
*New users cannot be set to "Release group assignment."
For more details about the priority of groups, refer to Item priority.
- Multiple groups: separate them with "||".
e.g.) Group A||Group B - Groups of hierarchical relationships: separate them with ">>>" and enter them from the parent hierarchy.
e.g.) Parent group>>Child group
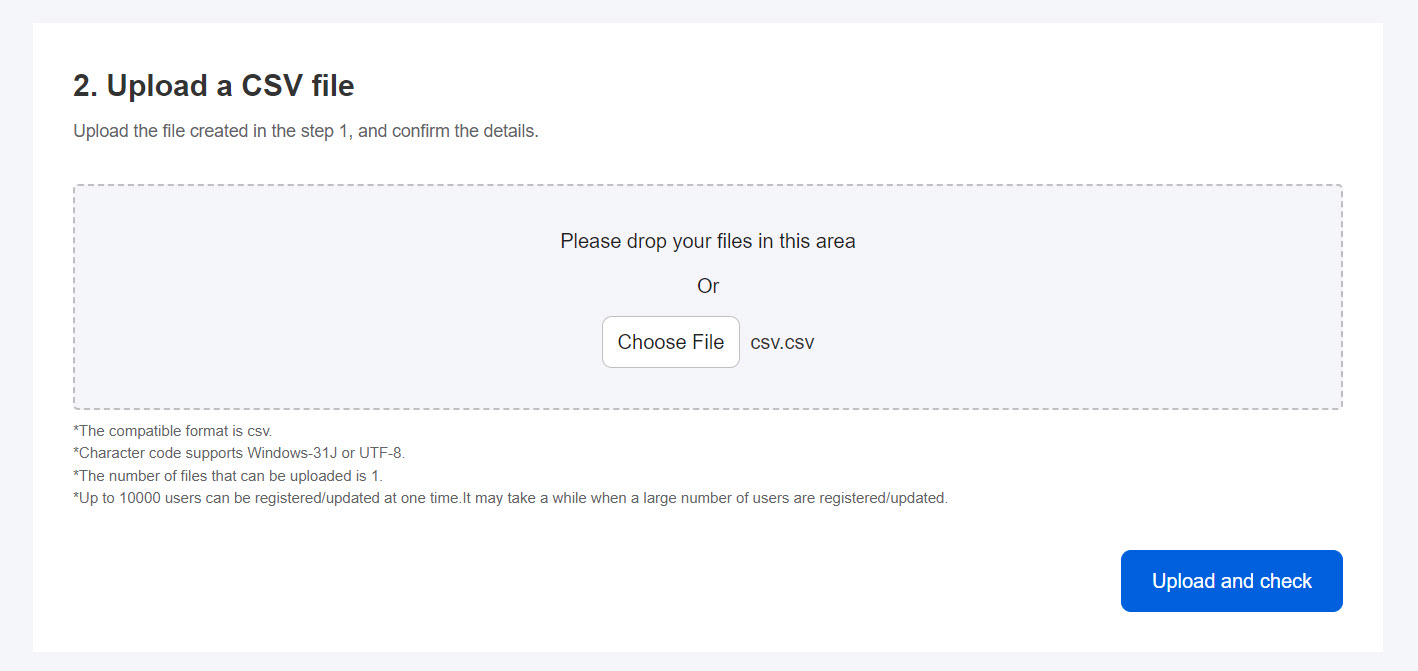
05. Upload files
Go back to the Batch user registration/update, and drag and drop the edited CSV file into the gray frame, or select it from "Choose File" and click "Upload and check."
06. Results
The uploaded user information will be displayed.
To complete the registration, click on "Execute registration."
*When registering a new user, the user will be assigned to a group entered in either "Belong to" or "Add group assignment." However, "Add group assignment" takes precedence.
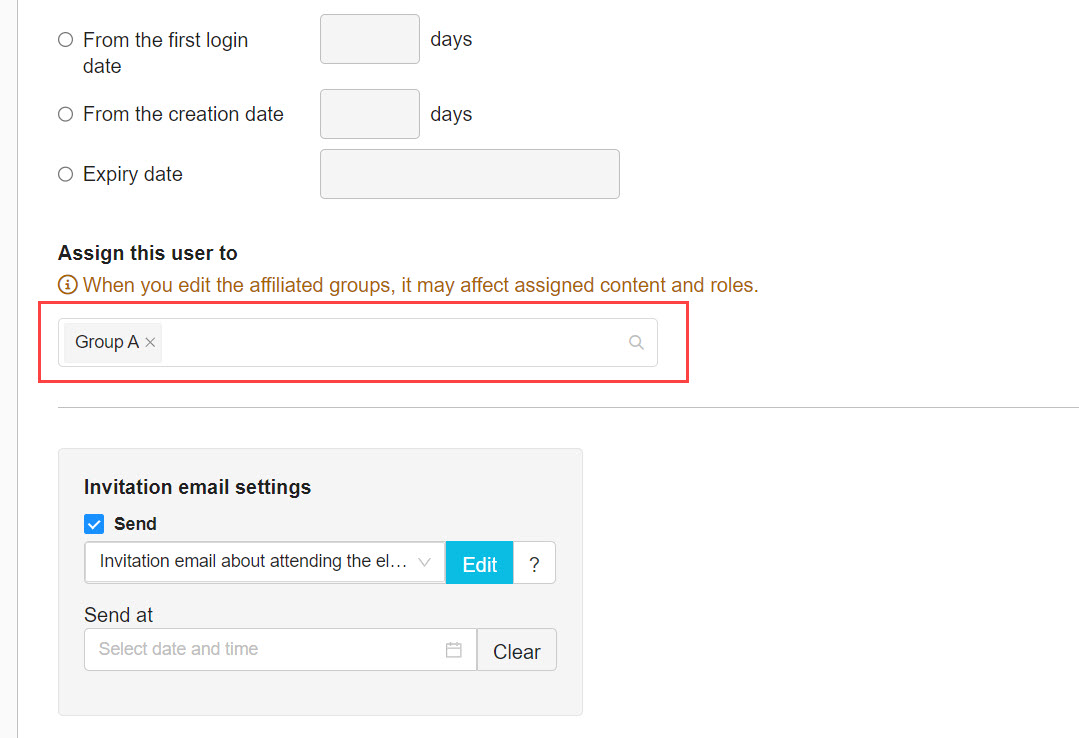
07. Belonged group
In the above example, the user belongs to "Group A".
Update
01. Go to Manage users
Click on the "Manage users."
02. Download user information
Click the "+" button > "Batch Operation (CSV)" > "Download users"
03. Add an item
Open the downloaded CSV file.
"Add group assignment" and "Release group assignment" can be added.
Enter a group in each of these columns.
Save the settings.
*For more details about the item priority of groups, refer to Item priority.

- Multiple groups: separate them with "||".
e.g.) Group A||Group B - Groups of hierarchical relationships: separate them with ">>>" and enter them from the parent hierarchy.
e.g.) Parent group>>Child group
04. File upload
Go back to the Batch user registration/update, and drag and drop the edited CSV file into the gray frame, or select it from "Choose File" and click "Upload and check."
05. Results
The uploaded user information will be displayed.
To complete the registration, click on "Execute registration."
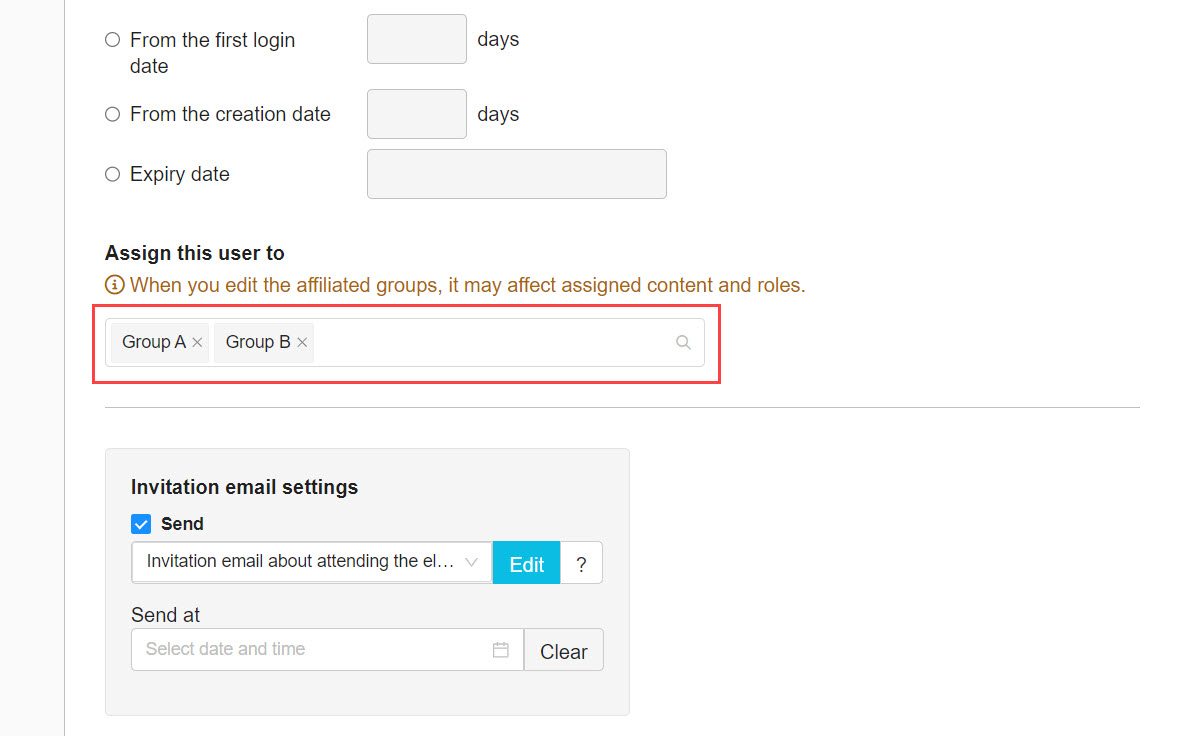
06. Belonged group
In the above example, the user belongs to two groups: Group A, to which the user originally belonged, and Group B, to which the user was newly added.
Item Priority
Each item related to group has a priority order as follows:
Add group assignment > Release group assignment > Group assignment