Manage IP restrictions
This function allows you to set restrictions so that only certain IP addresses can access the site.
Creating an access list
First, create a list to allow access.
Required
Management role of Co-admin
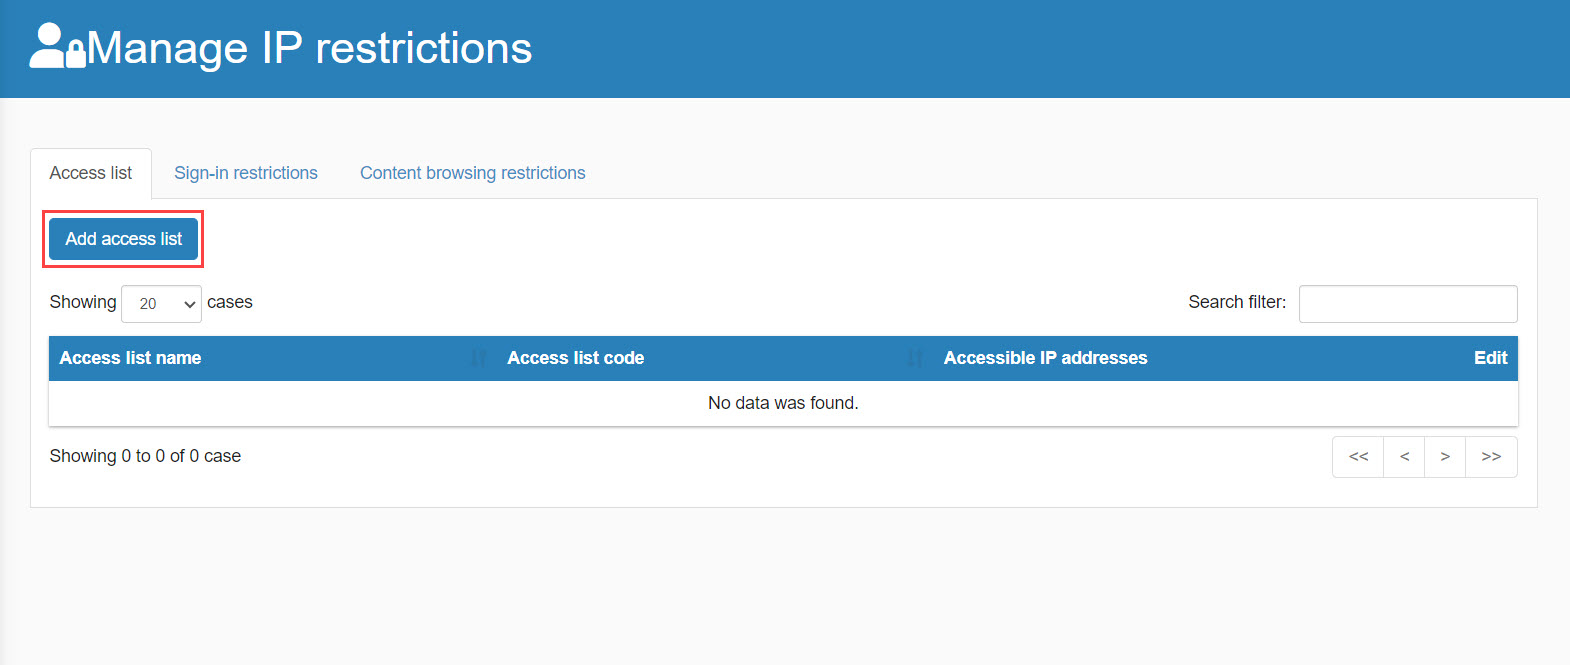
01. Go to Manage IP restrictions
In the side menu, select "System Settings" > "IP Restrictions Management".
02. Add access list
Click on "Add Access List."
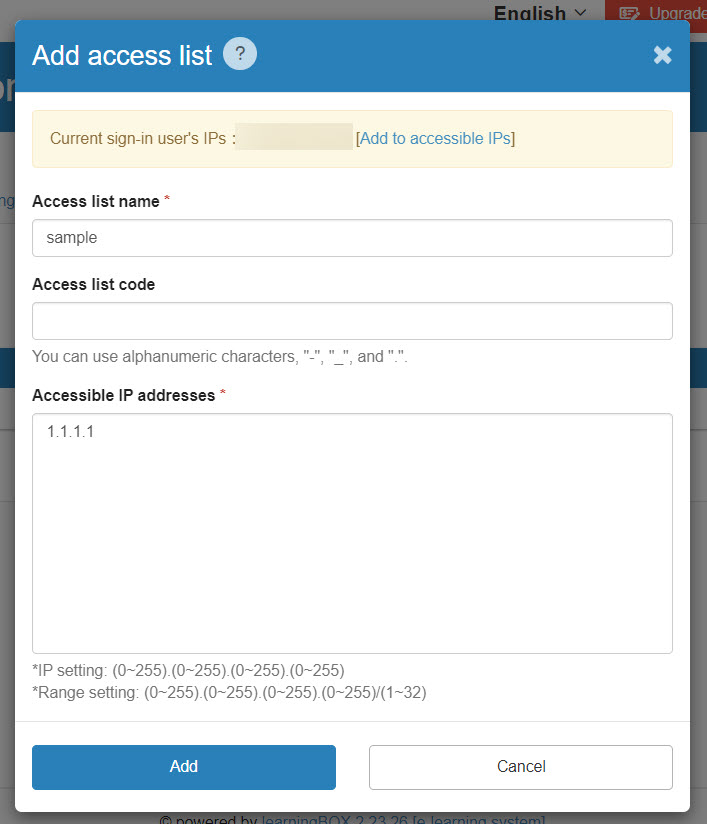
03. Enter access list name and IP address
Enter the "Access List Name" and "Accessible IP Addresses."
An "access list code" can also be set if necessary.
Login Restrictions
Required
Management role of Group manage (Edit) + Co-admin
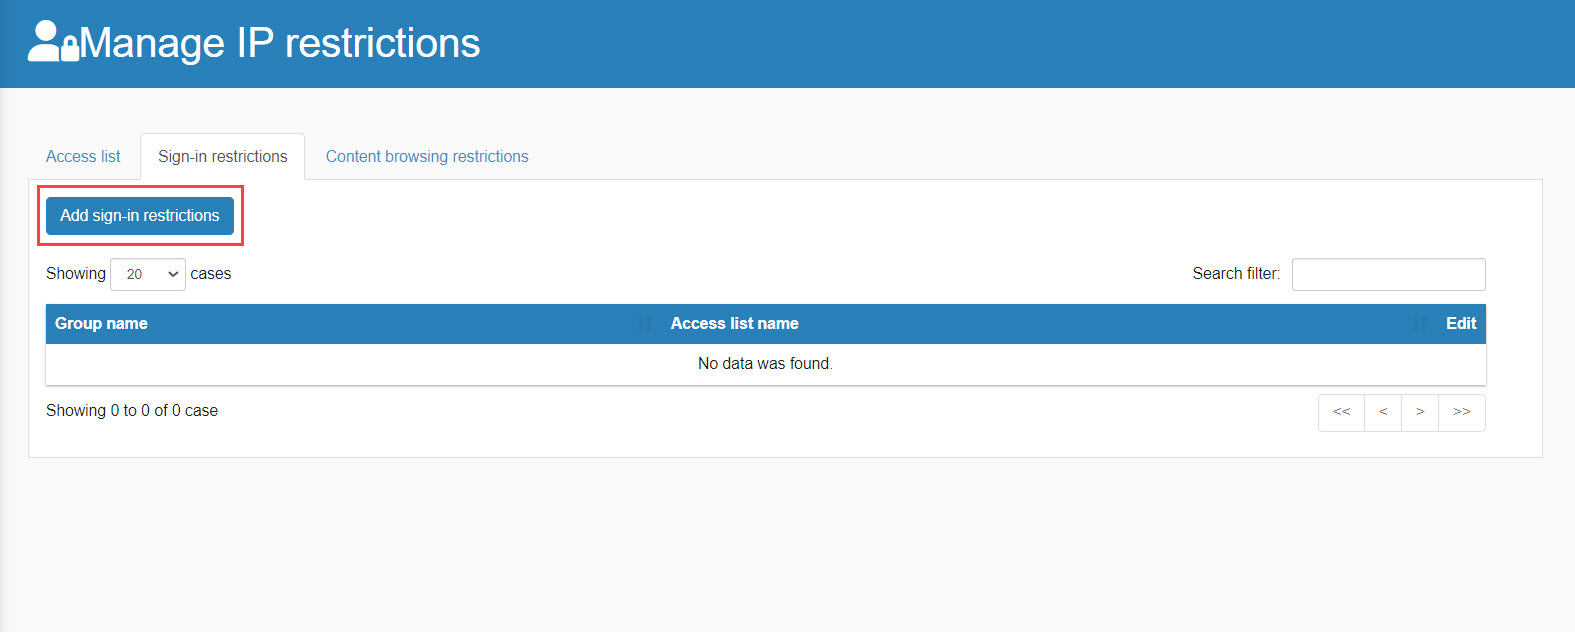
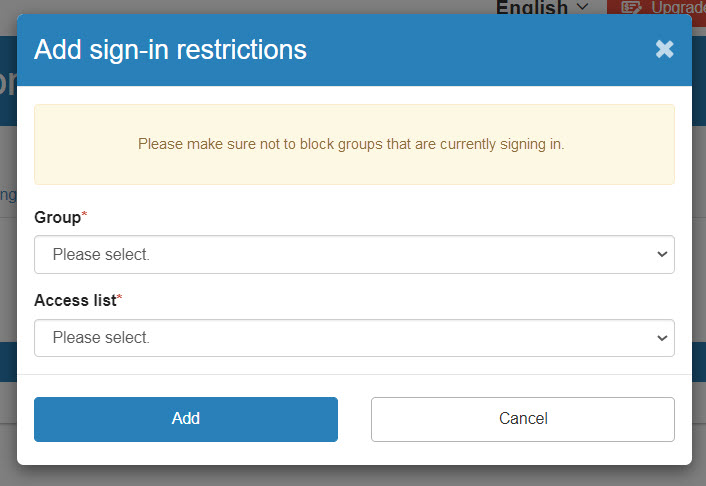
01. Add login restrictions
To set login restrictions, go to the "Login Restrictions" tab and click on "Add Login Restrictions".
02. Select Groups and Access Lists
Select "Group" and "Access List" from the pull-down menu.
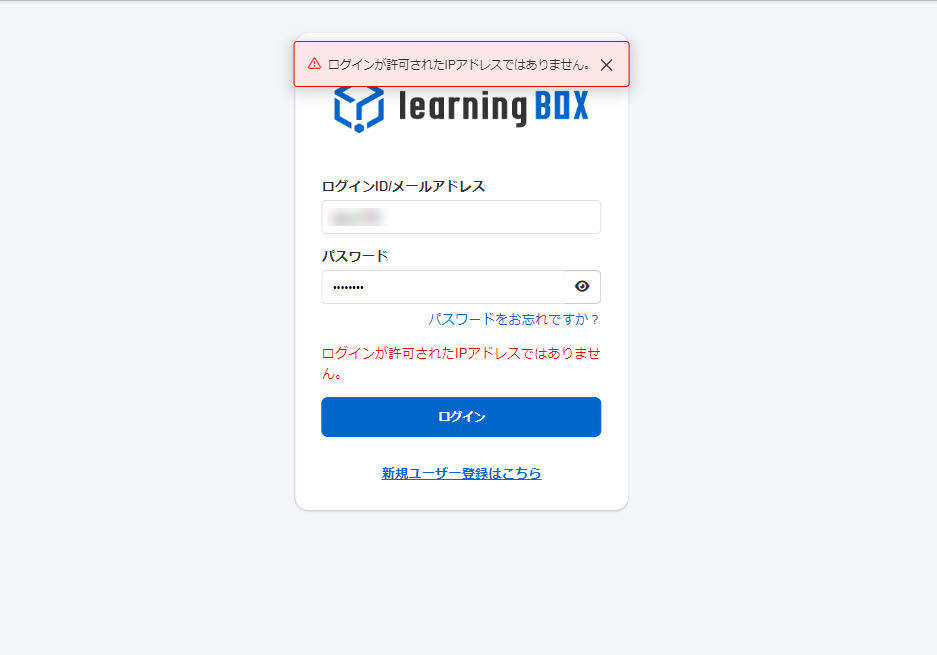
Allow access from IP addresses in the added access list.
Display on login screen
Attempts to log in from outside the access list will be denied.
Content Viewing Restrictions
Required
Content allocation authority + setting page access authority
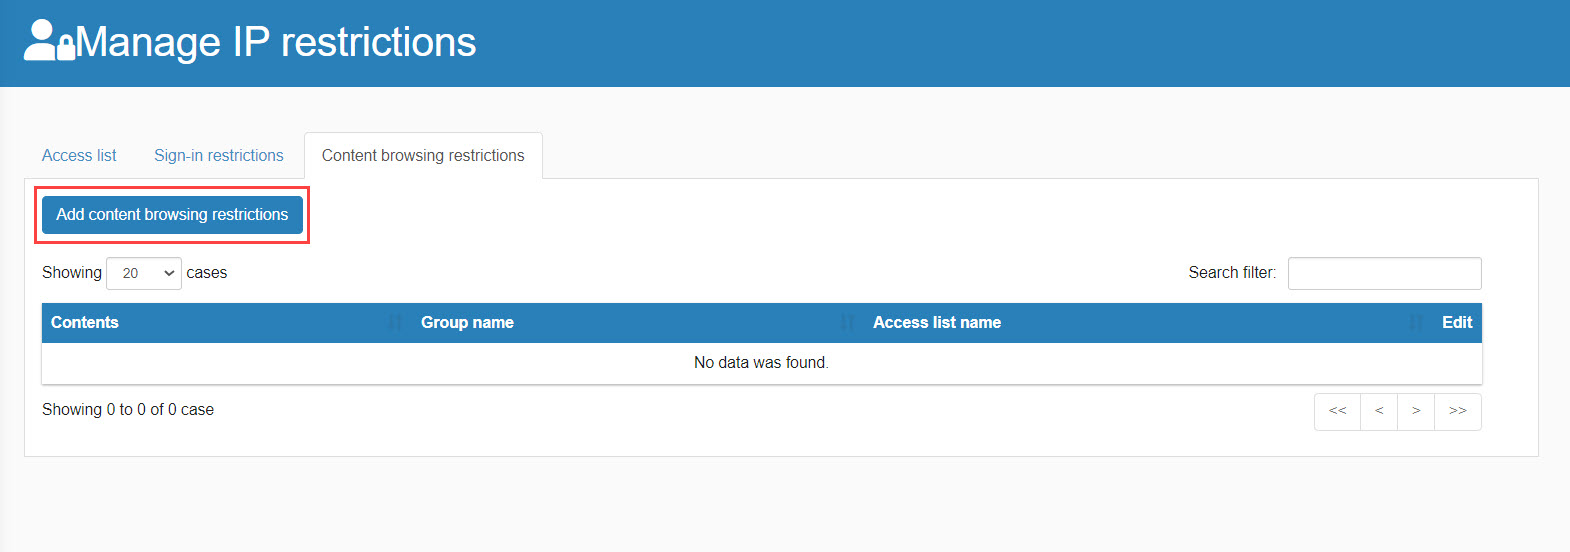
01.Adding Viewing Restrictions
Open the "Content Viewing Restrictions" tab and click on "Add Content Viewing Restrictions".
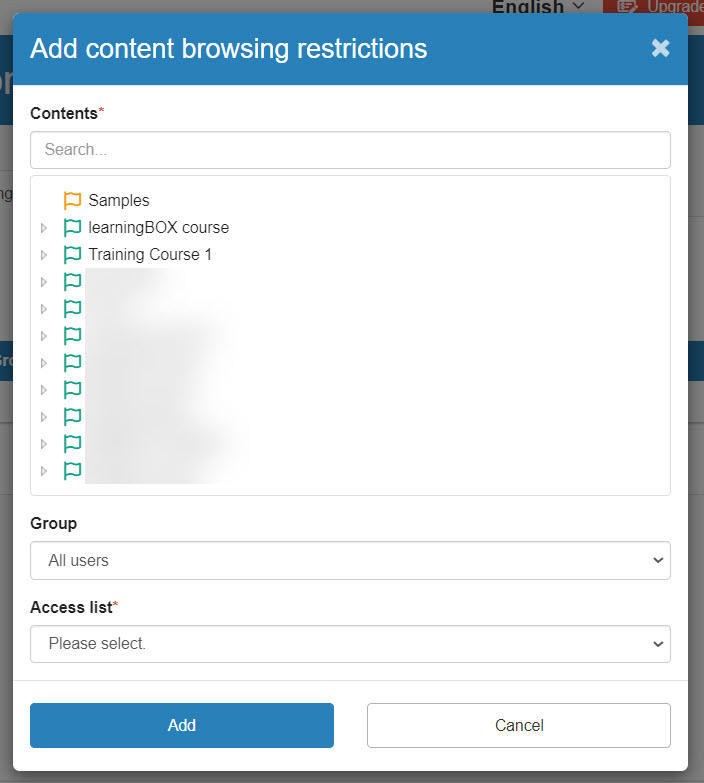
02. Select contents, groups and access lists
Select "Contents/Groups/Access Lists" and click "Add".
Allow access from IP addresses in the added access list.
03. How to set up from the contents side
Open the content management screen and right-click on the target content or click on the gear icon and select "IP Address Restrictions".
04. Adding Viewing Restrictions
The "IP Restrictions Management" screen will open.
Set up in the same way as the above procedure.
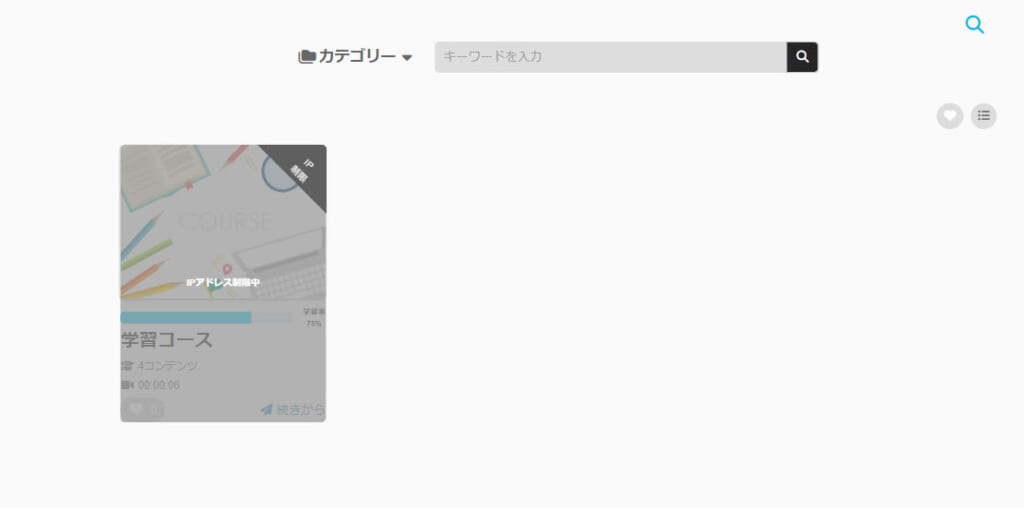
On the Select a course page
Content cannot be viewed from outside the access list.