Page designer
You can customize the login page. "System page" allows design change with templates, and "Original page" allows you to customize pages on your own.
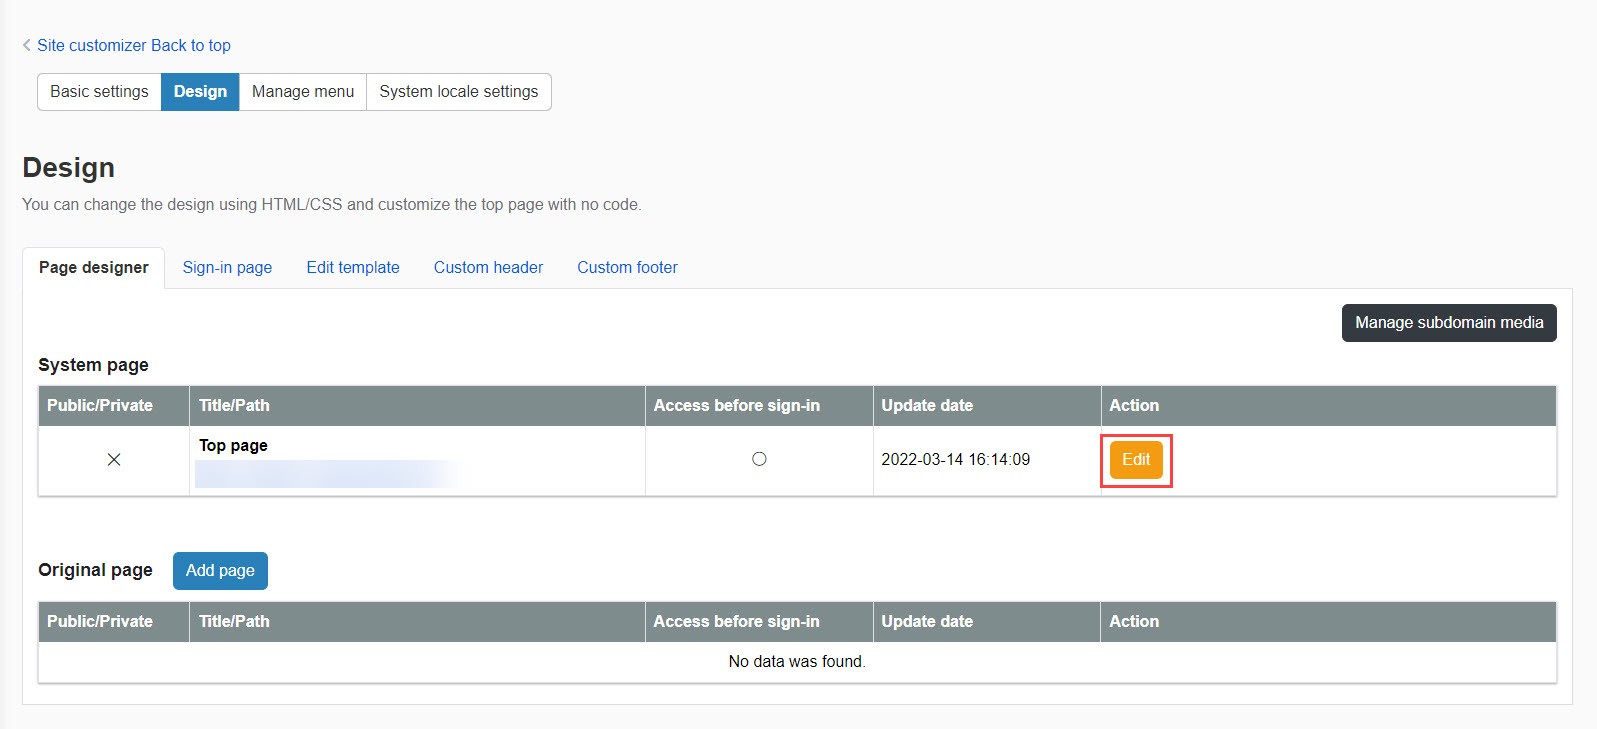
*Select "Site customizer" from the side menu and click on the Design tab.
Select the Page designer tab.
*We will not be able to address any issues that may happen as a result of your operation of the Site customizer.
For more details about problems that may occur, click here.
Required
Customization, Site customizer, Management role of Co-admin
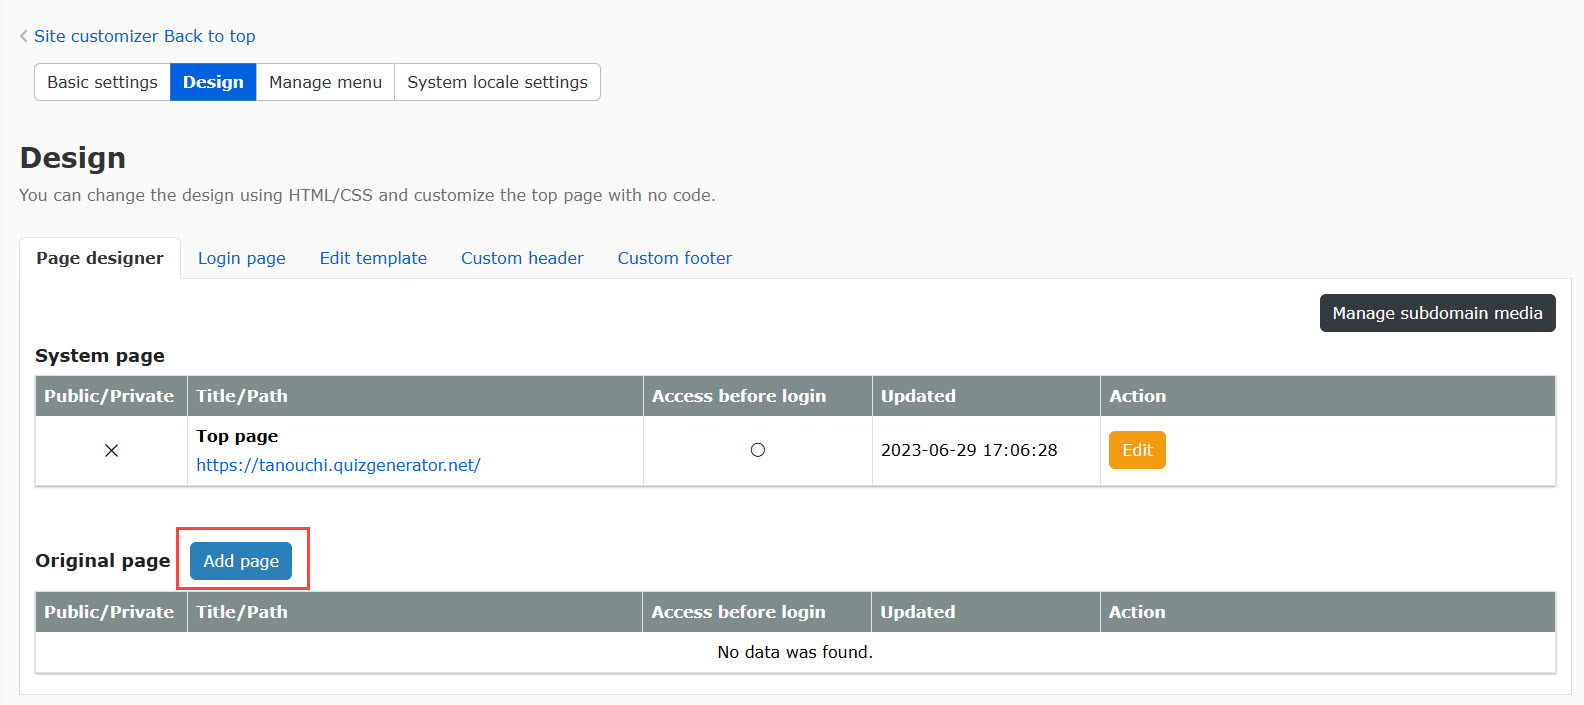
System page
01. Go to the Edit page
In the Page designer tab, click on "Edit" in the System page.
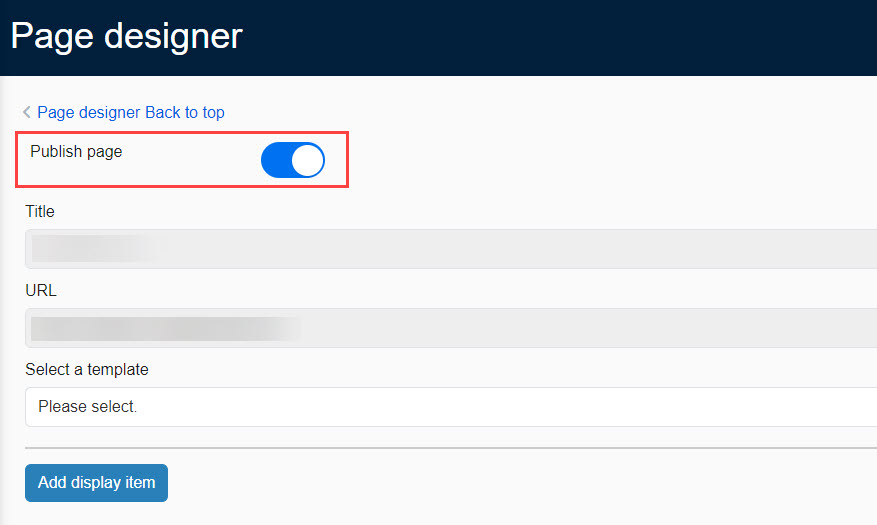
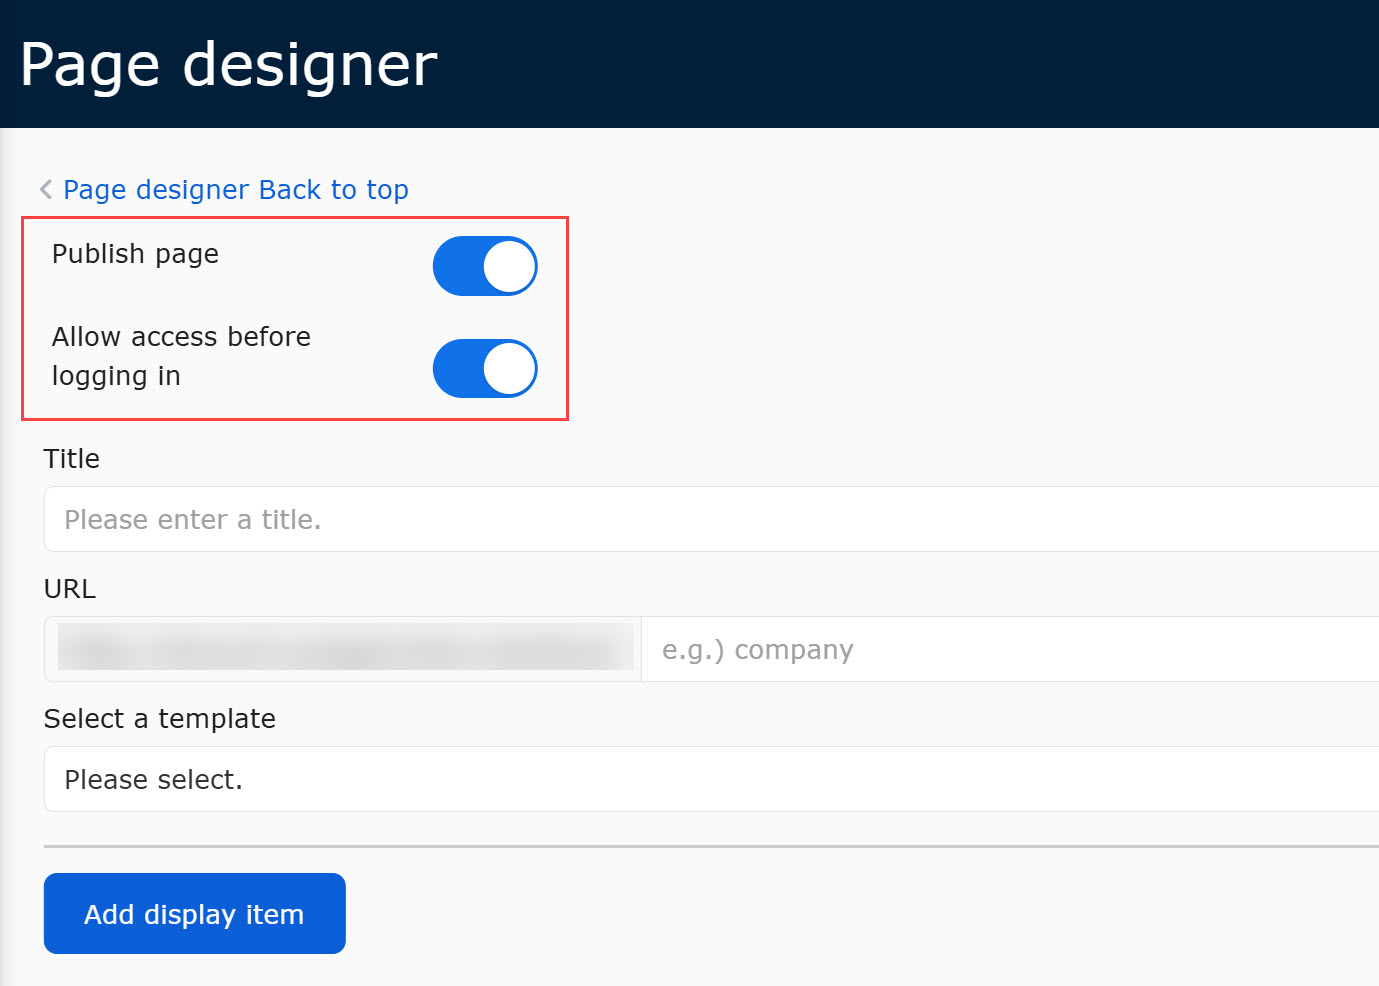
02. Publish page
To publish the created page, turn the toggle key of "Publish page."
When it is turned off, the page will be saved as a draft.
03. Enter title/URL
You cannot edit the title and URL on the system page.
Note
There are two ways to edit the content: create a panel from scratch or load a template. Each is explained in detail below.
Add panel
You can select which panels to display and edit the content.
01. Select panel
Click on "Add display item."

Select a panel to edit.
02. Settings
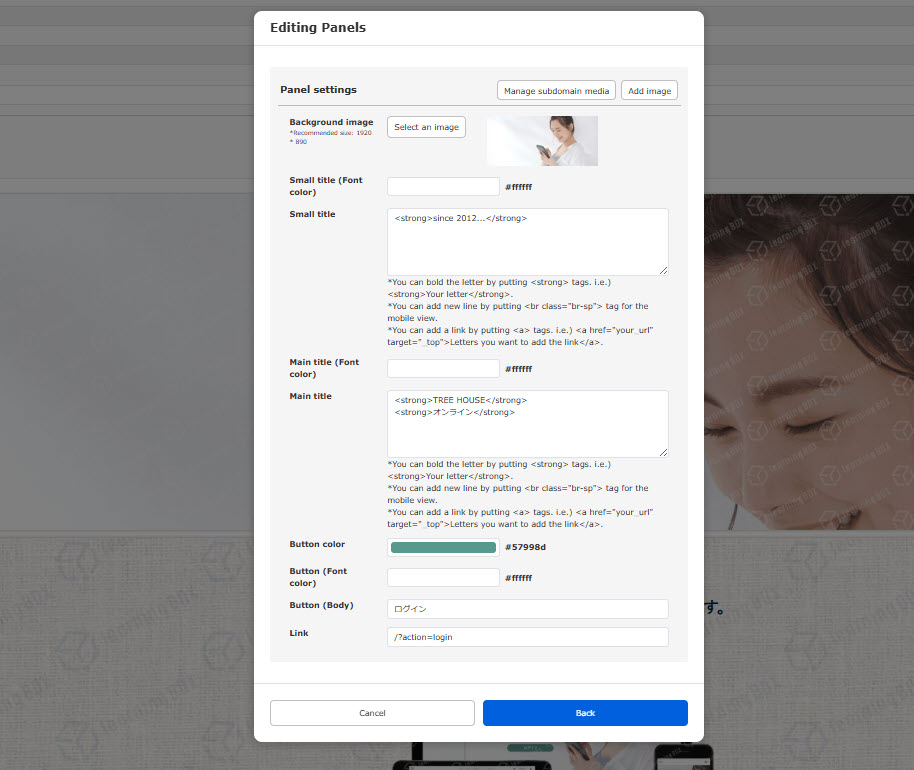
The following popup window will be displayed.

Available items are as follows.
When all settings are completed, click on the Create new.
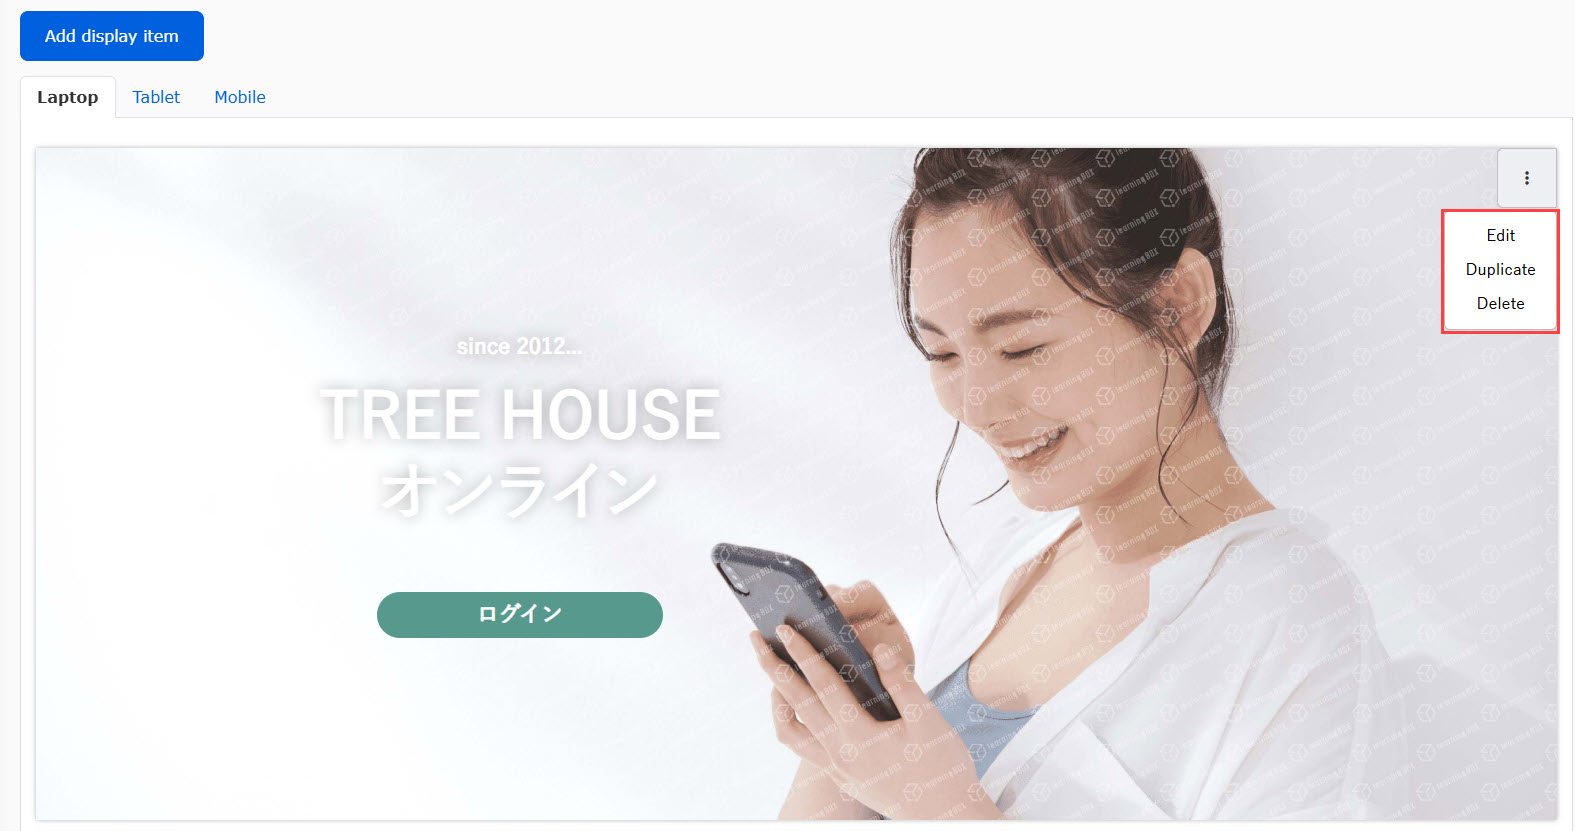
▼ Edit panel
To change the panel, click on "Edit panel."
▼ Background image
To add a new image file, click on "Add image," and upload a file from "Choose File."
Uploaded files will be stored in the Manage subdomain media.
Click on "Select image" to select an image.
You can choose from uploaded images or default images.
*For more information about "Manage subdomain media, click here.
▼ Small title
You can set the font color and content of the small title.
▼Main title
You can set the main title and text color.
▼ Button
You can set the button color, button text color, button text and link.
03. Edit panel
You can edit panels you have created.
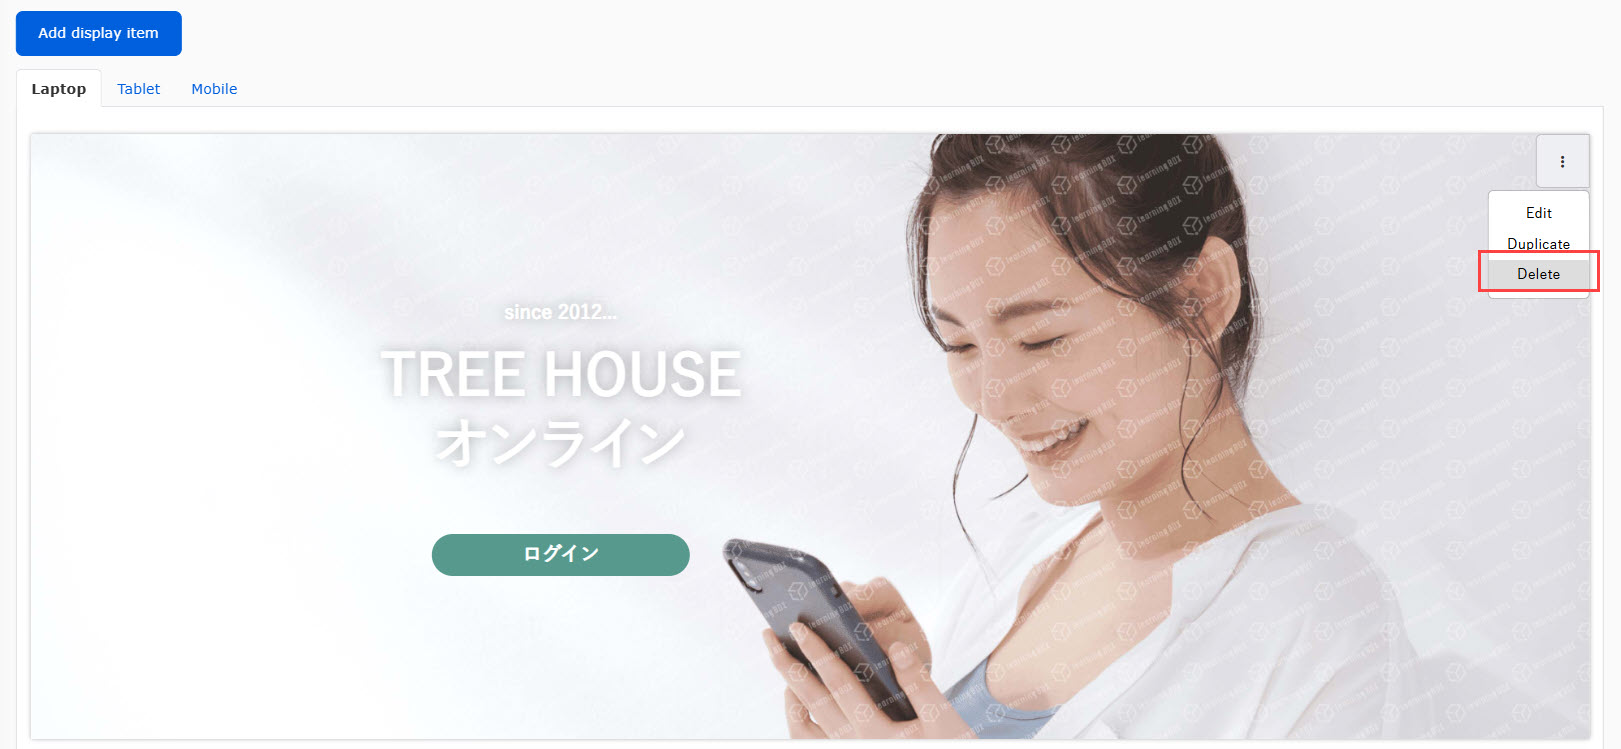
Click on "︙" in each panel and select "Edit."
The following window will be displayed.
Refer to "02. Settings" above for details on the settings of each item.
When all settings are complete, click on "Back."
04. Sort panels
You can sort panels.
To move a panel, drag and drop it.
05. Duplicate panel
You can duplicate a panel you have created.
Click on "︙" in each panel and select "Duplicate."

06. Delete panel
To delete a panel, click on "︙" icon and select "Delete."
Use template
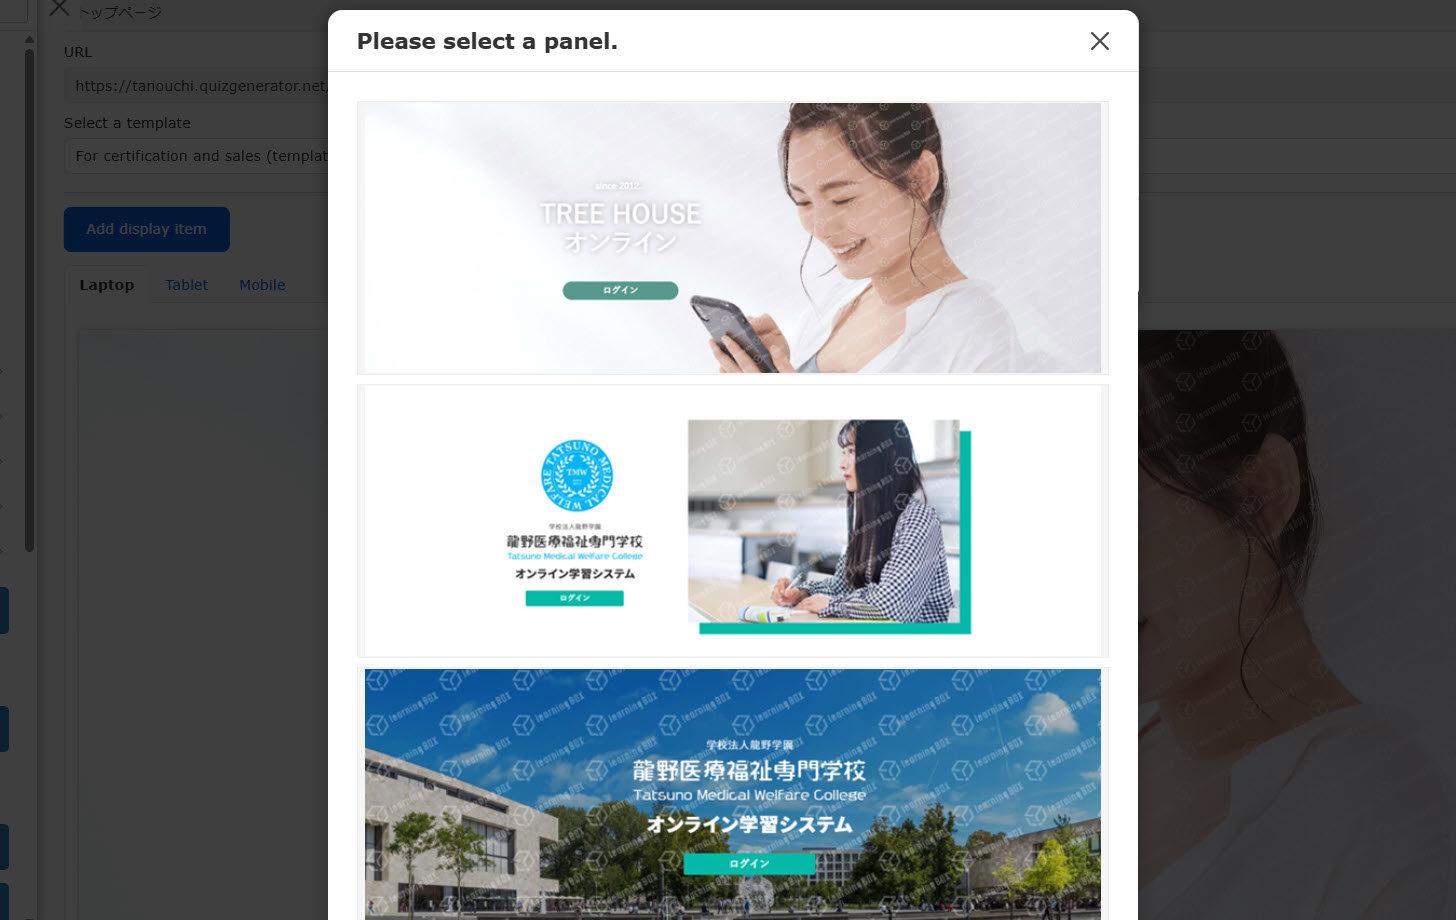
01. Select template
You can use templates in the system.
To use the template , select one from the list.
Click "Apply."
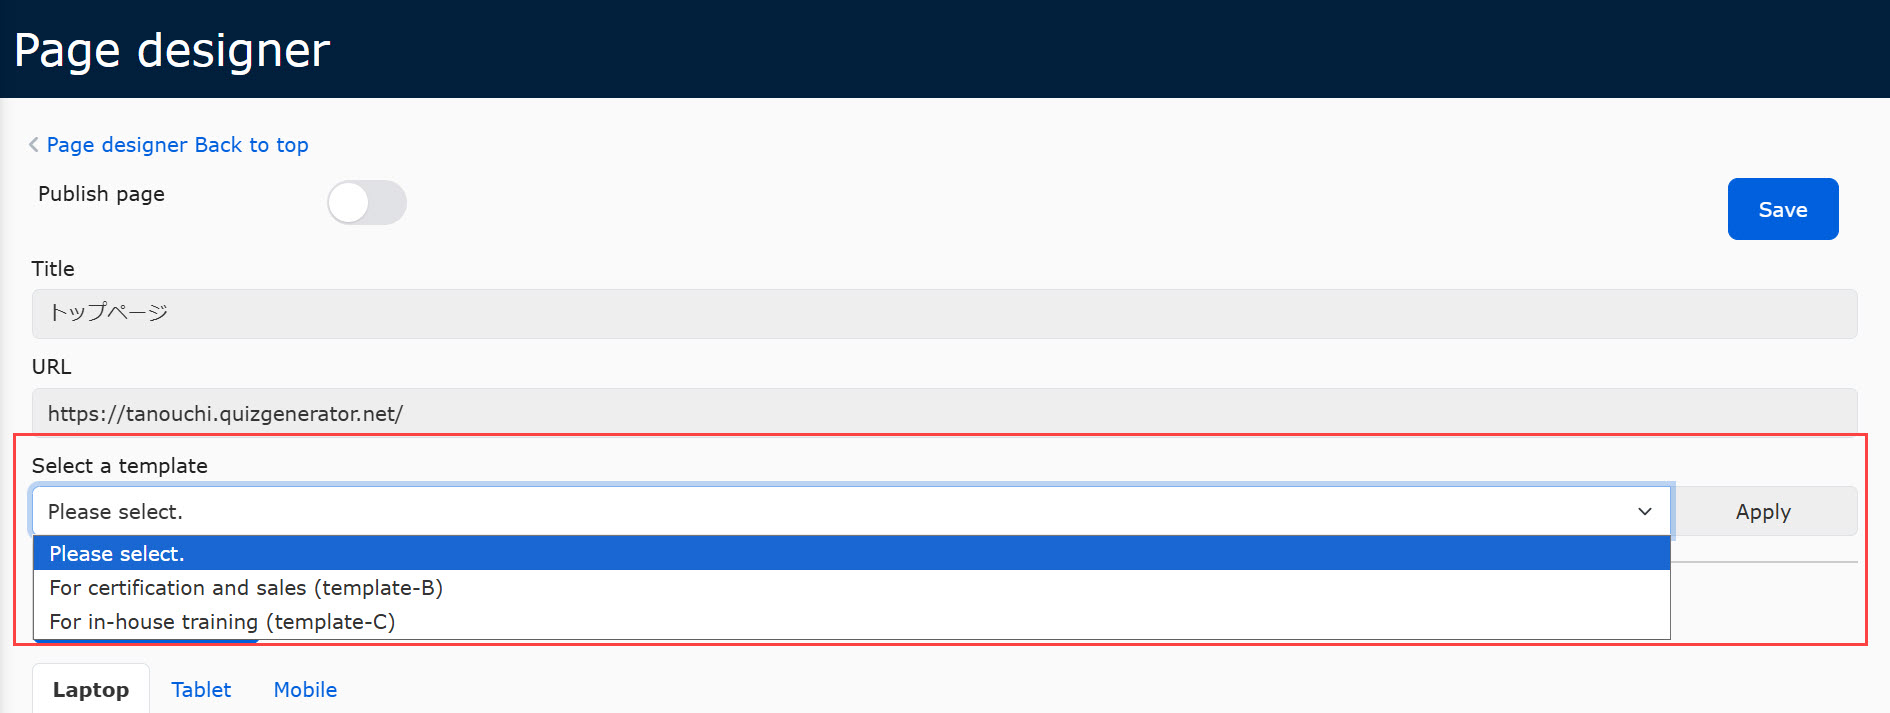
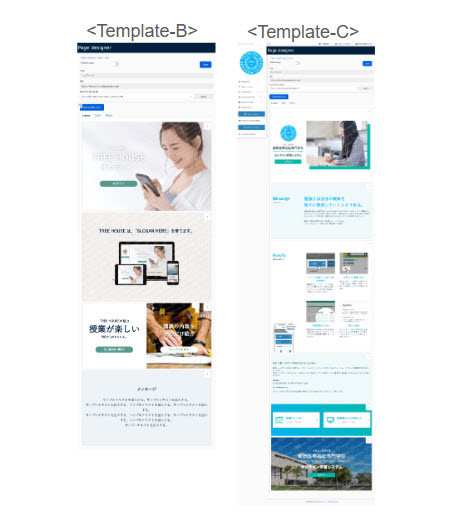
The following two templates are available.
02. Edit panel
You can edit the panels in the template.
Click on "︙" in each panel and select "Edit."
*For more information on how to edit, see "Add panel.
03. Sort panels
You can sort panels.
To move a panel, drag and drop it.
04. Duplicate panel
You can duplicate a panel you have created.
Click on "︙" in each panel and select "Duplicate."
05. Delete panel
To delete a panel, click on "︙" icon and select "Delete."
Original page
01. Go to the Edit page
Click on "Add page" in the Original page.
02. Publish page /Allow access before logging in
To publish the created page, turn the toggle key of "Publish page."
When it is turned off, the page will be saved as a draft.
You can also set whether or not to allow access to the page before users log in.
Turn on the toggle key of "Allow access before logging in" to allow access.
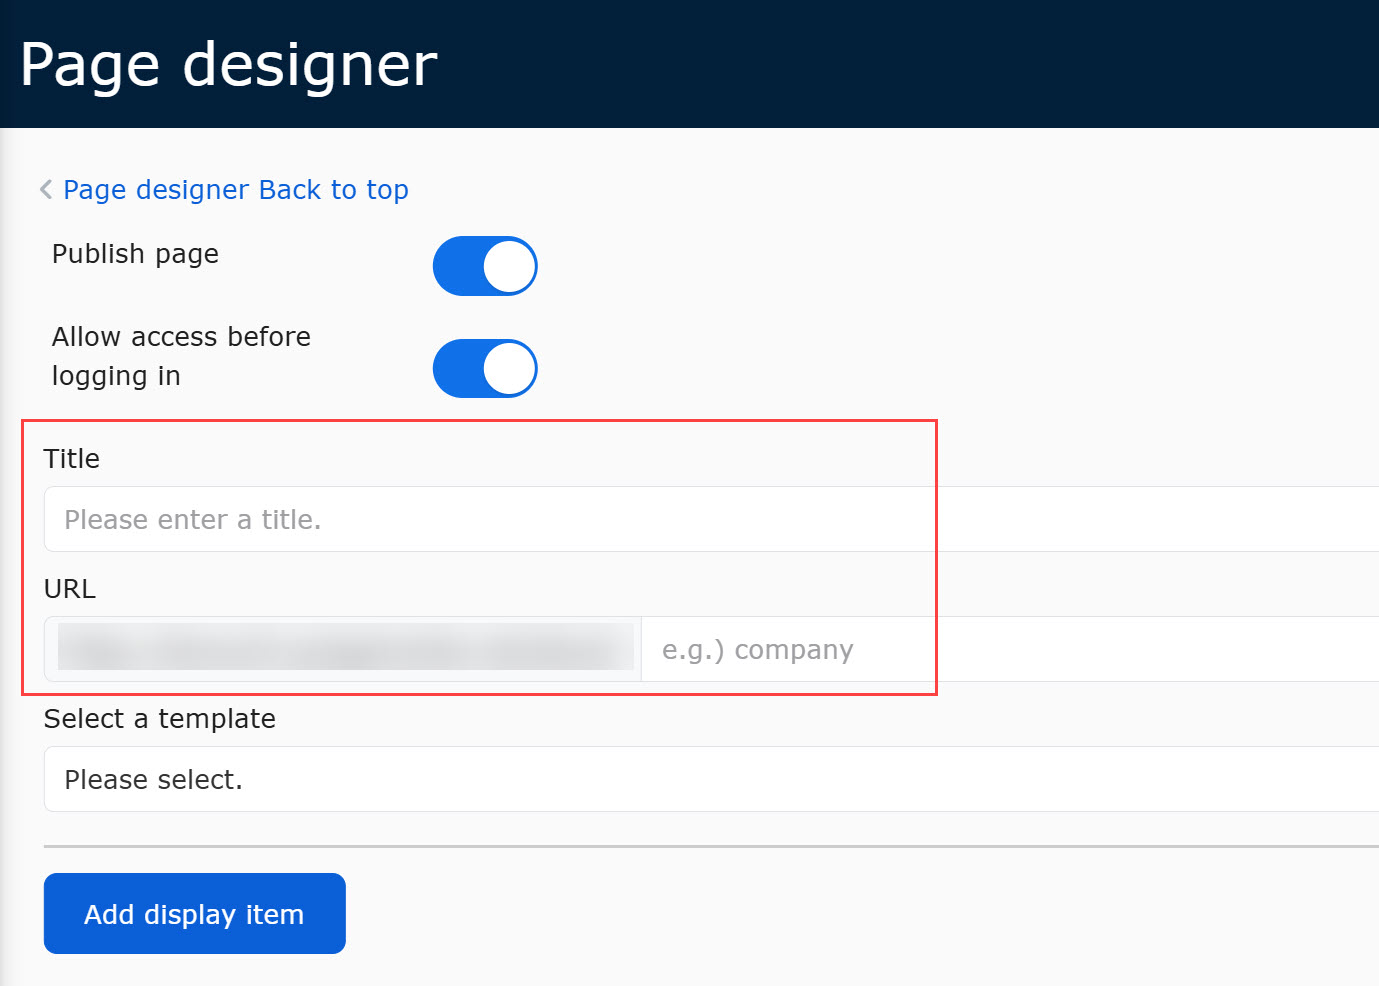
03. Enter title/URL
Enter the title and URL.
Note
You can create a panel from scratch or load a template to edit the content.
*For more details about the settings, click here.
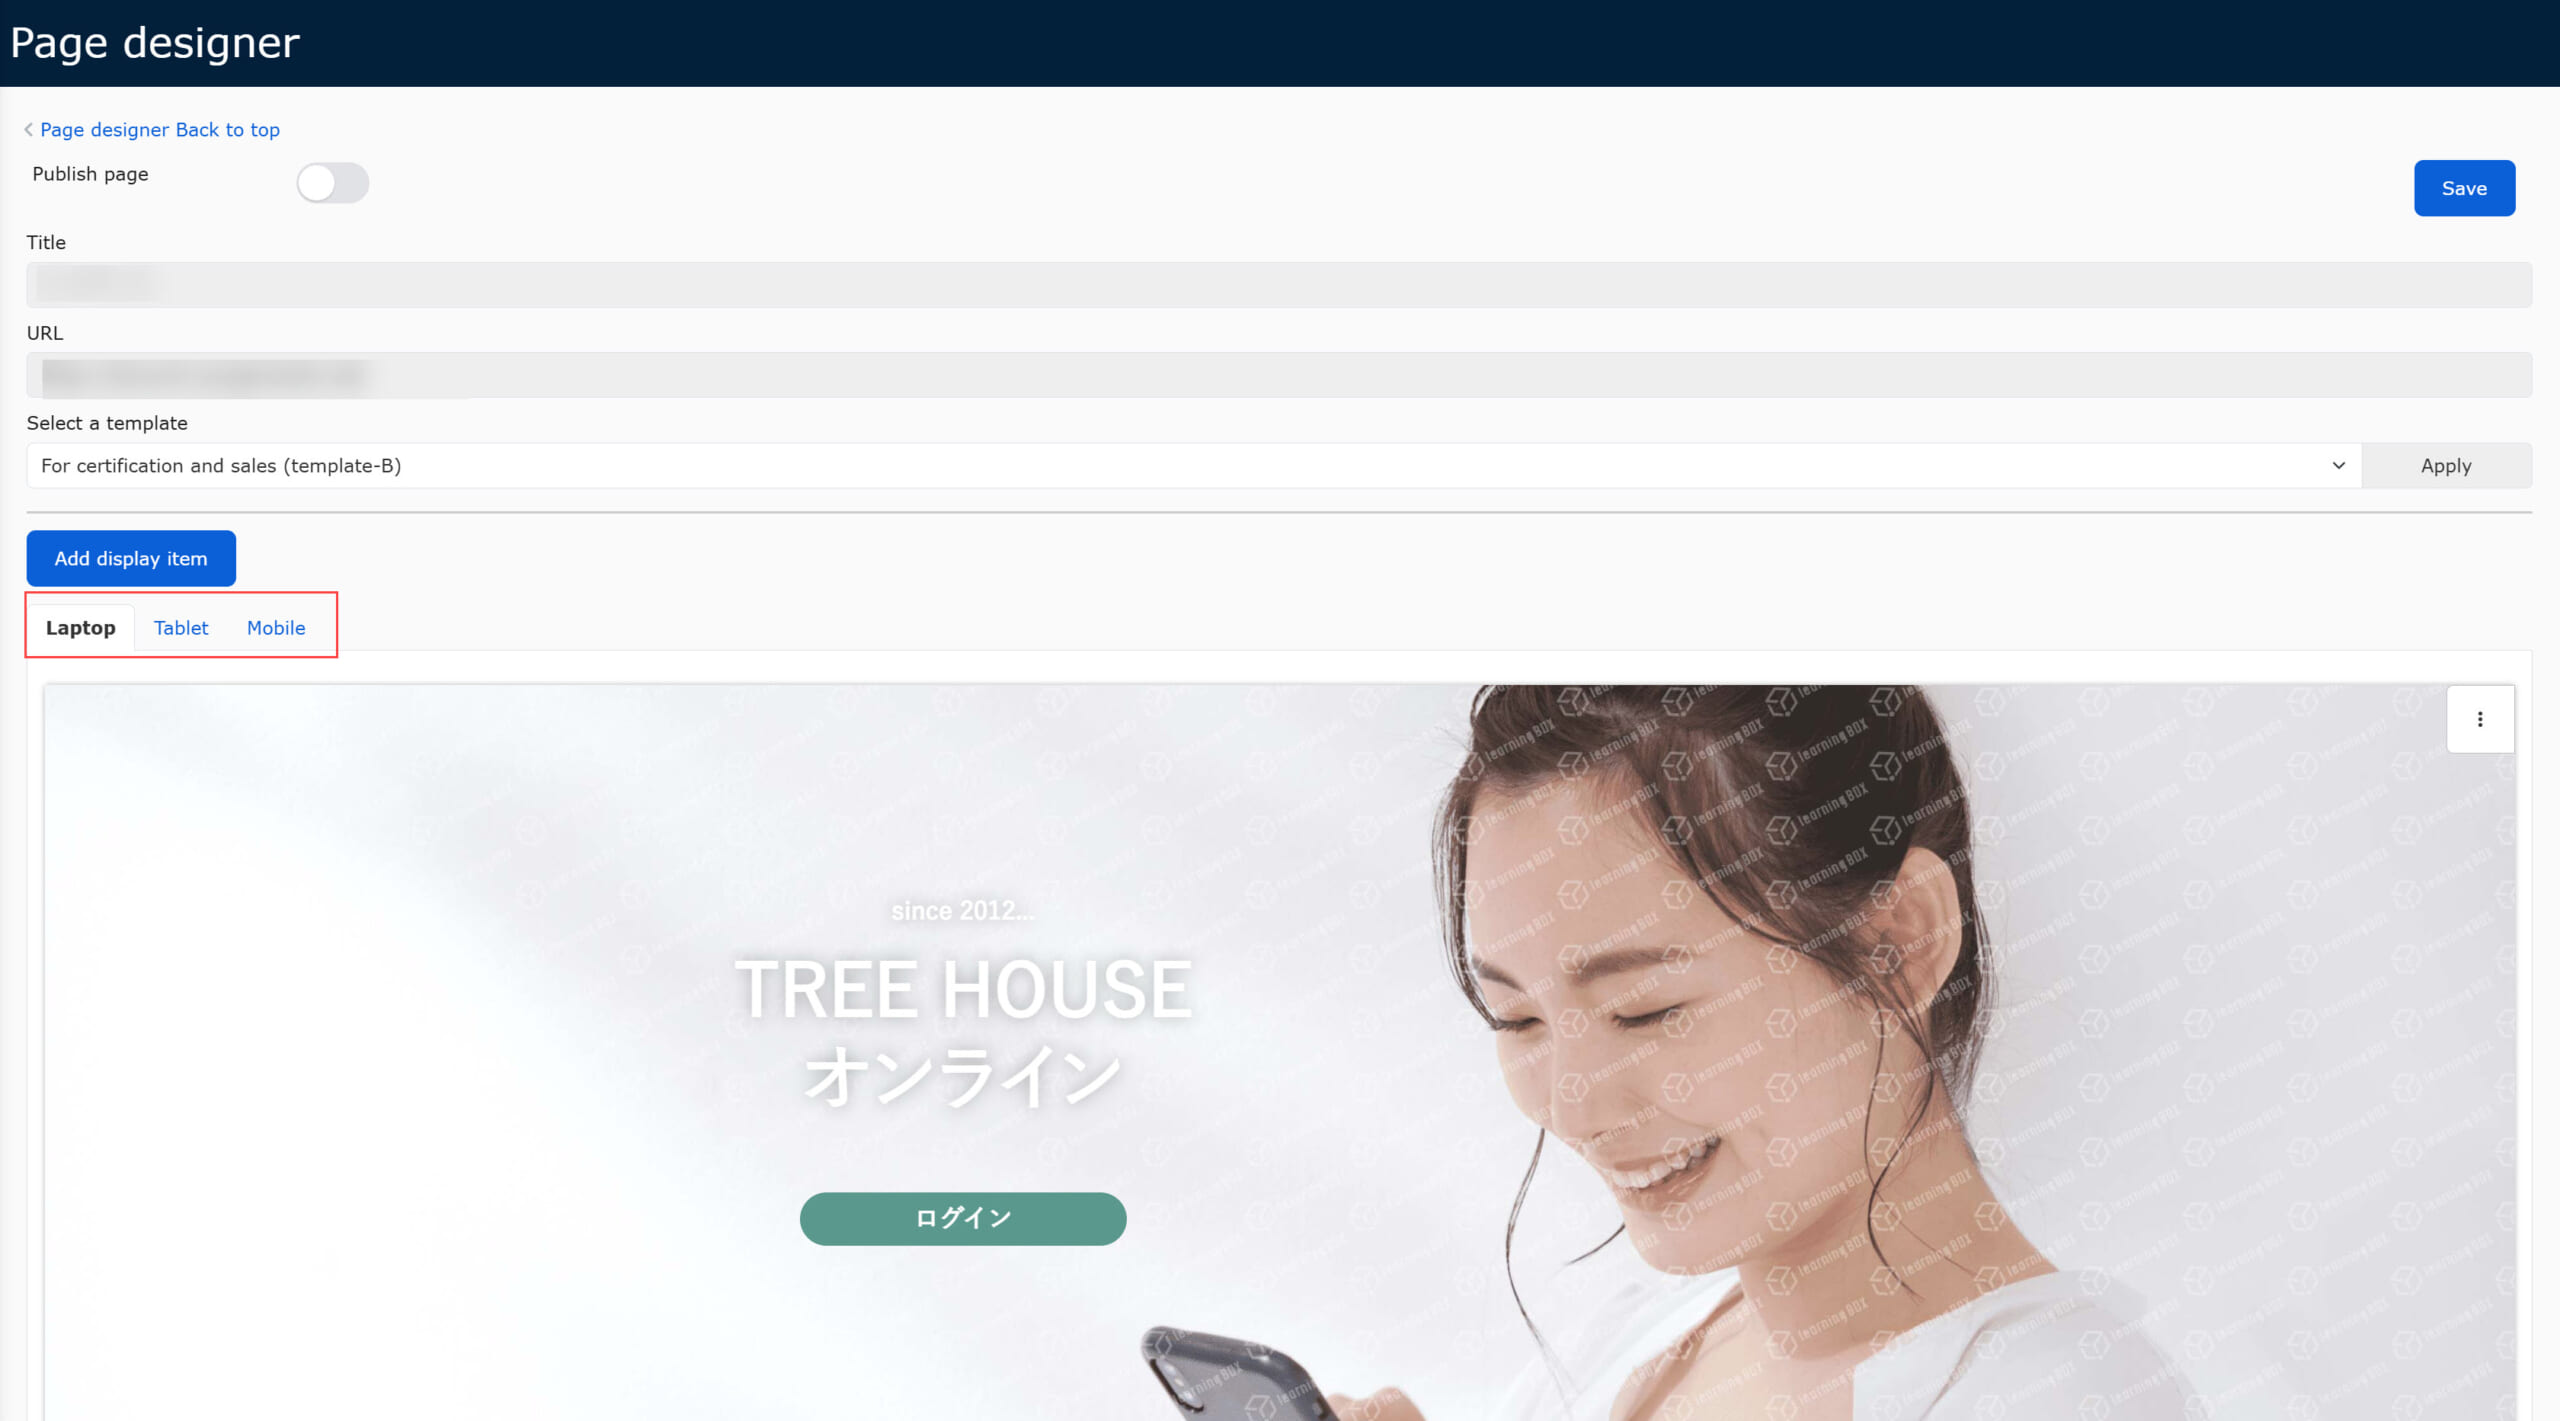
Interface by device
You can check the user interface on a PC, tablet and smartphone.
*Whe you edit, duplicate or delete panels, all changes will be applied to each interface.
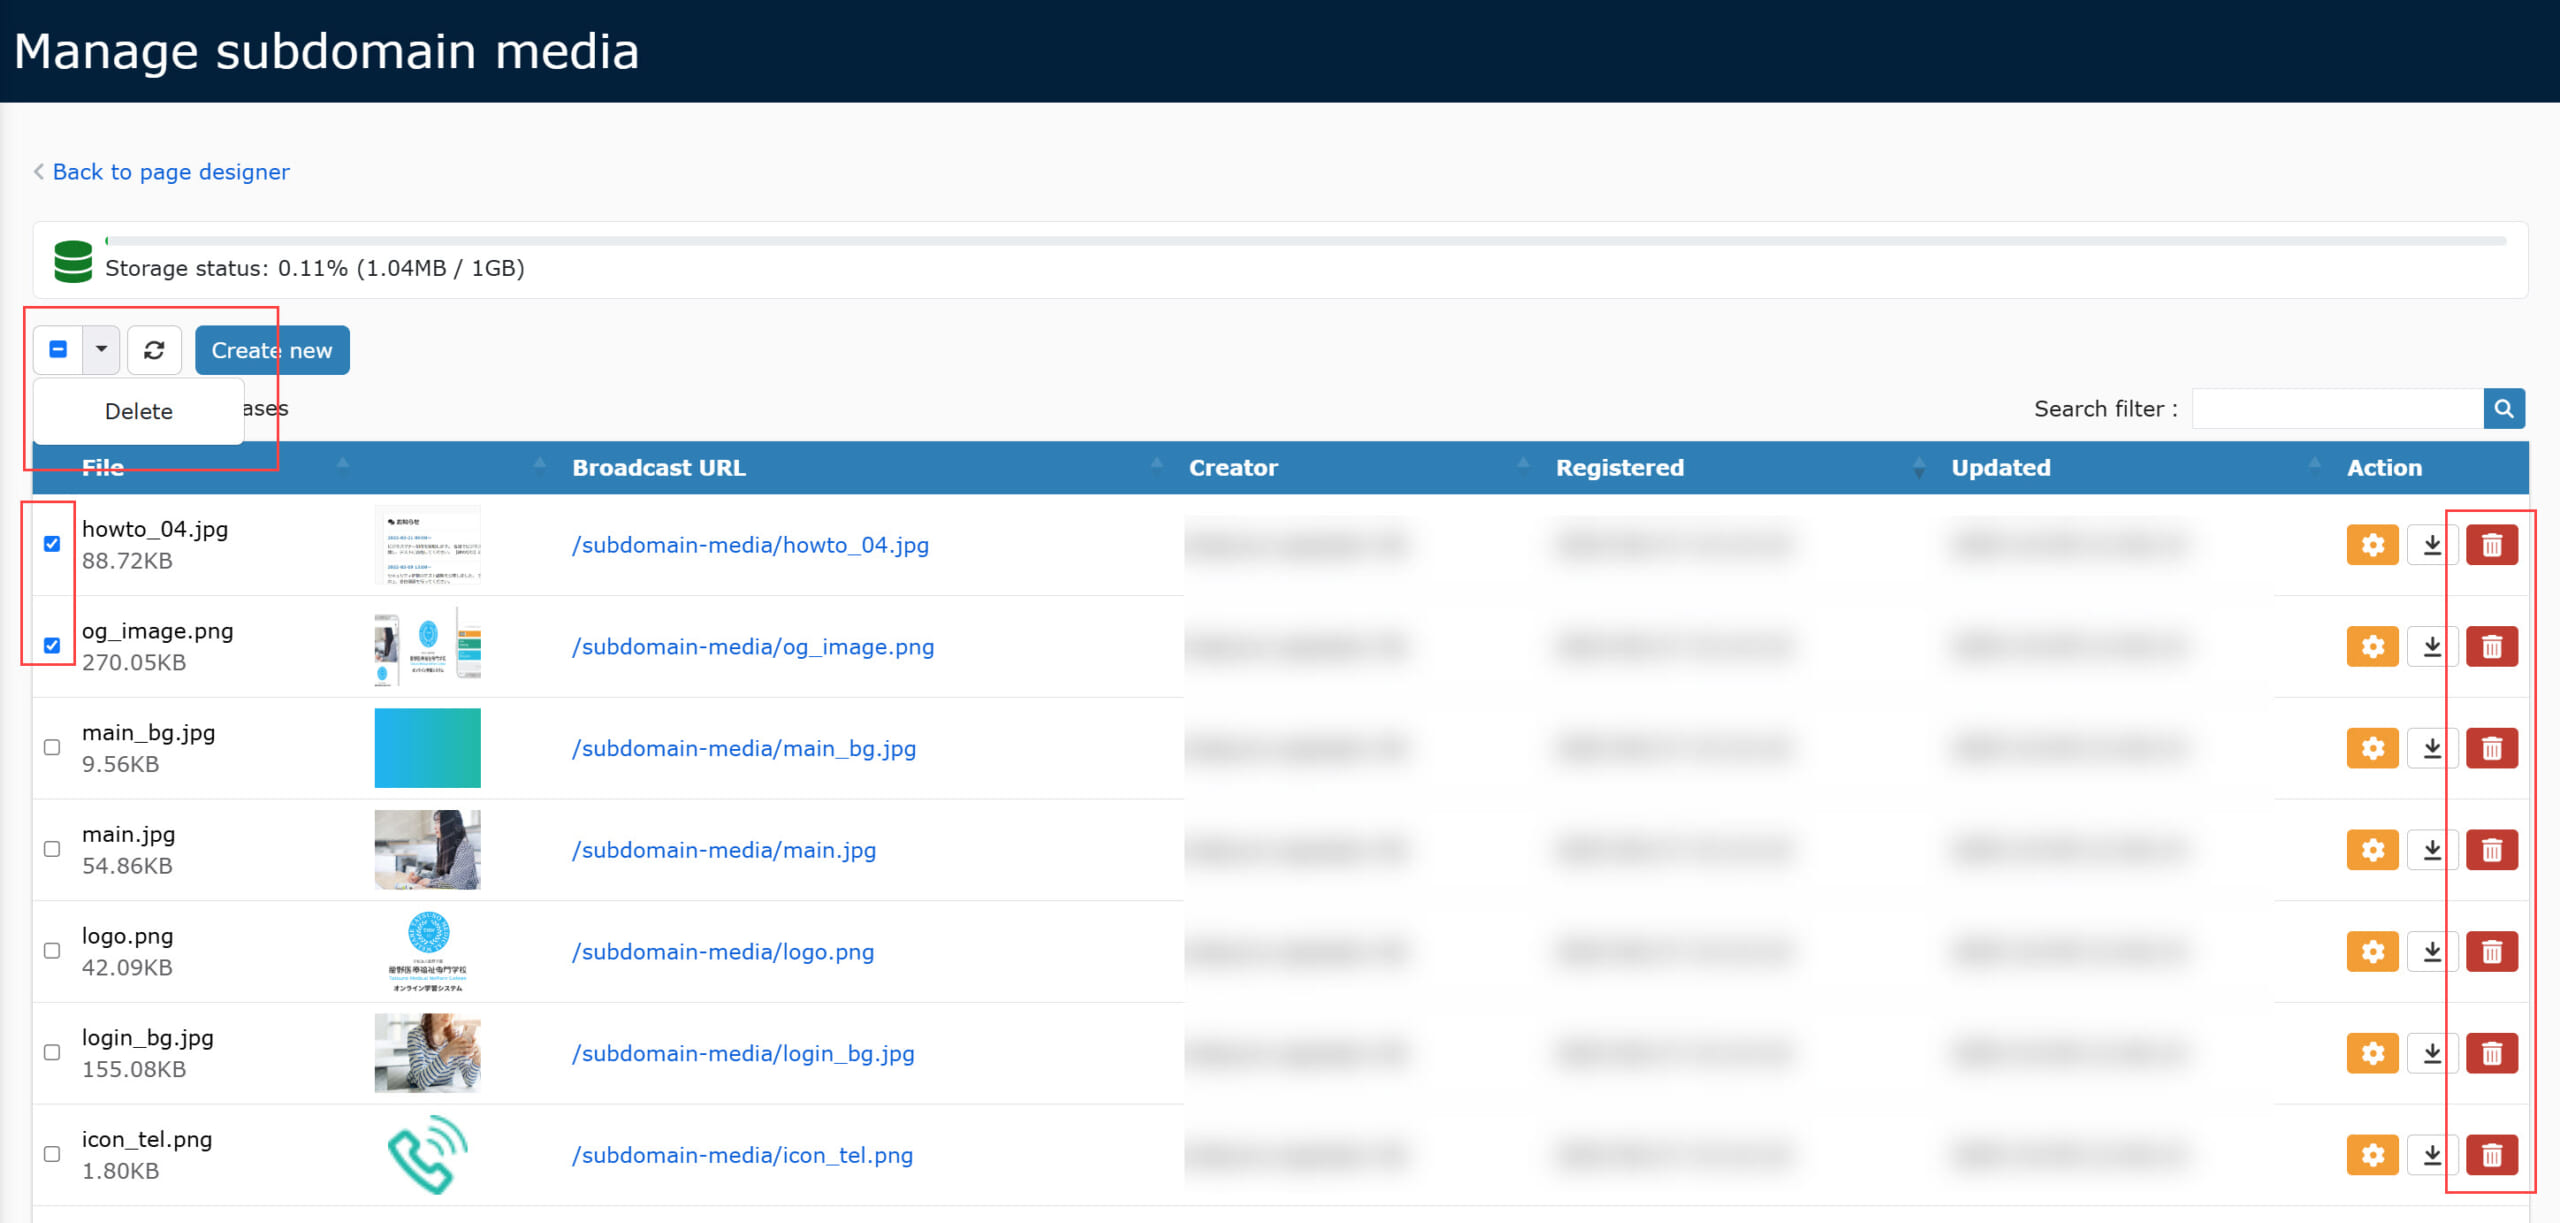
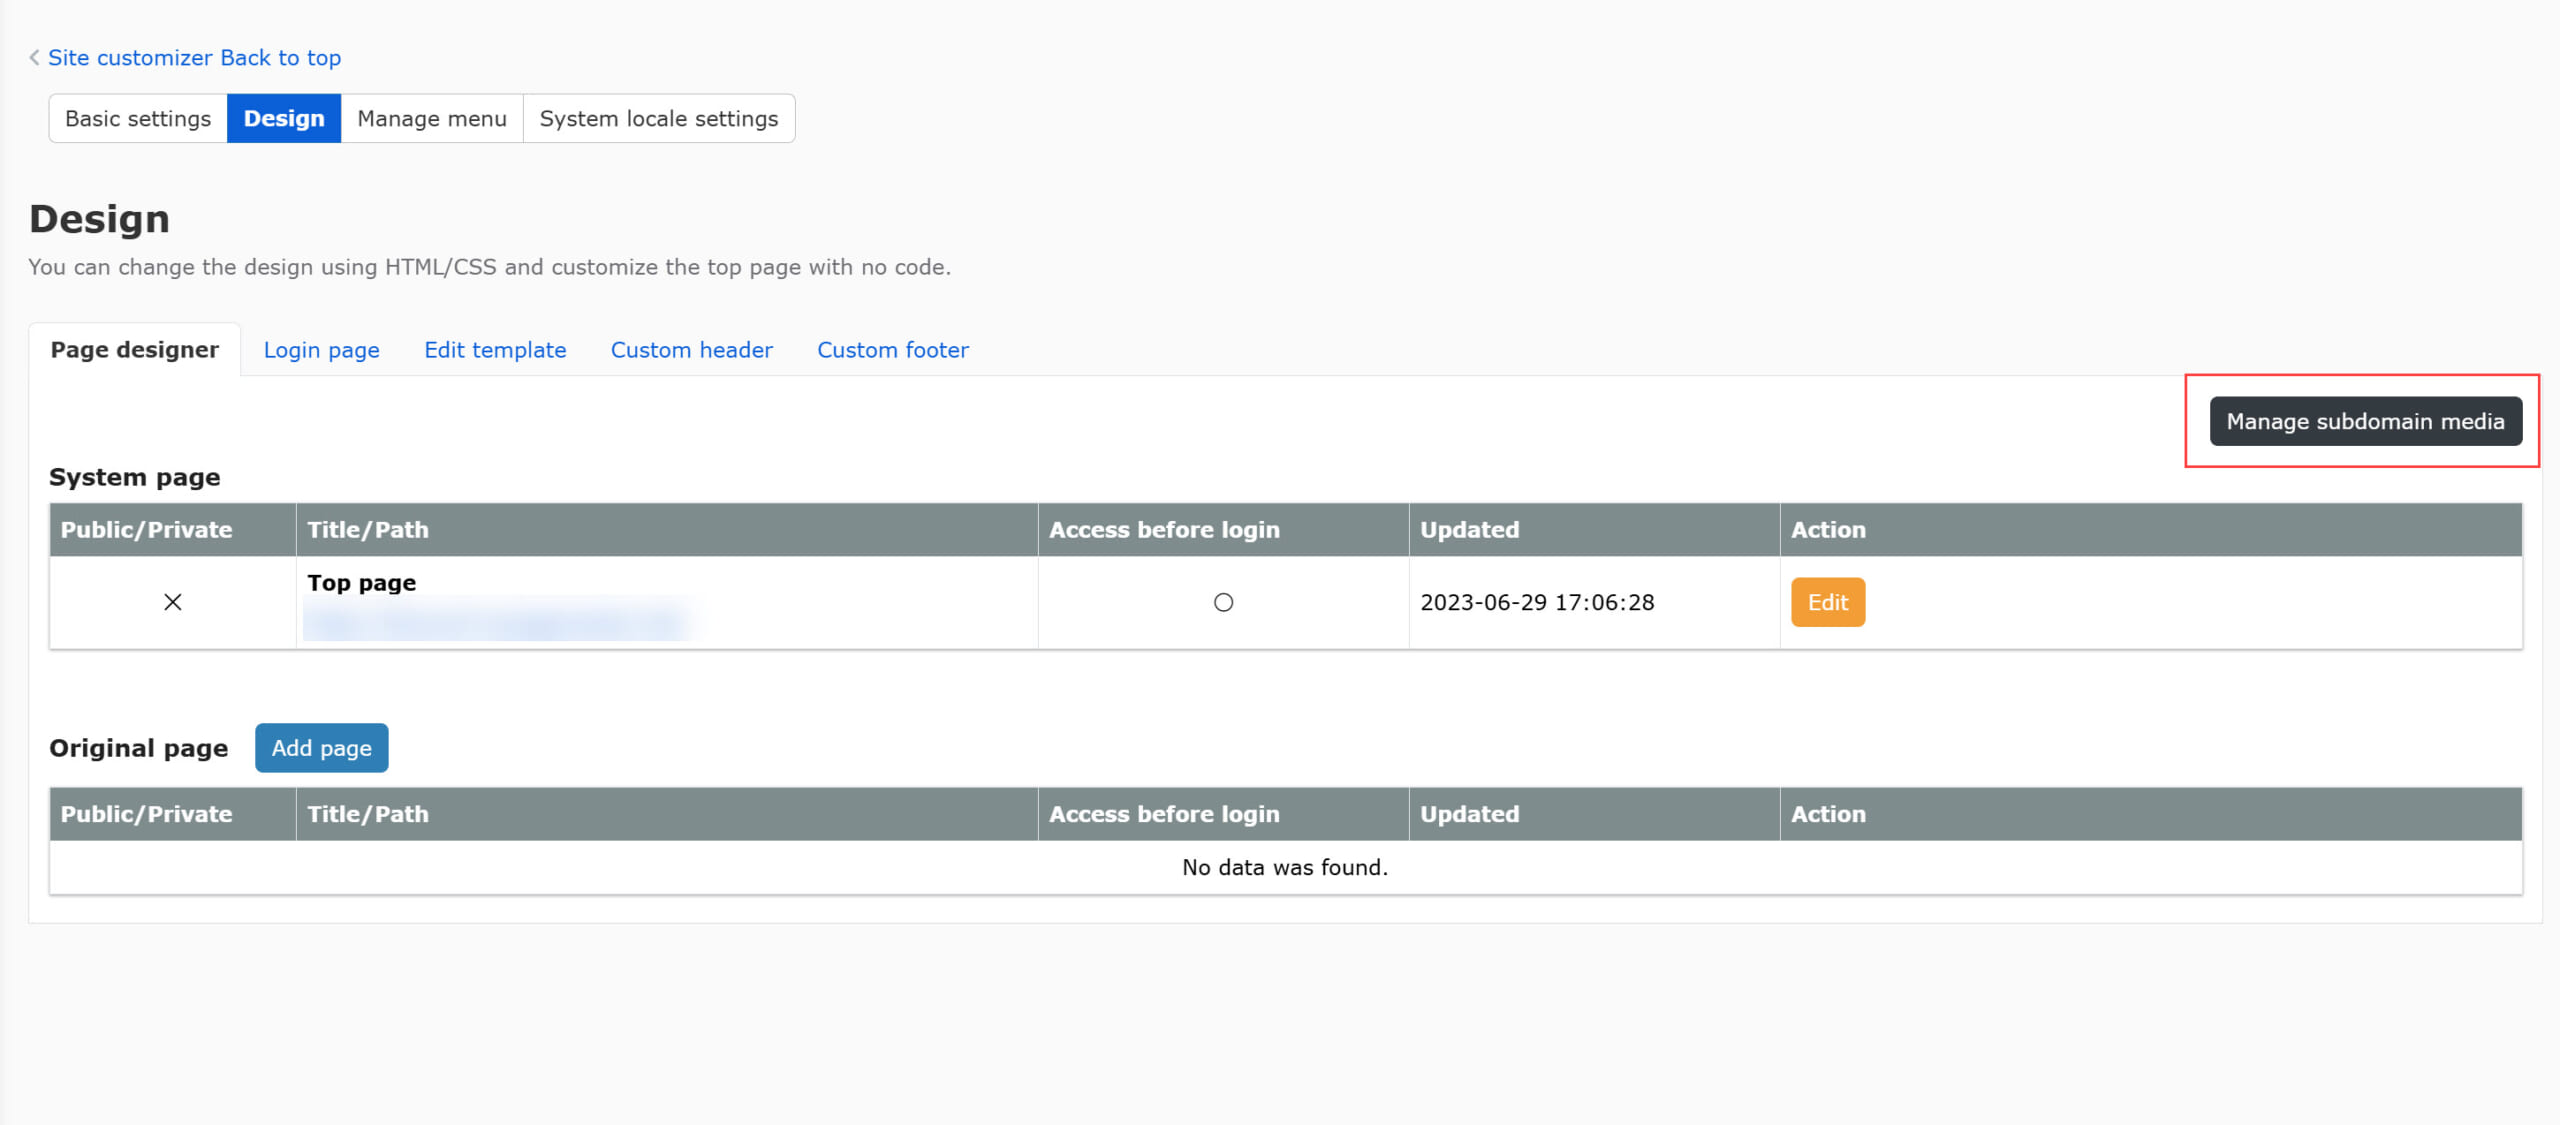
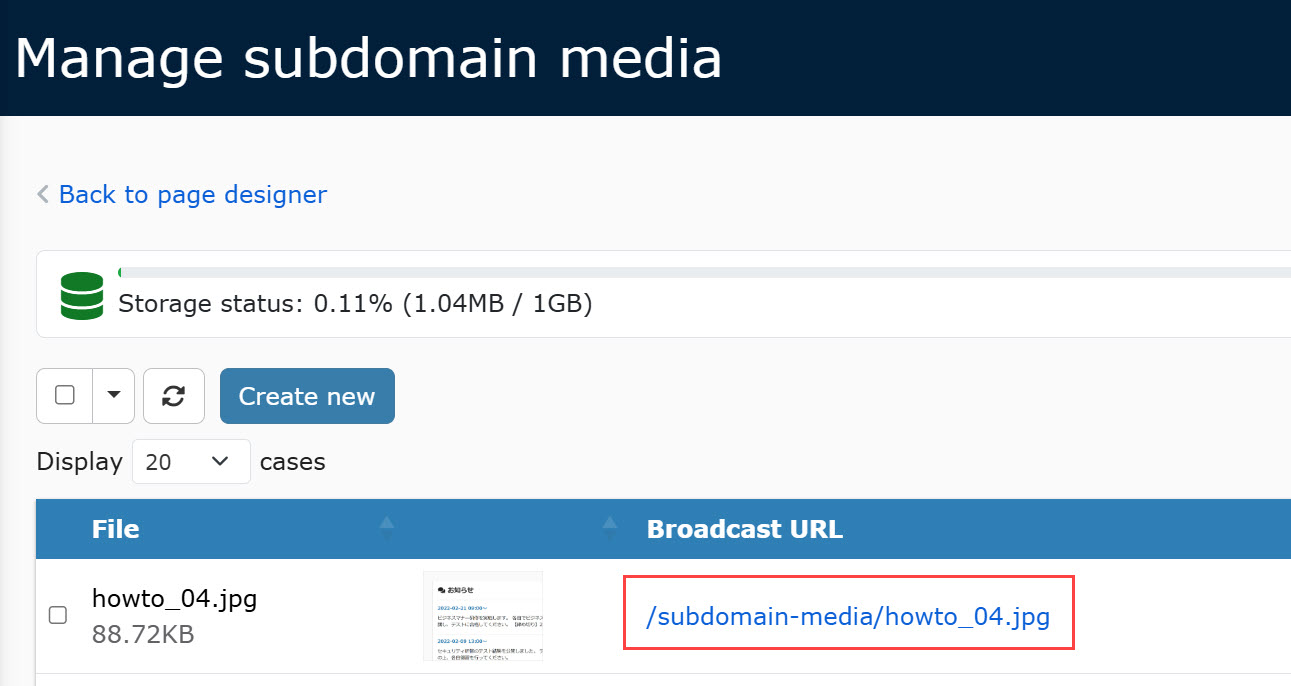
Manage subdomain media
Images used in the Page designer can be managed in the Manage subdomain media.
Images can be uploaded within the 1GB.
01. Go to Manage subdomain media
On the Page designer tab, click on "Manage subdomain media."
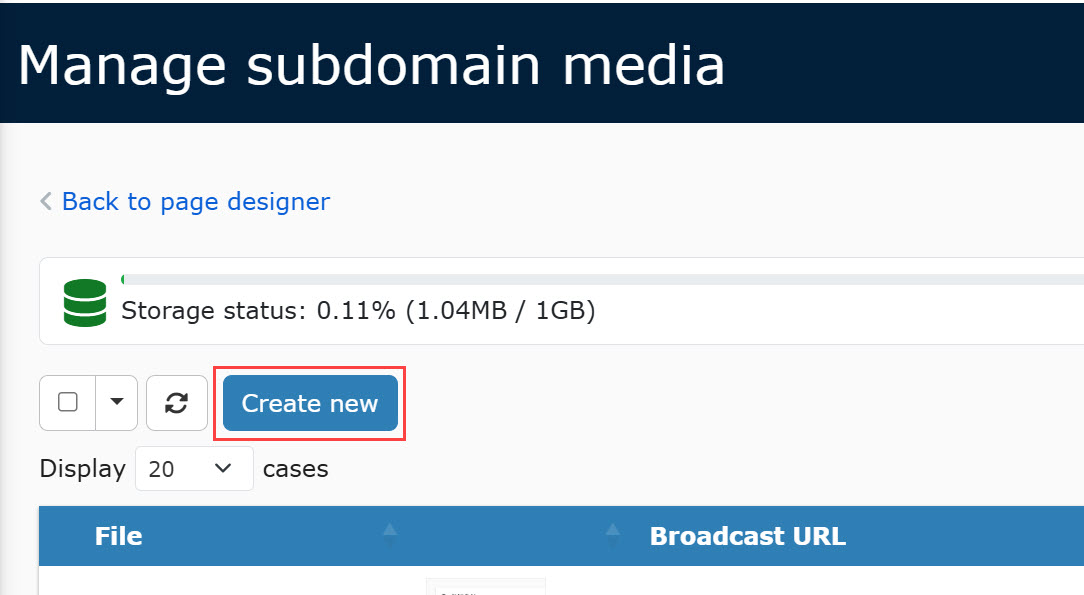
02. Add image
To add an image, click on "Create new."
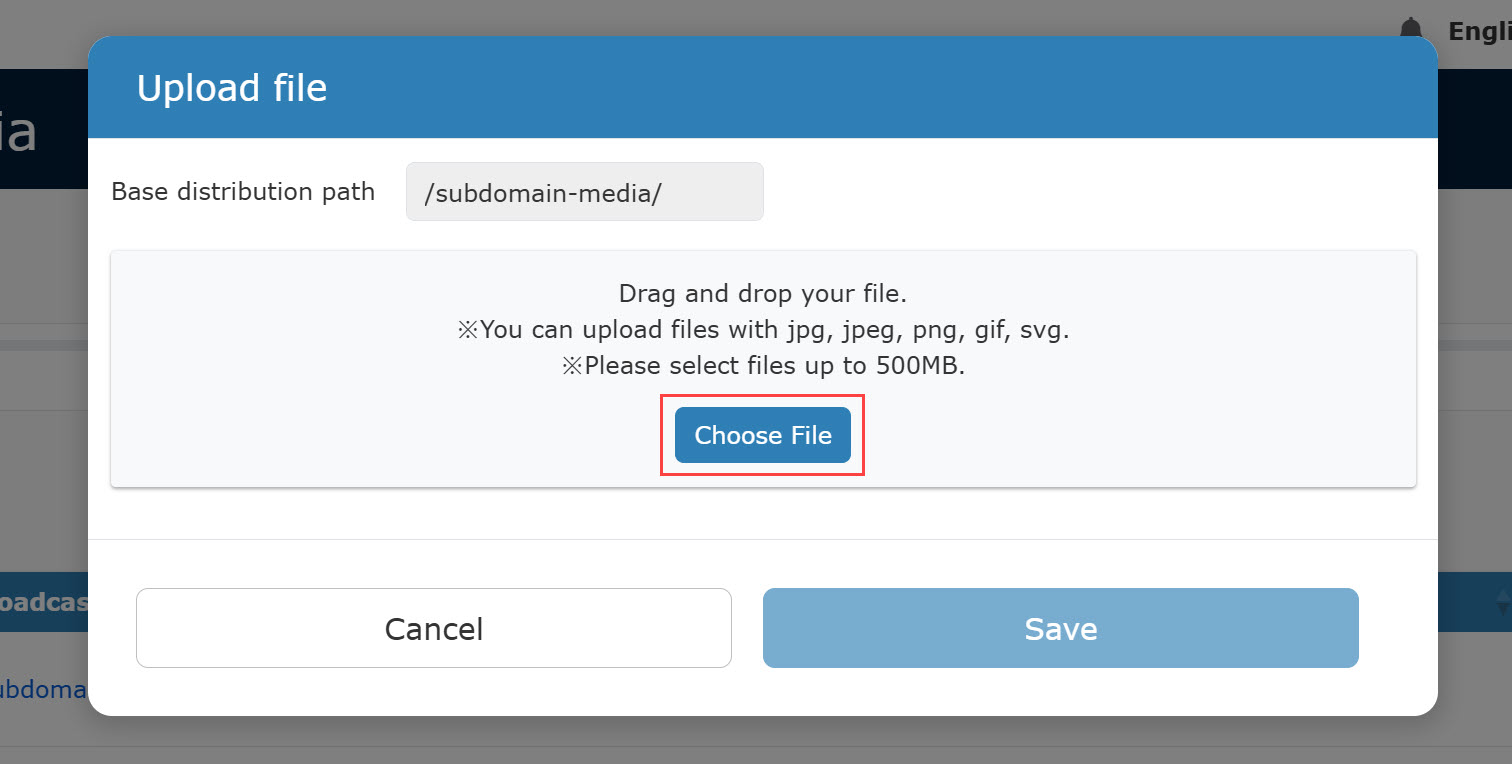
Upload an image file from "Choose File."
An image will be added as follows.
Note that the URL consists of "/subdomain-media/" + the file name of the image.
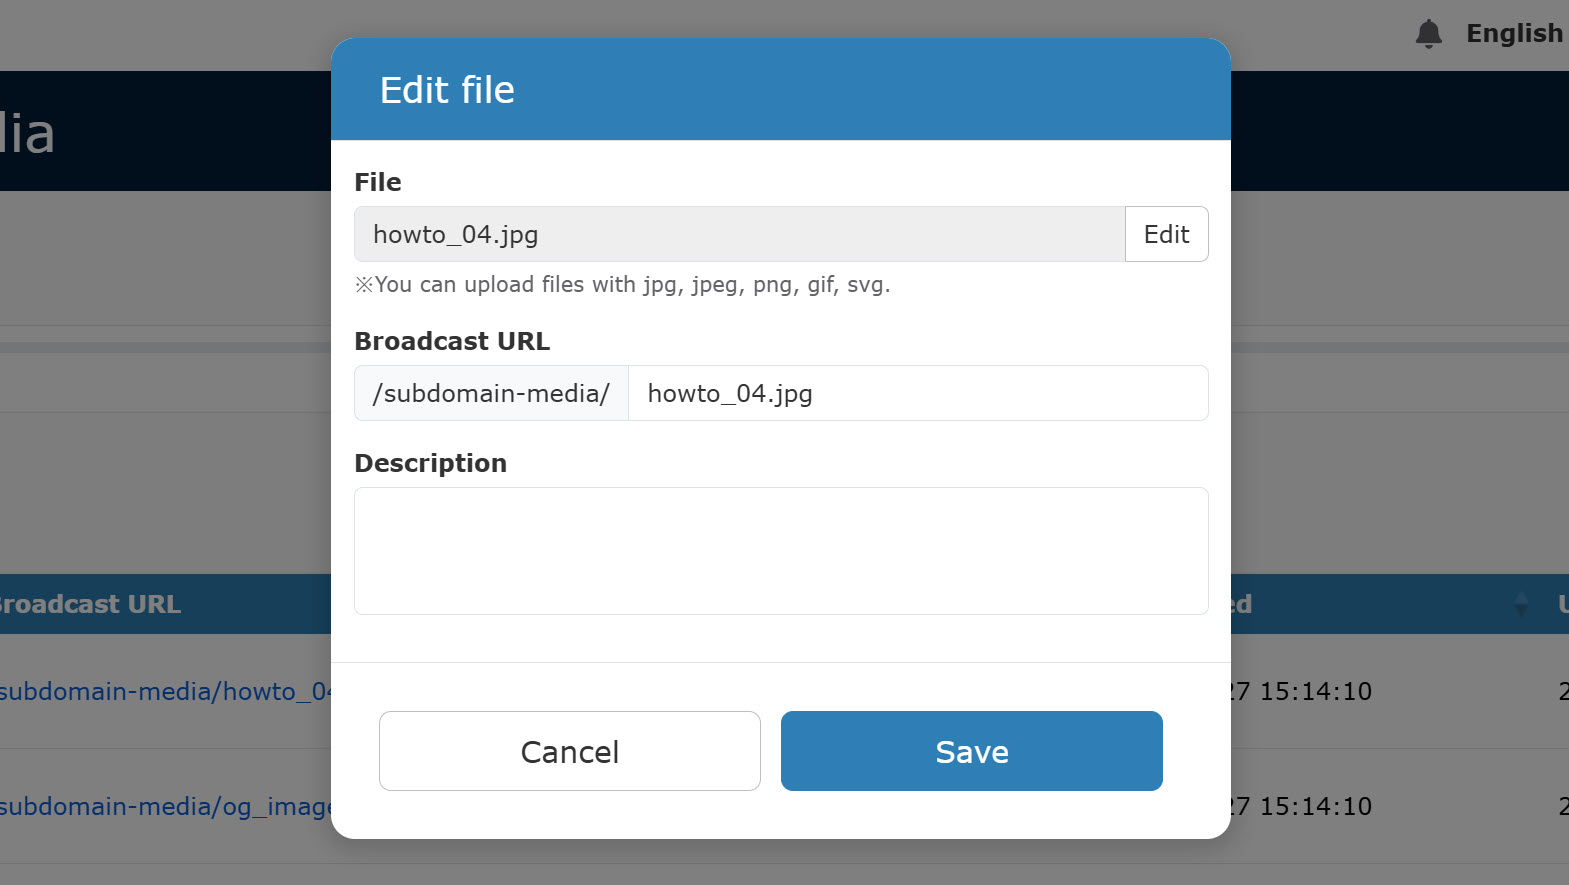
03. Edit image
Uploaded images can be edited.
Click on the gear icon you wish to edit.

The following window will open.
You can change the file or the URL.
*The streaming URL will not be changed even if the file is changed.
04. Download image
Uploaded image files can be downloaded.
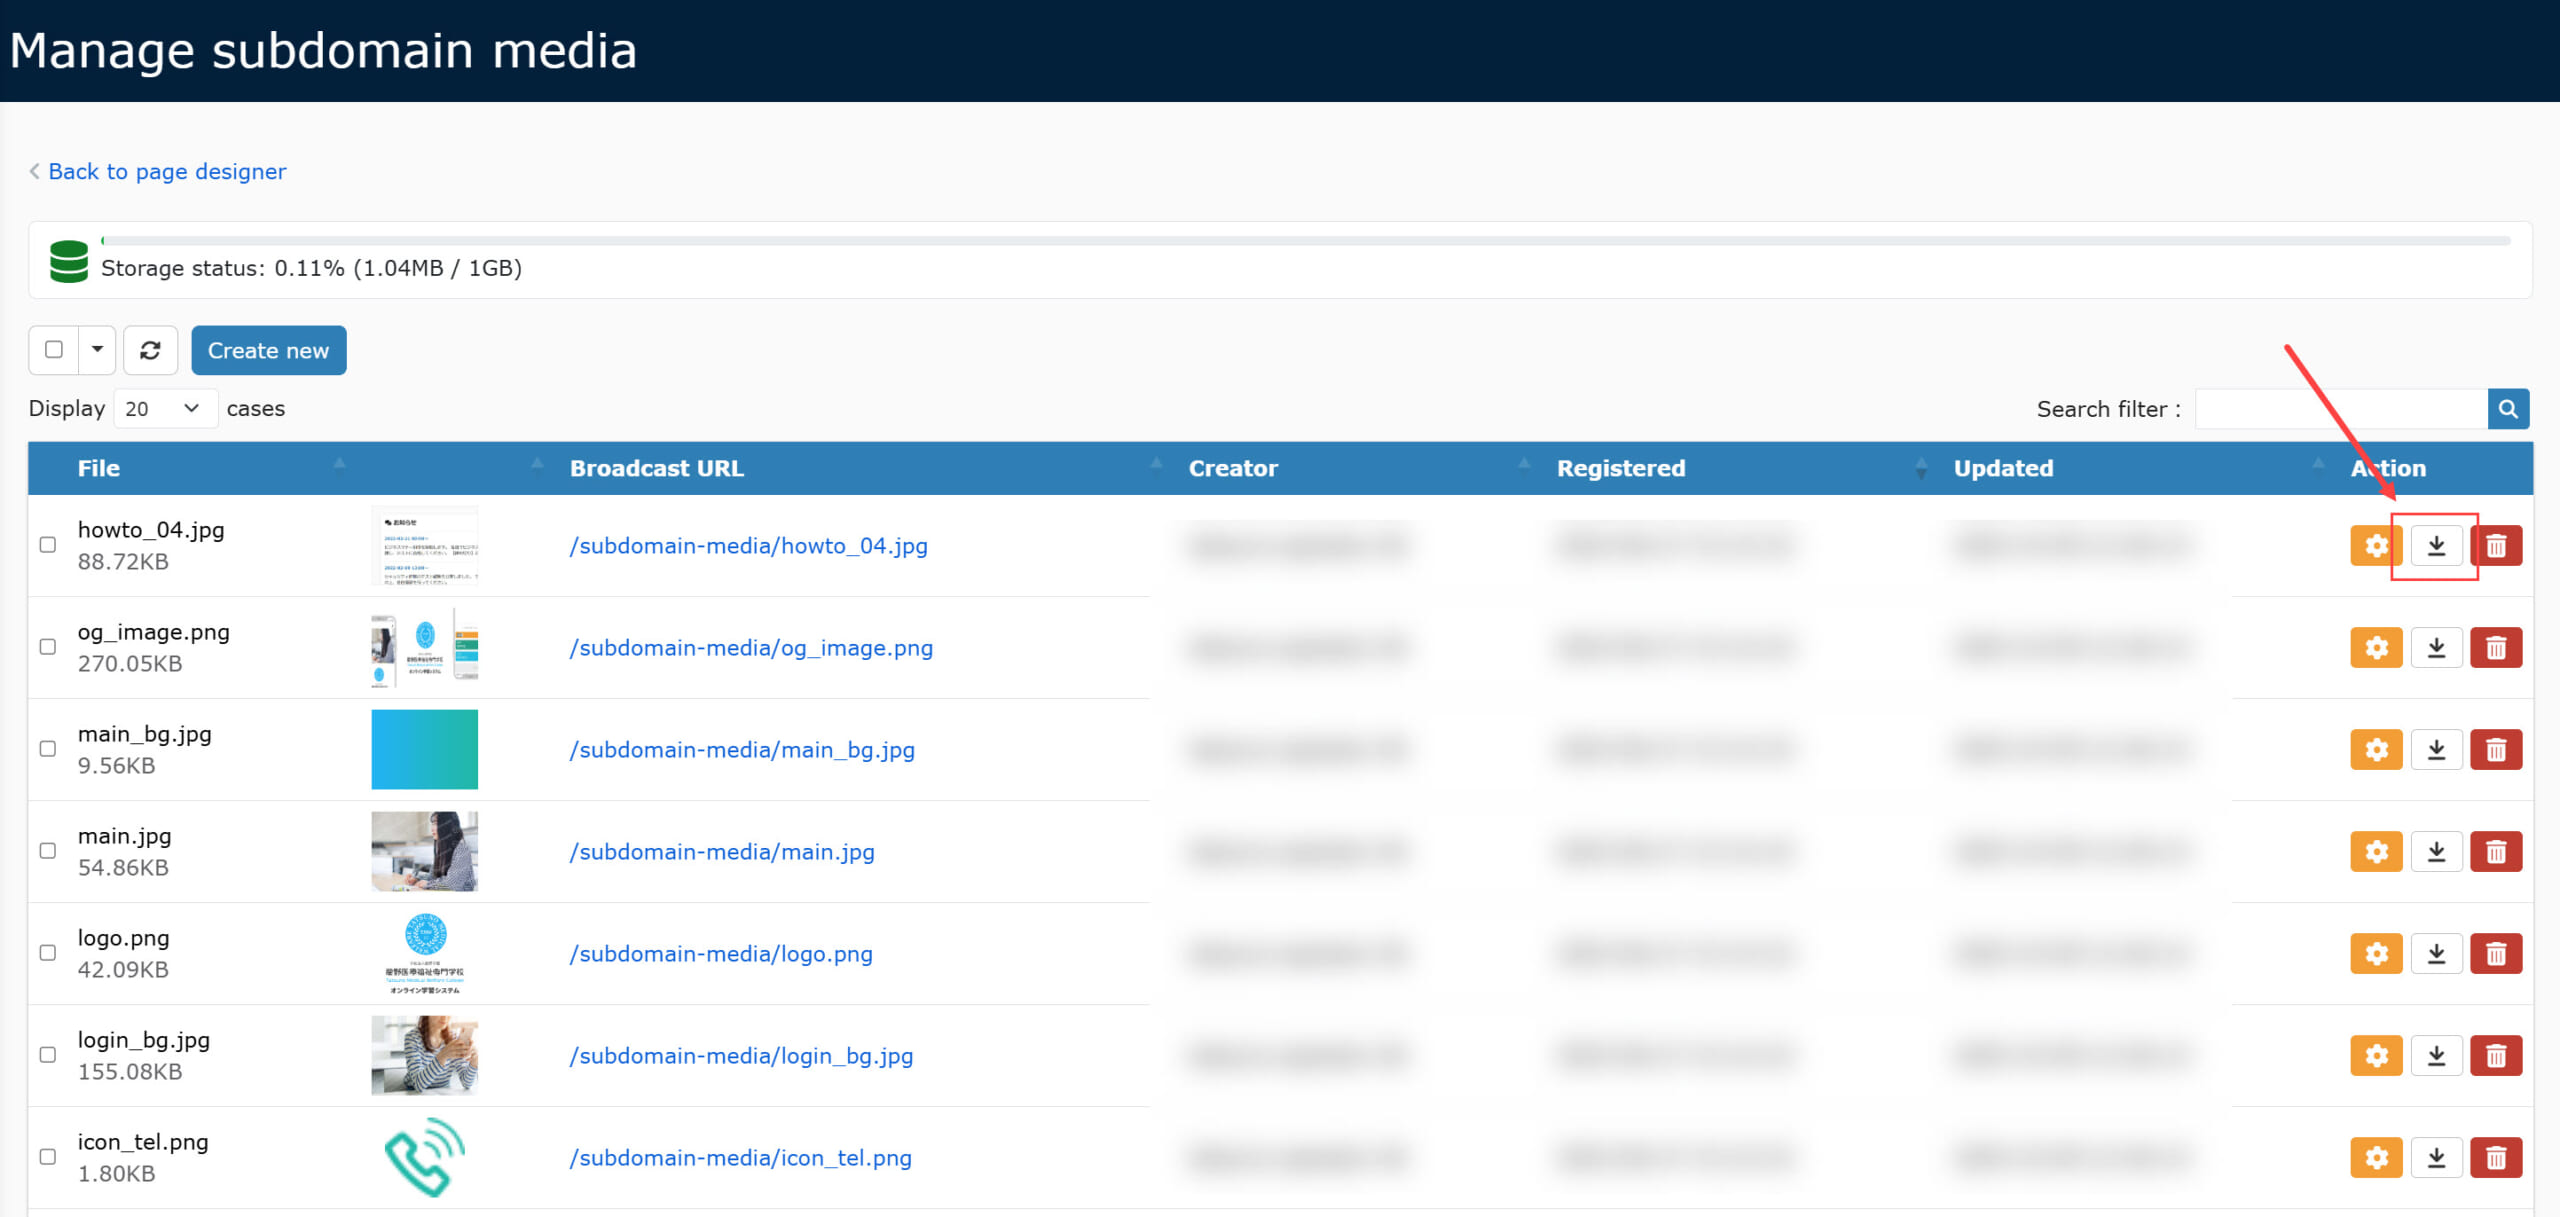
05. Delete image
Click on the trash can icon to delete an image.
To delete multiple images in bulk, tick the boxes, click on the arrow icon and select "Delete."