Purchase history
The learner can check the contents of products/seminars, contracted plans, and tickets purchased by the learner.
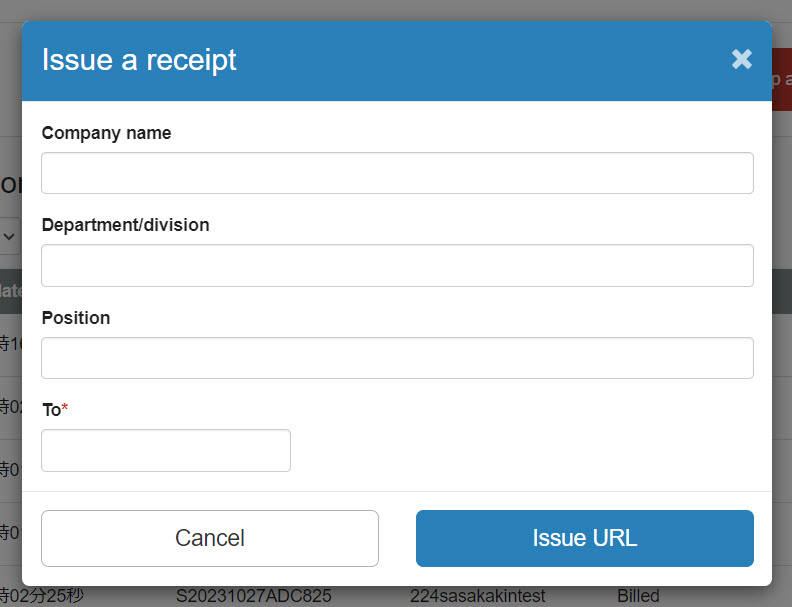
*The "Purchase History" screen is opened by clicking the account name in the upper right corner of the screen and selecting "Purchase History.
Required
Customization options, EC options
order
You will see your subscription and regular purchases and seminar orders, not account billing.
01. Open the order screen
On the "Purchase History" screen, open the "Orders" tab.
02. Confirmation of order list
Here you can see a list of your product/seminar order history.
03. Confirmation of courses included in the product/seminar
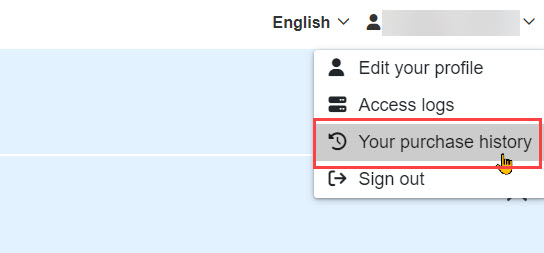
Click on "Course included" in the "Order Details" column and a pop-up will display the courses included in the product/seminar.
04. Contact for bank transfer
When a product/seminar is purchased via bank transfer, the completion of the transfer can be notified to the administrator.
Click on "Transfer Contact" in the "Other" column to open the following pop-up window.
Enter the payee's name information here (you can also enter contact information, if necessary).
When you have completed the form, click "Submit.
05. Cancel
Depending on the payment method, the learner may be able to cancel the order before the purchase is completed.
Click "Cancel" in the "Other" column.
06. Cancellation Request
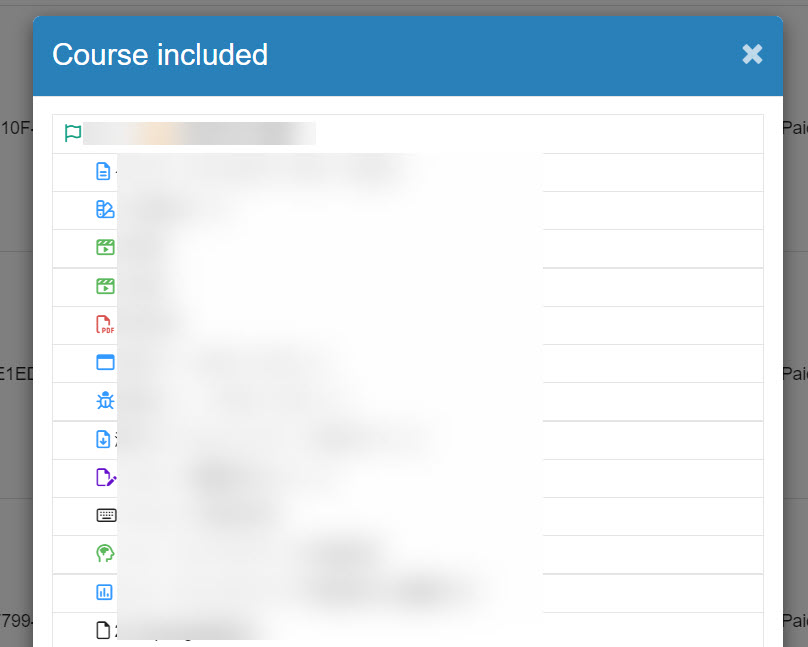
Depending on the payment method, it may be possible to request cancellation from the administrator before the purchase is completed.
Click the gear icon in the "Other" column to open the following pop-up window.
Enter the reason for cancellation, etc., and click "Apply.
07. Issuance and confirmation of receipt
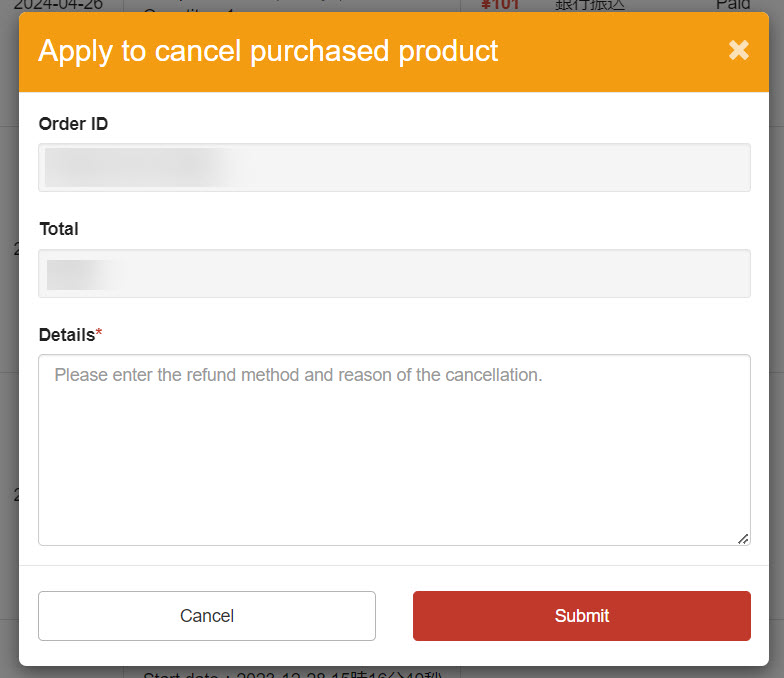
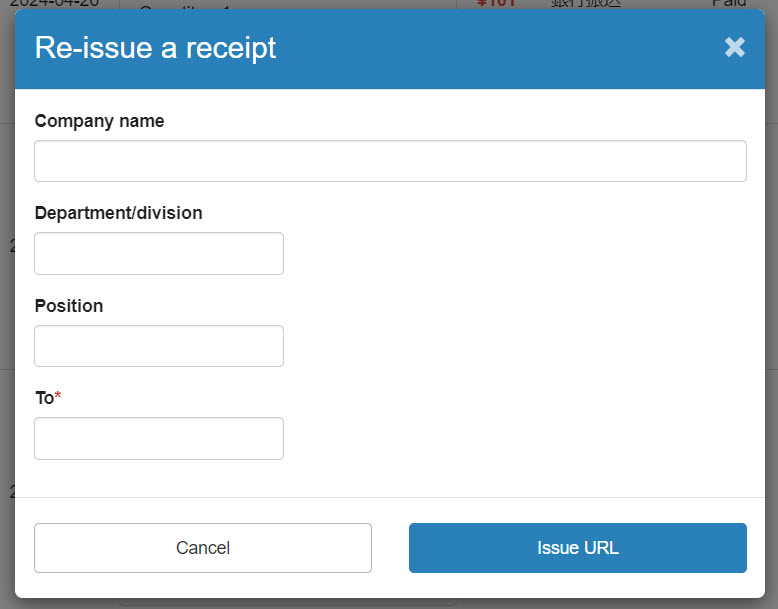
Click "Issue Receipt" in the "Other" column to open the following pop-up window.
Enter the name of the recipient and click "Issue" to issue the receipt.
Receipts issued can be viewed from the "Receipts" button.
Receipts can also be reissued by clicking on the "Reissue" button.
08. Learner Allocation (proxy purchase)
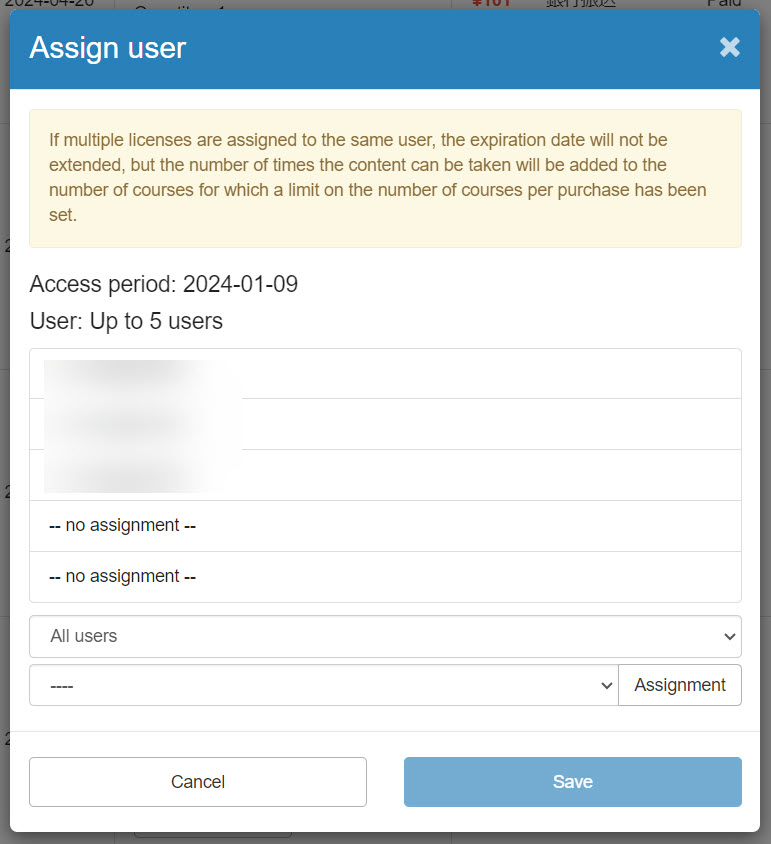
When a product is purchased on behalf of a customer, the "Assign User" button will appear in the "Order Details" section, and clicking it will open the following pop-up window.
Select the target learners by narrowing down the learners in the group pull-down, etc., and then click "Assign".
To cancel the assignment, click "Cancel" for the target learner.
When all settings are complete, save the file.
*For more information on purchasing by proxy, please see "Purchase product on behalf learners.
Subscription Products
Order details for items purchased by subscription only will be displayed.
01. Open the Subscription Products screen.
On the "Purchase History" screen, open the "Subscription Products" tab.
02. Confirmation of order list
Here you can see a list of your order history for subscription products.
Clicking on the "Product Name" of each order will display a detailed screen for that product.
03. Confirmation of details
The "Details" button will appear in the "Operation" column of the purchased item.
Click here to go to the PayPal login page.
After logging in, you can view your order details and cancel your subscription within PayPal.

ticket
On the "Purchase History" screen, open the "Tickets" tab.
You can set whether or not to use the Manage seminarsWhen conducting both online and in-person seminars at the "Seminar Management Center", you can manage the number of participants for in-person seminars by issuing tickets.
The history and details of this ticket purchase will be displayed.
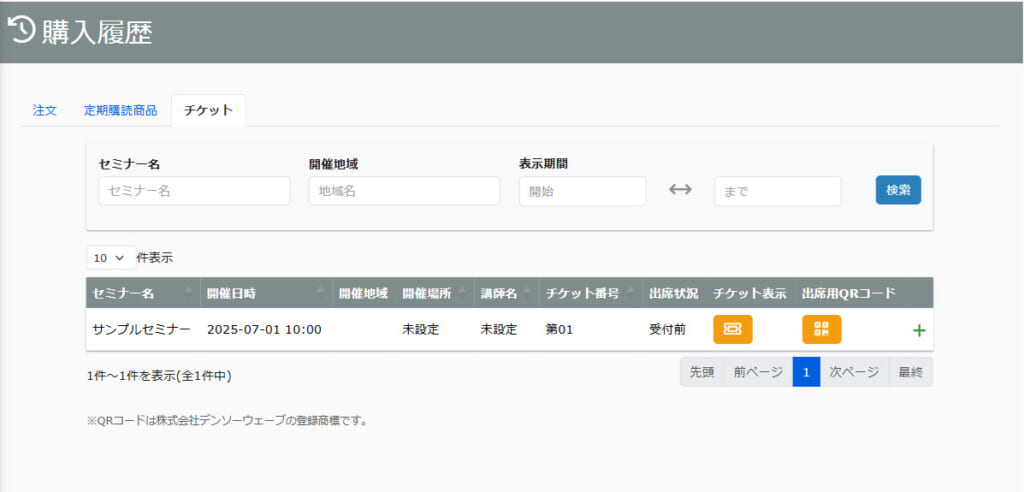
01. Check the list of tickets
A list of tickets set up for the seminar you purchased will be displayed.
This is a search field at the top of the screen that allows you to narrow down the tickets to be displayed based on the "Seminar Name/Region/Range of Display" information.
02. Ticket Display
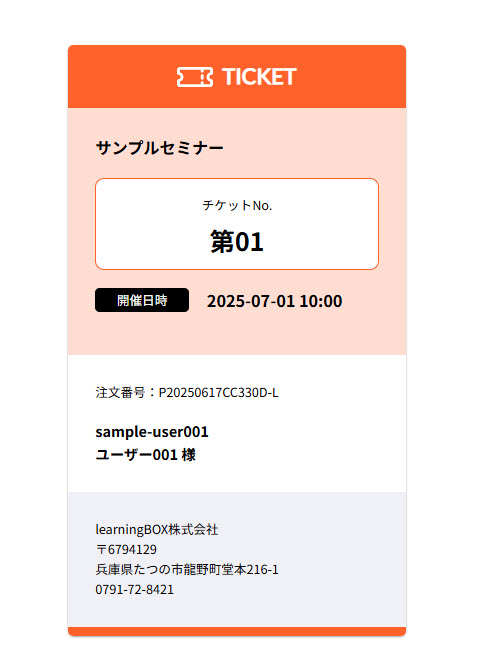
Click the ticket icon to show the ticket.
03. QR Code display
Click on the icon in the "QR Code for Attendance" column of the applicable ticket to display a separate tab with a QR code that can be used to attend the seminar.
Attendance can be managed by scanning the code at the organizer.
The QR Code will not be displayed when the attendance status is Attend.
Only in the case of "Before reception/Absent", it can be displayed.
Contract Plan
Account billing will display the order details for the billing plan purchased.
01. Open the Contract Plan screen.
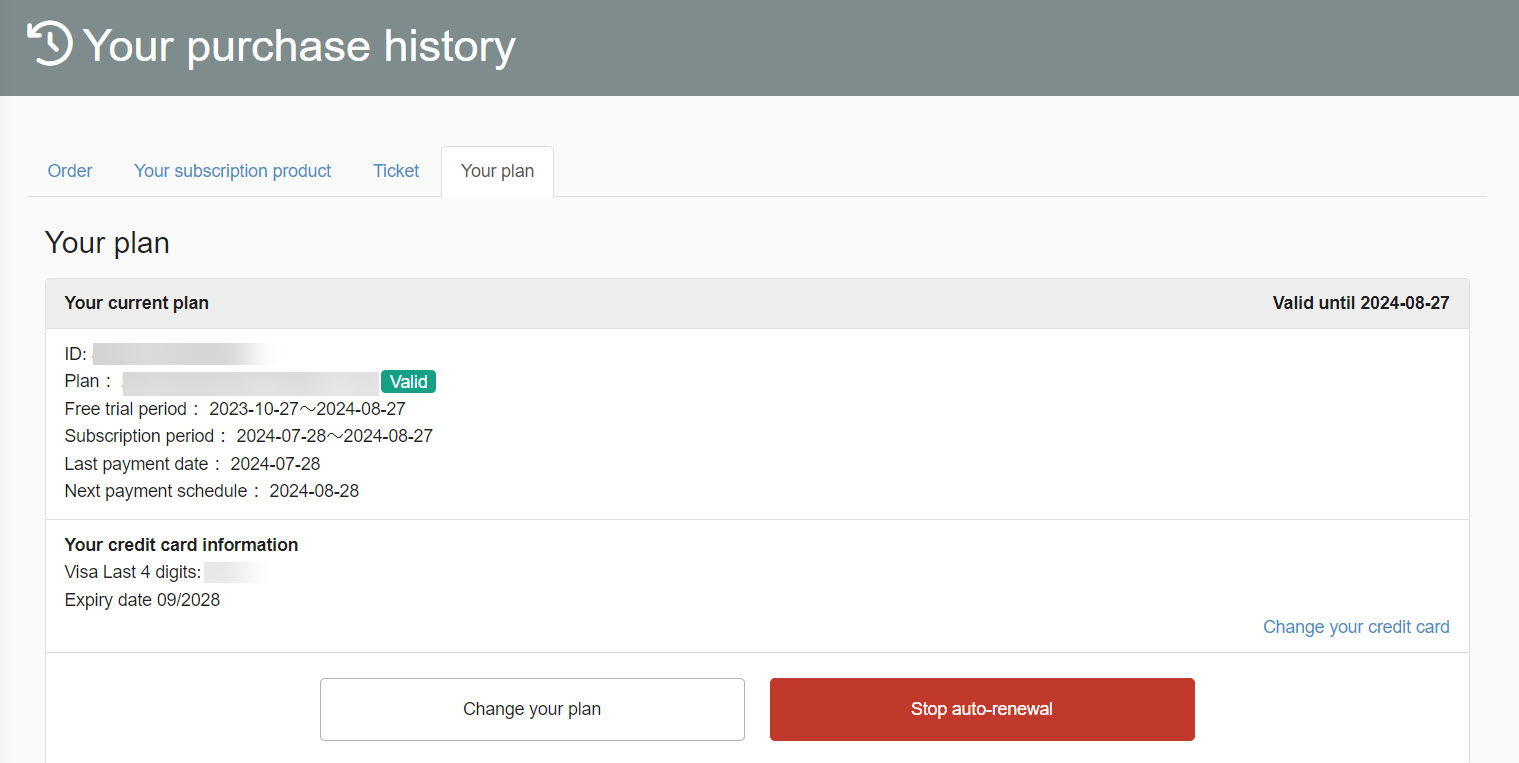
On the "Purchase History" screen, open the "Subscription Plans" tab.
02. Confirmation of contract details
The top of the screen displays the billing plan to which you are currently subscribed.
If you are not subscribed to a plan, the message "No plans are currently subscribed." will be displayed. will be displayed if you have not signed up for a plan.
03. Select/Change Contract Plan
If you have not signed up for a plan, the "Select a plan" button will appear, and clicking it will open the plan selection screen.
If you are currently subscribing to or canceling a plan, the "Change Plan" button will appear and the plan selection screen will open in the same manner.
04. Stop automatic renewal
When you purchase a billing plan with account billing, your subscription is automatically renewed for each period set in the plan.
This automatic update can be stopped by the learner.
You can do so by clicking on the "Stop Automatic Renewal" button displayed on the screen.
05. Confirmation of transaction history
At the bottom of the screen, you can see a list of the history of transactions (contracts, charges, cancellations, etc.) that have occurred for all billing plan contracts.
06. Issuance and confirmation of receipt
Click "Issue Receipt" in the "Other" column of each transaction to open the following pop-up window.
Enter the address information and click "Issue" to issue the receipt.
You can also click on "Receipts" to see the receipts that have been issued.
Receipts can also be reissued by clicking the "Reissue" button.
