
First page settings
You can determine which page users land on immediately after logging in and configure restrictions for compatible operating systems and web browsers.
*To access these settings, navigate to System settings in the side menu > First page settings.
Required
Management role of Co-admin
Global settings
Configure the default landing page that users see right after logging in.
*Select the Global settings tab.
First page settings
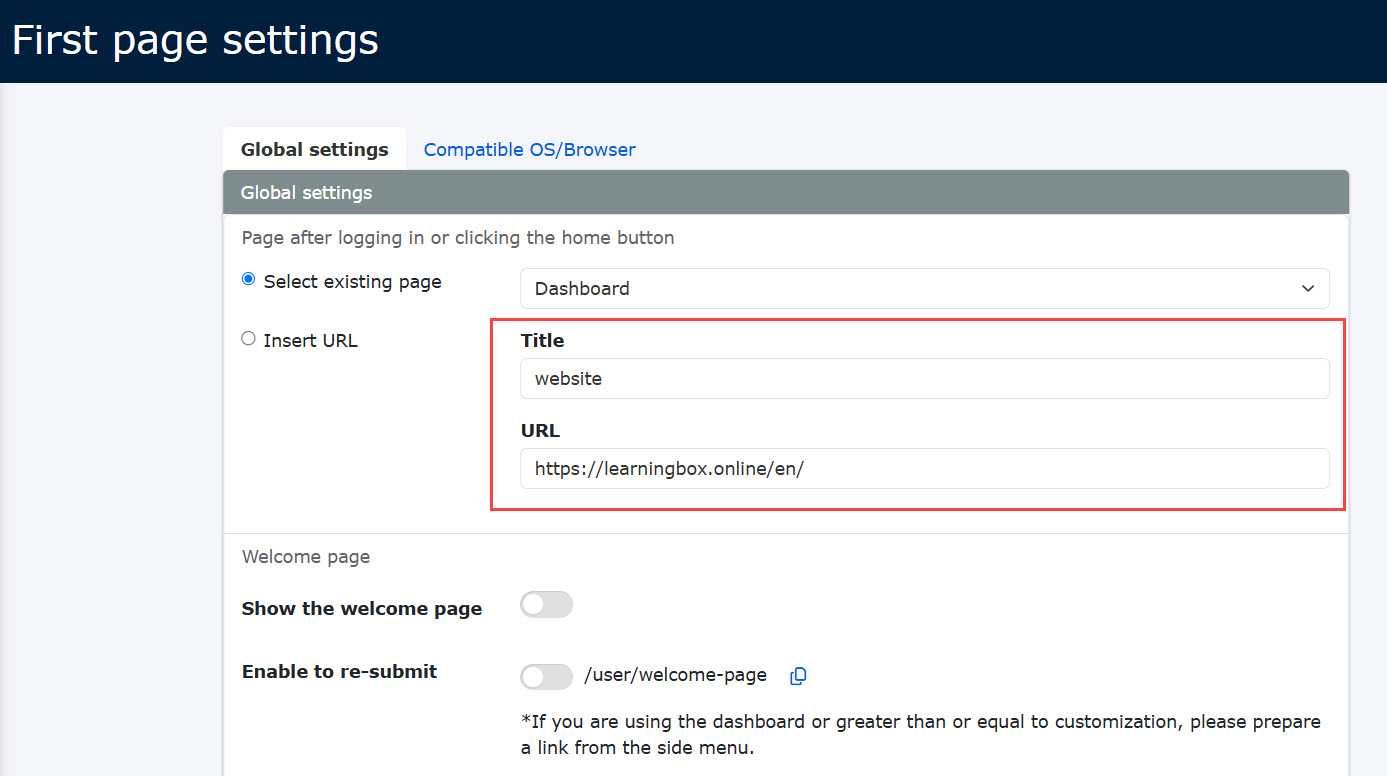
01. Select existing page
Click Select existing page dropdown menu.
You will see three standard layout options: Dashboard, Select a course, Progress record.

02. Specify URL
Alternatively, you can specify URL to direct users to a custom internal or external link upon login.
Welcome page
01. How to set up
Switch the Show the welcome page toggle to ON.
Define your custom title and message body text in the text editor fields.

02. Allow redisplay
By default, the welcome page only appears the very first time a user logs into learningBOX.
However, you can allow users to view it again by enabling the redisplay toggle.
This adds a dedicated access link to the user's Dashboard.
If you subscribe to a Customization option, you can also pin the welcome page directly to the side menu.

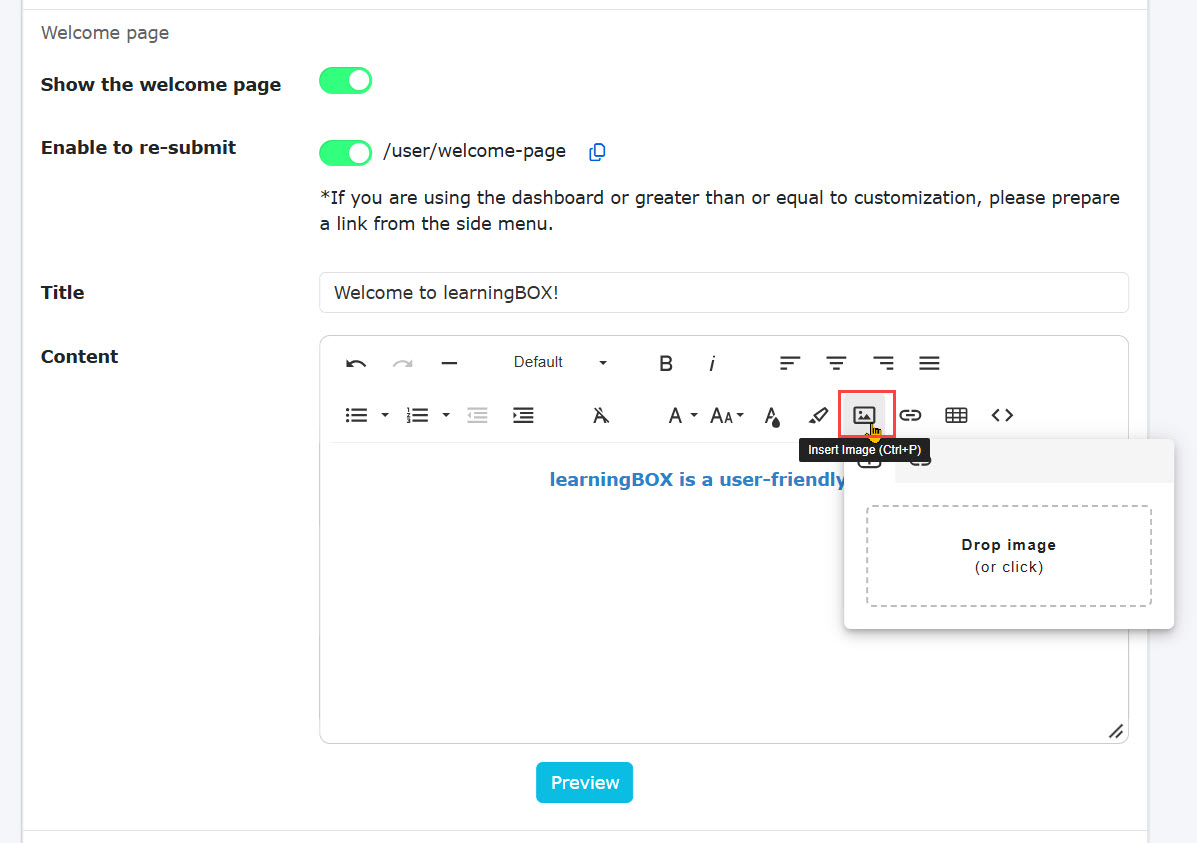
03. Insert image
Click the image icon inside the text editor toolbar, then drag and drop your image file into the upload box.
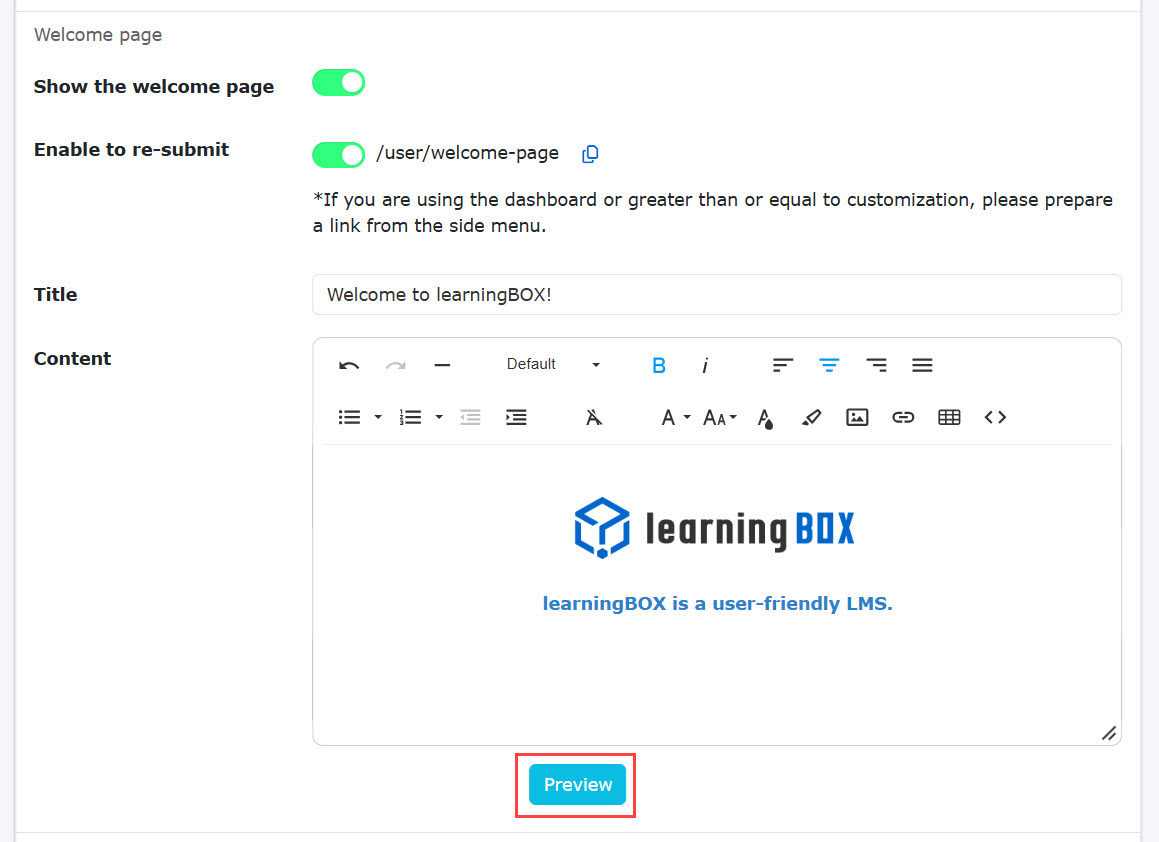
04. Preview
Click Preview to see how the welcome page will look to your learners.
Save your changes once all settings are complete.
05.User interface
When a learner logs in, the welcome page will display.
Clicking Next will close the welcome page and take them to the first page you configured.

Supported OS and browser check
When a user logs in, the system can automatically audit their operating system and browser compatibility to block or warn users on unsupported devices.
*Select the Compatible OS/Browser tab.
On certain Android tablets using Google Chrome (version 143 or higher), the exact OS version may not be accurately detected or reported due to browser privacy protocols. Consequently, access control rules may not function perfectly.
Example: Even if your rule specifies "Android OS 16 or higher," a user on an Android 14 device might still bypass the filter without receiving an "unsupported device" notice.
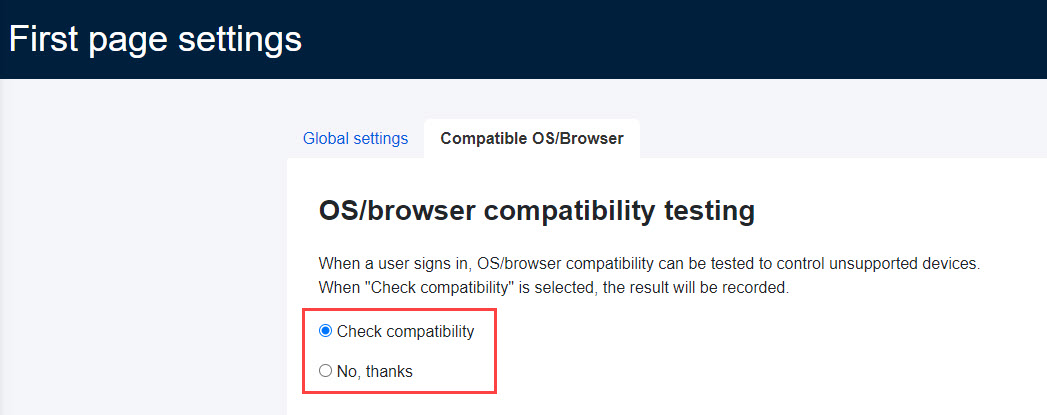
01. Enable the feature
Tick one in the red frame below.
Select either Check compatibility or No, thanks.
02. Set versions
Define the exact software requirements needed to log in.
You can choose between two methods:
▼Use supported version (auto updates)
This applies learningBOX’s official system requirements automatically.
Each information will be automatically updated on the major upgrade.
The information is also automatically updated with each update.
*For more details, refer to Supported Environments.

▼Customize version
You can also customize versions.
Set OS and browser information for each device.
Click +OR to add conditions.
When you set only the OS version without setting the browser version, tick No settings.
To delete a condition, click on the trash can icon.
*learningBOX does not guarantee software stability or technical operation on environments outside our official system requirements.
If you choose the Customize version, you are responsible for updating these rules manually.

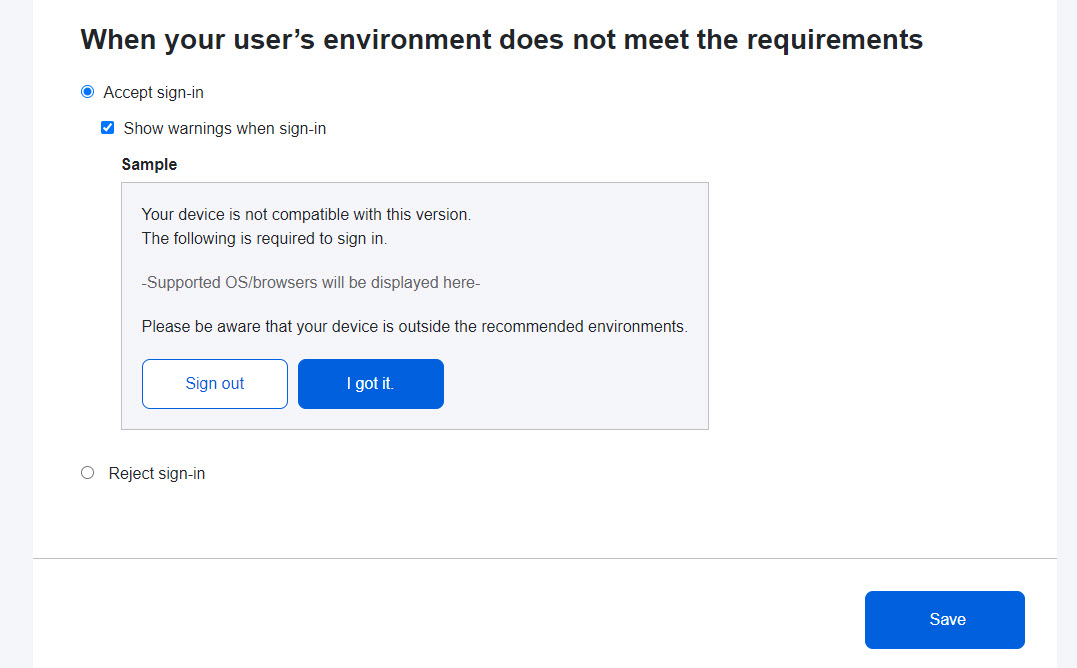
04. Handle deficient environments
Determine what happens when a user's device fails to meet the criteria established in Step 02.
Select either Allow login or Reject login.
If login is allowed (Warning only)
You can choose to display a dismissible warning banner upon login informing the user that their setup falls outside recommended conditions.
Tick the box to enable this warning.
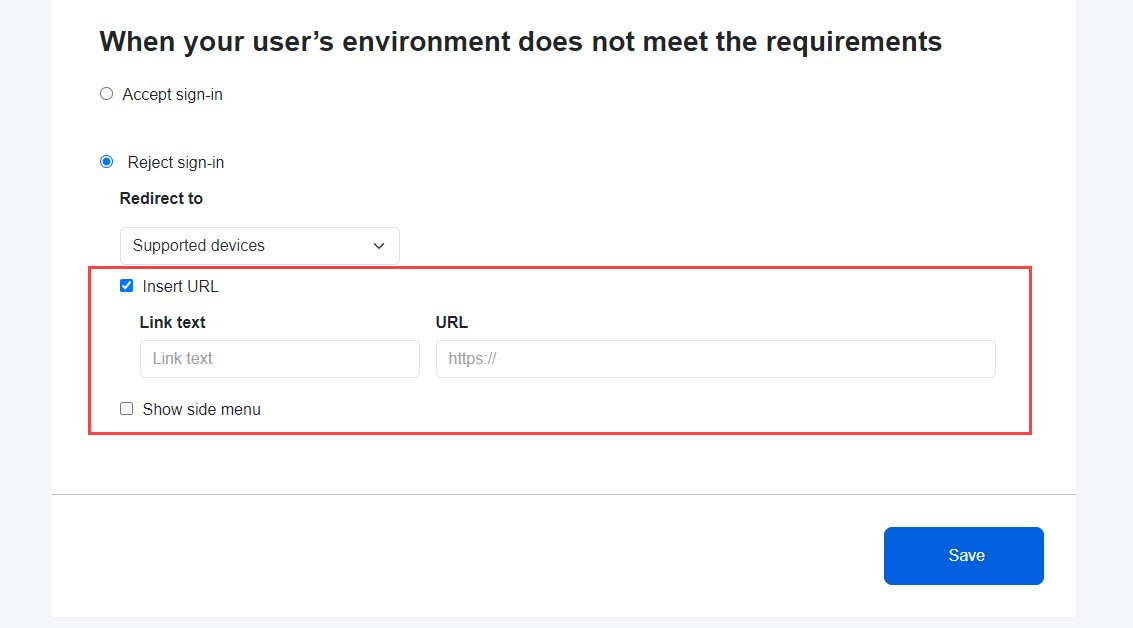
If login is rejected (Blocked access)
Select a destination page to redirect the blocked user to:

You can insert a URL when Supported devices is selected.
Tick Insert URL to enter the link text and URL.
You can also choose whether or not to display the side menu.
Specify URL: Directs them to a completely custom external page.
Enter the destination URL in the input field.

Save your changes once all settings are complete.