Dashboard
This page explains how to select panels to display on the Dashboard.
Interface
Depending on the management roles, displayed buttons will be different.
*For more details, refer to Management roles.
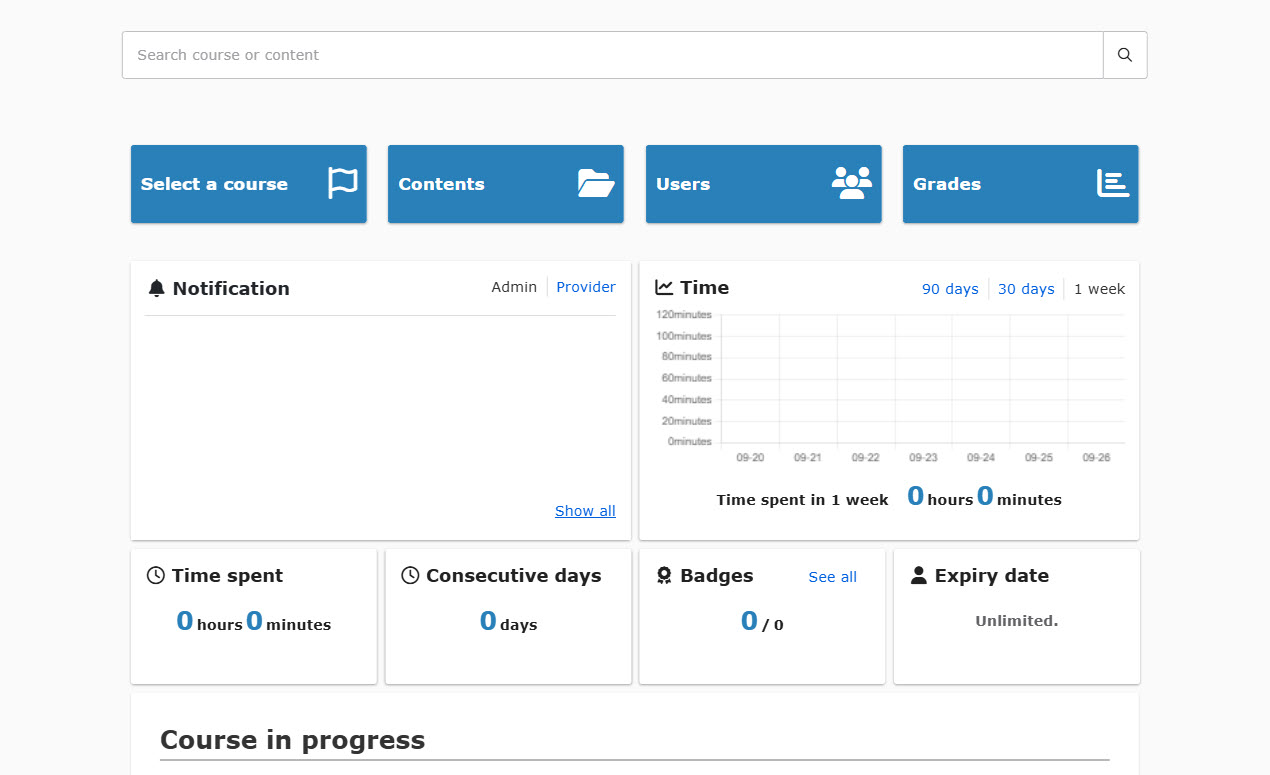
01. Admin
All panels will be displayed.
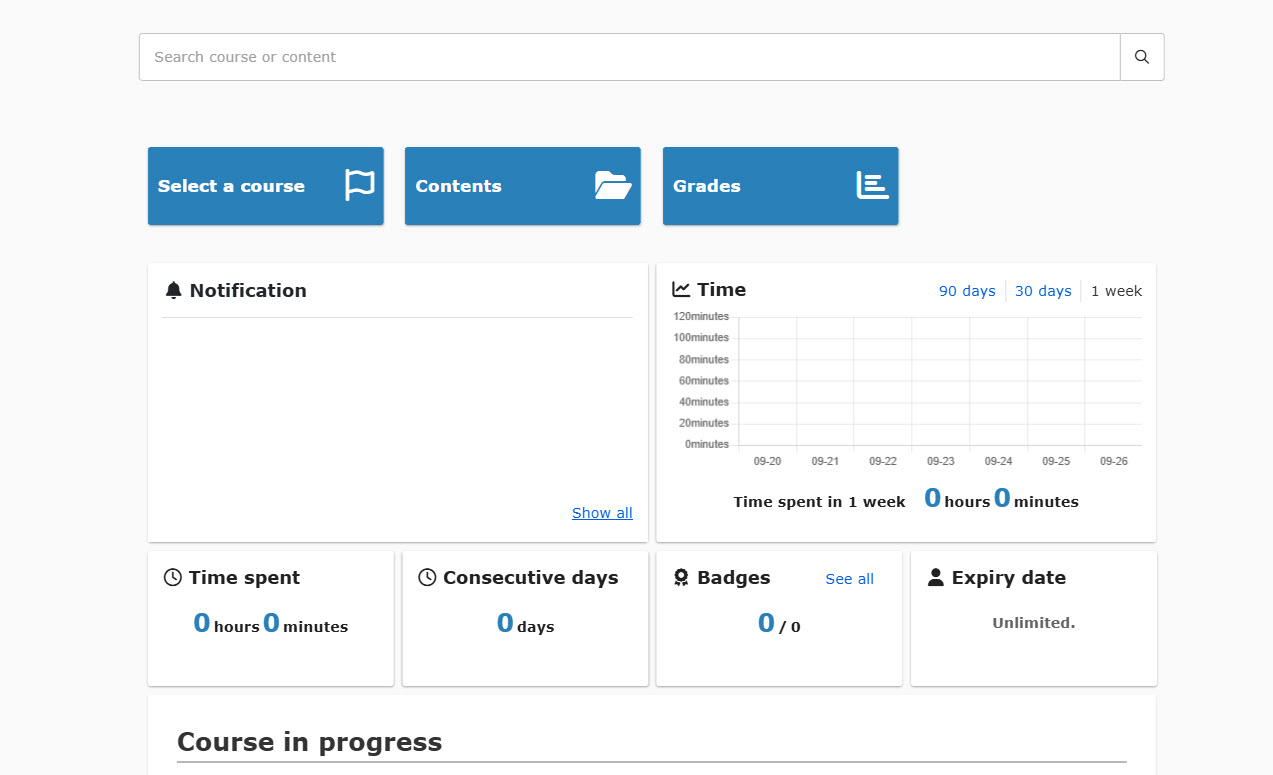
02. Users with management roles
Depending on the management roles, buttons will be displayed.
e.g.) The "Contents" button will be displayed when you are a Content manager.
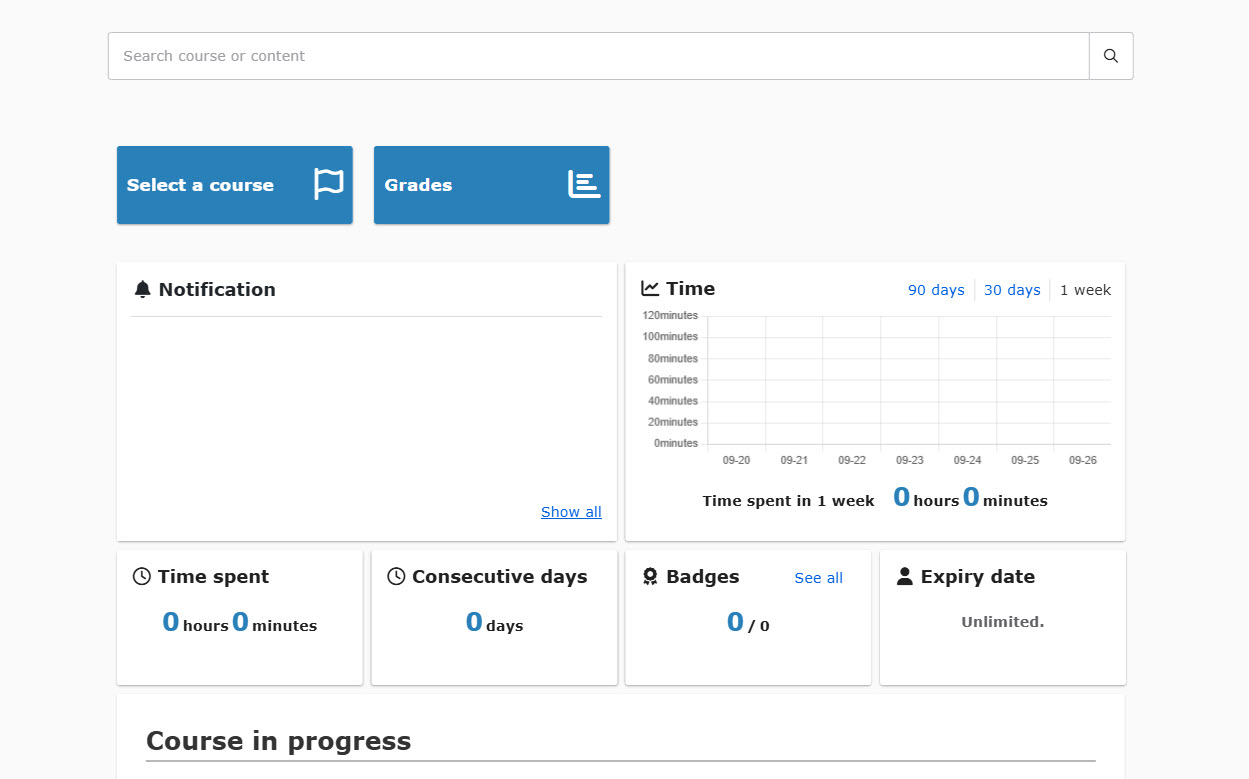
03. Users with no management roles
Only "Select a course" and "Grades" will be displayed.
Settings
Required
Management role of Co-admin
*Make sure to click the Save button at the top before you leave the page.
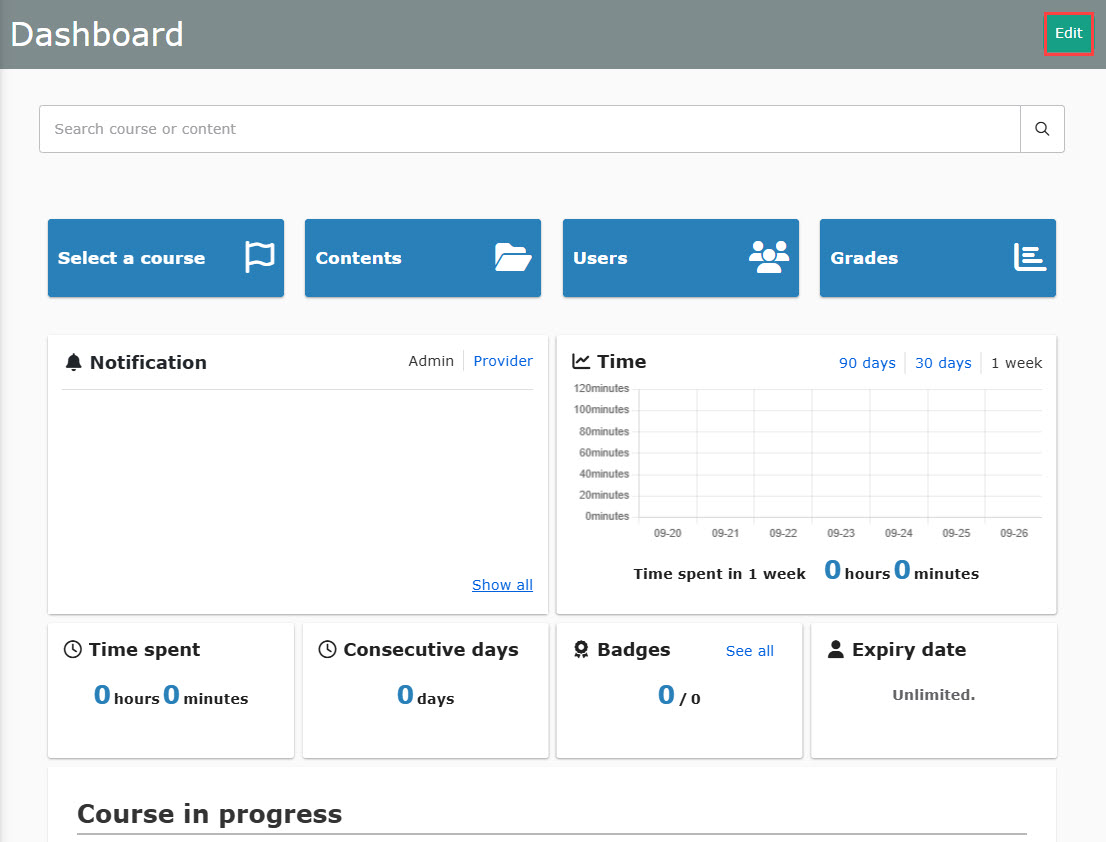
01. Dashboard settings
Click on "Edit."
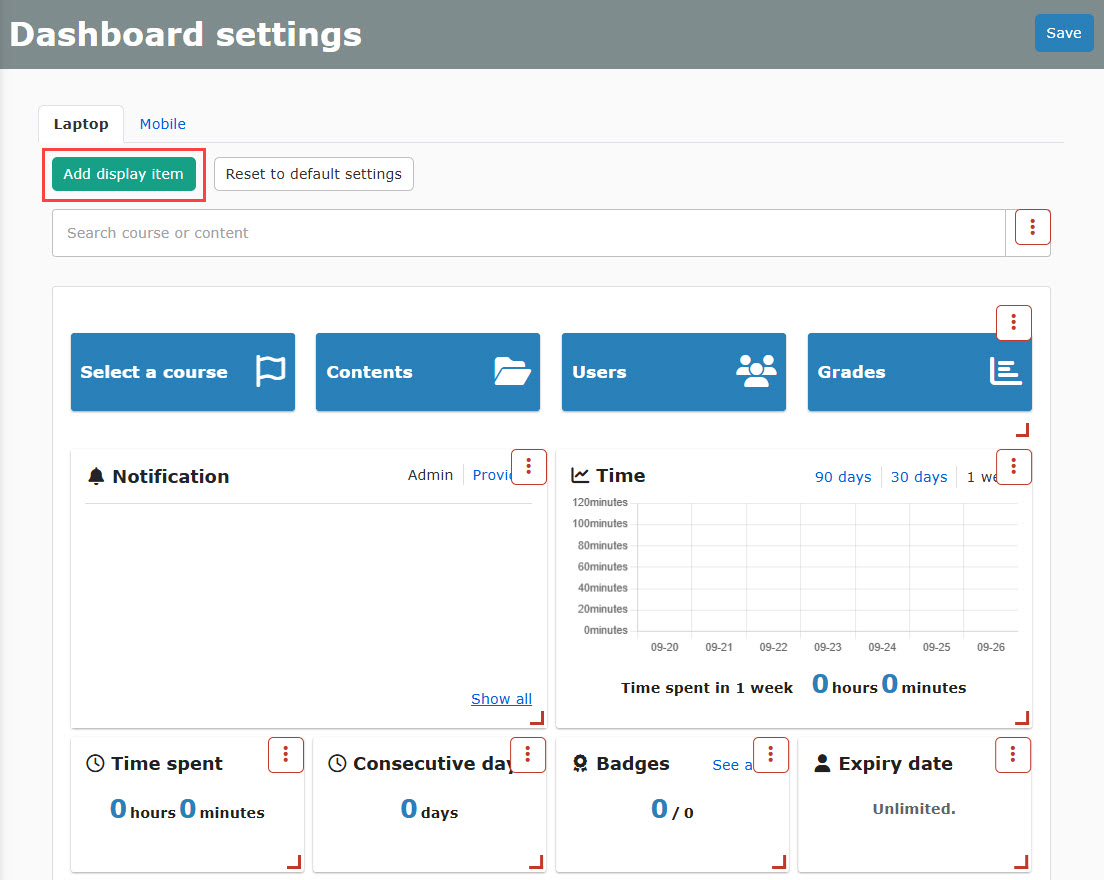
02. Add items to display
Click on the green button.
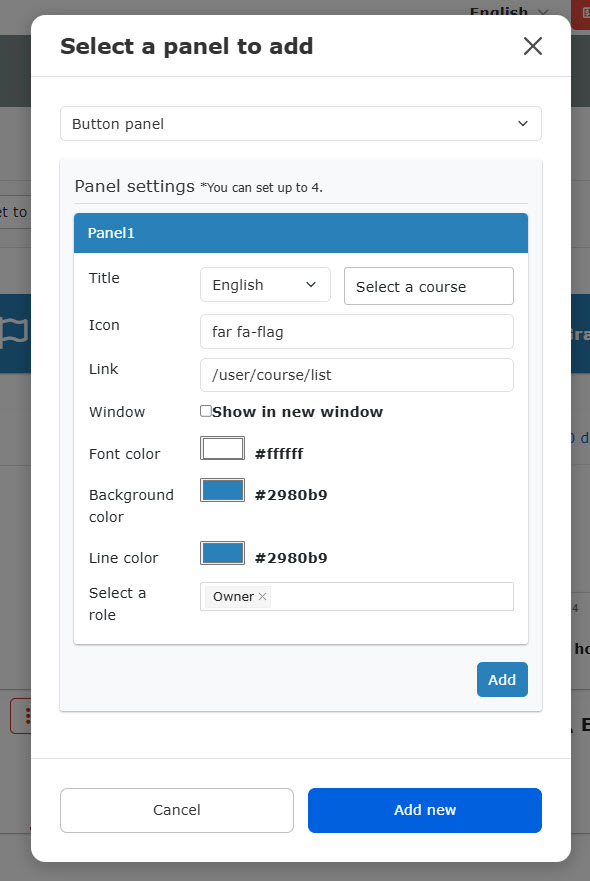
03. Select panel
Select panels to add on the Dashboard.
Click "Add new."
▼Displayed items will be different depending on your contract.
[Curriculum/Training]
Customization option is required.
[Products/Seminars]
EC option is required.
Panel settings
01. Button panel
Any button panel can be added.
Titles, icons, URLs, text color and more options can be customized.
Select users to display each panel.
Click "Add" to add a new panel.
*Up to four panels can be added.
02. Search fields (course or content)
A search field for courses and content can be displayed at the top of the Dashboard.
Users can search by entering keywords or specifying categories.
The results will be displayed after clicking the magnifying glass icon.

Only one search field can be set on the dashboard.
It will be placed at the top of the page, and cannot be moved.
03. Eye-catching area
Carousel images can be displayed on the Dashboard, and a link can be set along with the images.
*Carousel: The format that users can swipe between multiple images to view.

Only one eye-catching area can be displayed on the Dashboard.
It will be placed under the search field and cannot be moved.
*When the search field is hidden, it will be placed at the top of the Dashboard.
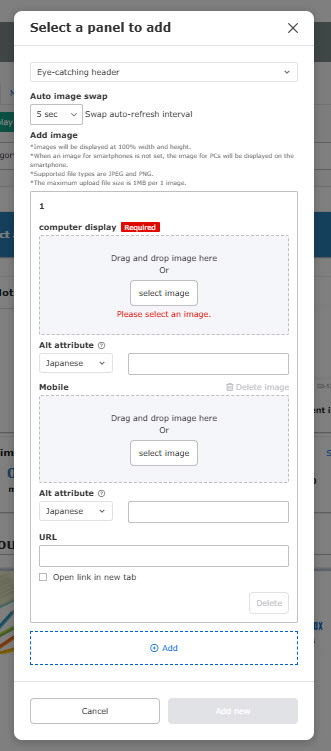
Configure the following items:
▼Auto image swap
Set the interval between 3 and 30 seconds for the auto image swap.
▼Add image
Set images to be displayed.
Up to four sets of images can be set.
・Select image
To upload an image, drag and drop a file to the gray area or select the file from "Select image."
*Images can be uploaded in any aspect ratio.
Uploaded images will be scaled up or down to fit the device's screen while maintaining the ratio.
Images for PC must be set.
The image for smartphone display is optional.
When it is not set, the image for PC will be displayed.
・alt attribute
Depending on the language, you can display dirrefent items.
*alt attribute: it provides alternative text for an image.
URL
You can specify the URL when users click on the image.
Tick "Open link in new tab" if necessary.
To add more images, click "+ Add."
To delete the uploaded image, click on Delete.
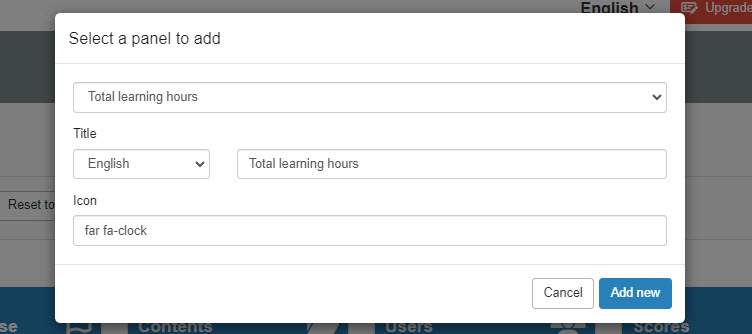
04. Time spent, consecutive days, expiration date, badges
Items regarding a learner's progress can be displayed.
Set the title and icon for the panel.
" Manage badges, you can select how you want to display the acquired badges to users as follows:
- Show only badges set to the currently assigned content
- Show all badges set to the deleted/previously assigned content
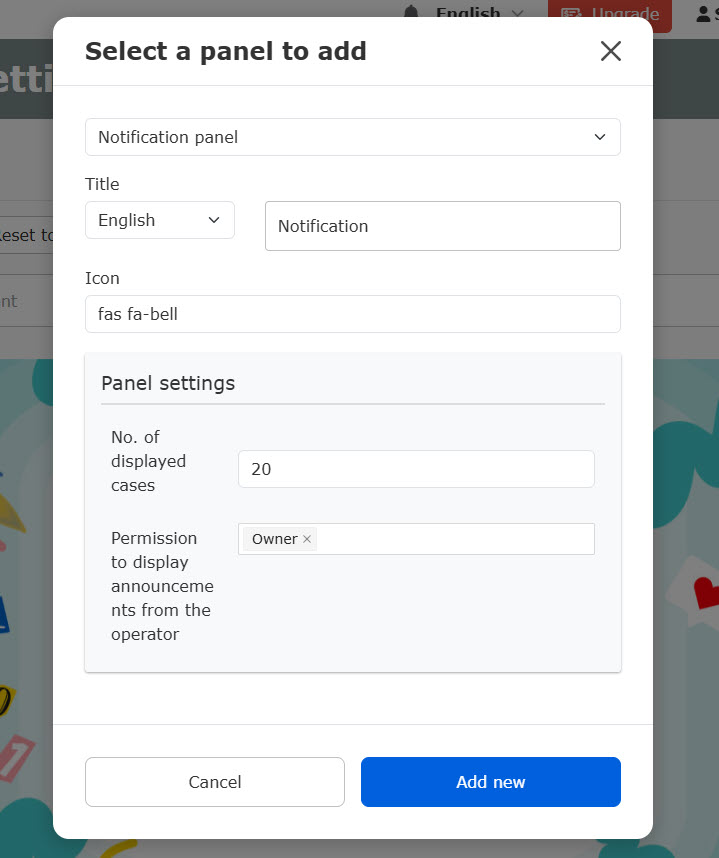
05. Notification panel
Notification can be displayed.
Set the title, icon, number of notifications to be displayed, etc.
Select users to display notifications from the system provider.
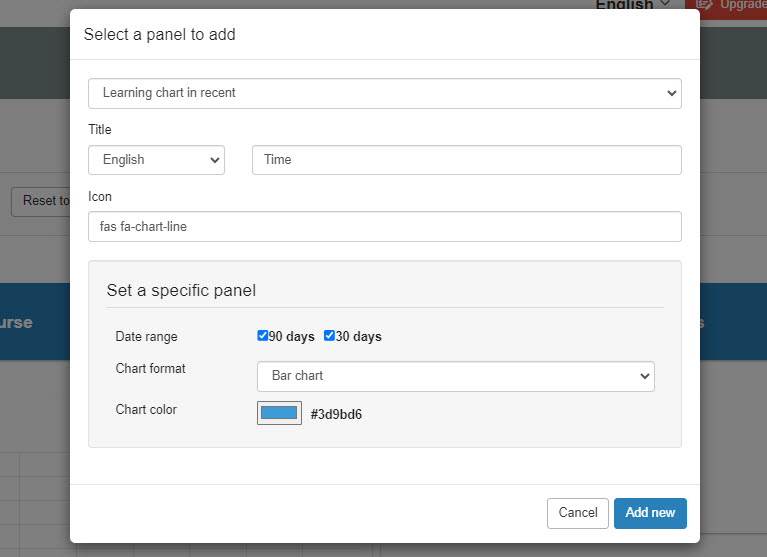
06. Time spent
Time spent can be displayed in a graph.
You can set a title and icon, and add the durations to display on the graph.
Also, the graph format and color are selectable.
*When "Line chart" is selected, boldness of the line and dots, colors can be specified.
07.Course List
Newly arrived courses and courses which is expiring can be displayed in a list.

Configure the following items:
▼ Title
Enter the title of the panel.
*You can set what to display for each language.
▼ Display order
Select the display order from the list.
The settings you have made will be displayed in the Display order details section.
When one of the following is selected, the "View all" link will be displayed. The link will allows learners to move to the Select a course page.
- Most popular
- Newest
- Closest end date
*When multiple categories are selected in the "Set a category," the display order will be hidden.
▼ Condition
Select either "Show all" or "Show nloy not completed."
▼ Display format
Select either list view or panel view.
▼ Display items
Select which items to be displayed in the course start page.
Tick the items to display.
▼ Set a category
Courses with specified categories can be displayed.
Select a category from the list if necessary.
When multiple categories are selected, the "View all" link, which allows learners to move to the Select a course page, will be hidden.
▼Max
Set the maximum number of courses to be displayed in the course panel (up to 20).
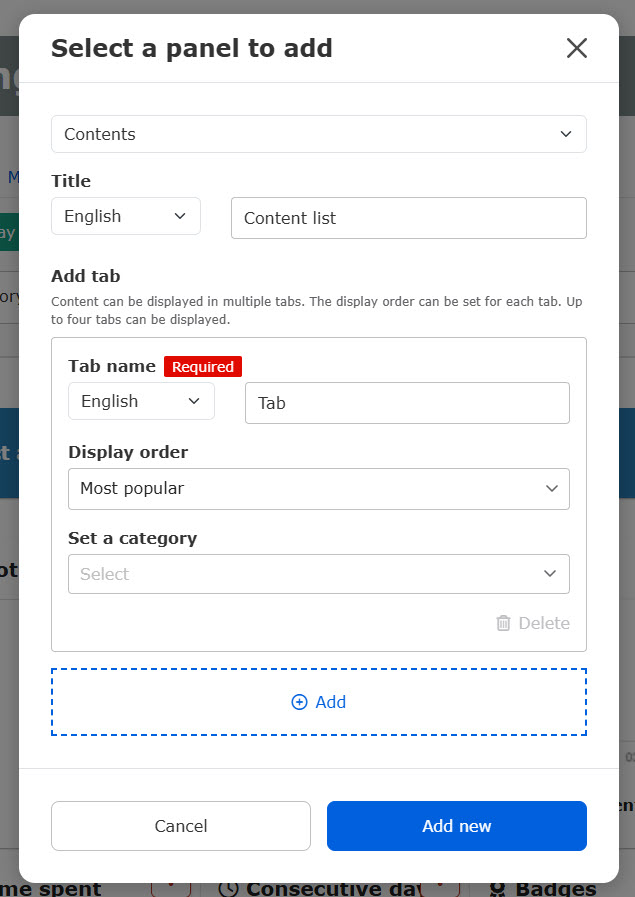
08. Contents
Content can be listed by specified criteria, such as popularity or new arrivals.
Configure the following items:
▼ Title
Enter the title of the panel.
*You can set what to display for each language.
▼Add tab
Multiple tabs can be displayed by setting the display conditions for each tab (up to 4 tabs can be set).
You can add tabs with "+Add" and delete tabs with "Delete".
Tab name
Enter a tab name (you can set what to display for each language).
Display order
Select the order in which to display the contents from the list.
- Most popular: In order of the number of users who have taken the content
- Newest: In descending order of the creation date
- Closest end date: In order of the closest end date
- Random: Displayed at random
When you select Random, the "See all" button that jumps to the Select a course page will be hidden.
Set a category
Only content with specific categories can be displayed.
Select a category from the list if necessary.
Only one category can be set per tab.
*For more details on the categories, refer to Manage content categories.
09. List of uncompleted courses/folders/contents
Up to 20 courses/folders/content that have not been completed & are about to be due (within 31 days remaining until the due date), for which a publication period or course due date has been set, can be displayed on the dashboard.
*Exemptions are not applicable to those designated as exempt.

Configure the following items:
▼ Title
Enter the title of the panel.
*You can set what to display for each language.
▼ Display order
The following two options are available:
- In descending order of public closing date and time
- Closest to course due date
▼ Displayed subject
Tick the courses/folders/contents you wish to view.
▼ Subject to display of course expiration
The following two options are available:
Only when you select "nearest due date" in the "order of display".
- Show
- Do not display
When all settings are complete, click "Add New".
When multiple publication periods with overlapping durations are set for a single content by group, the display of users belonging to both is as follows
- Start date: Oldest date and time
- End date: Most future date and time
For course deadlines, settings made on a per-user basis take precedence over settings made on a per-group basis.
If multiple groups have different due dates, the earliest due date and time will be displayed.
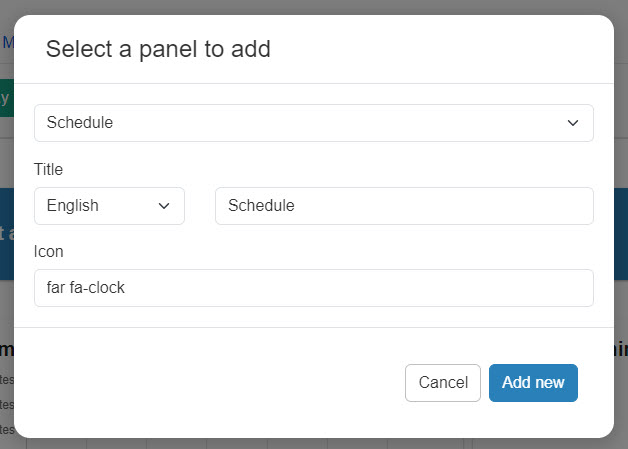
10. Schedule
The created Schedule can be displayed on the Dashboard.
Set the title and icon for the panel.
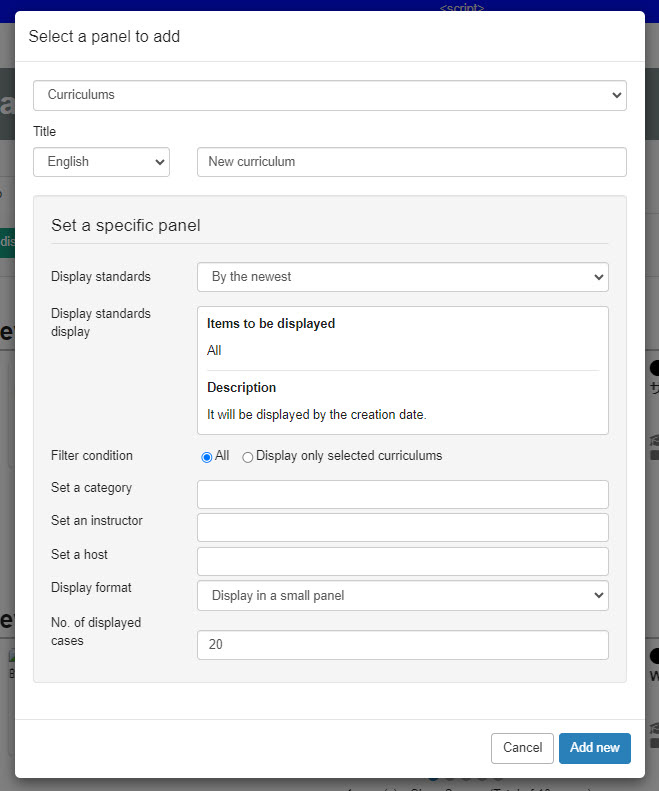
11. Curriculum/training list
You can display the list of curriculum/training based on the criteria.
Set the items in each field.
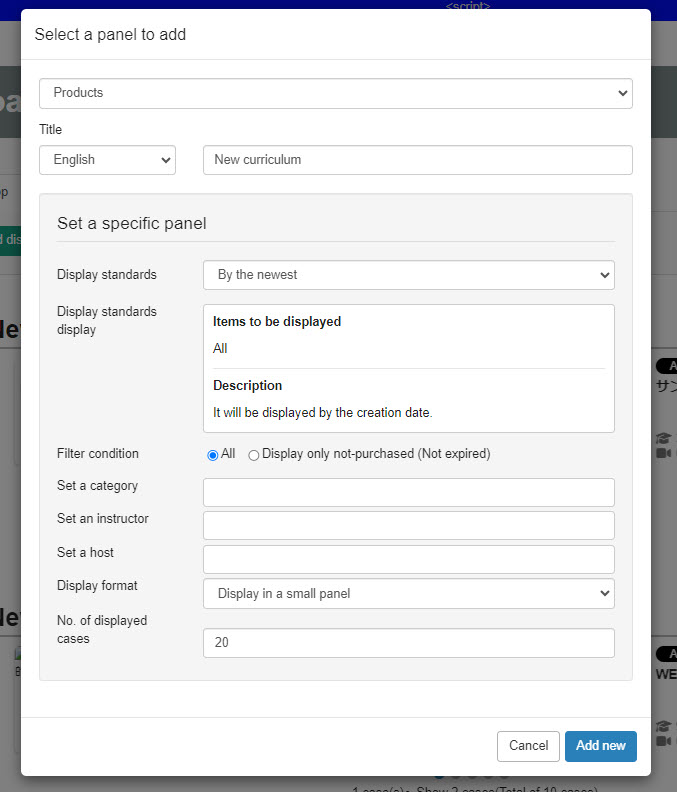
12. Product/seminar list
You can display a list of products/seminars based on the criteria.
Set the items in each field.
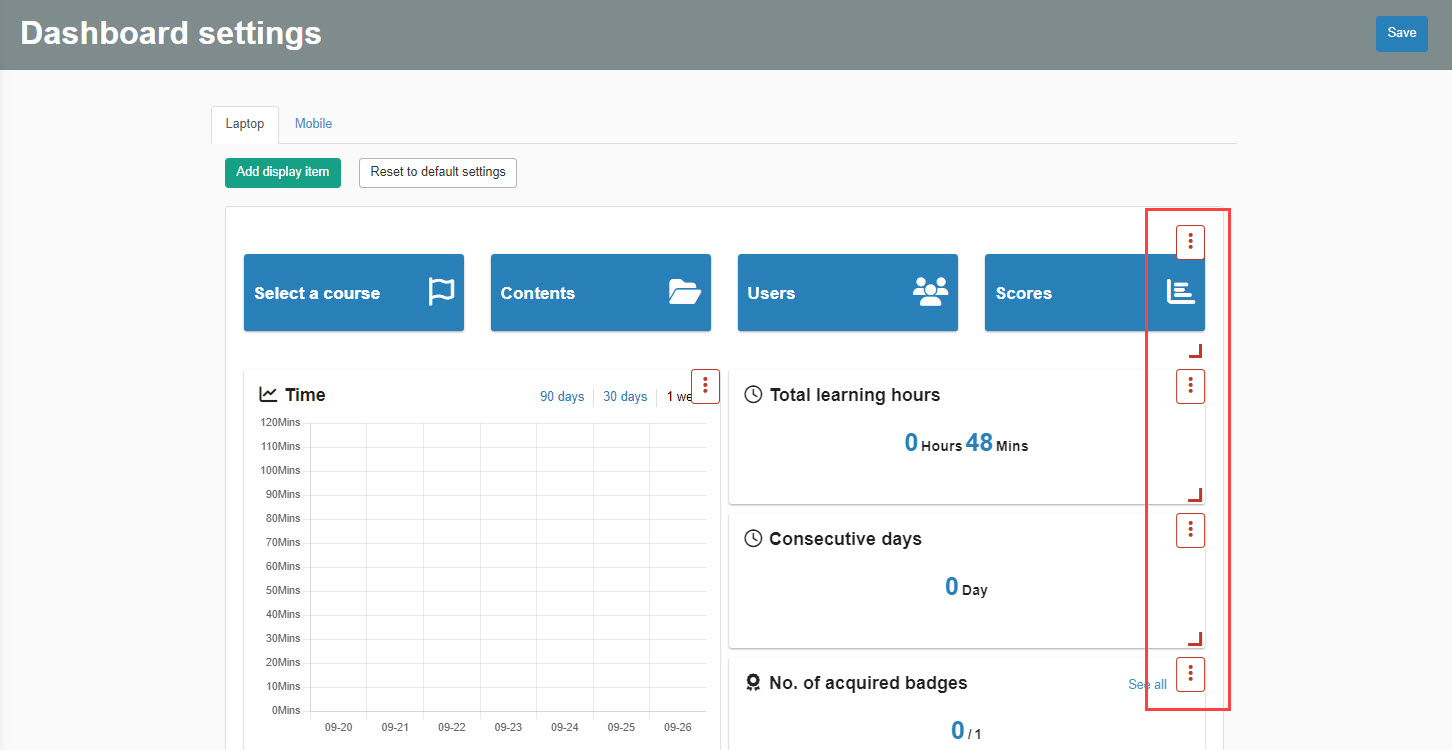
Edit panel
01. Edit
Click on the "︙" icon to edit, duplicate or delete.
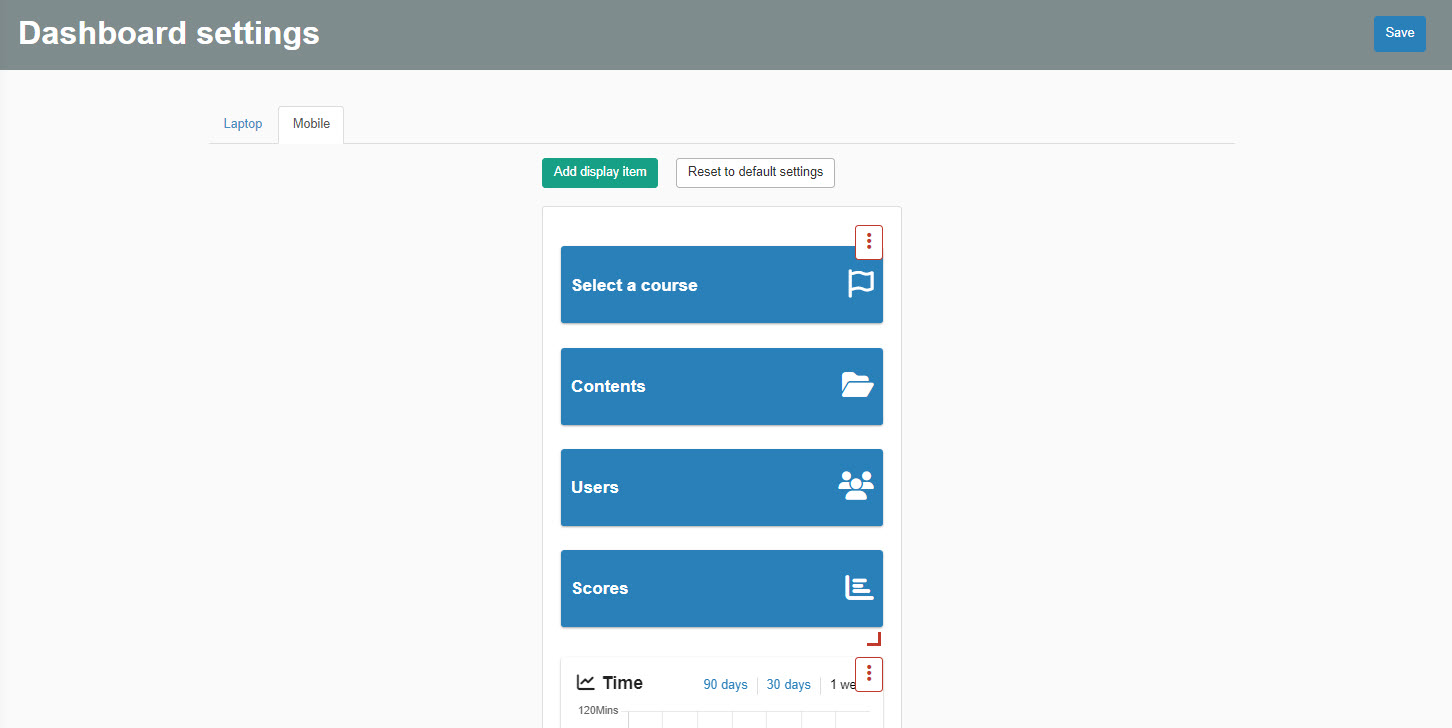
02. Check how the page looks on mobile
Click on the "Mobile" tab.
Customize the layout and size of panels for smartphones.