Management roles
Assigning roles allows an admin to share tasks on learningBOX.
*Batch registration via CSV available.
For more information, refer to Assign management roles by CSV.
Required
Privileged roles
01. Go to Manage users
Click on the "Manage users."
02. Roles
Each icon show the roles.
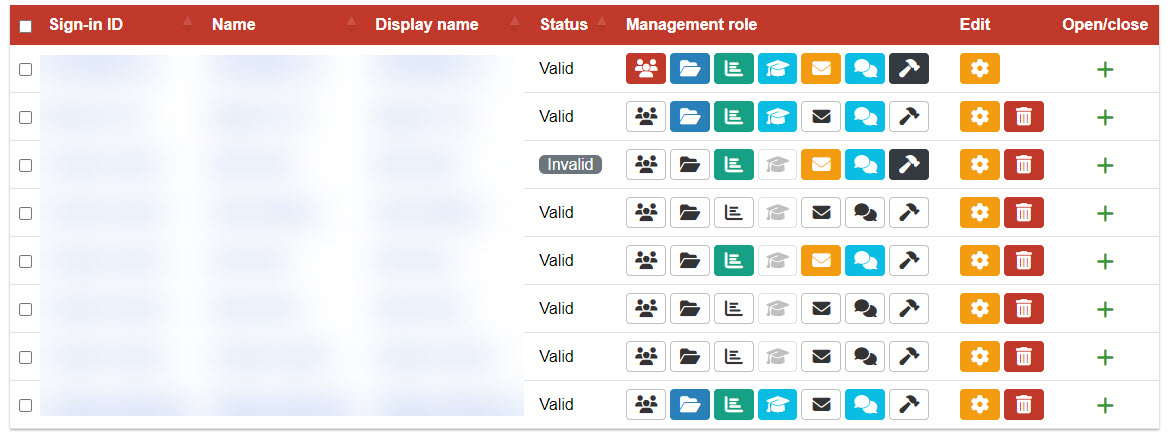
▼ Types of roles
- Content manager
- Management role of Grade manager
- Content manager(Assign)
- Email template manager
- Message box manager
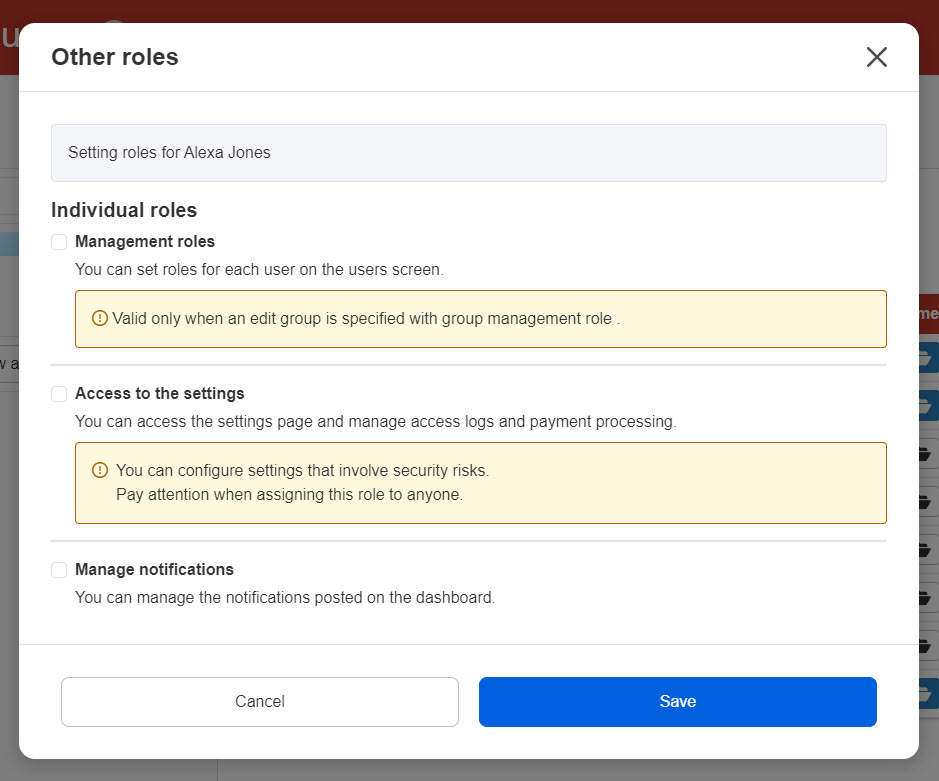
- Other permissions
Management roles contain the above seven roles.
The following explains the specifics of each role.
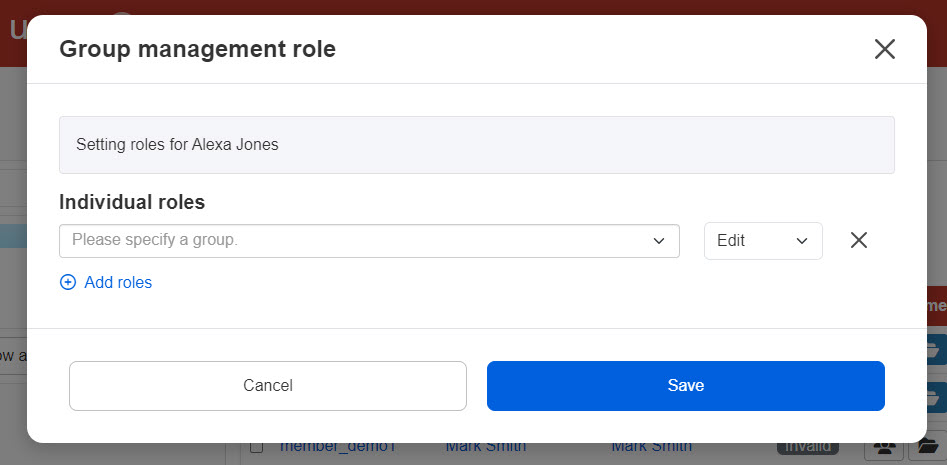
Group manager
This role allows users to manage users and groups on the Manage users page.
▼ How to set
Click the icon in the red frame below to assign the role on the Manage users page.

Select a group and choose Edit or View to assign.
The "+" icon allows you to add more permissions to other groups.
To delete a setting, click the "x" icon.
Save the settings.
*For more information about Group manager(View), refer to Role of View.
Content manager
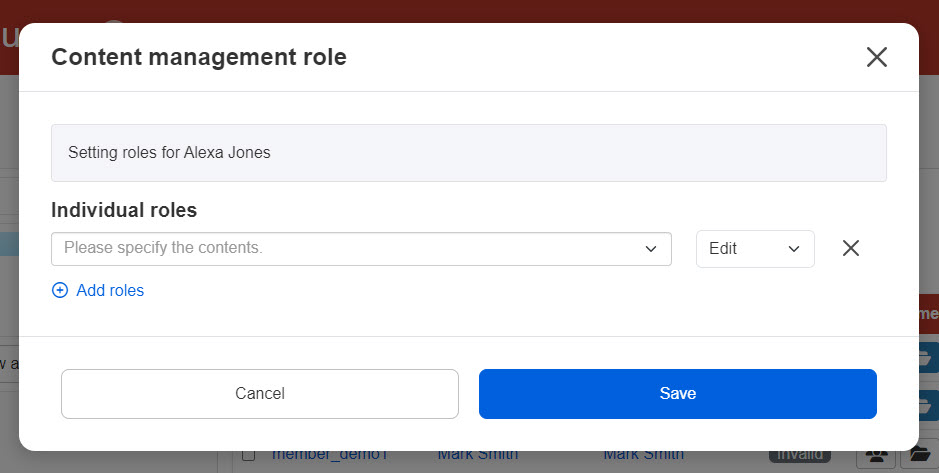
This role allows users to manage content.
▼ How to set
Click on the folder icon to assign the role on the Manage users page.

Select a course or folder and choose Edit or View as a permission.
Click on the "+" icon to add a permission.
To delete a setting, click the "x" icon.
Save the settings.
*For more information about Content manager(View), refer to Role of View.
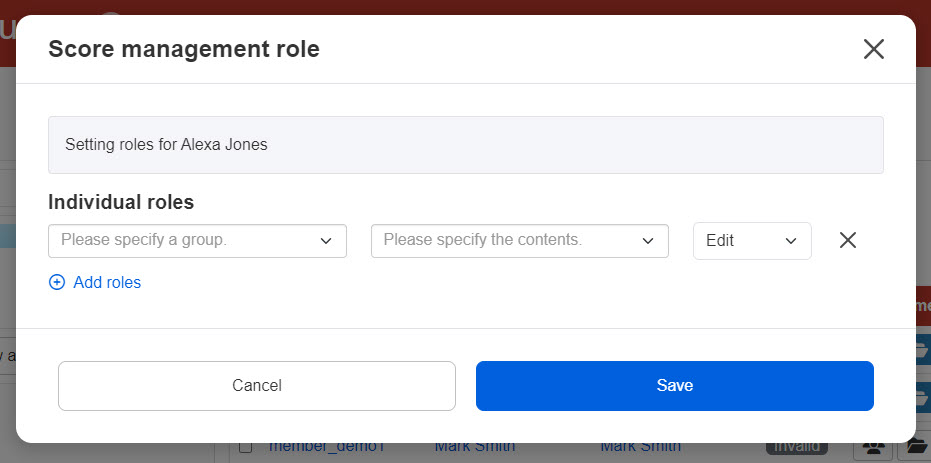
Management role of Grade manager
This role allows users to manage grades.
▼ How to set
Click on the graph icon to assign the role on the Manage users page.

Select a group.
Select a course(s) or folder(s).
The following four types of permissions are selectable.
・ Edit: Grading of submissions and grade management
・ View: View user's grades
・ Grading: Grading of submissions
・ Approval: Approve submissions before they are graded and returned according to the Grading workflow.
You can also add more permissions by clicking on "Add roles."
To delete a setting, click the x button.
Save the settings.
*For more information about Score manager(Edit), refer to Role of View.
Content manager(Assign)
This role allows users to assign content to a group(s) on the Manage users/content page.
Content assigner must be set together with Group manager or Content manager.
▼ How to set
Click on the group or file icon on the selected user, and choose the hat icon.
* Group manager and Content manager.

Select a group.
Select a course(s) or folder(s).
Click on the "+" icon to add a permission.
To delete a setting, click the "x" icon.
Save the settings.
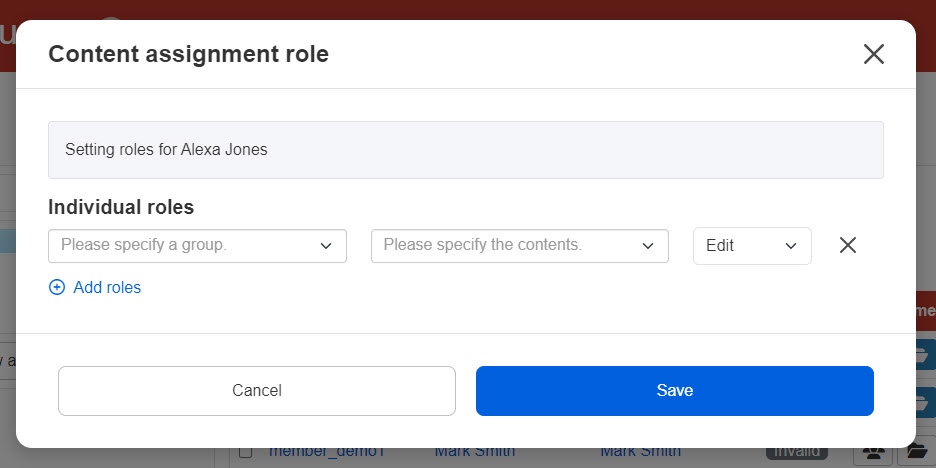
- Groups which you have a permission to can be selected.
- Courses/folders which you have a permission to can be selected.
Email template manager
This role allows users to edit email templates on Email settings. The emails will be sent from learningBOX.
▼ How to set
Click on the envelope icon on the Manage users page.

Select a group.
Click on the "+" icon to add a role.
To delete a setting, click the "x" icon.
Save the settings.
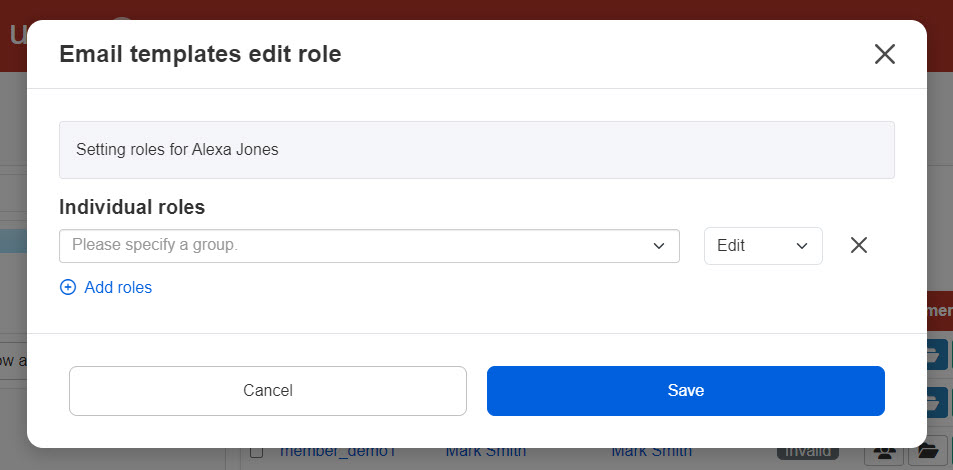
When you specify a group to send an email, only Invitation email notification and Grade management notification are editable.
*For more details, refer to Email settings by admin.
Message box manager
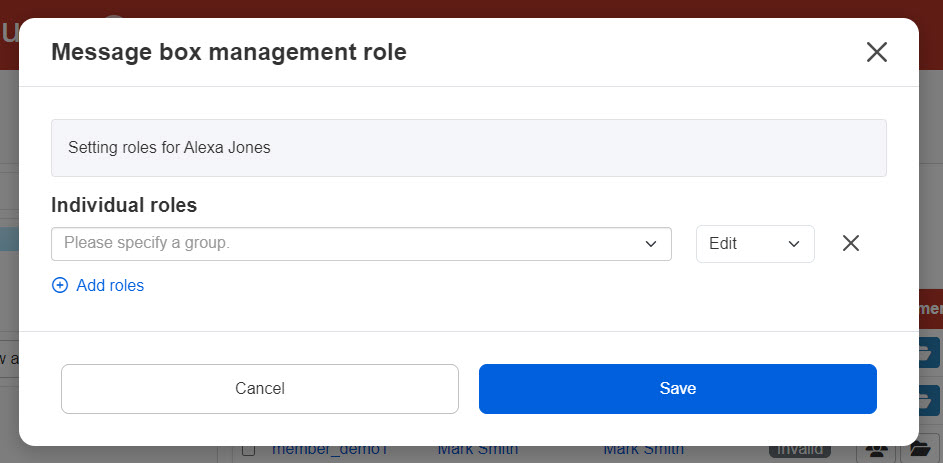
This role allows users to send a message to users/learners in addition to an admin.
*Users without this role can send a message only to an admin/users assigned this role.
▼ How to set
Click on the speech bubble icon on the Manage users page.

Select a group.
Click on the "+" icon to add a role.
To delete a setting, click the "x" icon.
Save the settings.
Other permissions
Other permissions are follows.
■ Role assigner
This role allows users to edit roles on the Manage users page.
* Group manager is required to assign this role.
■Co-admin
This role allows users to manage various settings in the learningBOX.
■ Notification manager
This role allows users to edit notifications posted on learningBOX.
▼ How to set
Click on the hammer icon on the selected user.

Tick a role you want to assing.
Save the settings.
