Assign management roles by CSV
This guide explains how to assign or update management roles for users in bulk using a CSV file.
*For more details, refer to Management roles.
Required
Management roles of Group manager (Edit) + Role assigner
Enter data into CSV
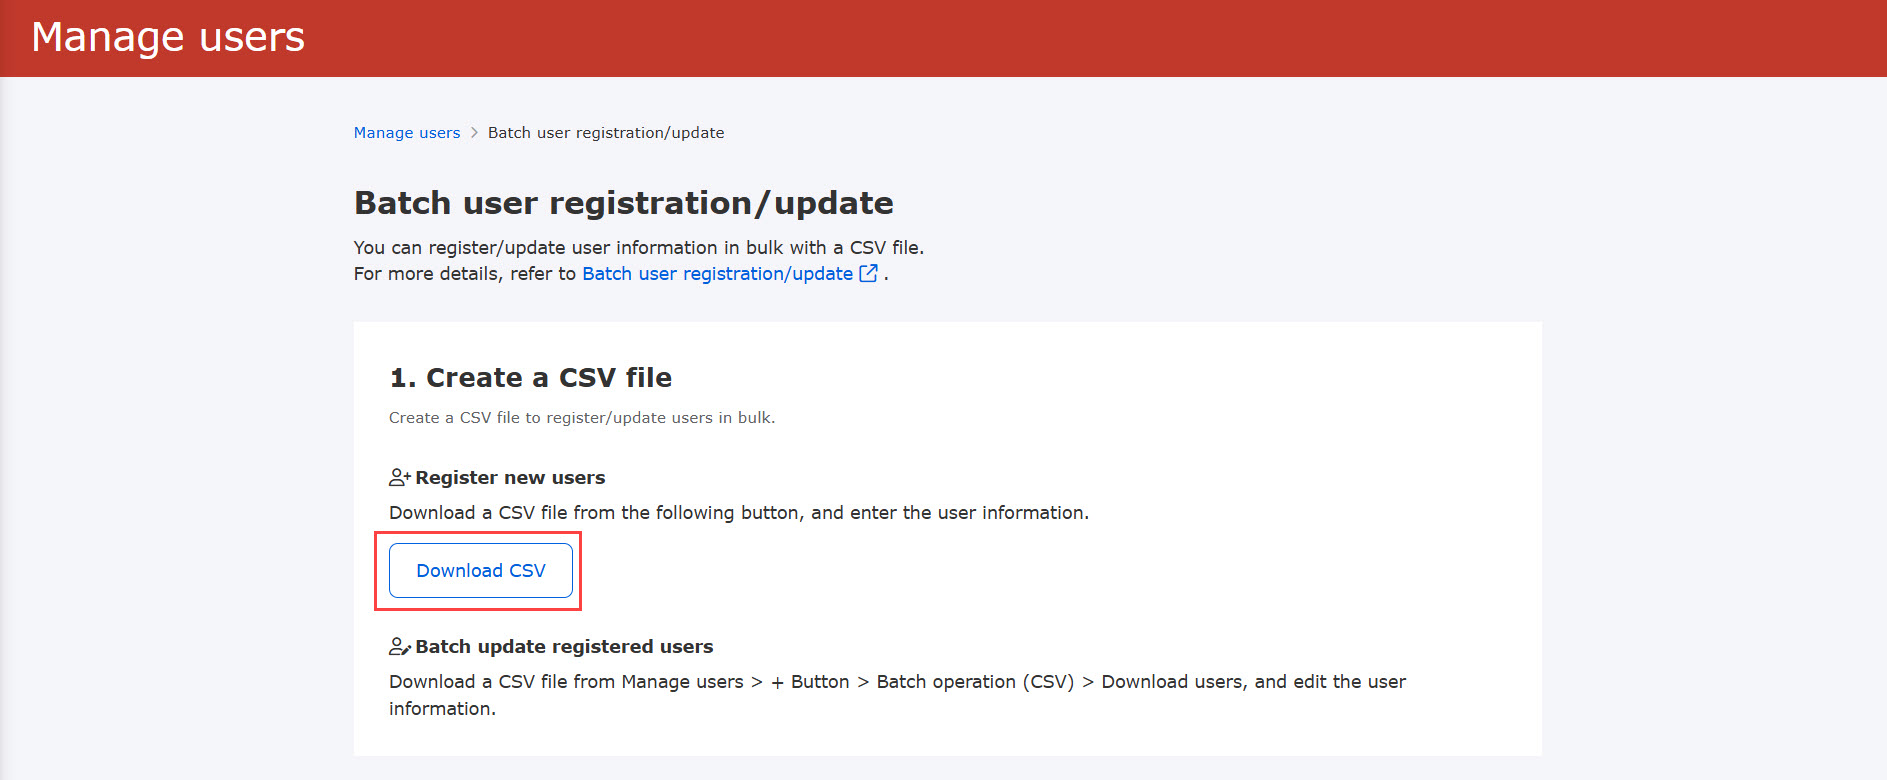
01. Go to the Manage users
Click "Manage users" on the Dashboard or the side menu.
Click the "+" icon on the Manage users page, > Batch operation (CSV) > Batch user registration/update.
02. Download CSV
Click Download CSV to download the template file.
03. Enter text on CSV
Enter the required information for each user.
Use one row per user to register or update their profiles.
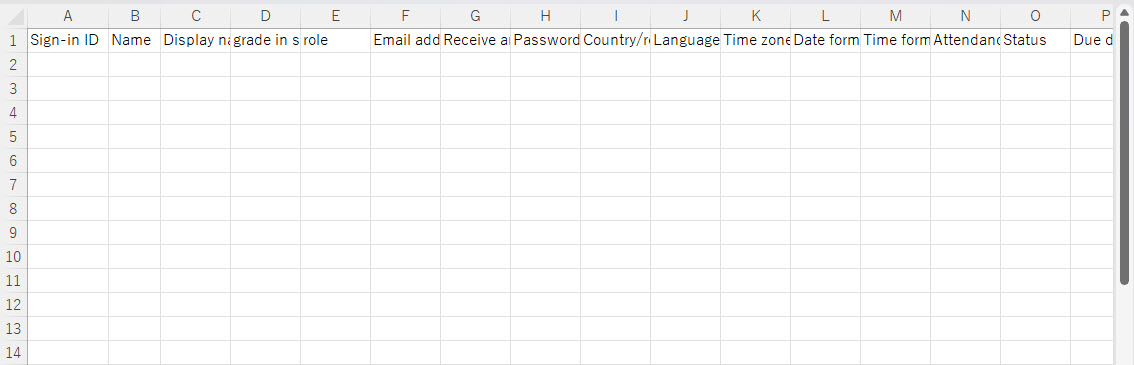
If you enable permission assignment per segment on the Segment settings, the following managemnet roles will be included as columns in the downloaded template, in addition to the standard roles:
・ Content manager
・ Grade manager
・ Content manager (Assign)
Formatting rules
Follow the specific entry formatting rules when inputting management roles.
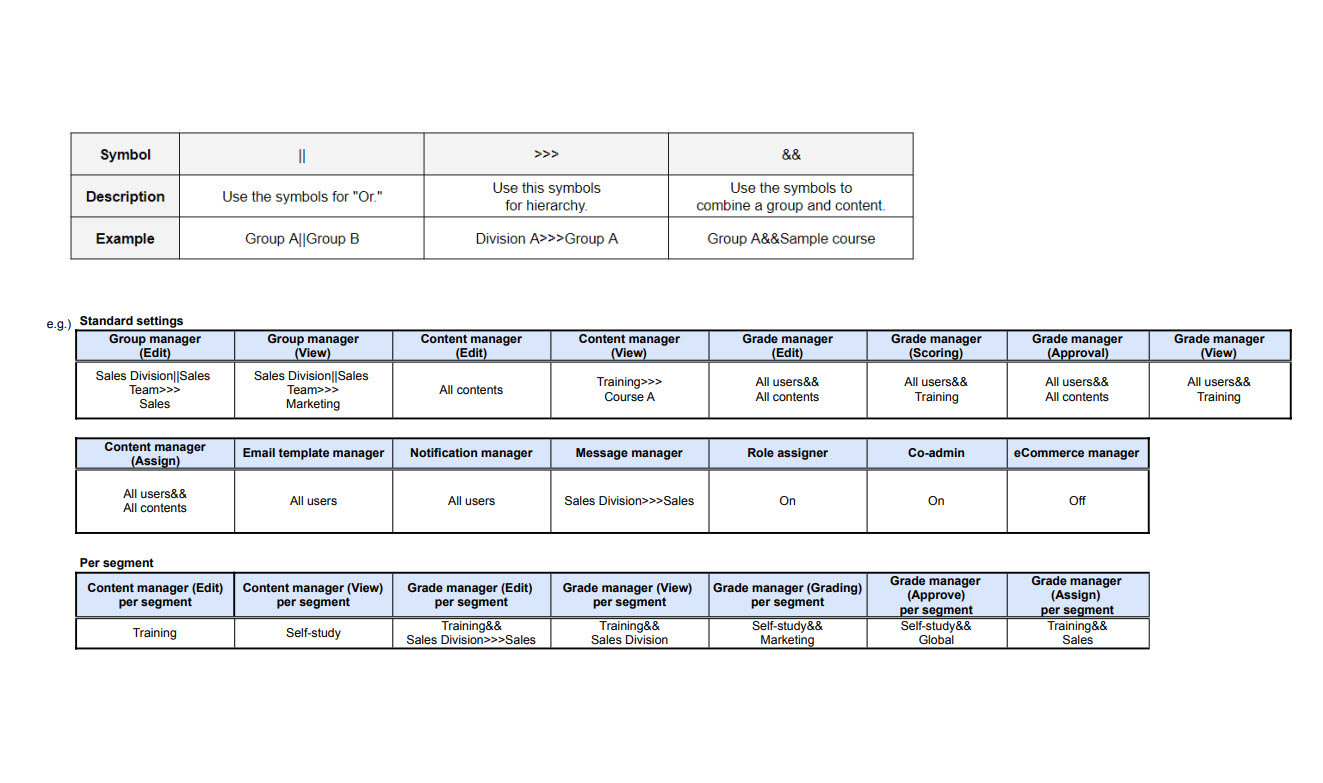
*Management roles for each segment are identified and designated by their unique segment codes.
Conditions to assign roles
Only users with Role assigner permissions can use this function.
If a user without this role attempts to upload the file, an error message will appear.
If you manually register a few sample users directly within learningBOX first, editing the CSV becomes much easier.
You can download a template by navigating to Batch operation (CSV) > Download users.
Update flag
Entering "add" (or leaving it blank), "delete", or "save" in the update flag column determines how the system handles user permissions:
- add: Adds the specified management role to the user.
- delete: Revokes the specified management role from the user.
- save: Overwrites all existing roles for the user with the new roles specified in the row.
▼ Applicable Management Roles
*This applies to all standard roles and segment-specific management roles:
- Management role of Group manager (Edit)
- Group manager (View)
- Management role of Content manager (Edit)
- Content manager (View)
- Grade manager (Edit)
- Grade manager (Grading)
- Grade manager (Approval)
- Grade manager (View)
- Content manager (Assign)
- Email template manager
- Notification manager
- Message manager
e.g.)
The following is an example scenarios.
・Kim: No permission ⇒ Group manager (Edit) for all users
・ Henry: Group manager (Edit) ⇒Keep the permission for Group manager
・Jim: No permission ⇒ Delete account
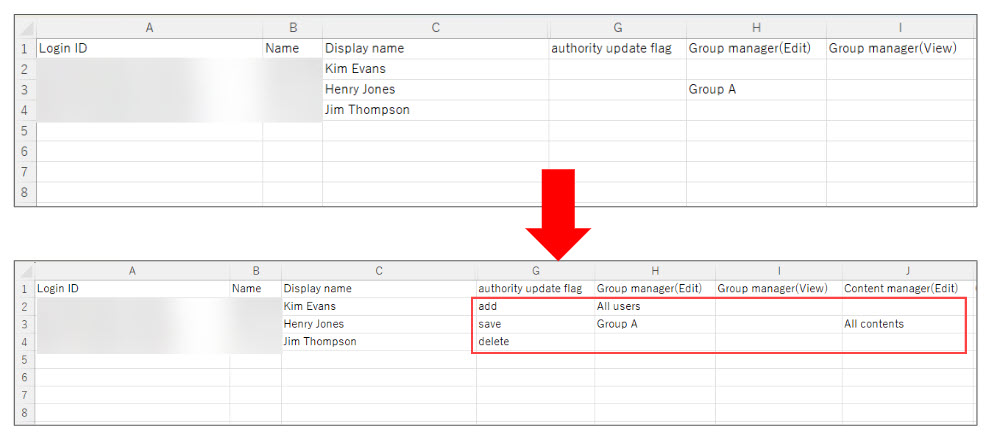
The "delete" flag cannot be applied to newly registered users who do not yet exist in the system.
Upload files
Upload your completed or edited CSV file to apply the changes.
01. Go to the Manage users
Click the "+" icon on the Manage users > Batch operation (CSV) > Batch user registration/update.
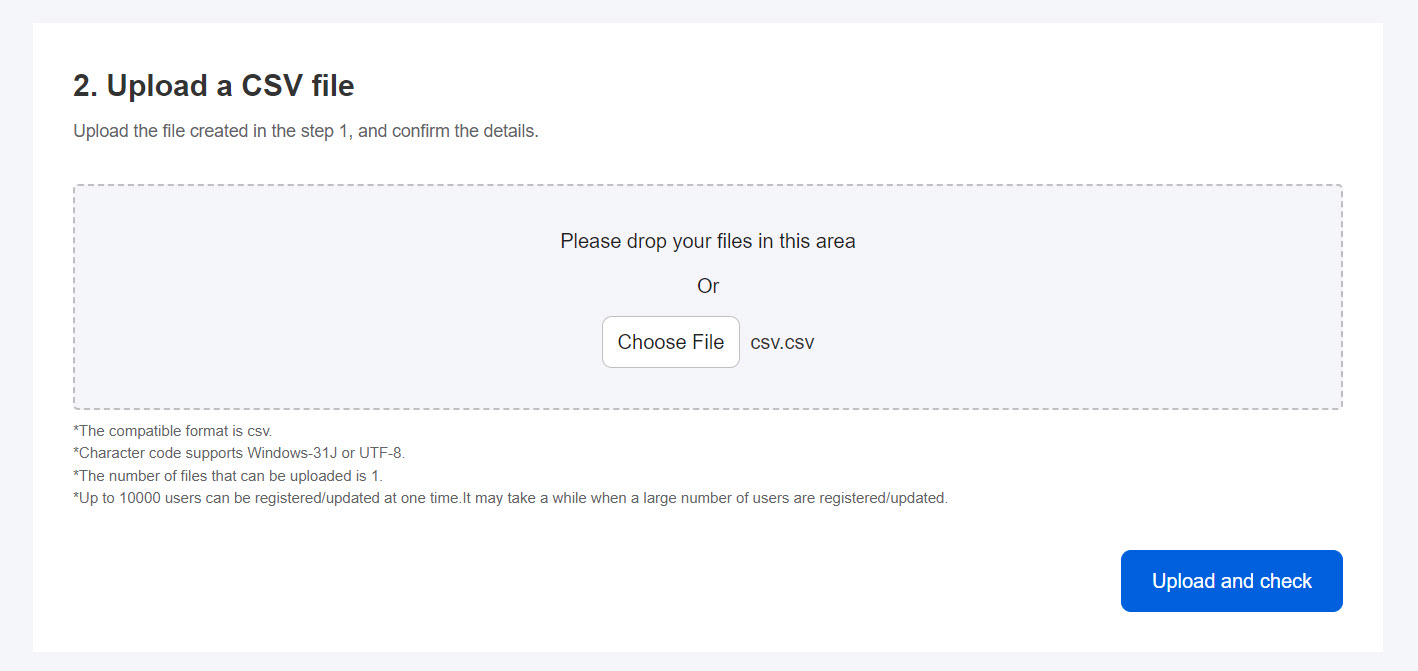
02. Upload
Drag and drop your edited CSV file into the designated gray area, or click Choose File to select it from your device.
03. Confirm uploaded data
A preview list of the uploaded users and changes will be displayed.
Verify the information and click "Execute registration."

The following window will appear.
To automatically invite your users, tick the box.
You can select a pre-made email template from the dropdown list and customize its text by clicking Edit.
Click "Send at" to schedule a specific date and time for the invitation emails to go out.
*For more details on editing email templates, click the question mark icon.
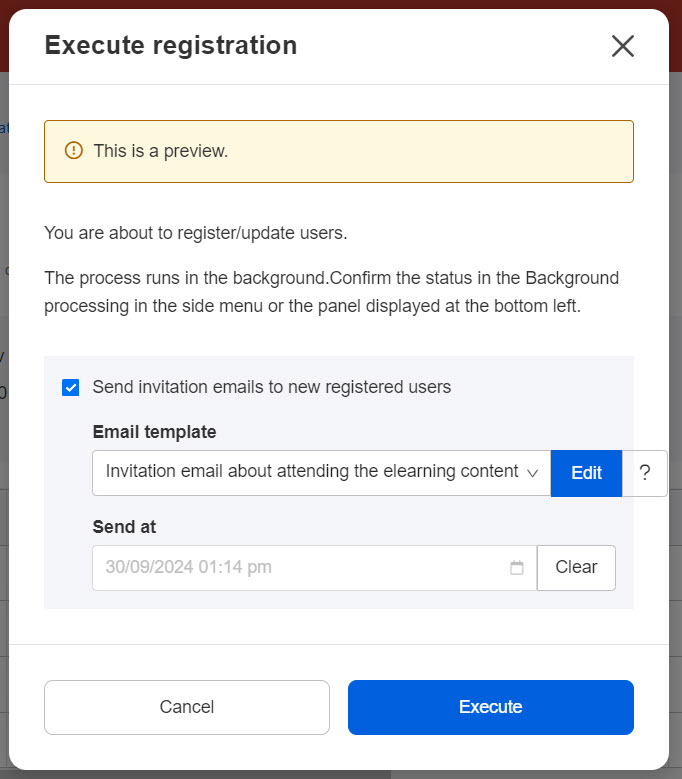
After finalizing your preferences, click Execute.
The registration process will run in the background.
You can track the processing status via the status panel in the lower-left corner of the page, or by navigating to "Background processing" in the side menu.