Assign management roles by CSV
This section describes how to assign management roles to users in bulk via CSV.
*For more details, refer to Management roles.
Required
Management roles of Group manager(Edit) + Role assigner
Enter text on CSV
01. Go to the Manage users
Click on the Manage users on the Dashboard or the side menu.
Click the "+" icon on the Manage users page > Batch Operation (CSV) > Batch user registration/update
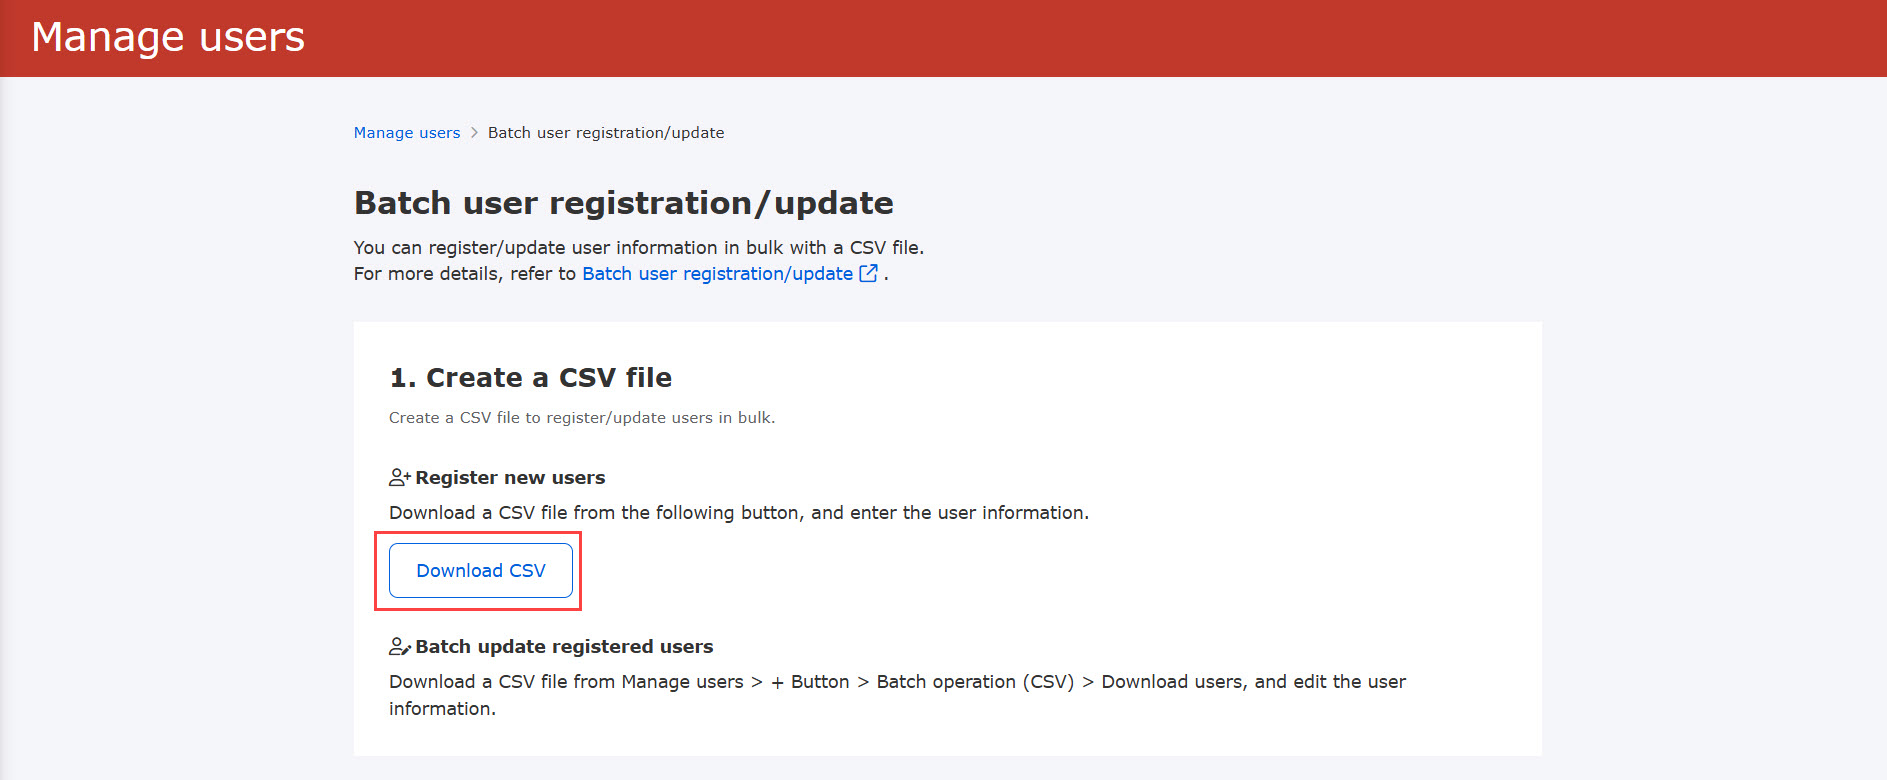
02. Download CSV
Click on the Download CSV.
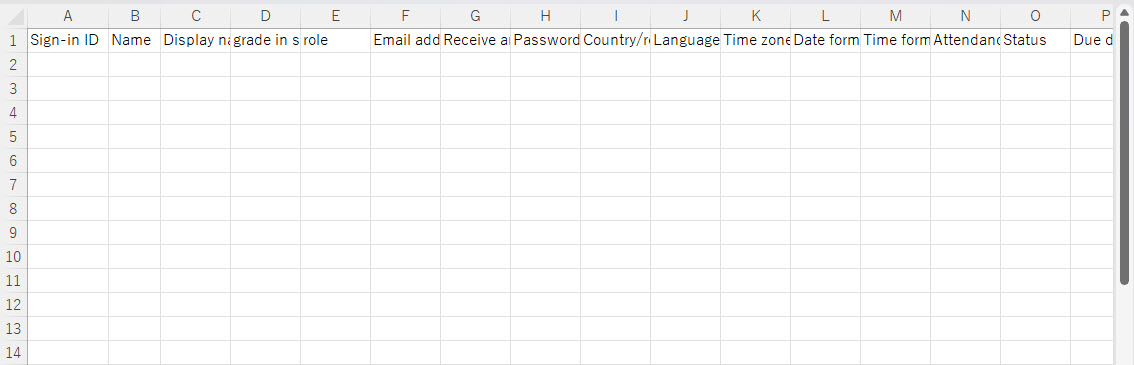
03. Enter text on CSV
Enter user information for one user in each row to register/update.
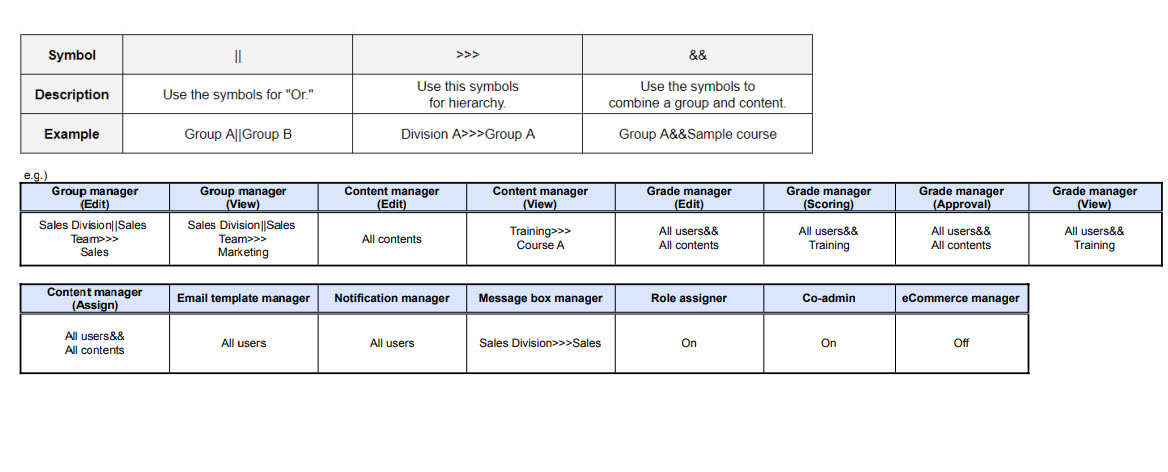
Rules
The following image shows the rules when entering management roles.
Conditions to assign roles
Role assigners can use this function.
Without the role, an error message will be shown.
When you register a few users on learningBOX first, it will be easier to edit a CSV file.
You can download the file from Batch operation (CSV) > Download users
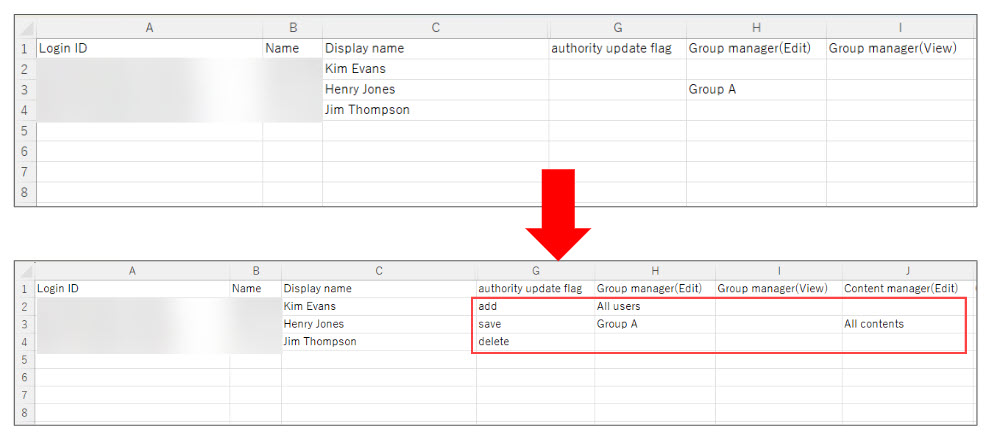
Update status
Specifying "add (or blank)", "delete", or "save" in this column allows you to change the privileges of a user who has already been granted privileges or to grant new privileges to a user who does not have them.
- add: add authority
- delete: Deletes the specified role(s)
- save: update role(s) and overwrites the existing one(s)
*Management roles are as follows
- Management role of Group manager (Edit)
- Group manager(View)
- Management role of Content manager (Edit)
- Content manager(View)
- Management role of Grade manager (Edit)
- Grade manager(Grading)
- Grade manager(Approval)
- Grade manager(View)
- Content manager(Assign)
- Email template manager
- Notification Management Authority
- Message box manager
<Example
Make the following changes.
User 001: No permission ⇒ Group management permission
User 002: Group management authority ⇒ No authority
User 003: Group management authority ⇒ Group management authority + Content management authority

"Delete" cannot be set for new users.
Upload Files
Upload the created/edited CSV file.
01. Go to the Manage users
Click the "+" on the Manage users > "Batch Operation (CSV)" > "Batch User Registration/Update".
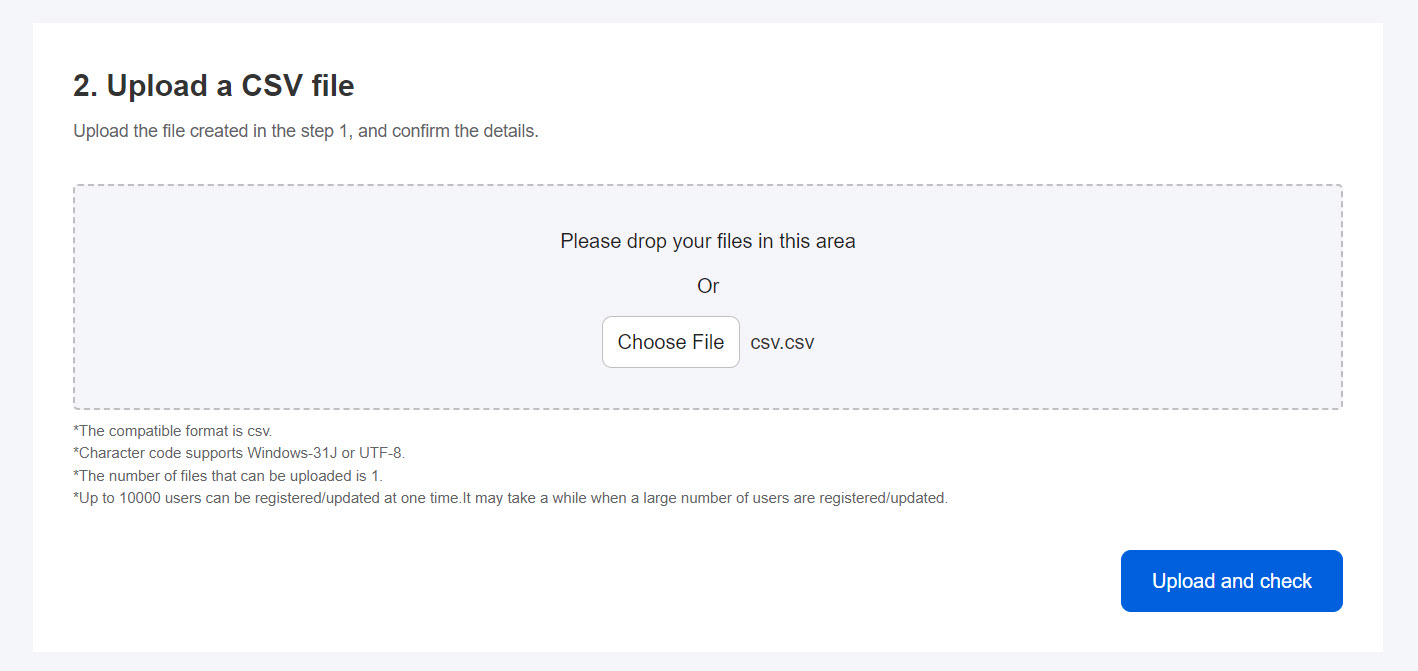
02. Upload
Drag and drop the edited CSV file into the gray area or select it from the Choose File and click "Upload and check."
03. Uploaded data
Uploaded users will be listed.
Click Execute registration.

The following window will be displayed.
To send an invitation e-mail to users, tick the "Send invitation e-mail to new registered users."
You can also select an email template from the list and edit the content by clicking the Edit.
Click on the "Send at" to specify the send date and time.
*For more details on editing email templates, click the question mark icon.
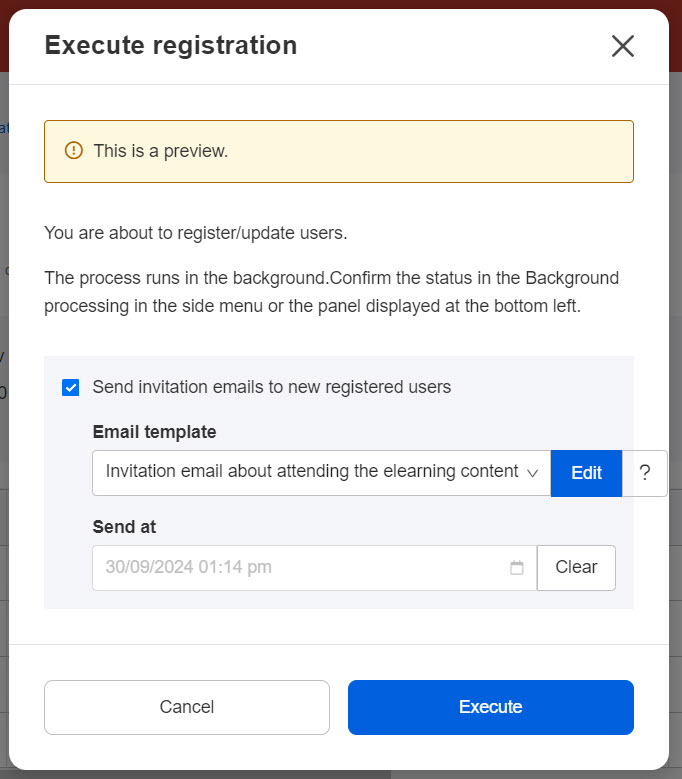
After completing the settings, click on the Execute.
The registration process runs in the background.
The status of processing can be checked in the panel displayed in the lower left corner of the page or in the "Background processing" in the side menu.