Subscription
Apart from the method of charging per product as in the normal e-commerce function, there is the method of "account billing," in which you can freely take a product (educational material) for a certain period of time by purchasing an account.
With account billing, you can choose between the following two billing timing options
Charging at login
Charging at the learner's timing
Required
Customization options, EC options, EC function access rights
- When a learner signs up for account billing, the contract will automatically continue for each selected period (e.g., one month)
- Learners registered on the administrator's side cannot use account billing
Account Billing Setup
The first step is to configure settings related to account billing.
01. Setting page
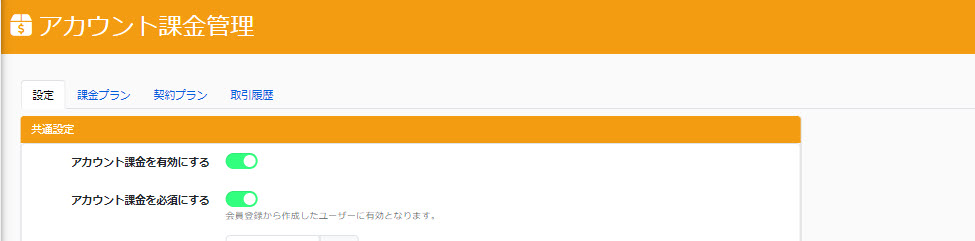
Select "Account Billing Management" from the side menu and open the "Settings" tab on the screen that opens.
02. Turn on the toggle key
The first step is to configure settings regarding the use of account billing.
If you wish to use account billing, be sure to turn the "Enable account billing" toggle On.
In addition, please set the following according to the timing of billing.
- If you want to charge immediately after login: Turn "Enable Account Billing / Require Account Billing" On.
- For billing at the learner's timing: Only "Enable account billing" is set to On.
03. Trial period for initial purchase
A free trial period can be set up for learners prior to the start of the plan contract.
Please enter a numerical value.
Please note that the trial period will begin counting as of and including the day you start.
Example: If you sign up for a plan with a trial period of 10 days and a setup date of March 1 at 23:00
The 10-day trial period begins at midnight on March 1 and ends at 23:59:59 on March 10.
04. Publish the membership rank of the plan.
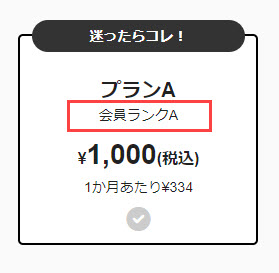
When the toggle for "Reveal plan membership rank" is set to On, the membership rank will be displayed on the plan selection screen.
05. Specified Commercial Transactions Law Notation
The description based on the Act on Specified Commercial Transactions is required, so please be sure to enter the content.
*"Please click here for the Specified Commercial Transactions Law Guide. to view the Specified Commercial Transactions Law Guide page.
You can also click on "Show Example Sentences" to view example sentences.
06. Terms of Use
To display the Terms of Use, turn the "Display Terms of Use" toggle On.
Also, please include the terms and conditions of use that will be displayed in the input field.
Login setingsPlease note that if the Terms of Use are also set up on the screen, they will be displayed twice.
07. GMO Settings
Register the GMO-PG information that you have previously registered on your side.
Set the following items:
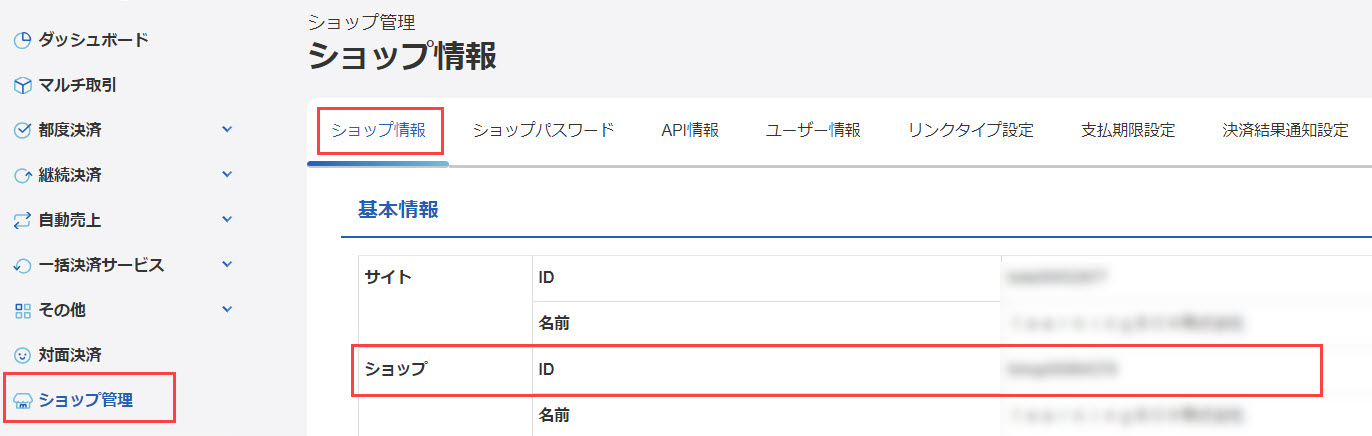
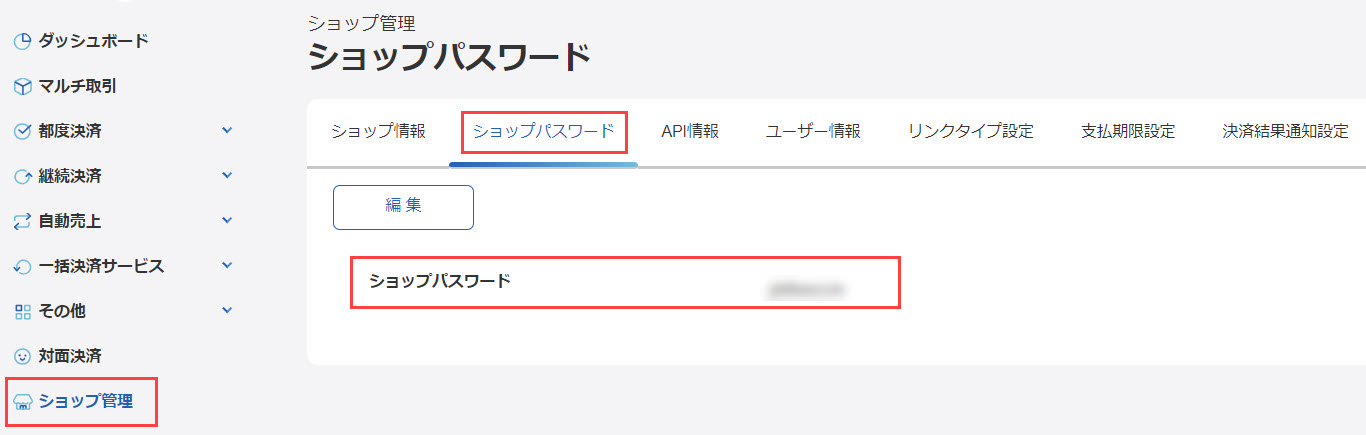
Store ID / Shop Password
Enter the ID in "Shop Management > Shop Information > Shop" ⇒ Enter the store ID.
Enter the store password in "Shop Password" in "Shop Management > Shop Password" ⇒ Enter the store password.
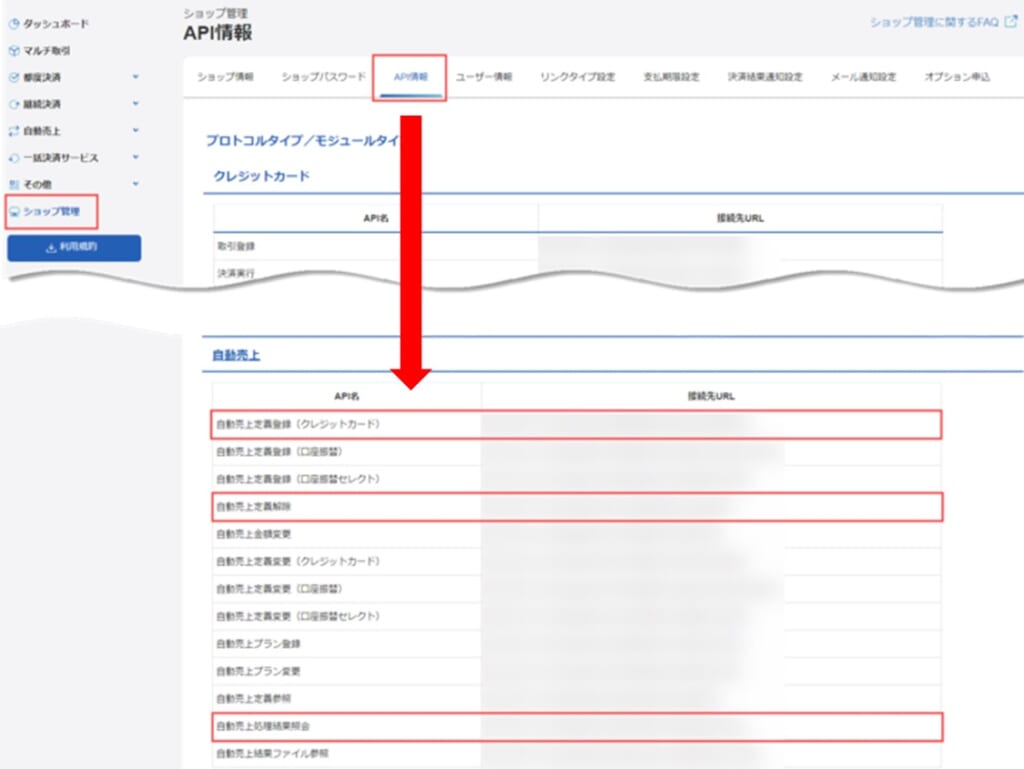
Automatic Sales Definition Registration API / Automatic Sales Definition Release API//Automatic Sales Result Retrieval API
It is located at "Shop Management > API Information > Auto Sales."
Automatic Sales Definition Registration (Credit Card) ⇒ Input to Automatic Sales Definition Registration API
Automatic Sales Definition Cancellation ⇒ Input to the Automatic Sales Definition Cancellation API
Inquire the result of automatic sales processing ⇒ Input to the API for automatic sales result acquisition
▼Sandbox Environment
A "sandbox environment" is a test environment.
Turn the toggle on for test operation, and turn the toggle off for production operation.
The "Automatic Sales Definition Registration API/Automatic Sales Definition Release API/Automatic Sales Result Retrieval API" is different between the production and test environments, and must be changed when migrating to production.
08. URL to be entered on the GMO side
The information on the learningBOX is registered on the GMO-PG side.
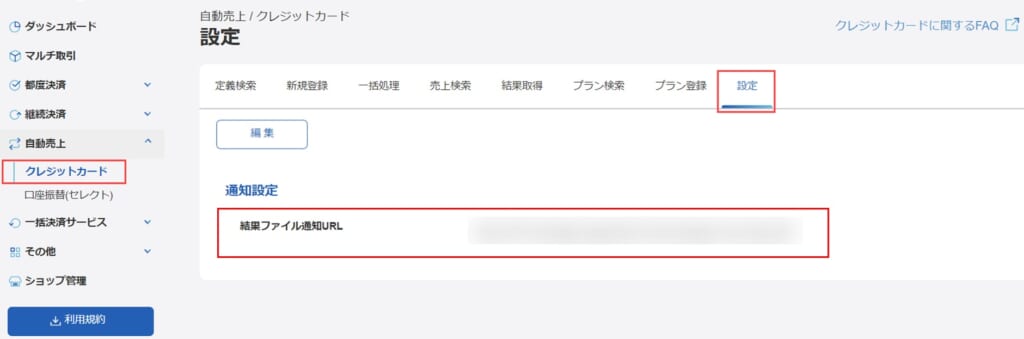
▼Auto Sales / Credit Card >> Settings
Enter the "Result File Notification URL" under "Auto Sales > Credit Card > Settings."
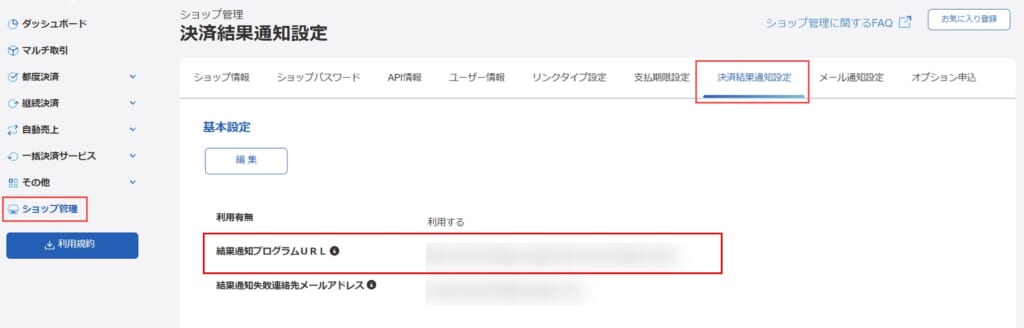
▼Store Management >> Setup Payment Result Notification
Please enter the "Result Notification Program URL" in the "Shop Management > Payment Result Notification Settings" section.
billing plan
Once you have completed the settings related to account billing, you can then create a billing plan.
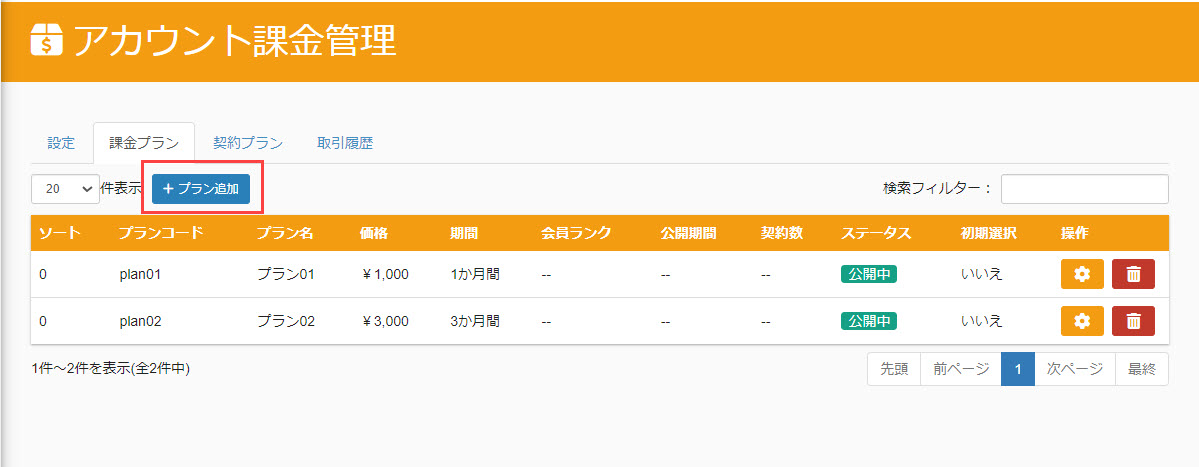
01. Open the billing plan screen
Select "Account Billing Management" from the side menu and open the "Billing Plans" tab on the screen that opens.
02. Create a new billing plan
To create a new billing plan, click "+ Add Plan" at the top of the screen.
03. Settings
The following window will be displayed.
Fields marked with an asterisk (*) are required.
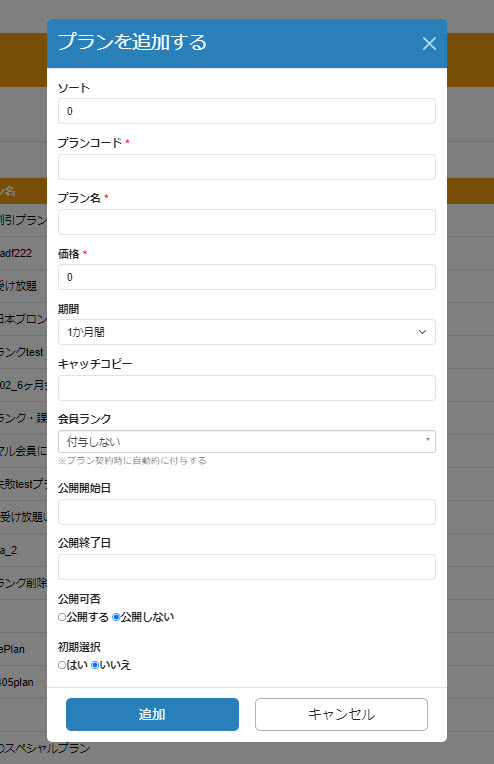
▼ Sort by
Any value can be set.
On the Billing Plans List screen, the smaller numbers entered in this "Sort" field are displayed in order of decreasing value.
▼ Plan Code
Set a code that is unique.
▼ Plan Name
Enter the name of the billing plan.
▼ Price
Please enter a price.
▼ Period
Please select the billing plan availability period from the pull-down menu.
▼ Catch Copy
You can set the catchphrase for your billing plan.
▼Member Rank
It is possible to automatically assign specific membership ranks to learners who have purchased such plans.
To set, please specify the membership rank from the pull-down menu.
Start/end date of release
You can set the start and end dates for the publication of your billing plan from the calendar.
▼ Availability of public
Please select whether or not to publish the relevant billing plan.
▼Initial settings
If "Yes" is ticked, the plan will be selected by default when the learner opens the plan selection screen (it is possible to re-select a plan later).
If "No" is ticked, no particular initial selection is specified.
04. Listing of billing plans
Once a new billing plan has been created, it will appear in the list.
05. Edit billing plan contents
To edit the contents of a billing plan you have created, click on the gear icon to the right of the plan in question.
The items to be edited are the same as when creating a new item, so please refer to "03 Setting of each item" above.
06. Delete billing plan
To delete a billing plan you have created, click on the trash can icon to the right of the plan in question.
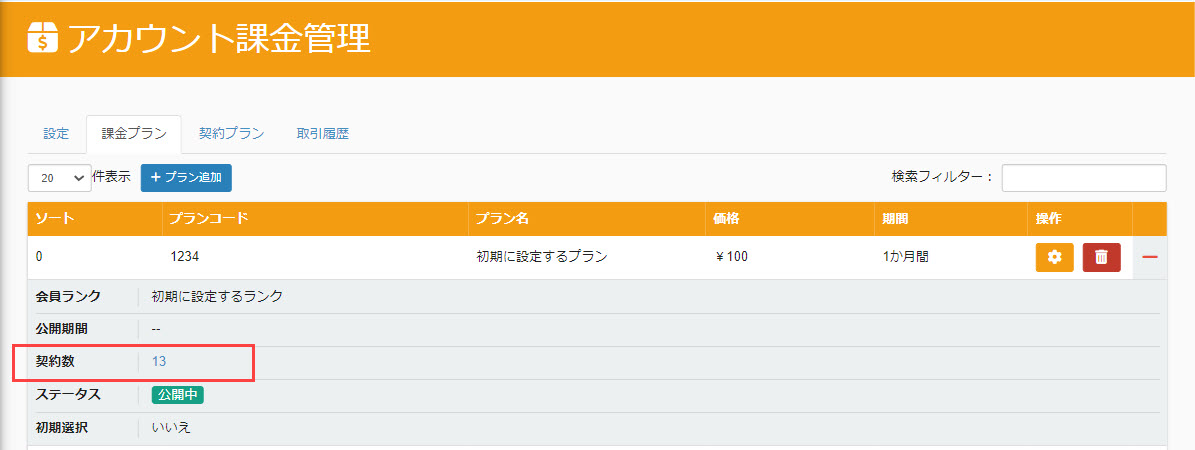
07. Number of contracts
Information on the "number of subscriptions" is displayed for each billing plan.
Clicking on this displayed number will take you to the "Contract Plans" tab, where all contracts for the plan in question will be listed.
Use of account billing (learner side)
Next, we will explain the process of contracting account billing on the learner side, broken down by billing timing.
Charge when logged in.
01.Membership Registration
First, the learner will apply for membership.
The administrator will then approve the application and the learner will be able to log in.
For more information about membership registration, please contact us.Self-registration.
02. Plan Selection
After the learner logs in after registering as a member, the following plan selection screen will appear.
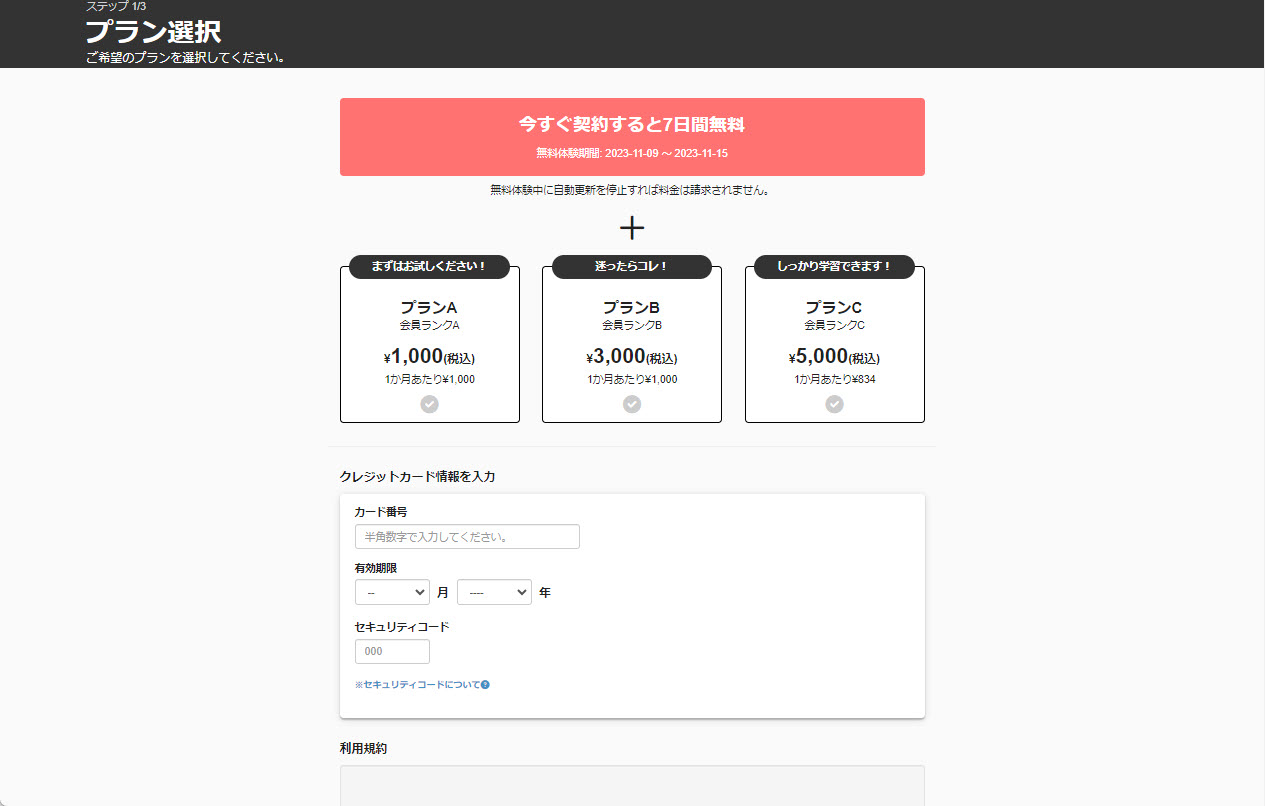
▼Trial Period
If you have set up a "first-time purchase trial period" in account billing, it will appear at the top of the screen.
(In the above image, 7 days is set as an example.)
▼ Plans
Plans available for purchase are listed.
The learner selects the desired one based on the catchphrase, membership rank, and amount.
▼Enter credit card information
Enter the credit card information used to purchase the plan.
Terms of Use
If you have set up terms of service with account billing, you will see them here.
In addition, a check box for agreement to the Terms of Use will also be displayed.
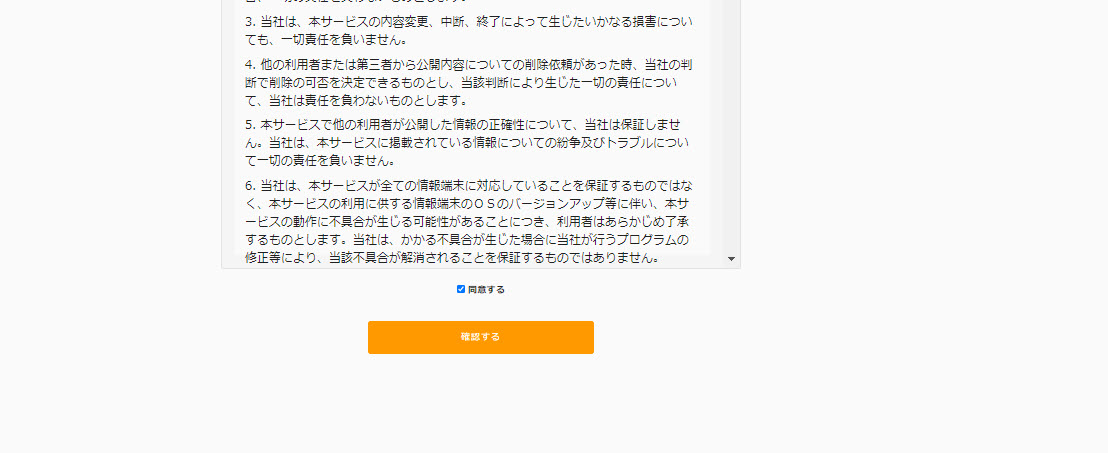
When all settings are complete, click "Confirm".
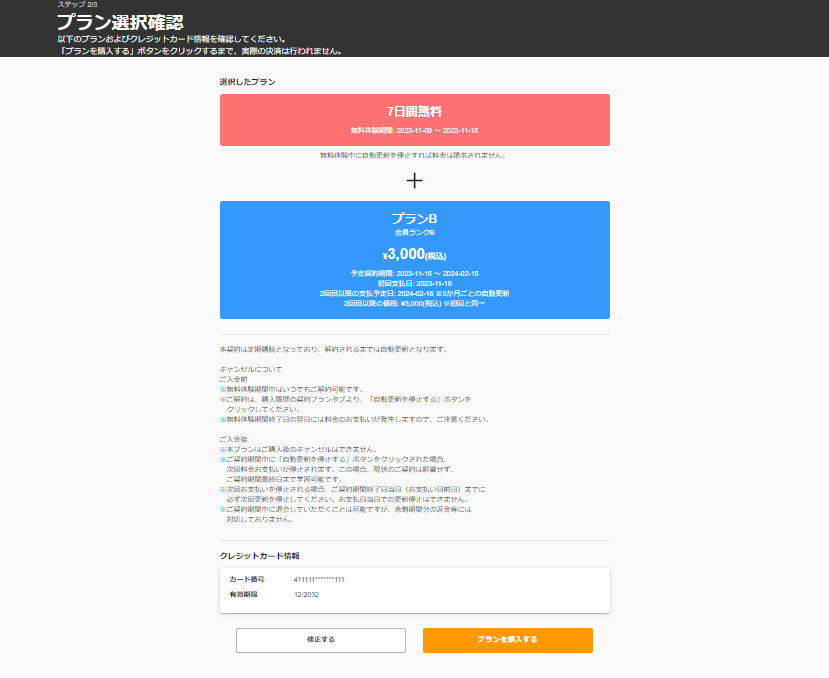
03. Confirm plan selection
After plan selection is complete, you will be redirected to the screen shown below.
Here you will see the details of the plan you selected, the Specified Commercial Transaction Law description, and your credit card information.
After confirming the contents, click "Purchase Plan.
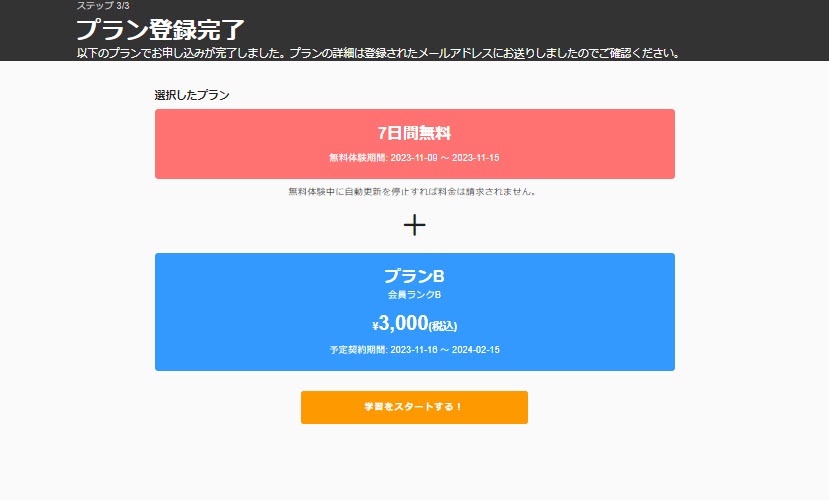
04. Plan Registration Completed
Upon completion of plan registration, you will be redirected to the screen shown below.
Learners "Start Learning!" to start learning.
Charging at the learner's timing.
01.Login
After registering, learners log in directly without going through the "Plan Selection" screen.
02. Open the plan selection screen.
Click on your account name in the upper right corner of the screen and select "Purchase History.
On the "Purchase History" screen that opens, select the "Contract Plan" tab and click "Select a Plan.
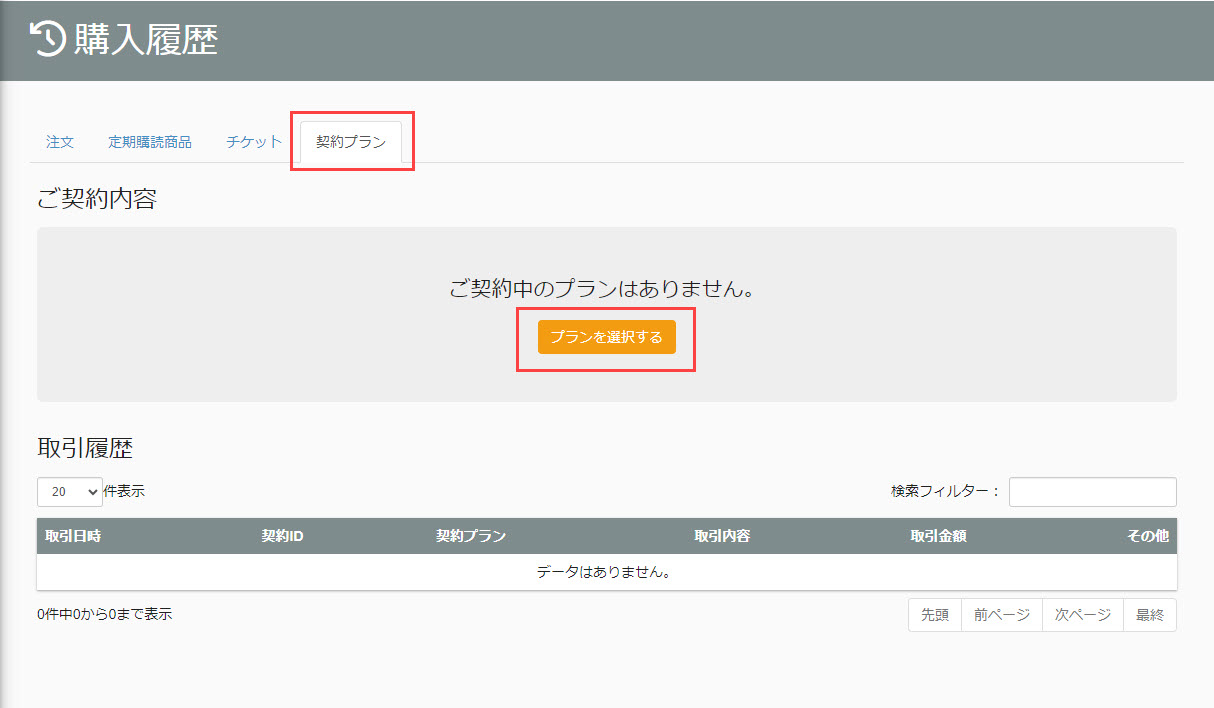
Subsequent operations areCharge when you log in."Please refer to the case as it is the same as in the case of
Contract Plan
Once the learner has signed up for account billing, the details can be viewed on the "Account Billing Management" > "Contracted Plans" screen on the administrator's side.
01. Open the Contract Plan screen.
Select "Account Billing Management" from the side menu and open the "Subscription Plans" tab on the screen that opens.
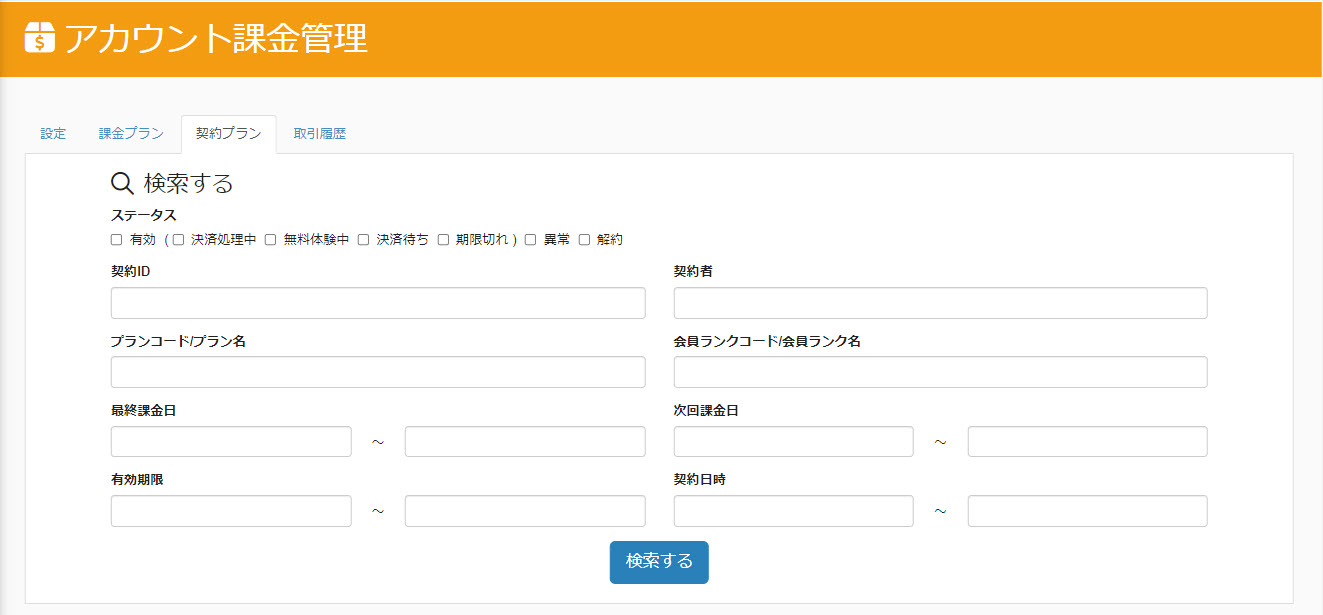
02. Search for a contract plan
At the top of the screen, there is a search field that allows you to narrow your view by status, contract ID, etc.
Please set your desired content and click "Search".
Contract plans that match your search criteria are listed at the bottom of the screen.
03. Confirmation of contract details
You can see the details for each contract at the bottom of the "Contract Plans" screen.
04. Cancellation
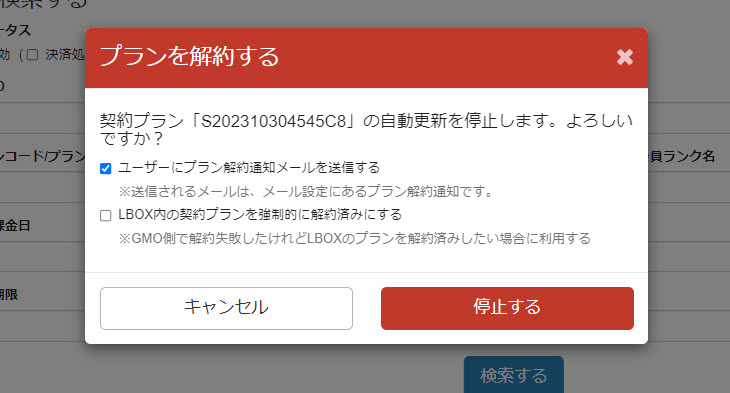
You can cancel your subscription by clicking the "Cancel" button to the right of the applicable subscription plan.
Clicking the button will open the following pop-up window.
Please confirm the contents and click "Stop".
▼Send plan cancellation notification emails to users
If you wish to send a cancellation notification email to the learner, please tick the box.
Forcing contracted plans in ▼LBOX to be already cancelled
Normally, the plan is available until the expiration date of the contract even if the plan is cancelled, but if you wish to make the plan unavailable upon cancellation, please tick the box.
Transaction History
A list of the history of transactions (contracts, billing, cancellations, etc.) that have occurred in all contracts can be viewed at a glance.
01. Open the transaction history screen.
Select "Account Billing Management" from the side menu and open the "Transaction History" tab on the screen that opens.
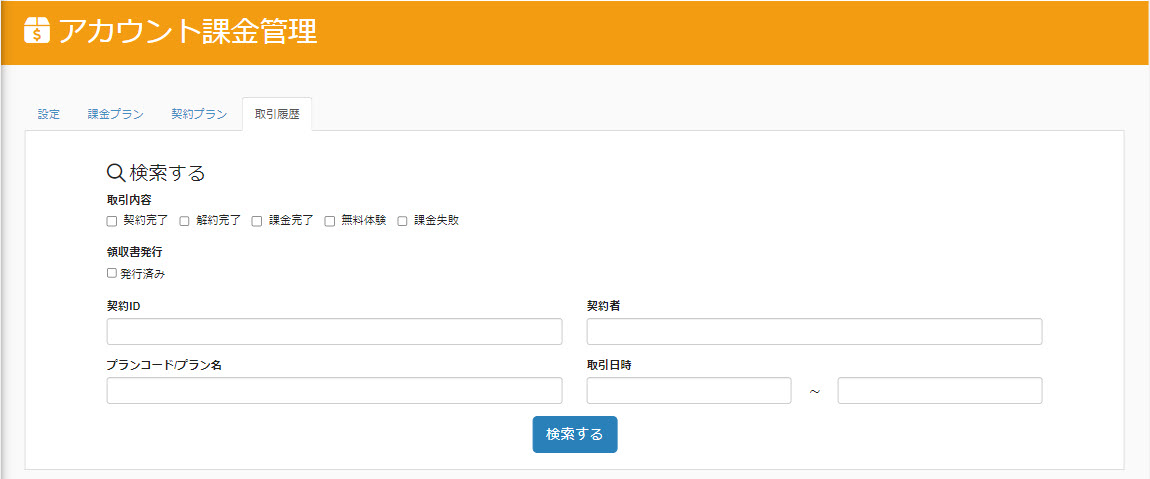
02. Search Transaction History
At the top of the screen, there is a search field that allows you to narrow down the display by transaction details, contract ID, etc.
Please set your desired content and click "Search".
Transactions matching the search criteria are listed at the bottom of the screen.
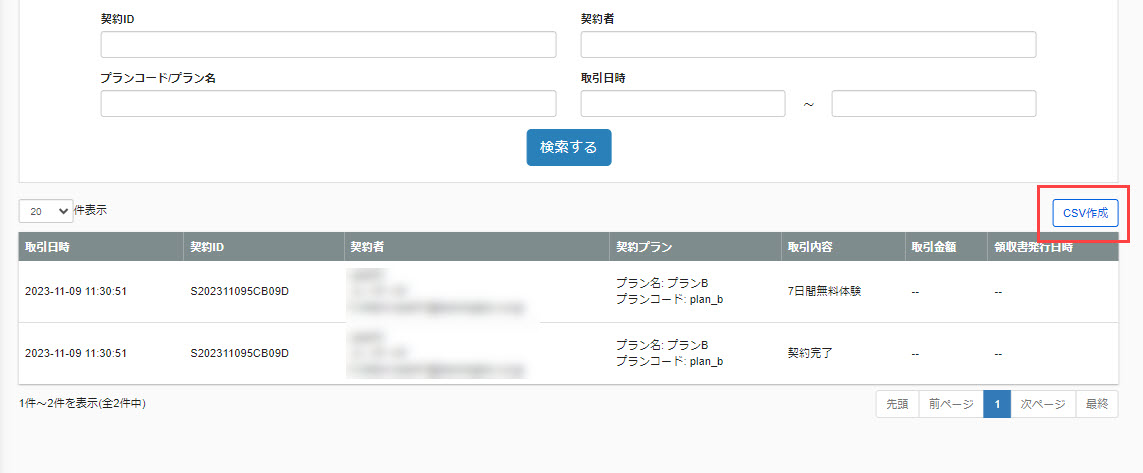
03. Confirmation of transaction history
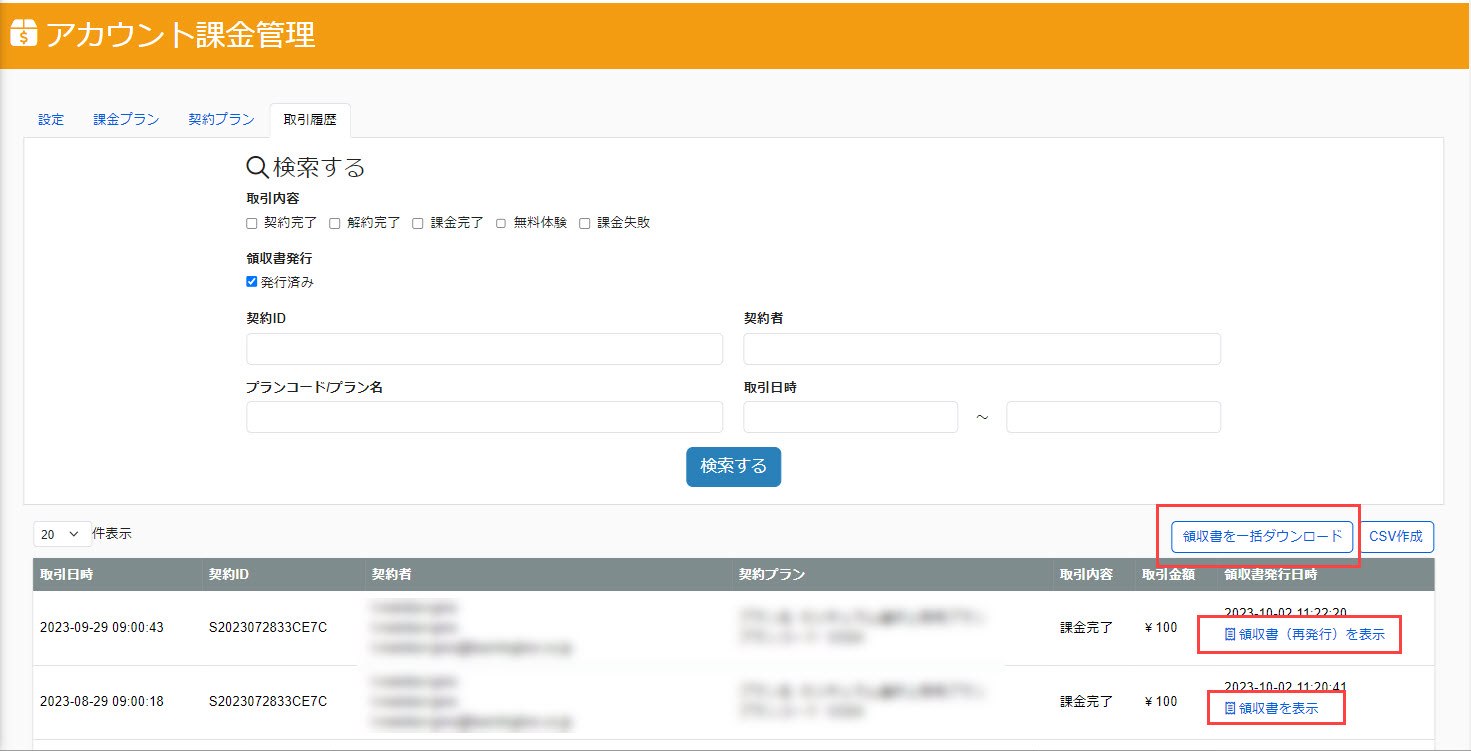
At the bottom of the "Transaction History" screen, you can see the details for each transaction.
04. CSV Creation
By clicking "Create CSV," you can output the list of transaction history displayed on the screen in CSV format.
05. Confirmation of receipt
In the "Receipt Issued" section of the search field, tick "Issued" and click "Search".
Click "View Receipt/View Receipt (Reissue)" for each transaction to review the contents.
You can also download all the receipts in the displayed list of transactions at once by clicking on "Download Receipts Batch" on the right side of the screen.