Batch user registration/update
Users can be registered and updated in bulk via CSV.
Register users in bulk
Create CSV
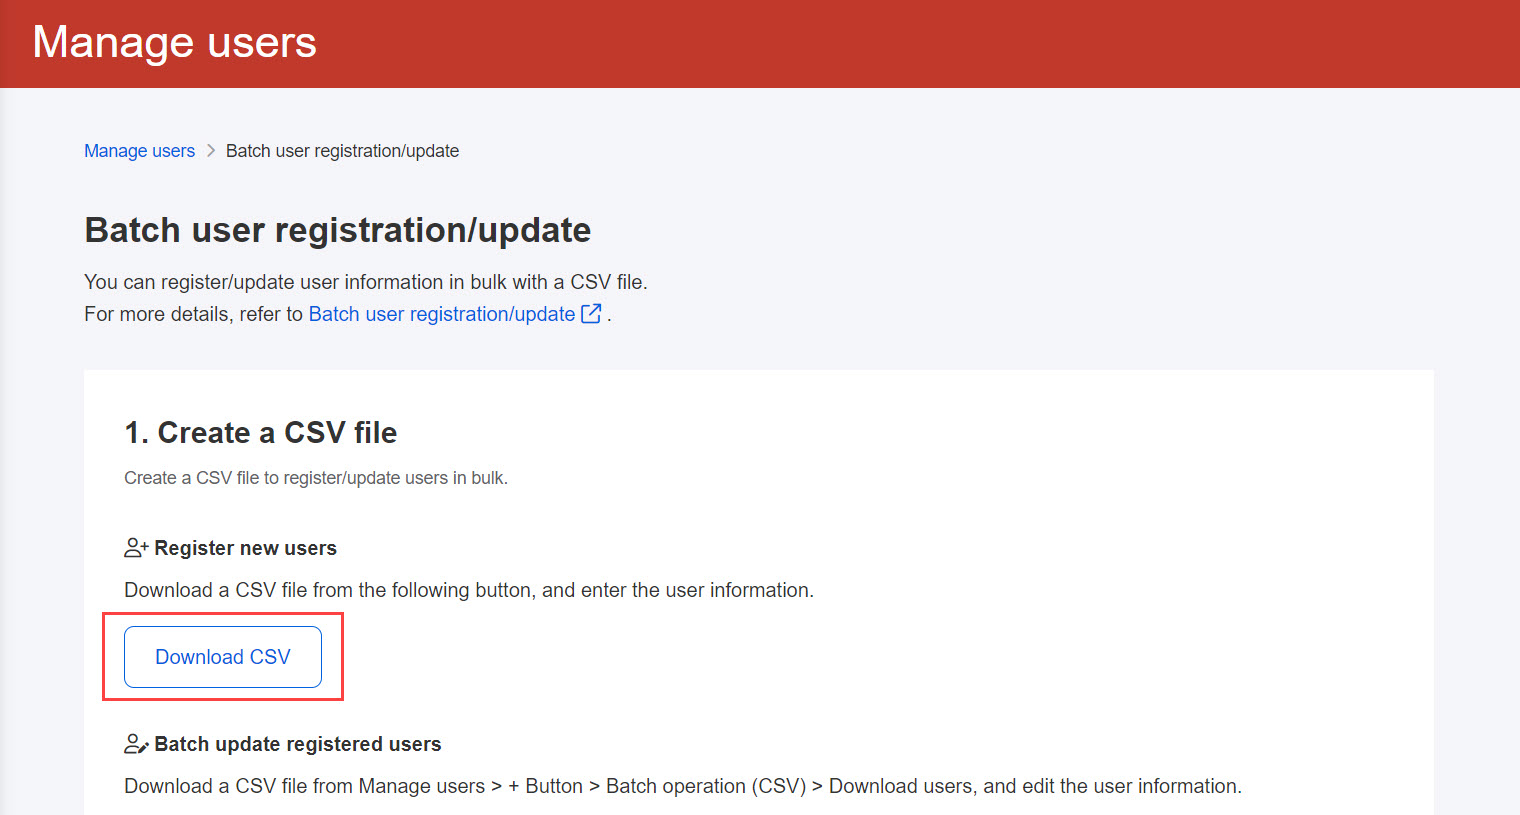
01. Go to the Manage users
Select the "+" icon in the Manage users > "Batch operation (CSV)" > "Batch user registration/update"
02. Download CSV
Click "Download CSV" to enter user information.
Edit CSV
Edit the downloaded CSV file.
*For more details, refer to How to enter information on CSV for batch user registration/update.
Upload CSV
Upload the edited CSV file.
01.Select file
Click the "Batch user registration/update."
Drag and drop the edited CSV file into the gray area or select it from the Choose File and click "Upload and check."
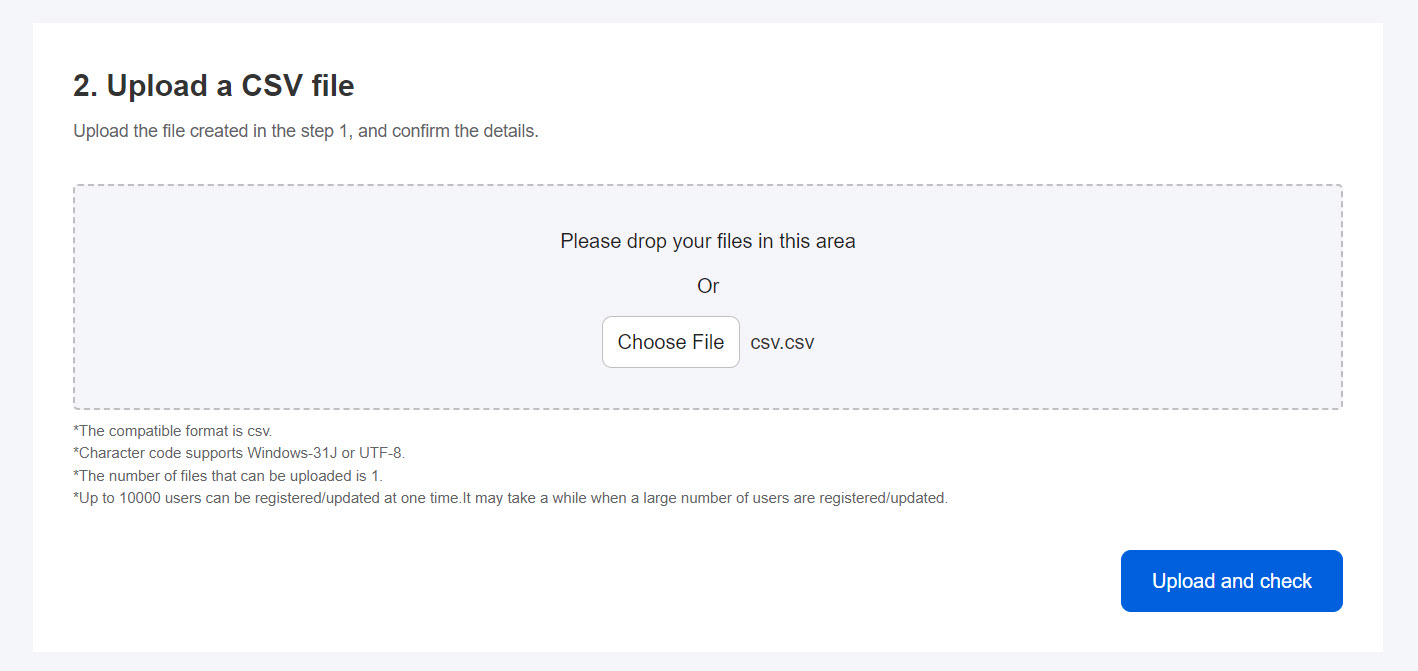
02. Upload
When the CSV file is incomplete, an error message will be displayed.
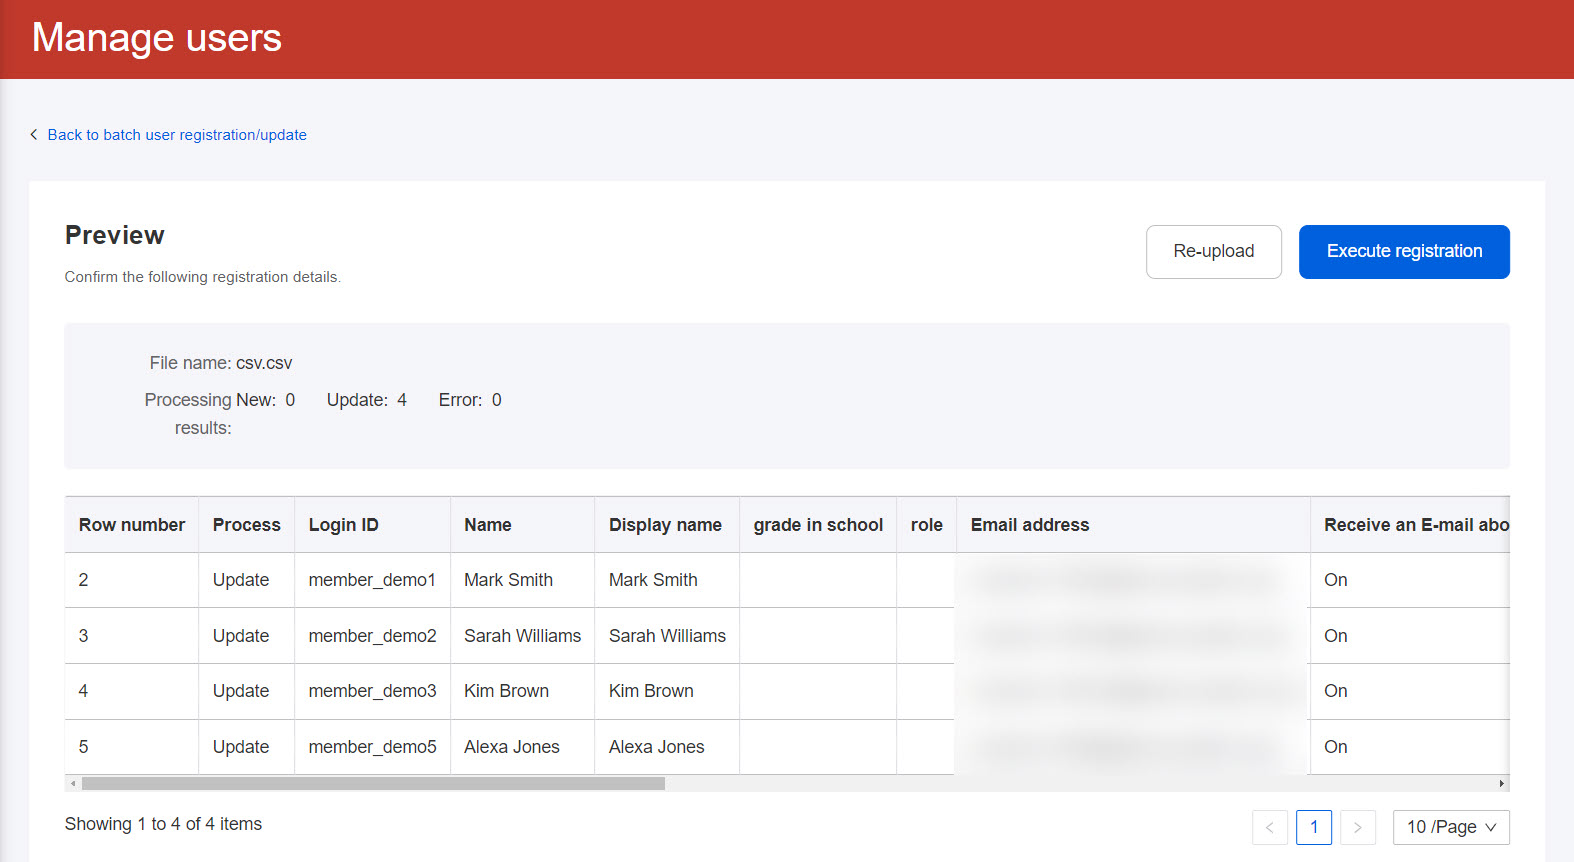
To move back to the User registration/update page, click "Back to batch user registration/update" or "Re-upload."
When all is well, click "Execute registration."
*Tick the "Show only errors" to filter the results.

The following pop-up will be displayed.
To send an invitation e-mail to users, tick the "Send invitation e-mail to new registered users."
You can also select an email template from the list and edit the content by clicking the Edit.
Click on the "Send at" to specify the send date and time.
*For more details on editing email templates, click the question mark icon.
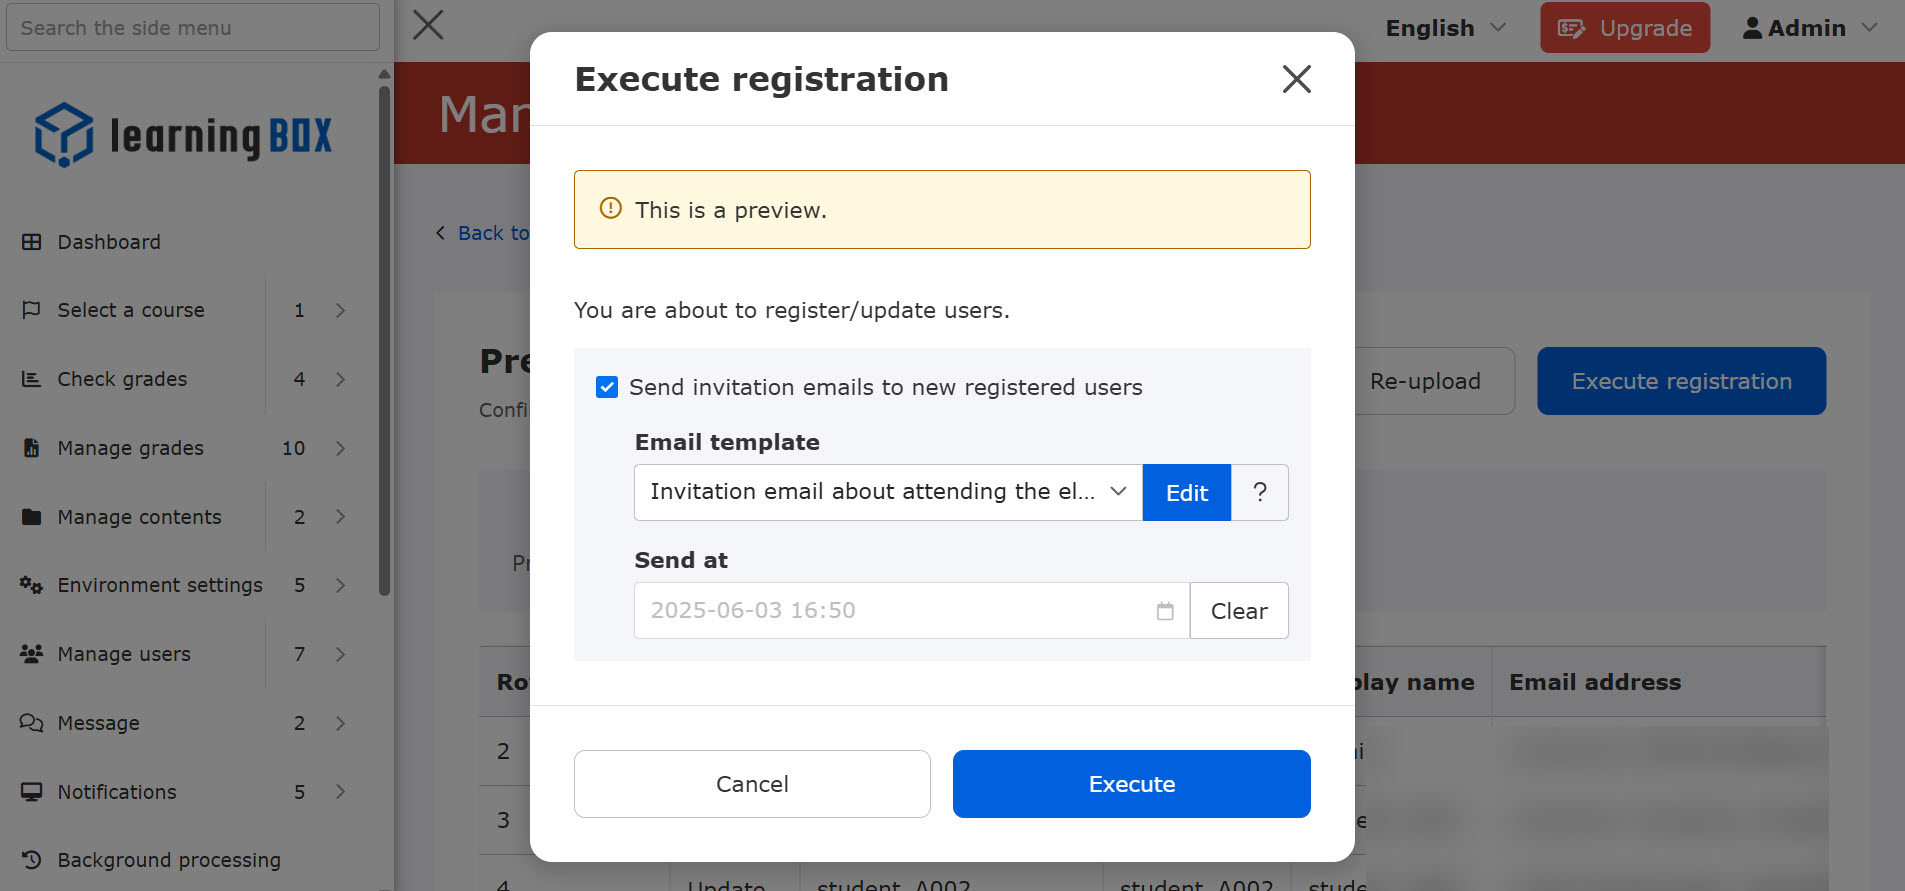
After completing the settings, click on the Execute.
The registration process will vary depending on the number of uploads.
If the number of registrations is less than or equal to 100: It is executed immediately.
If the number of registrations is 101 or more: Runs in the background
*You can check the results in the panel displayed in the lower left corner of the screen or the Background Processing in the side menu.
When you set not to use login ID in the Input field settings, leave blank in the sign-in/email address column on the CSV file.
*For more details, refer to Input field settings.
Items not reflected in CSV
When registering users via CSV, the values entered in the "First login/Last login/Registered date/Update Date" will not be reflected.
Update users in bulk
You can update the information of registered users in bulk.
The renewal process is as follows:
- Download users
- Edit CSV
- Upload CSV
You cannot update the login ID in batch update by CSV.
Go to Edit user to update the ID.
Download users
Download the information of registered users in a batch.
*For more details, refer to Download users.
Edit CSV
All users' information will be downloaded with a CSV file.
Edit the data on the file and save it.
Upload CSV
01.Select file
Click the "Batch user registration/update."
Drag and drop the edited CSV file into the gray area or select it from the Choose File and click "Upload and check."
02. Upload
When the CSV file is incomplete, an error message will be displayed.
To move back to the User registration/update page, click "Back to batch user registration/update" or "Re-upload."
When all is well, click "Execute registration."
*Tick the "Show only errors" to filter the results.
The following pop-up will be displayed.
For newly added users, invitation emails can be sent. Note that this setting will not be applied to the updates.
After completing the settings, click on the Execute.
The registration process will vary depending on the number of uploads.
If the number of registrations is less than or equal to 100: It is executed immediately.
If the number of registrations is 101 or more: Runs in the background
*You can check the results in the panel displayed in the lower left corner of the screen or the Background Processing in the side menu.
When you set not to use login ID in the Input field settings, leave blank in the sign-in/email address column on the CSV file.
*For more details, refer to Input field settings.
Bulk Deletion of Email Addresses
You can delete a registered e-mail address by entering "delete" in the Email address field.
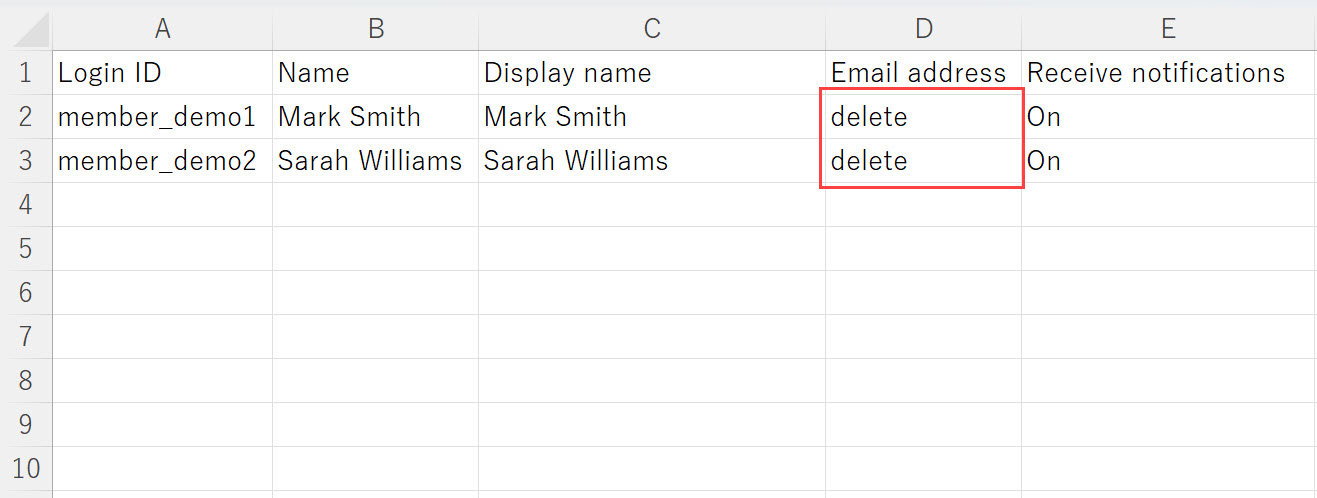
However, in the Input field settings, the following settings must be made:
- Show field: On
- Required: Off

Items not reflected in CSV
When updating users via CSV, values are not reflected if the items are in the "First Login Date/Last Login Date/Creation Date/Update Date."
CSV batch user registration of groups
▼When "Belong to" is entered
The user will be assigned to a group based on the information you entered.
▼When "Belong to" is left blank
The user(s) will be assigned to the group in which the CSV batch registration was made.