Create certificate template
This page explains how to create a certificate template.
Steps
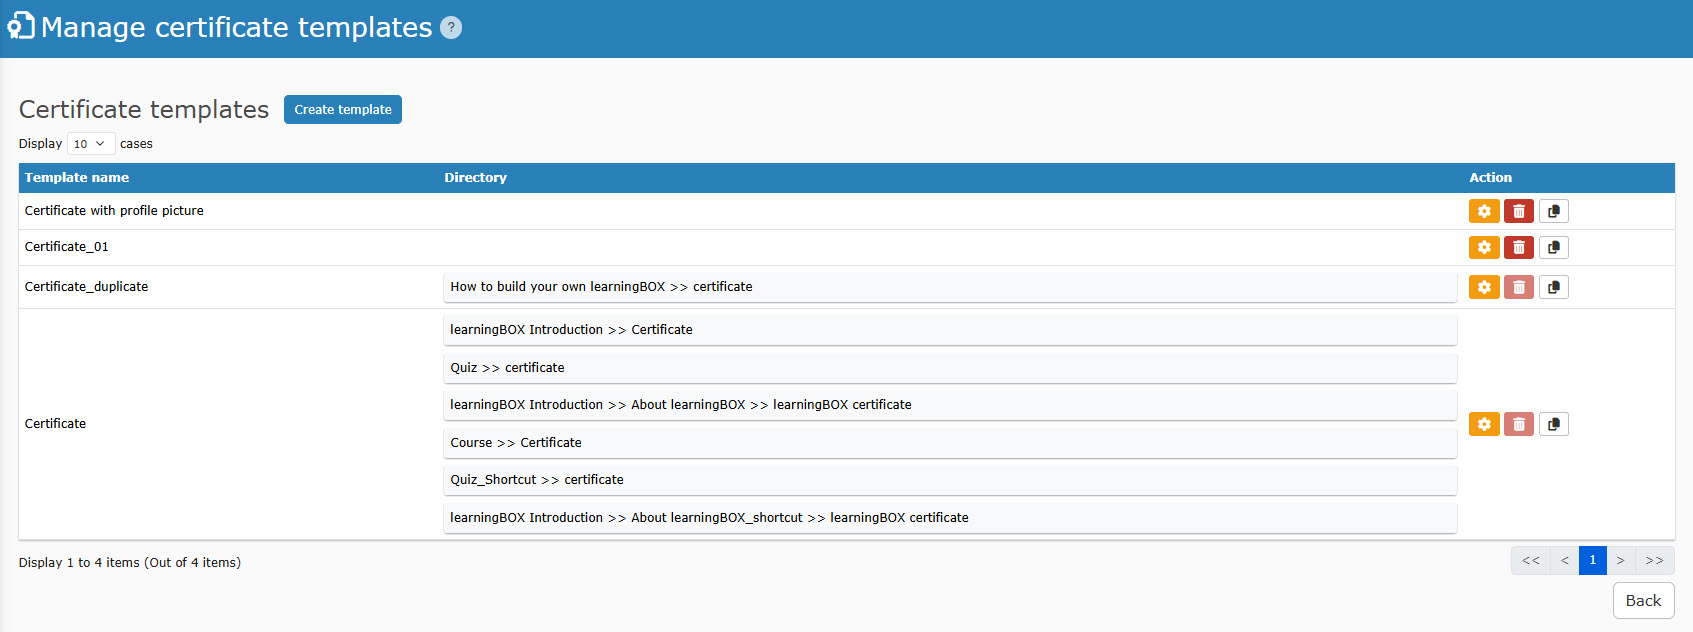
01. Go to the Manage certificate templates
Select Manage contents on the side menu.
Select the course you created and click the "+" icon > Certificate > Manage certificate templates
02. Select template
Click on "Create template."
Use <> icons to move pages.
Select a template and click "Create new."
03. Edit
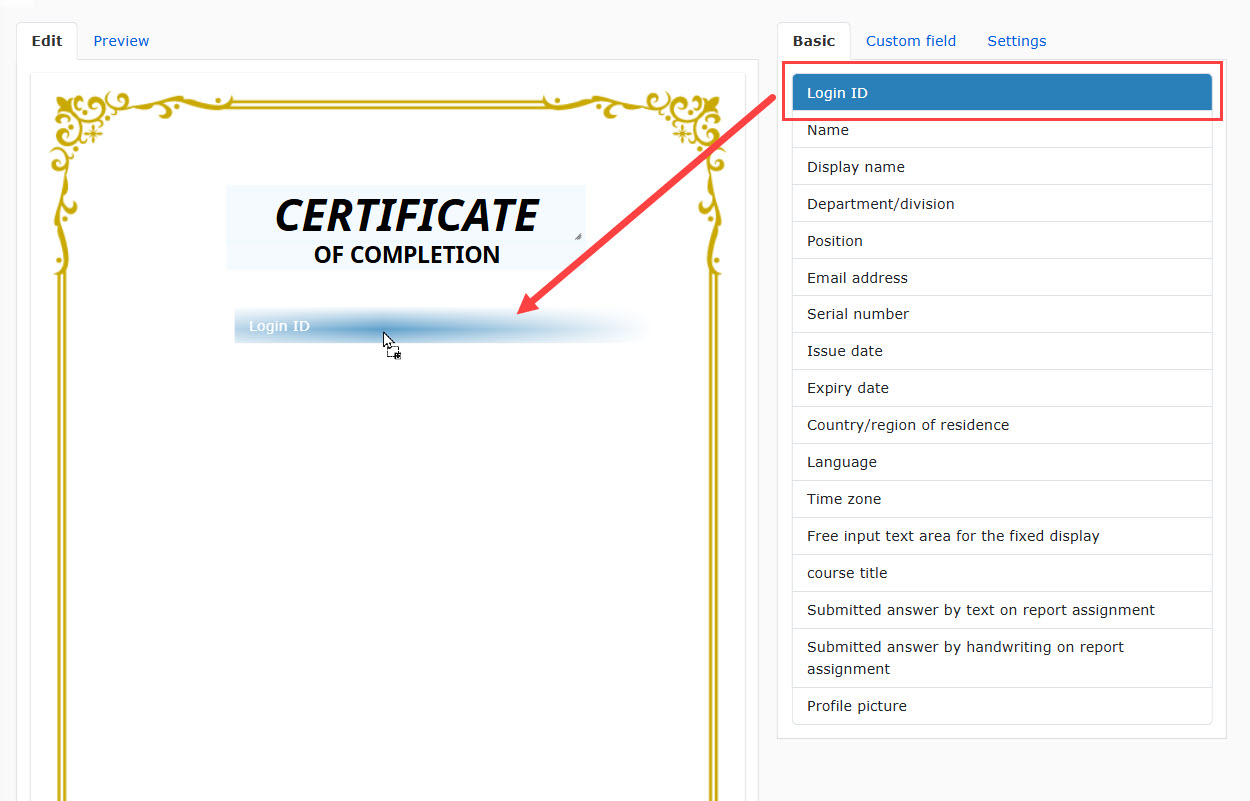
You can edit the template.
Add items from the list.
You can set whether or not to use the Input field settings will be displayed.
To add more, drag and drop the item(s) in the certificate.
Free input text area allows you to enter text directly.
Basic
To insert "Submitted answer by text on report assignment" and "Submitted answer by handwriting on report assignment," specify the content in this form.
*For more details, refer to Certificate.
To use a profile picture, a Standard or higher plan is required, and the settings on the Account sign-up settings must be made.
*For more details, refer to Profile, Profile picture section.
If you downgrade your plan to lower than Standard plan after using the profile picture function:
・ Newly created certificates will be dispalyed without profile pictures.
・ The certificates that have already been issued will be displayed with the registered profile pictures.
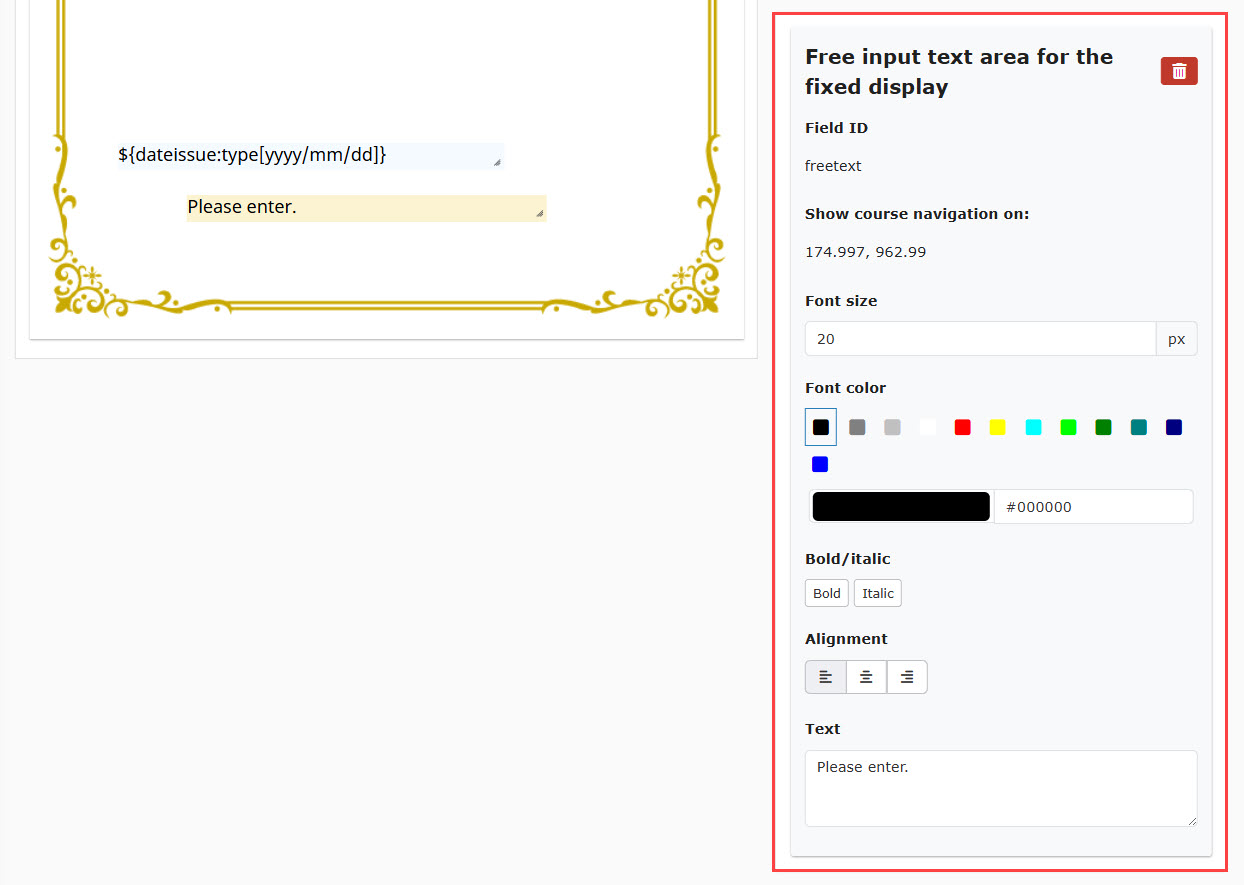
Click the item to edit.
You can edit the text in the text field.
Also, the font size/color, boldness and more can be customized.
To remove an item you have added, click on the trash can icon.
*For more details about the font color, refer to Color settings.
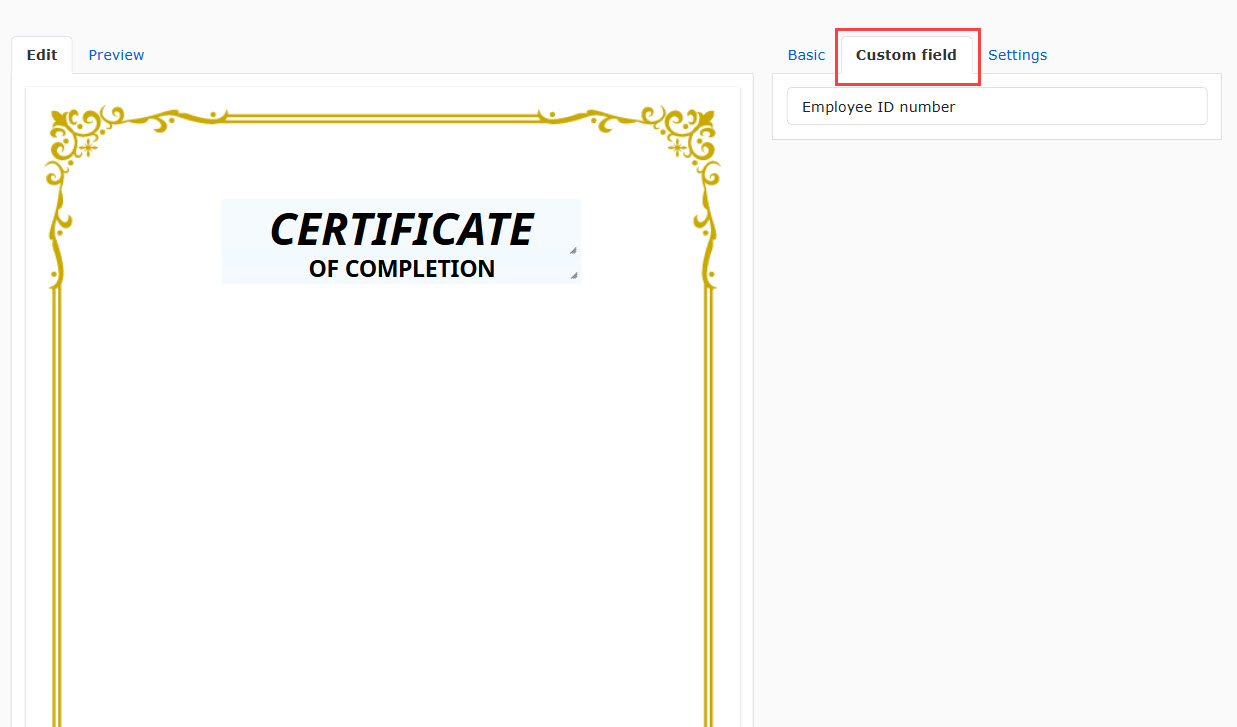
Custom field
In this tab, added items on theInput field settings will be displayed.
You can add/edit the item(s) as mentioned above.
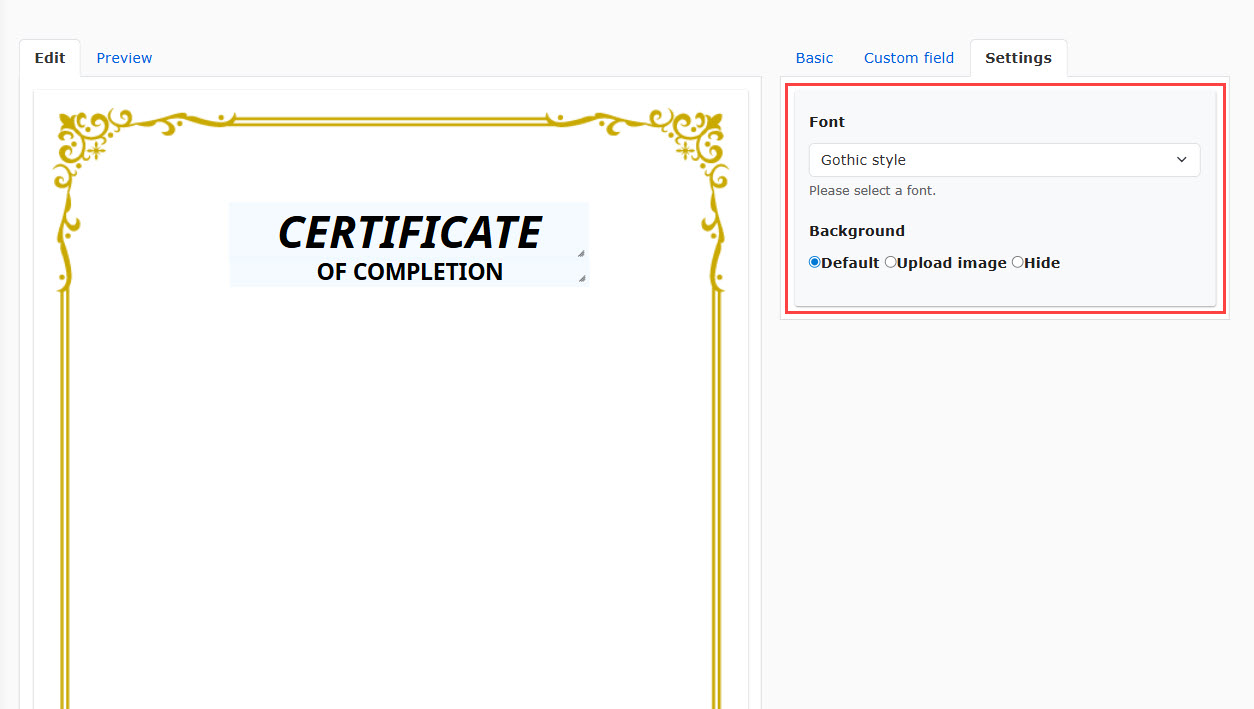
Settings
Select the font from the list.
You can change the background from the following:
- Default: The default background is applied
- Upload image: You can upload an image file from the "Choose File."
- Hide: The white background will be applied.
04. Preview
Click the Preview tab to preview the certificate.
*In the preview, a sample image will be displayed.

05. Save
Make sure if the template name is entered and save the template.
The templates you have created will be listed on the Manage certificate templates.