Create/edit schedules
This section explains how to create a schedule.
Required
Management role of Group manage (Edit) + Co-admin
Create New
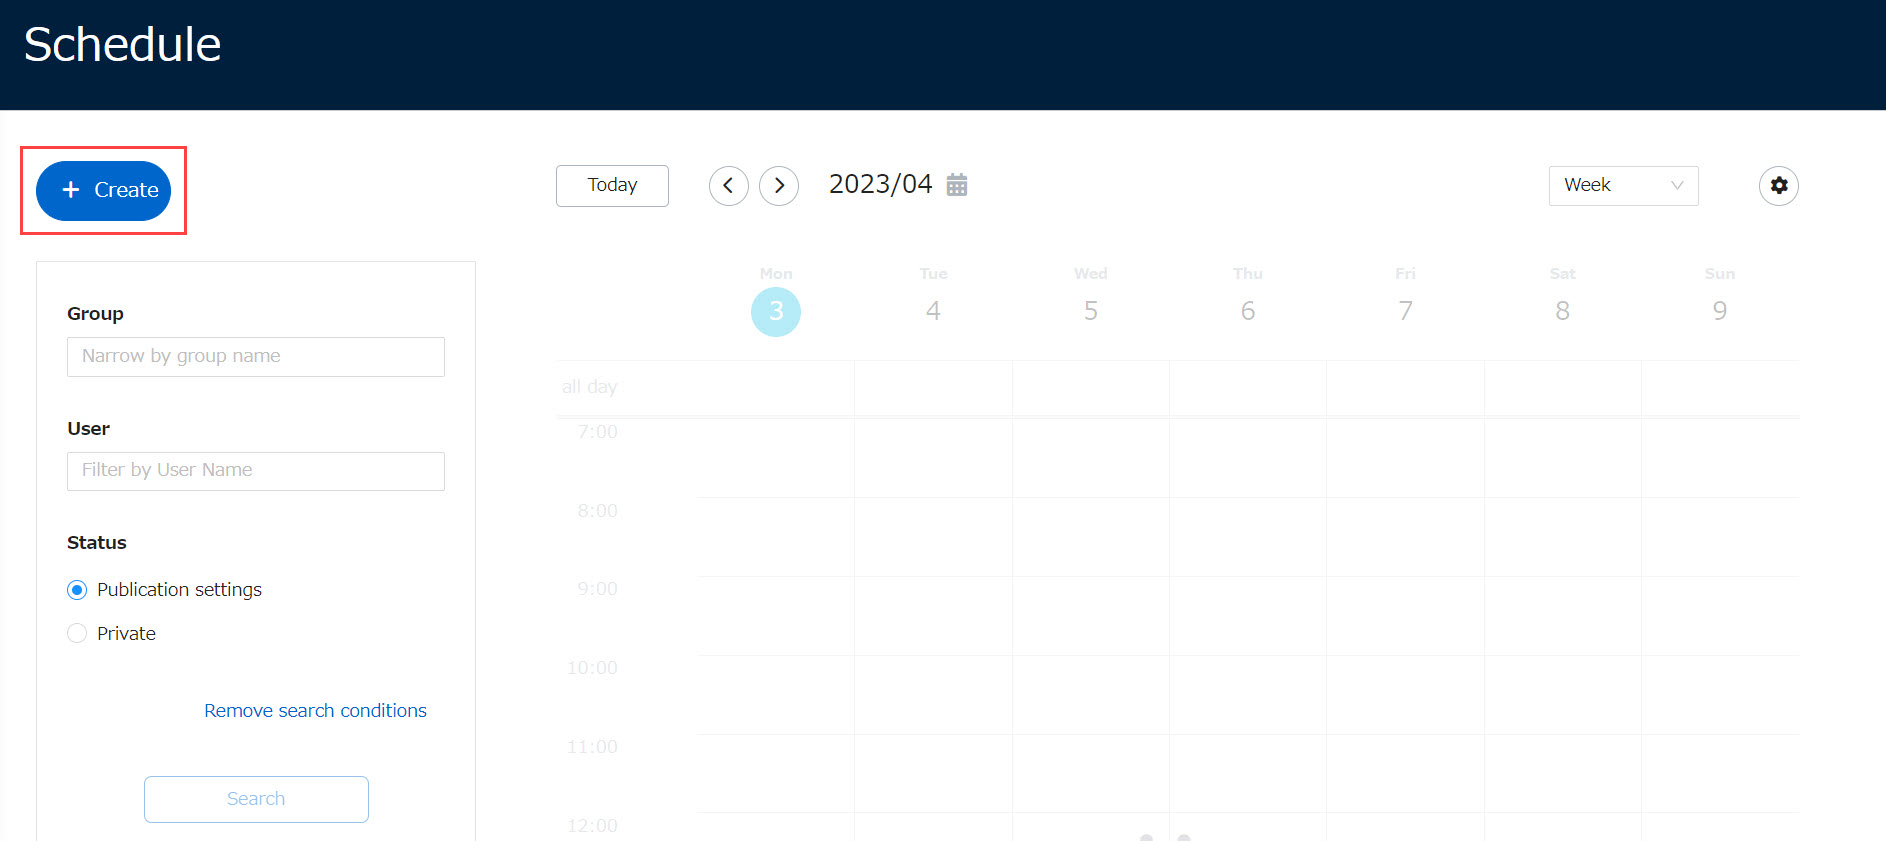
01. Open the creation screen
In the side menu, select "User Management" > "Schedule".
Click on "+Create" in the upper left corner of the "Schedule" screen that opens.
02. Basic Information Entry
The following window will be displayed.
First, enter a title.
Next, set the schedule dates.
Click on the empty date box and select from the calendar.
Then, from "Custom," select from the pull-down menu whether you would like to specify a specific time or an all-day appointment.
In addition, please select in the pull-down menu whether or not to make this a repeating schedule.

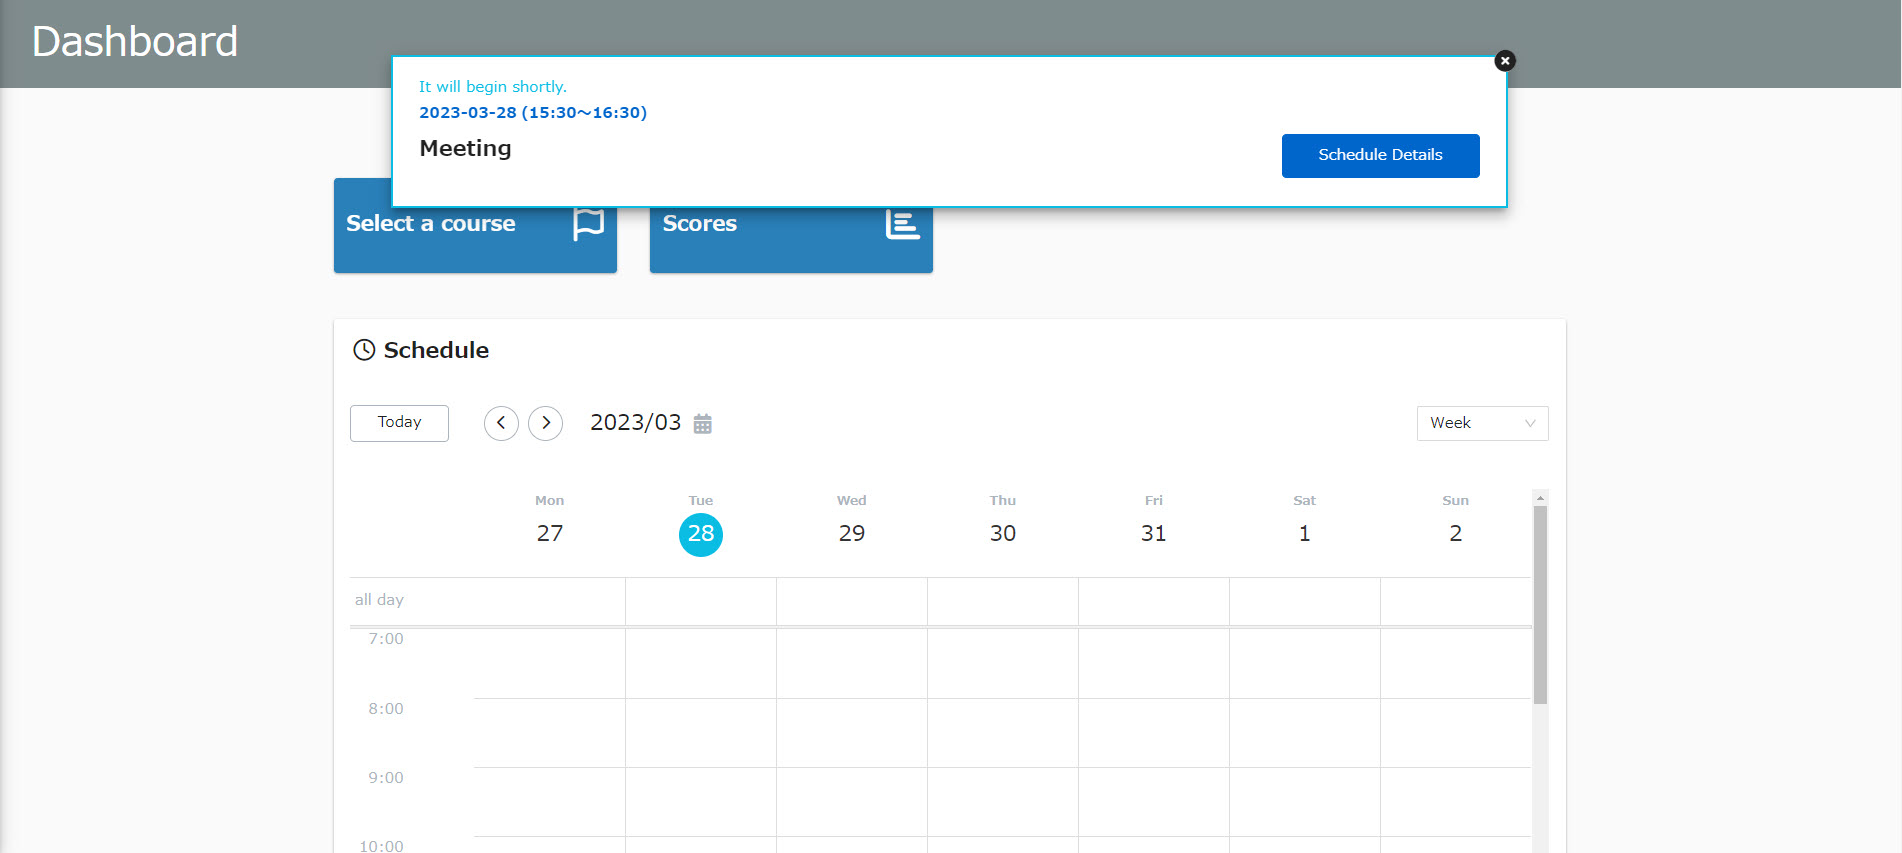
Dashboard Notifications
Tick "Notify me on the dashboard" and specify a time to apply the notification settings.
At the specified time, a pop-up will appear on the dashboard.
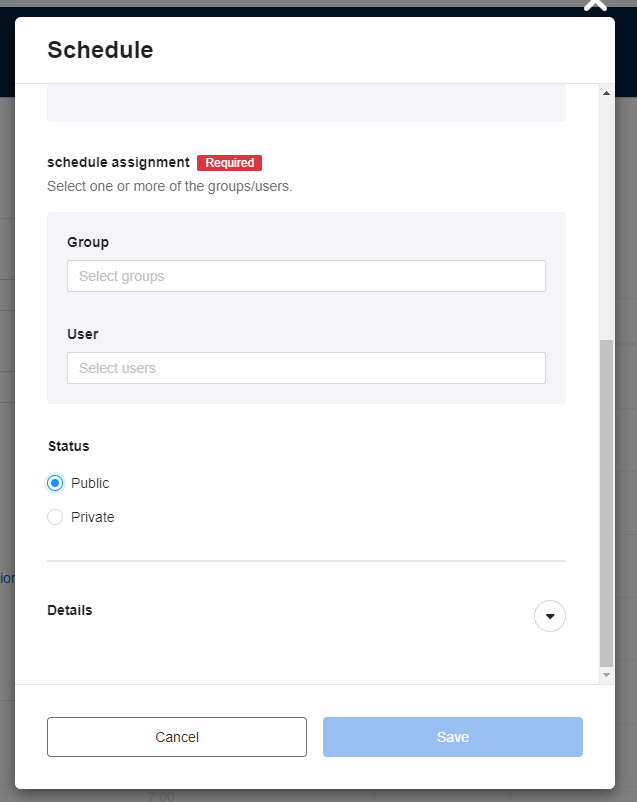
03. Schedule Assignment
Specify the target of the schedule from Group/User.
Next, choose whether you want the status to be public or private.
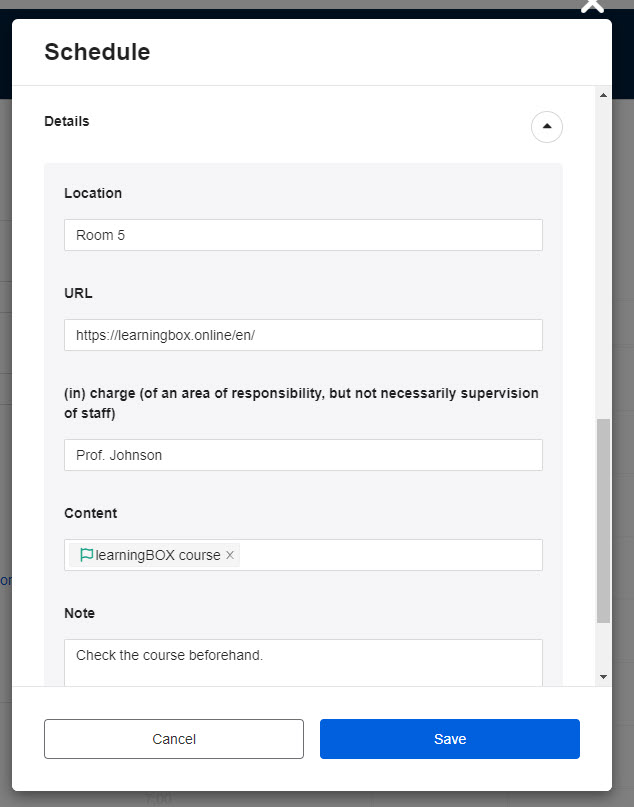
04. Enter detailed information
Click on the arrow to the right of "Details" to see the following items
- Location: Allows you to enter the location of the appointment set in the schedule.
- URL: Information related to the schedule can be pasted as a URL
- Responsibilities: Allows you to enter the responsibilities for the schedule
- Course Materials: You can set the schedule to link to the course details screen for specific course materials from the schedule (multiple selections allowed).
- Memo: The entered information can be displayed as a memo.
- Educational materials in the shortcut folder
- Teaching materials in shortcut courses
- Linked Content
- Prerequisites
- Heading
- In-course materials distributed from other environments
- Scene-setting teaching materials
- Materials not assigned to the user creating the schedule
Edit
01. Select target group/user
Open the "Schedule" window.
First, in the search field on the left side of the screen, set the criteria for either Group/User/Status and click "Search".
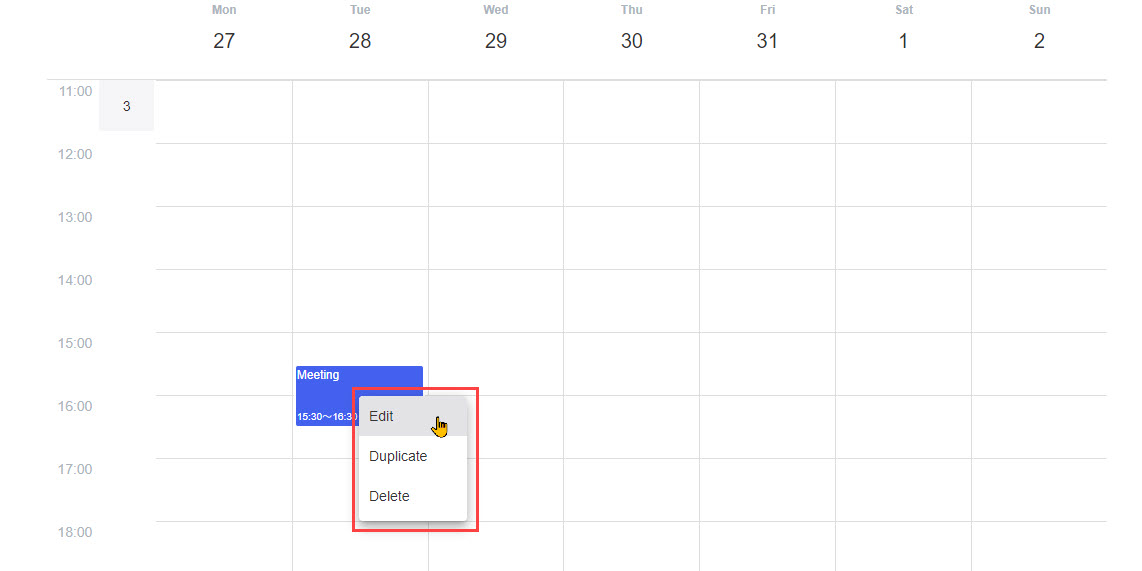
02. Edit / Duplicate / Delete a schedule
Schedules will be displayed according to your search criteria.
To change the contents, click on the schedule in question and select "Edit".
As for the item to be editedNew..
Select "Duplicate" to duplicate a schedule with the same content as the one you created.
Select "Delete" to delete the created schedule.