Create videos and slides <Operation in the Manage contents (Old)>
This section explains how to upload videos and slides.
Upload video
01. Create a course
Select Manage contents in the side menu.
First, create a course in the Manage contents.
*For details on creating a course, refer to Course/Folder.
02. Go to video creation form
Click the course you created, and select the "+" icon > Content > Video > Video and slide settings
03. Creation form
You can upload videos or slides within the creation form.

04. Title
Enter the title of the content.
When you leave the title blank, the uploaded file name will be automatically added.
05. Detailed settings
▼Create prerequisites [Give "Pass" status for all contents] before video
Ticking this box allows you to set the condition that learners must pass all the content in the course/folder before going on to the video content.
▼Disable skipping of video
Tick the box to disallow learners to skip video playback.
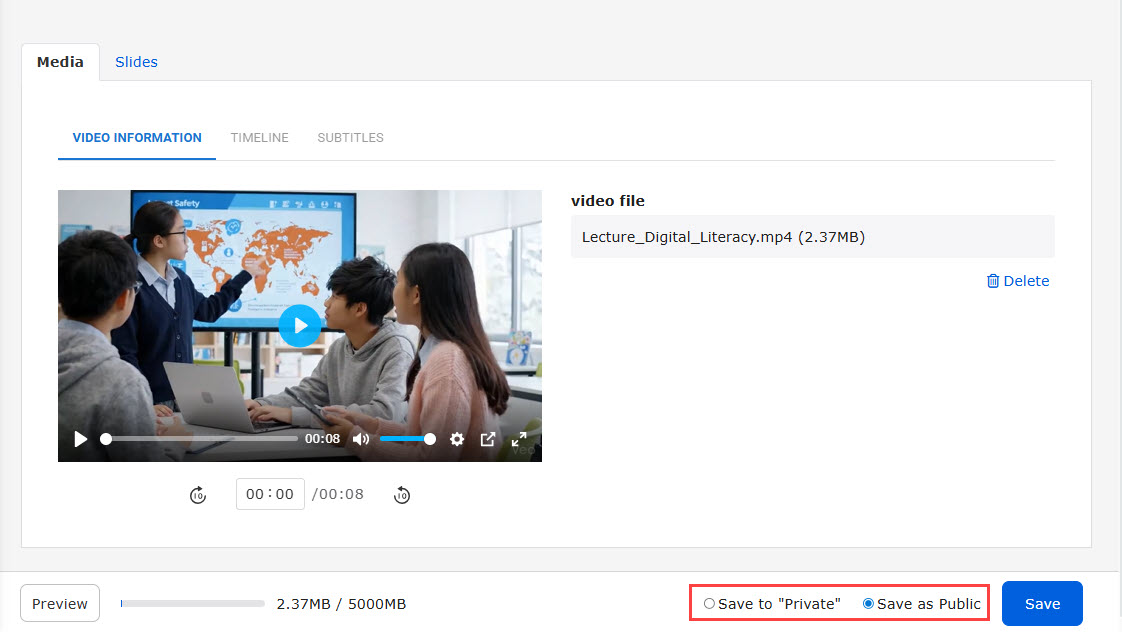
06. Media
Drag and drop or upload a video file from "Select media."
To delete an uploaded video, click "Delete."
A shorten preview will be displayed when encoding is completed.

Save files
When a video file is uploaded, the status will be private before saving the content.
If you want to add slides and timeline to the content, click "Save."
When it takes long to edit the content, save the file constantly to prevent from losing unsaved changes.
Delete media
If you delete a file in this page, the timeline and subtitles you set will remain when you reupload it.
Upload Slides
01. Slide
Select the "Slides" tab.
You can upload PDF or image files.
Drag and drop or upload a file from "Select media."
Uploaded files will be shown in a list.
Click the update icon to change the slide.
To delete the slide, click the trash icon.
*When a slide is deleted, it will also be deleted from the timeline.
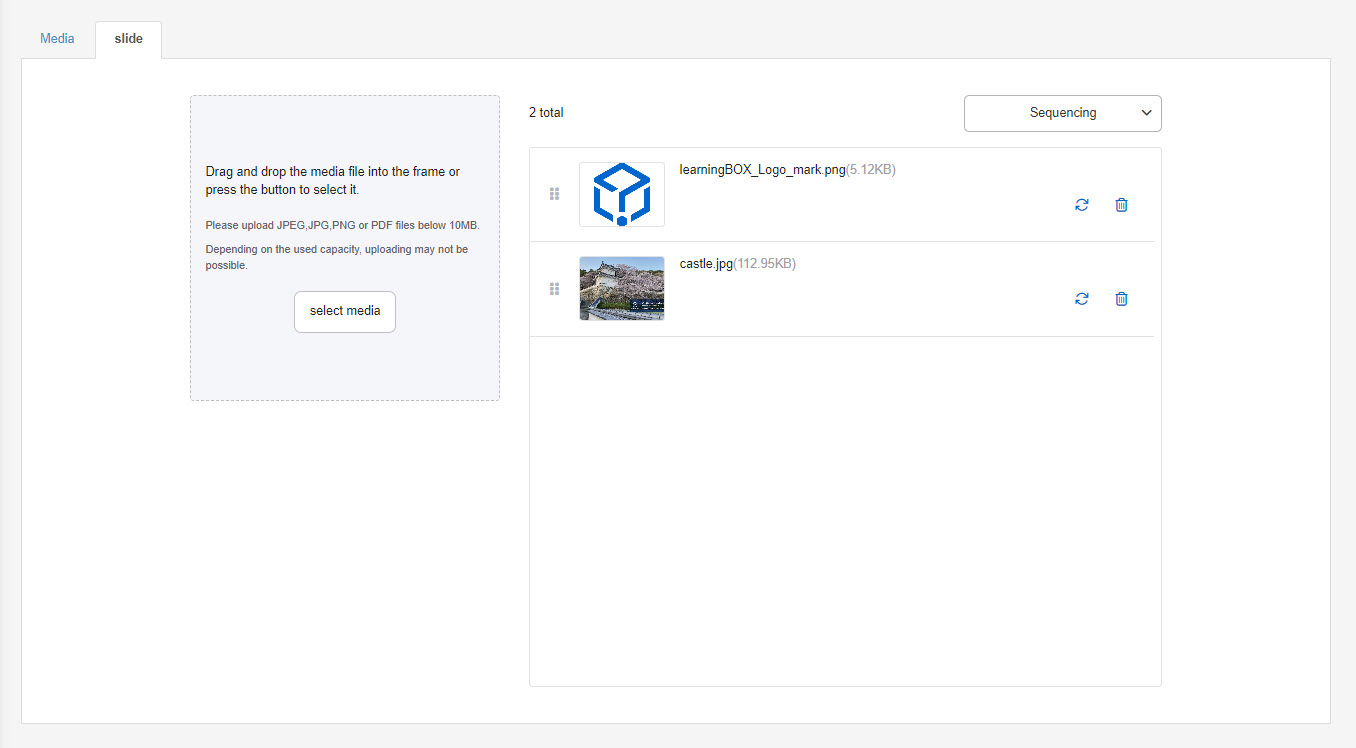
Reorder slides
Select one from the following:
1. Drag and drop the slide using the icon on the left.
2. Click the Sort button and select one from:
-Date added (Latest)
-Date added (Oldest)
-File name (A to Z)
-File name (Z to A)
Set timeline
01. Set timeline
Click the "Media" tab, and select the "TIMELINE" tab.
Clicking on "+Add timeline."

Set the following items:
▼ Start time
Enter the playback time of the video to set the timeline.
*For the first timeline, set the start time to "00:00."
▼Timeline name
Enter a name for the timeline.
*When you leave the timeline name blank, the uploaded file name will be set.
▼Automatically update timeline name when a linked slide is selected
Tick the box to automatically update the timeline name to the selected slide name.
If you want to keep the entered timeline name, untick the box.
▼ Linked slides
When you add slides in the Slides tab, "+Add linked slide" will be displayed in the TIMELINE.
Select a slide to add to the timeline.
To reselect a linked slide, click the refresh icon.
The trash can icon enables you to remove the slide from the timeline.
Save your changes once all settings are complete.
The added timeline will be listed.
02. Edit timeline
Click on the pencil icon to edit the timeline.
Refer to the step "01. Set timeline" to find how to edit the timeline.
03. Delete timeline
Click on the trash can icon to delete the timeline.
Subtitle settings
You can select a language for the subtitles.
Automatic subtitle generation and translation by AI are also available.
*AI functionality requires a Standard or higher plan subscription.
Manual configuration
01. Select language and enter text
You can select a language for the subtitles from the list.
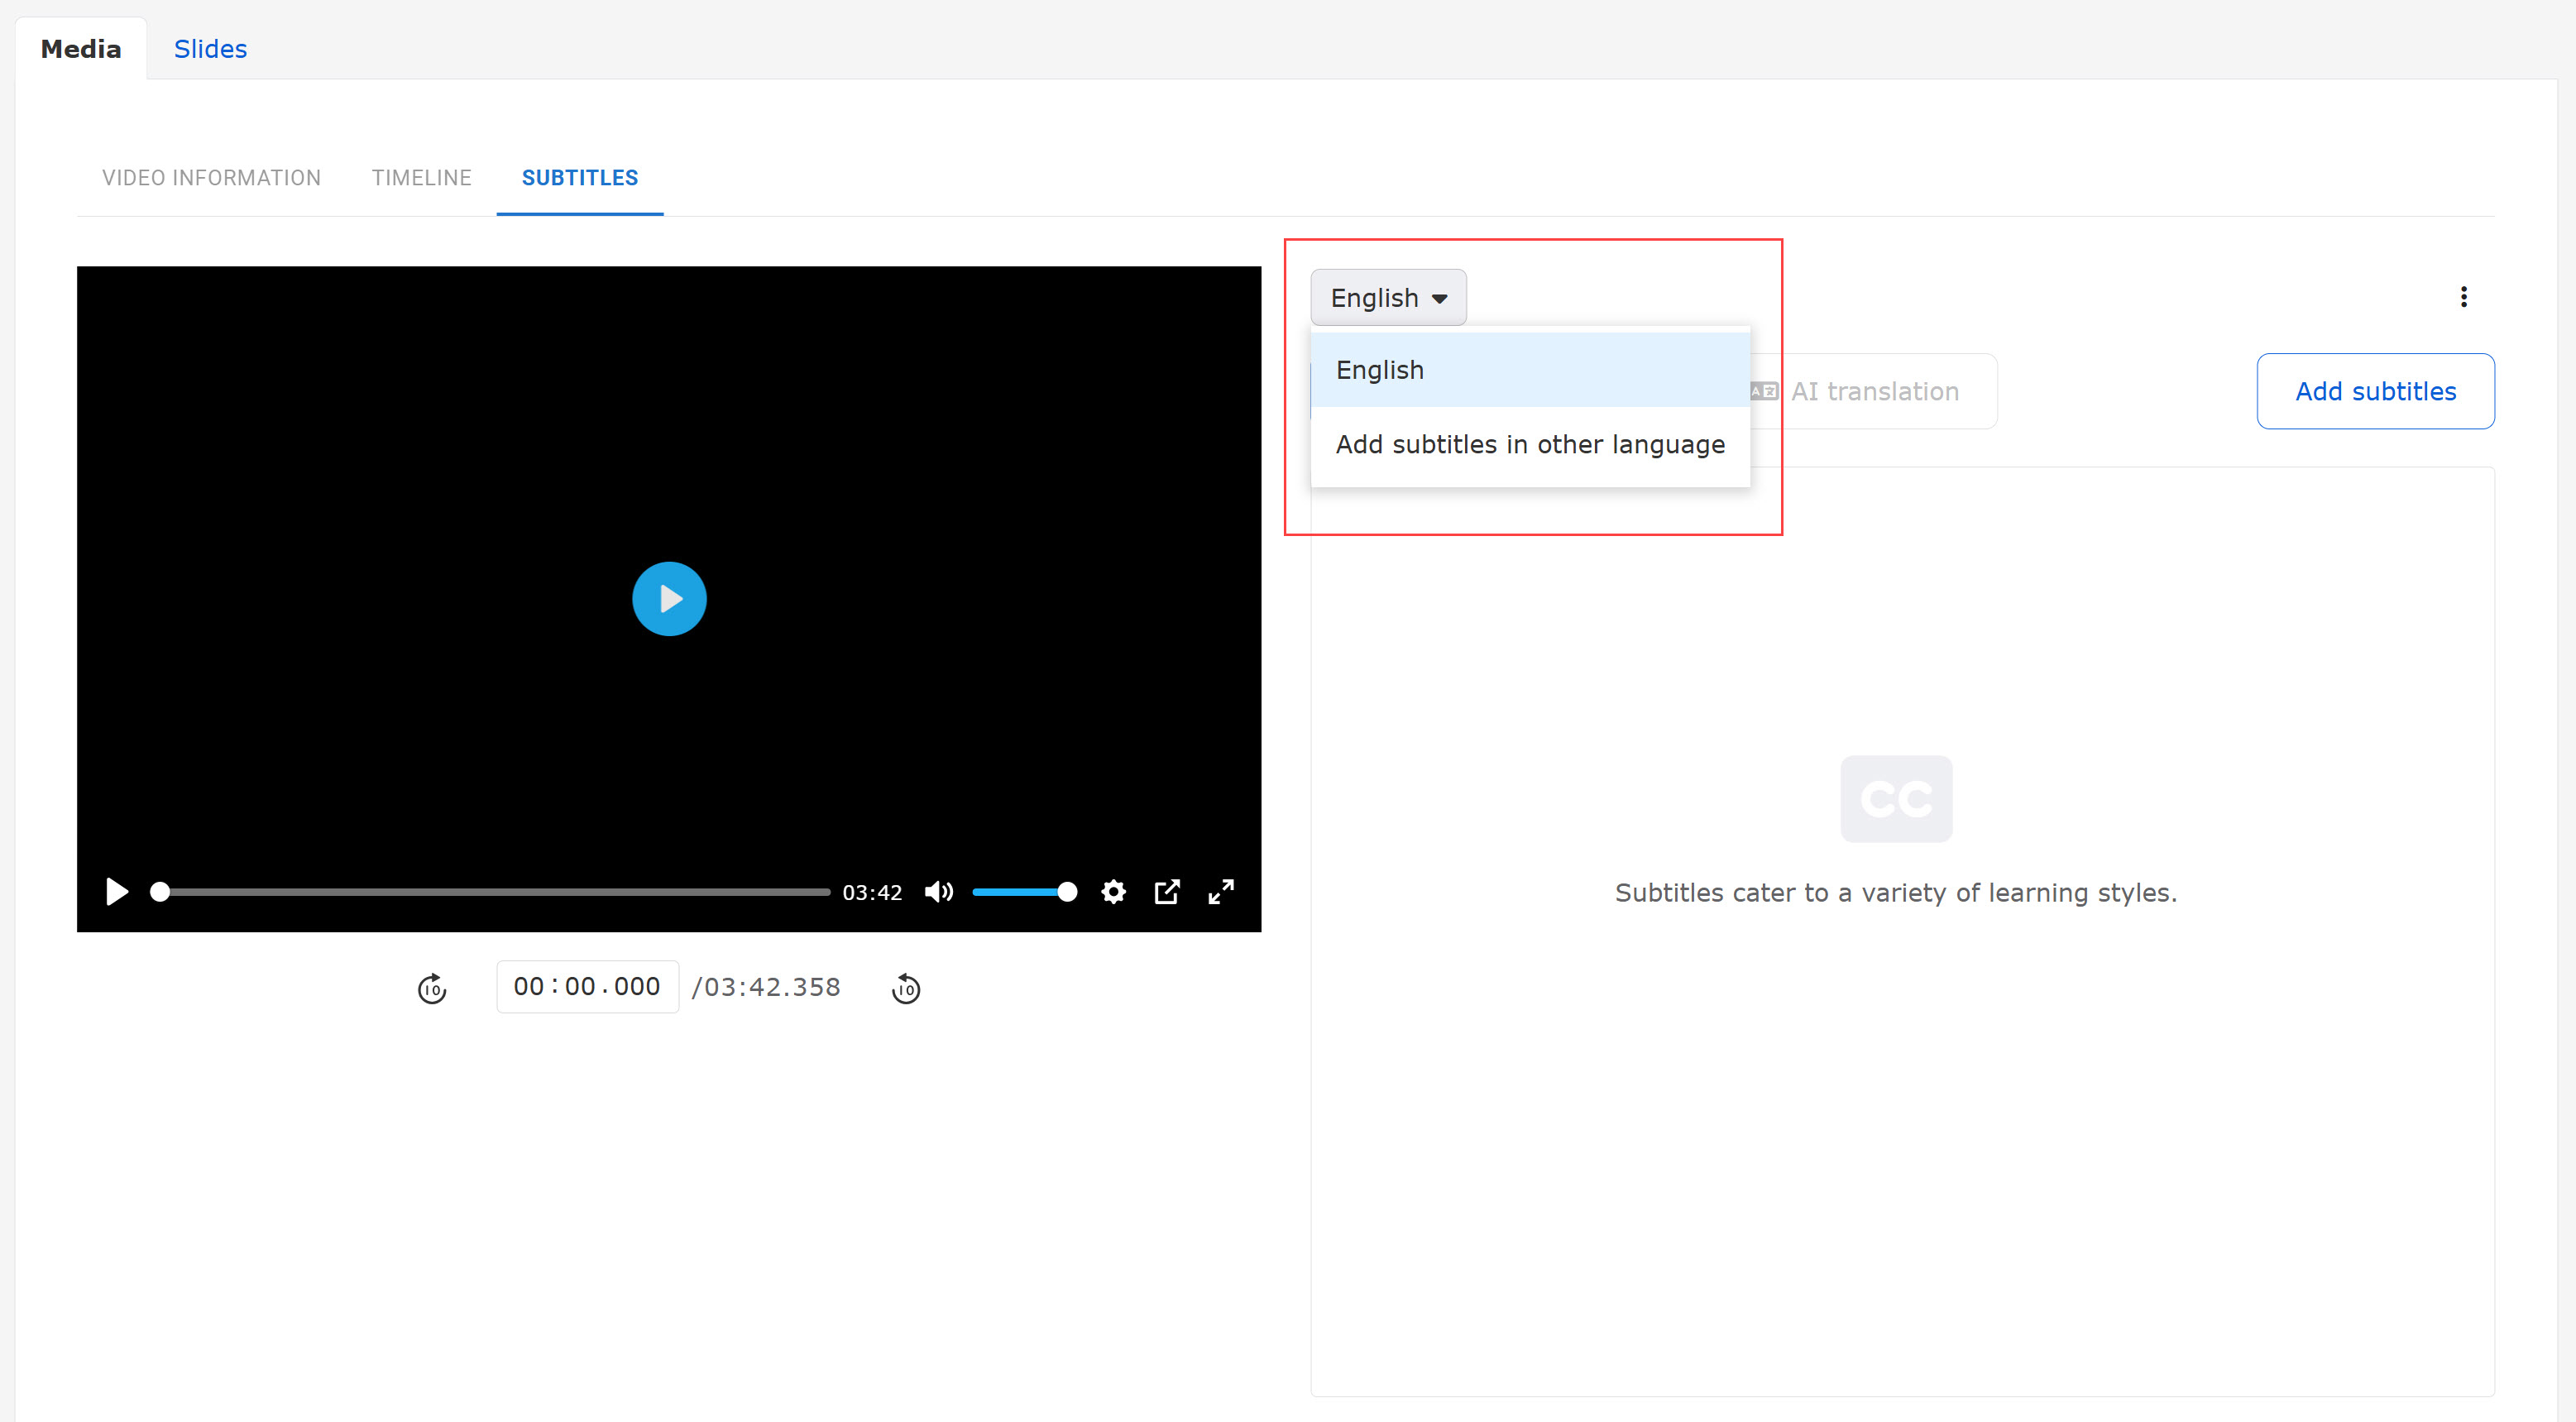
Click on "Add subtitles in other language."
Select a language from the list.
Select a method to add subtitles from the following.
This will help multilingual users.
▼Enter subtitle text
Enter text in the input field.
▼Upload file
Upload a subtitle file.
▼Conversion from timeline
The timeline name will be displayed as a subtitle.
*Time the subtitle is displayed will be the same as the timeline.
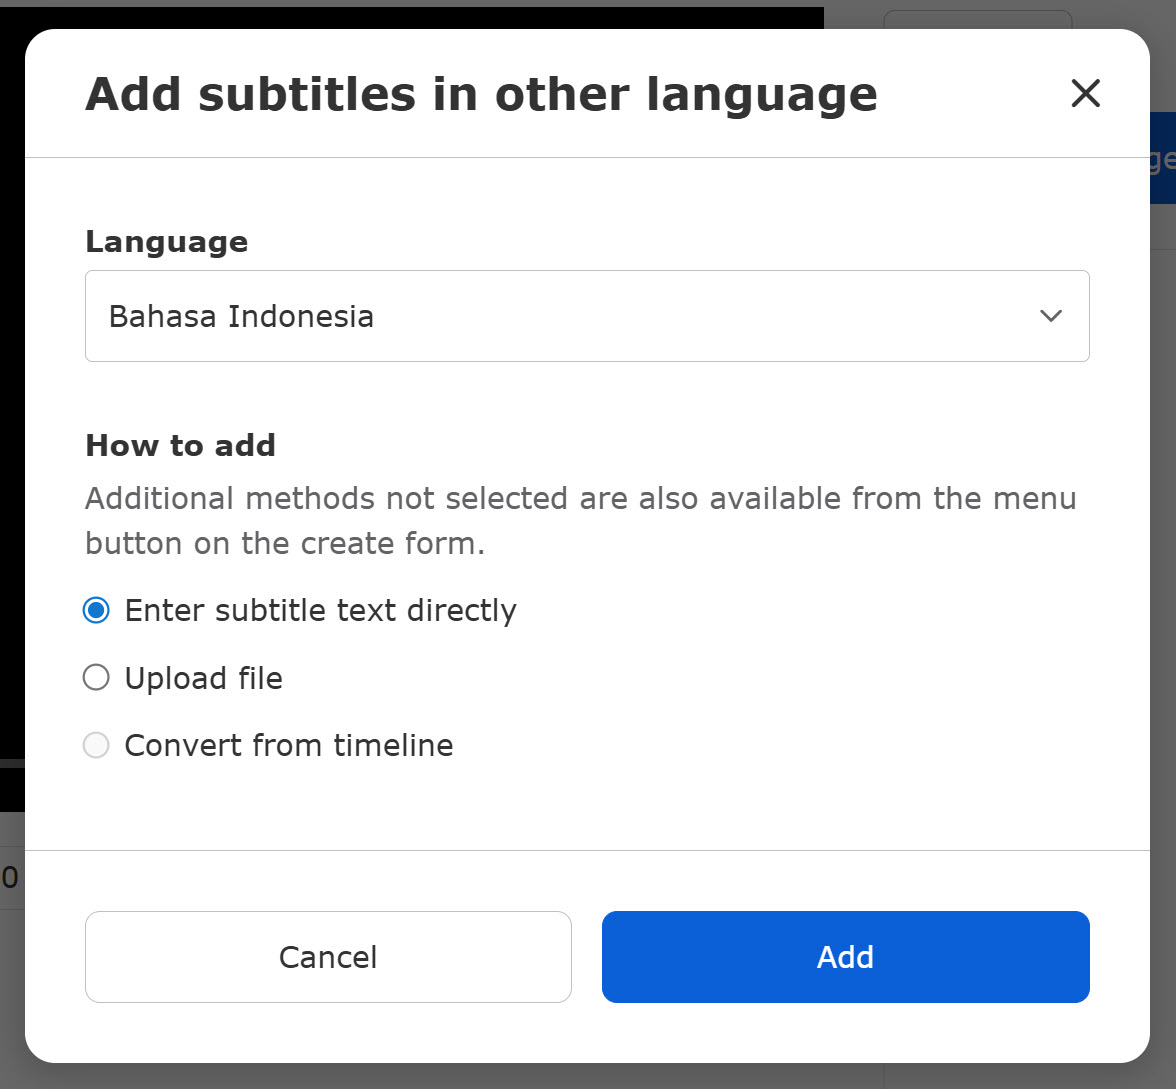
Click "Add" to add the selected language to the list.
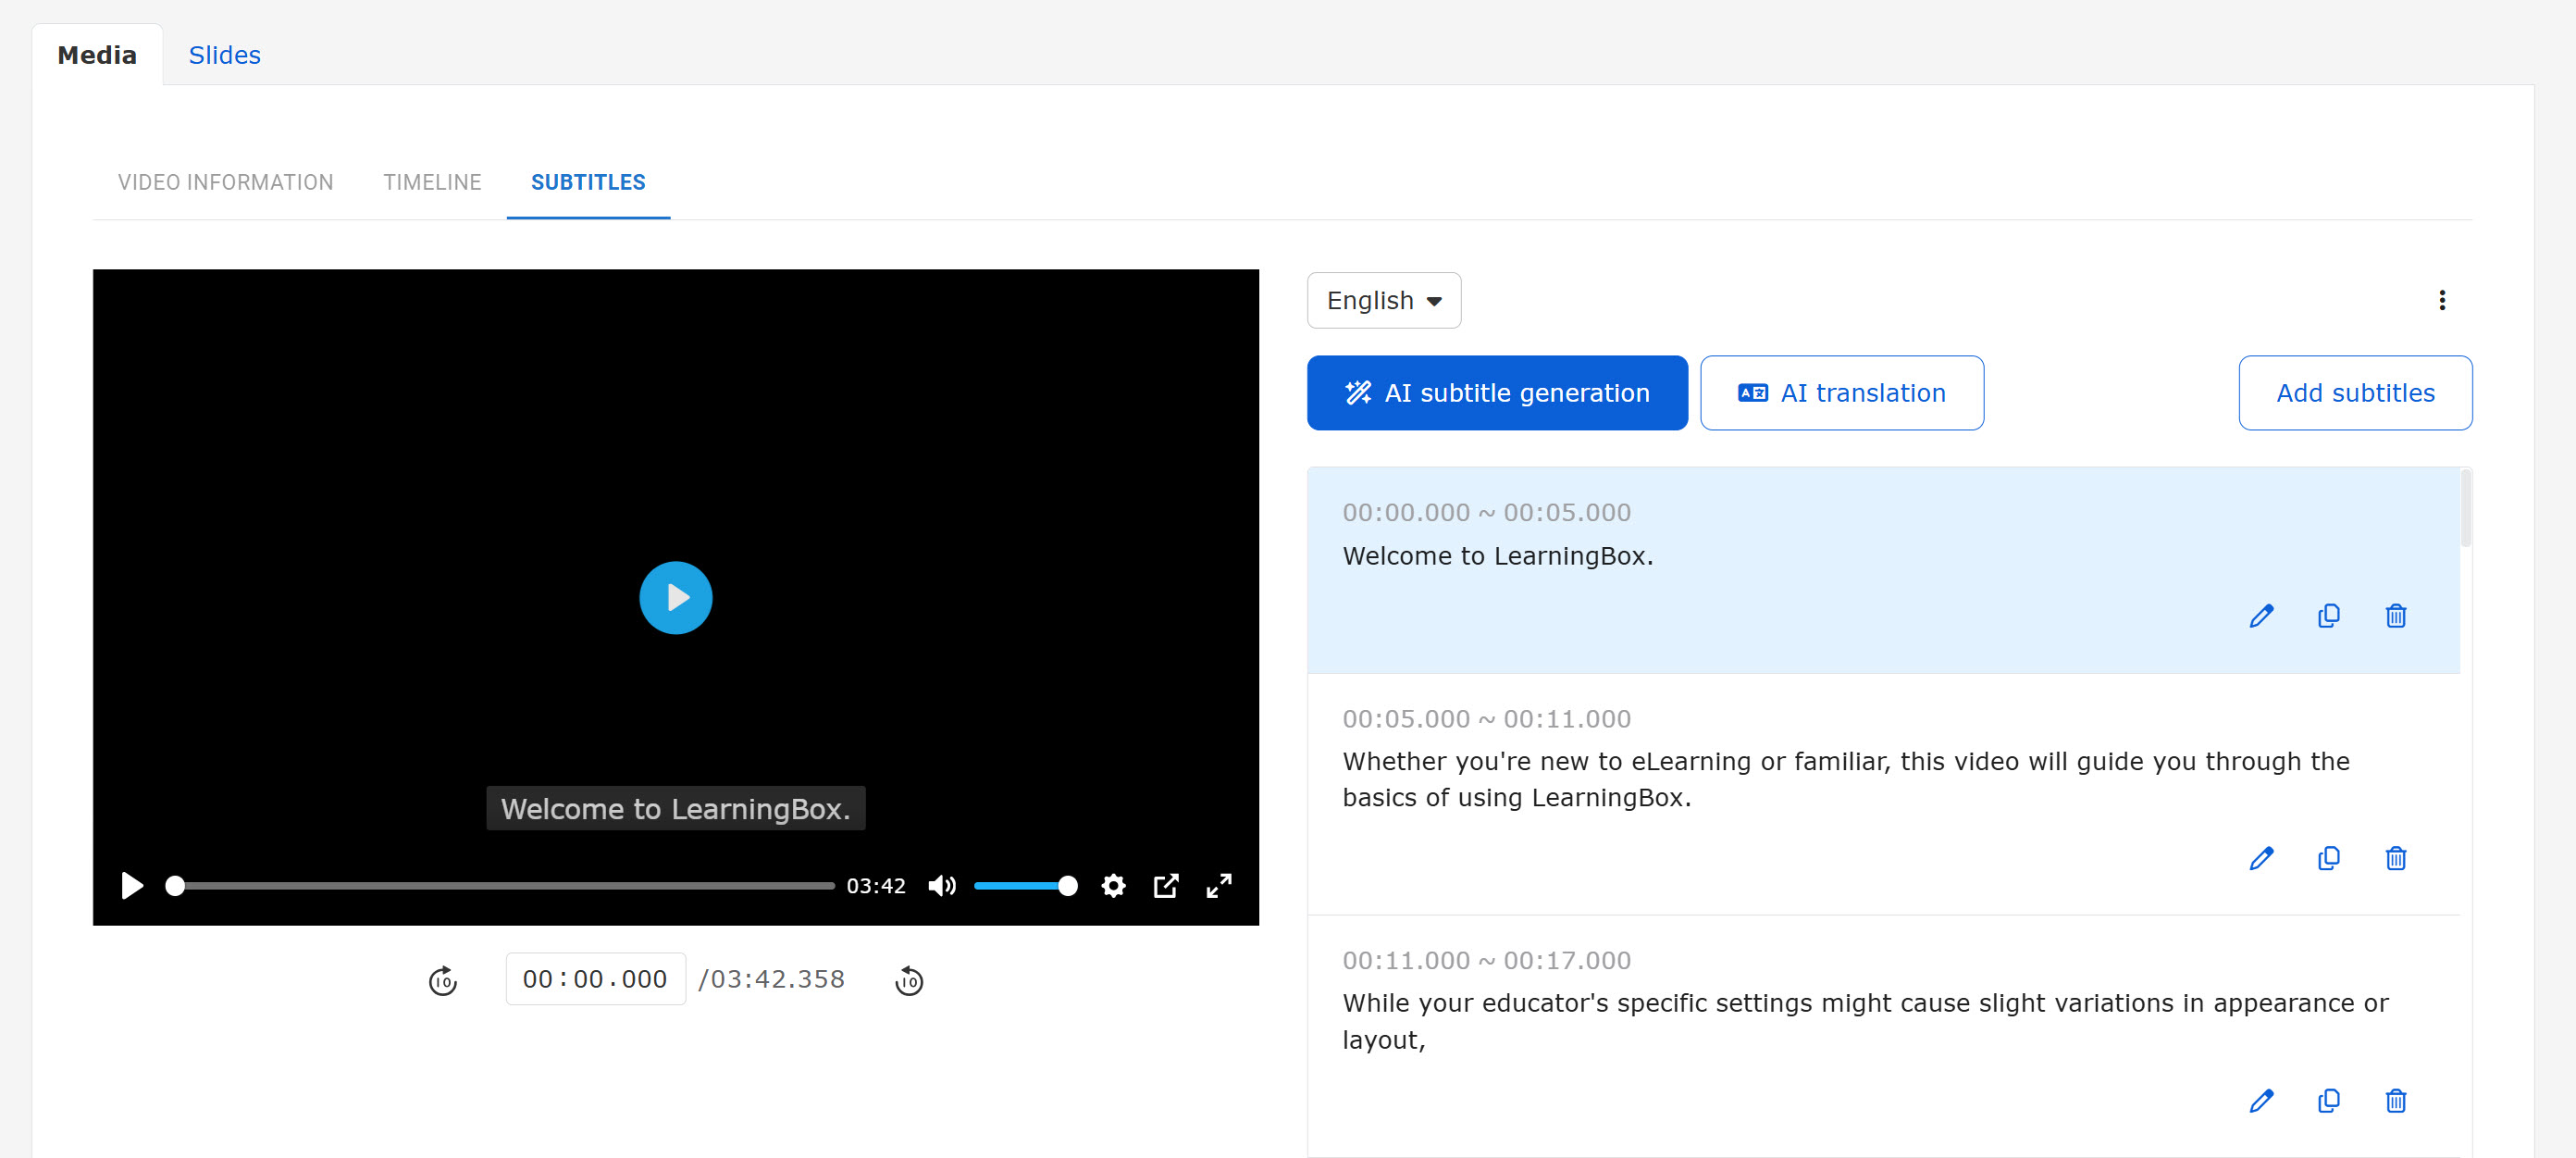
02. Add subtitle text
The following page will be displayed by clicking on "Add subtitles."
Enter the time to display the subtitle and text.

03. Edit subtitles
The subtitles you set will be listed as follows.
*Multiple subtitles can be set in the same timeline.

The following icons will be available for the subtitles.
- Edit: pencil icon
- Duplicate: file icon
- Delete : trash can icon
04. Settings for each language
Select a language, and click on the "︙" icon.
The following actions are available.
▼Upload subtitle file
Subtitle files can be uploaded.
▼Download subtitle file
You can download the subtitles you have set.
▼Conversion from timeline
The timeline name will be displayed as a subtitle.
*Time the subtitle is displayed will be the same as the timeline.
▼Delete subtitles
You can delete the added language.
Actions from the "︙" icon will overwrite the settings you have already made.
AI features
Subtitles can be automatically generated by AI based on the audio data of the video.
AI can also automatically translate subtitles into other languages.
Required
Standard or higher plan subscription
To use the AI function, you need to turn on the toggle key in the Settings, AI assist section.
AI Subtitle Generation
01. Subtitle generation
Click on "AI subtitle generation."
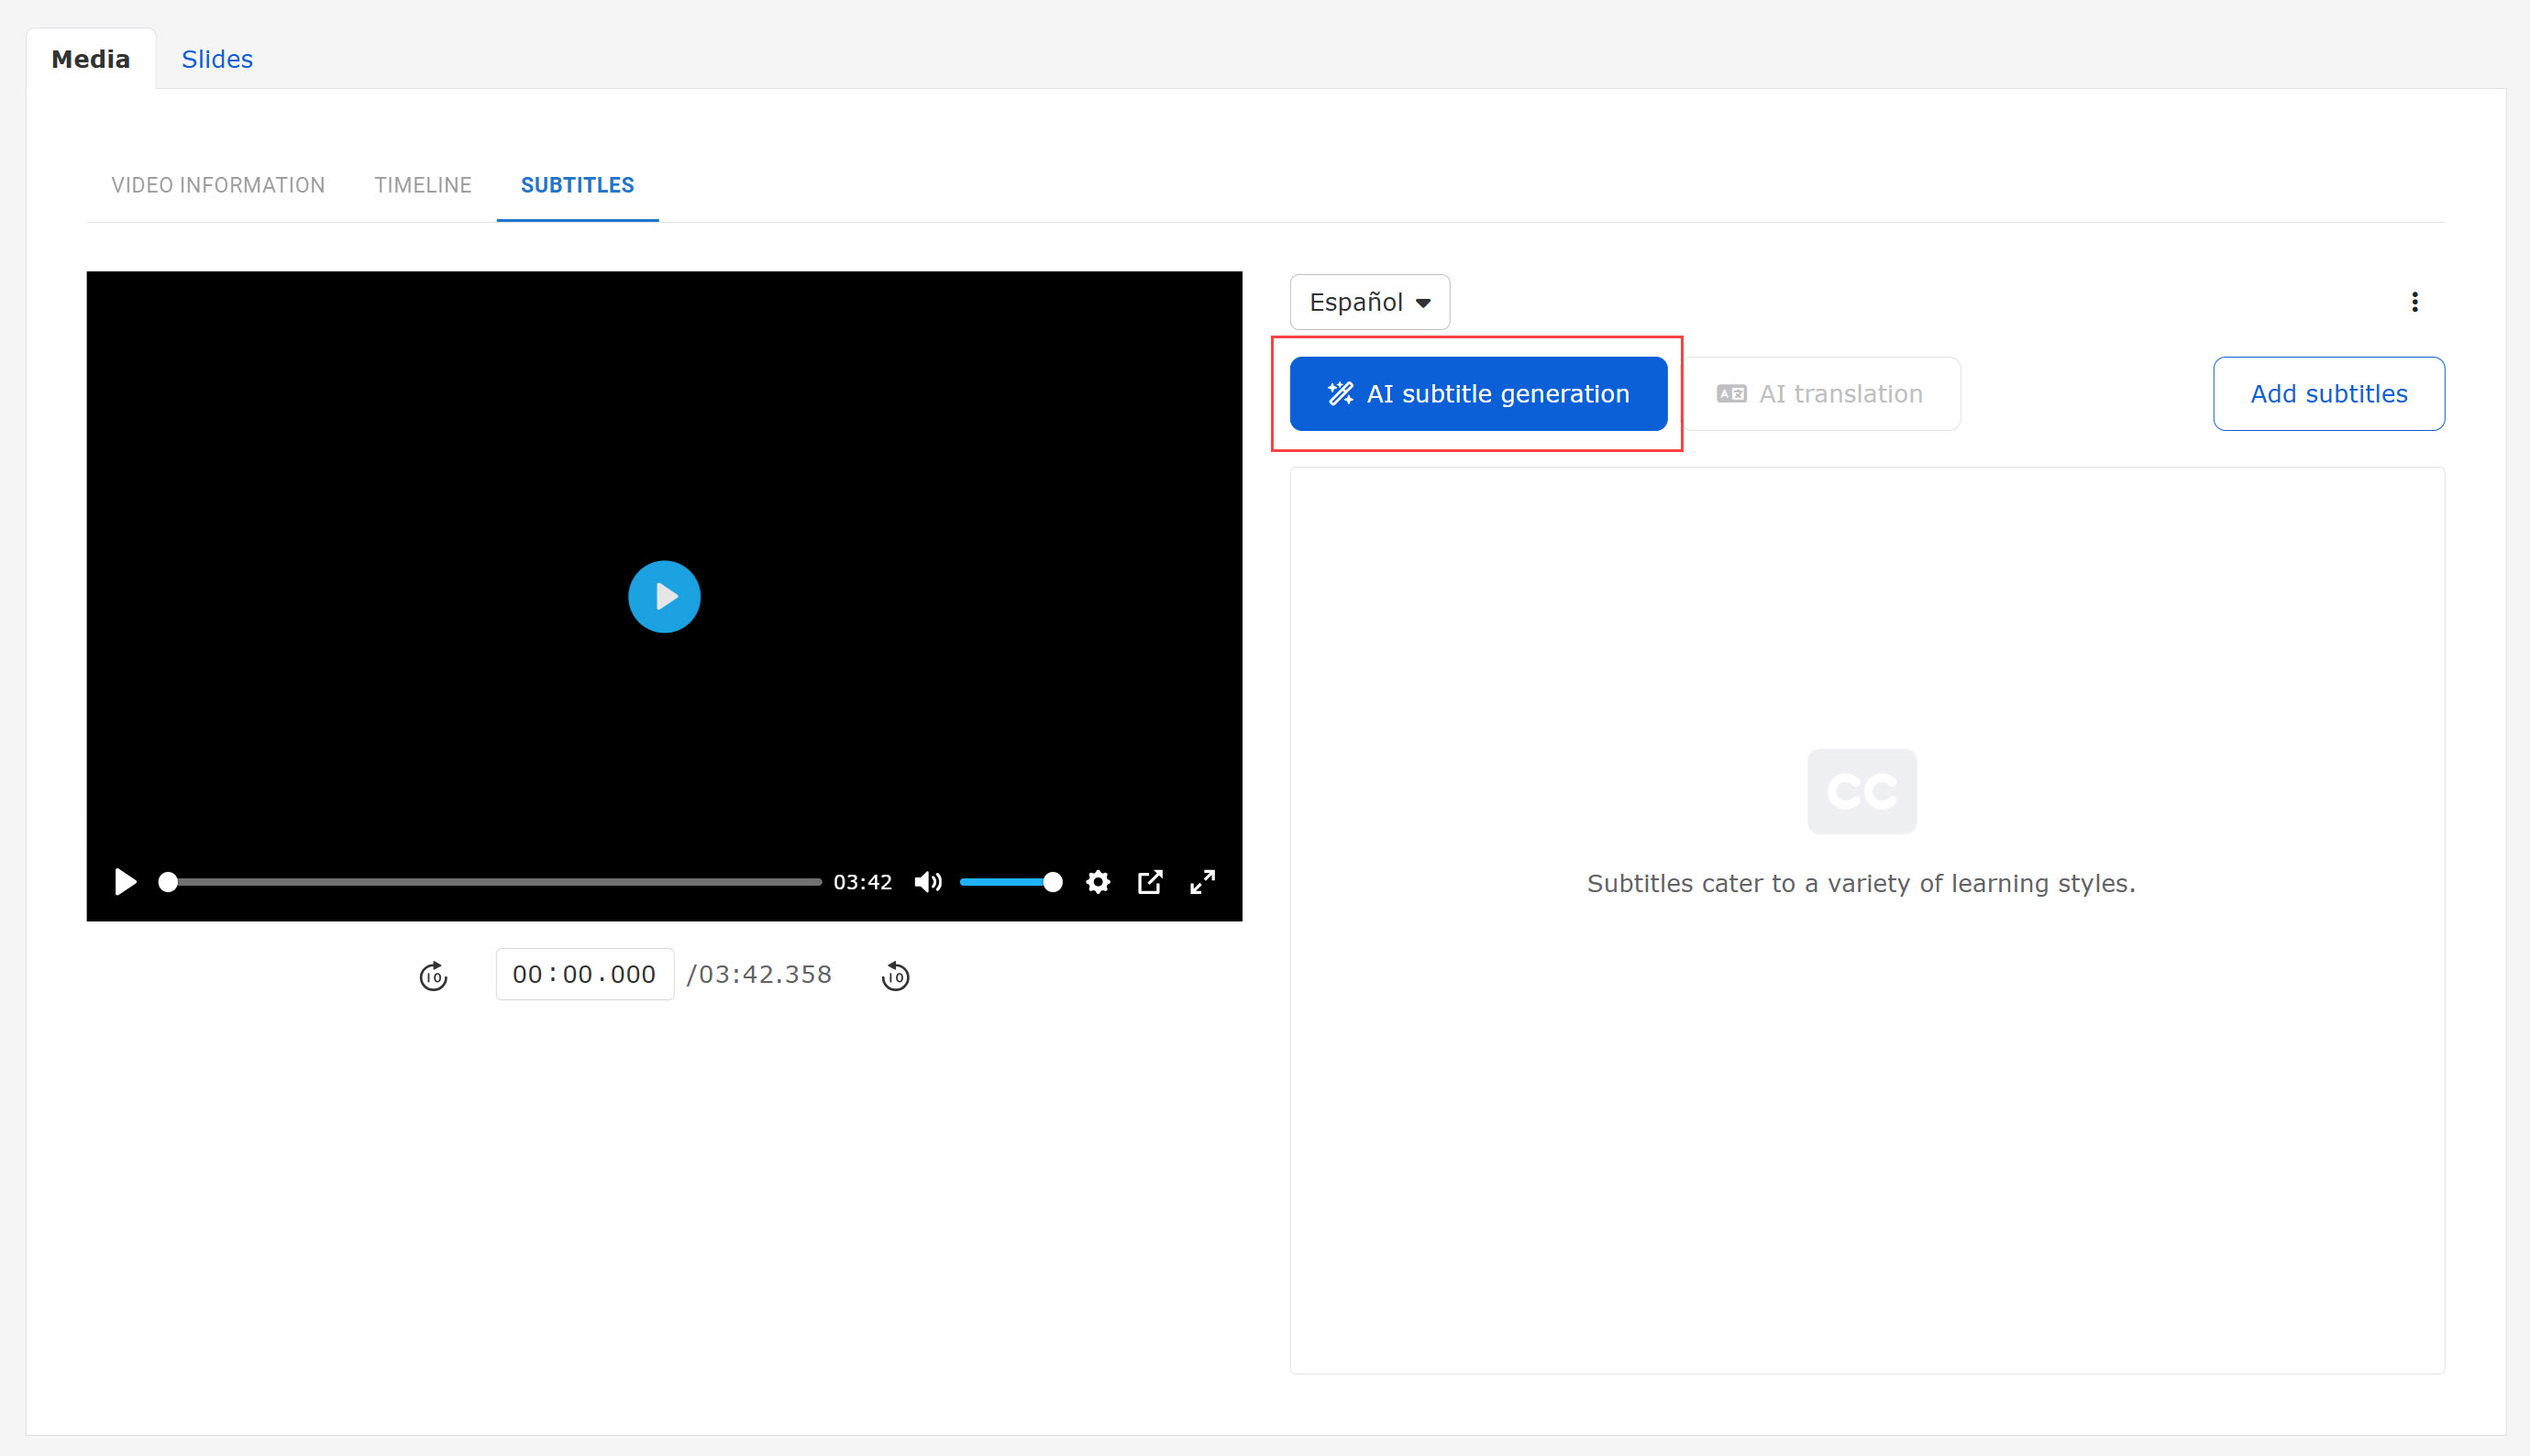
The following window will appear.
To have AI detect audio data in the video, select "Auto-detect."
If it does not give good results, specify a language from the list.
Click "Generate," and "Apply subtitles" after the subtitile generation.
*Available up to 60 minutes video.

Myanmar and Khmer languages are not supported to AI subtitle generation.
02. Subtitle display
The generated subtitles will be listed.
03. Edit subtitles
The following actions are available for the subtitles you have set:
- Edit: pencil icon
- Duplicate: file icon
- Delete : trash can icon
AI Automatic Translation
Subtitles can be automatically translated into another language.
Click on "AI translation."

The following content will be displayed:
・Left dropdown: Select the original language of the subtitles to be translated.
・Right dropdown: Select a language you wish to translate the subtitles into.
Click on "Translate" after the language selection.

The generated subtitles will be added as new subtitles in the specified language.
To edit the subtitle, click on the pencil icon.
Clicking "(language) subtitles" will display the subtitle list for each language.

Regarding the AI translation, each availability is as follows:
- Total number of characters: Up to 20,000
- Total number of subtitles: Up to 1,000
- Number of characters in each subtitle: Up to 1,000
Preview/Save
Click on "Preview" in the lower left corner to preview the content.
Select "Save to Private" or "Save as Public," and click "Save."
Integration with Manage media
When you upload video/slides, the slides and thumbnail files will be saved in the Manage media.
*For more details, refer to Manage media.
Access level
When the video player is set to [MOVIE-3.0] or later, the Access level will not appeare in the menu displayed by clicking the gear icon on the content.
To set the Access level, click the gear icon > "Video and Slide Setup," and save as public/to private.
*For video and slide shortcuts, "Access level" will appear in the Edit menu.