Member rank
You can limit the sale of your products to specific members only.
Required
Customization options, EC options, user management editing privileges, EC function access privileges
Adding Membership Ranks
First, create a new membership rank.
01. Open membership rank screen
Go to the Manage users.
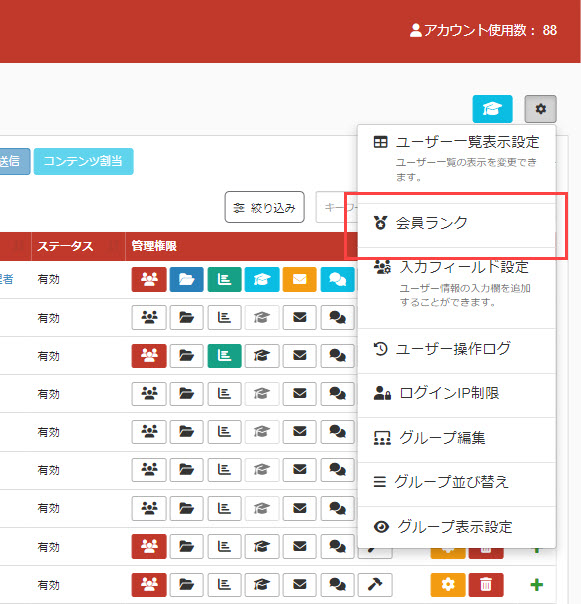
Then click on the gear icon in the upper right corner of the user management screen and select "Member Rank".

02. Open the Add Membership Rank screen.
On the screen that opens, click on "Add Membership Rank".
03. Settings
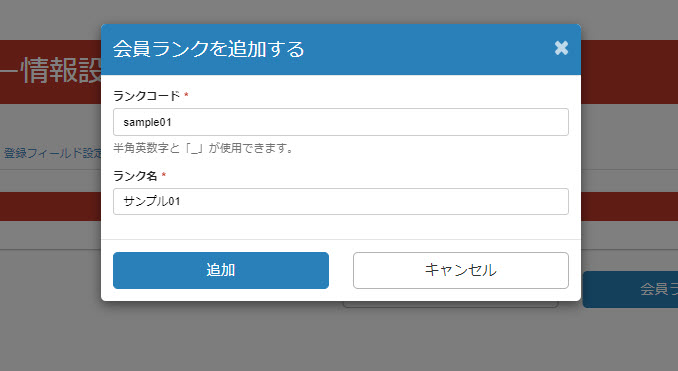
The following window will be displayed.
Set the "Rank Code" and "Rank Name" and click "Add.

04. Member Rank List
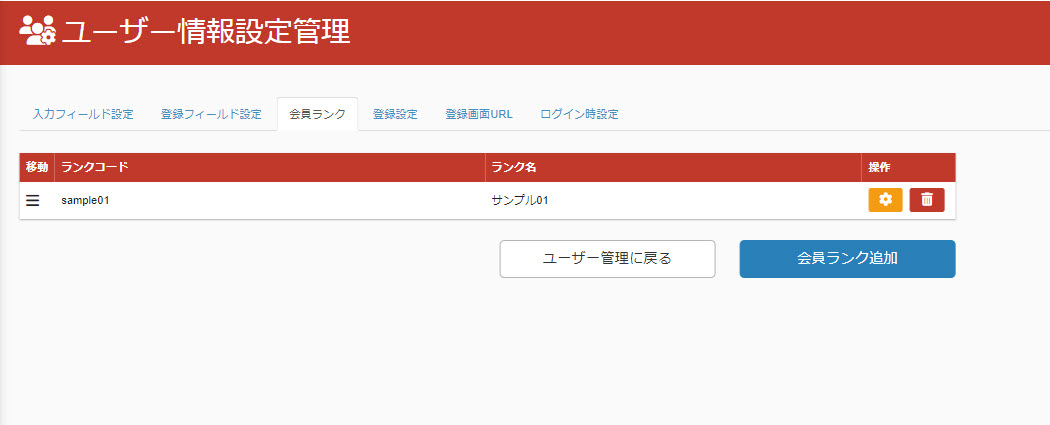
The membership ranks you have added will be listed.

05. Sort by membership rank
You can reorder them by placing the cursor on the icon to the left of each member rank, clicking and holding in the shape of a hand, and dragging and dropping.
Edit/delete membership ranks
You can edit/delete the membership ranks you have created.
01. Open membership rank screen
Go to the Manage users.
Then click on the gear icon in the upper right corner of the user management screen and select "Member Rank".
02. Edit membership rank
Click on the gear icon to the right of the target membership rank.
A pop-up will open to update your membership rank.
*The items to be edited are the same as when creating a new item, so you can use the "Adding Membership Ranks.
03. Deletion of membership rank
Click on the trash can icon to the right of the target membership rank.
Please check the content and delete it.
Use of membership ranks
Next, we will explain the setup procedure for restricting purchases by using the membership ranks you have created.
This is available for both regular product sales and account billing.
Register for Products
*For more details, refer to Add productPlease refer to the "Membership Ranks Available for Purchase" in the "Membership Ranks Available for Purchase" section.
Enrollment in account billing billing plans
*For more details, refer to SubscriptionPlease refer to "Membership Rank" in the "Membership Rank" section.