Purchase product
The following is an explanation of the process by which a learner purchases a product.
*Purchases are made on the product list screen, which is opened by clicking on "Find Products" in the side menu.
Required
Shared server/customization, EC
Product Selection
First, select the product you wish to purchase.
01. Product Selection
The learner selects the desired item from the list of products.
In selecting products, you can search for products in the following four ways
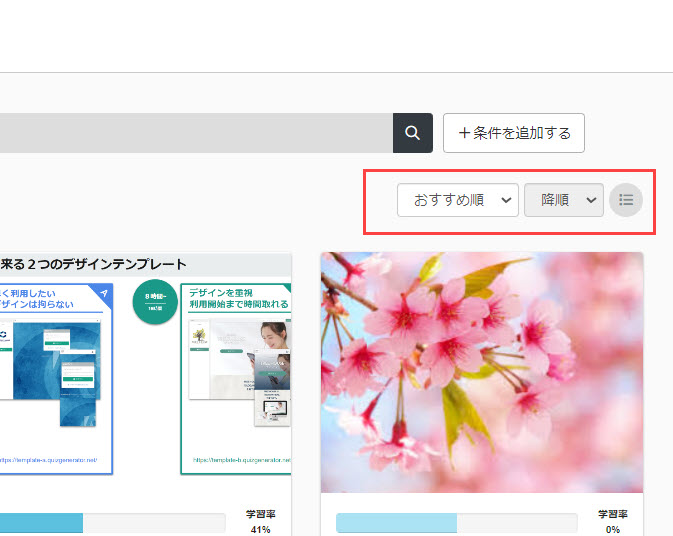
Change the order of products
You can choose from four types of product order, including "Recommended" and "New Arrivals," and select ascending or descending order.
It is also possible to switch between list and panel display.
Search by Category
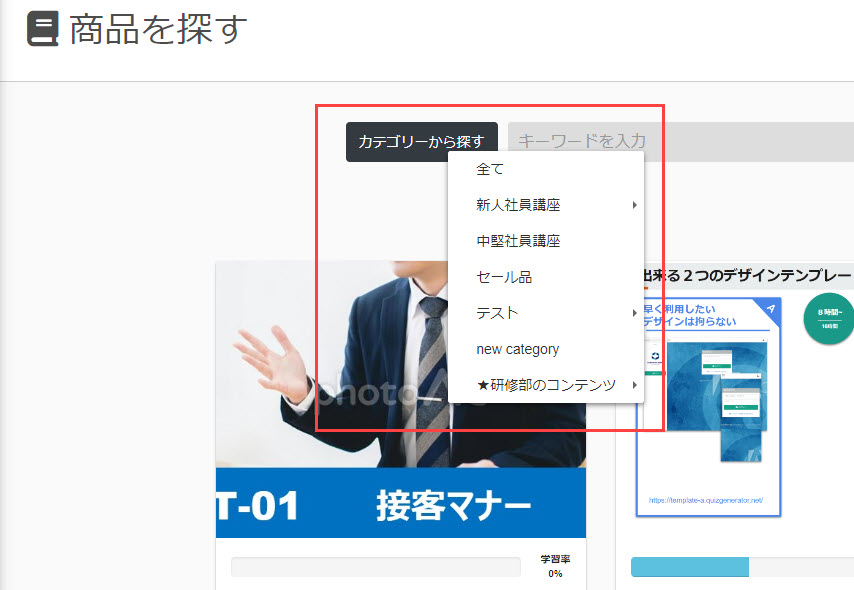
Click on "Find a Category" in the upper left corner of the screen to see a list of pre-created categories.
If you select a specific category from this list, only products with that category set will be displayed.
*For more details about the categories, refer to Manage categories.
Search by Keyword
After entering keywords related to the product in the input field at the top of the screen, you can search for the product by clicking on the magnifying glass icon.

Add search criteria
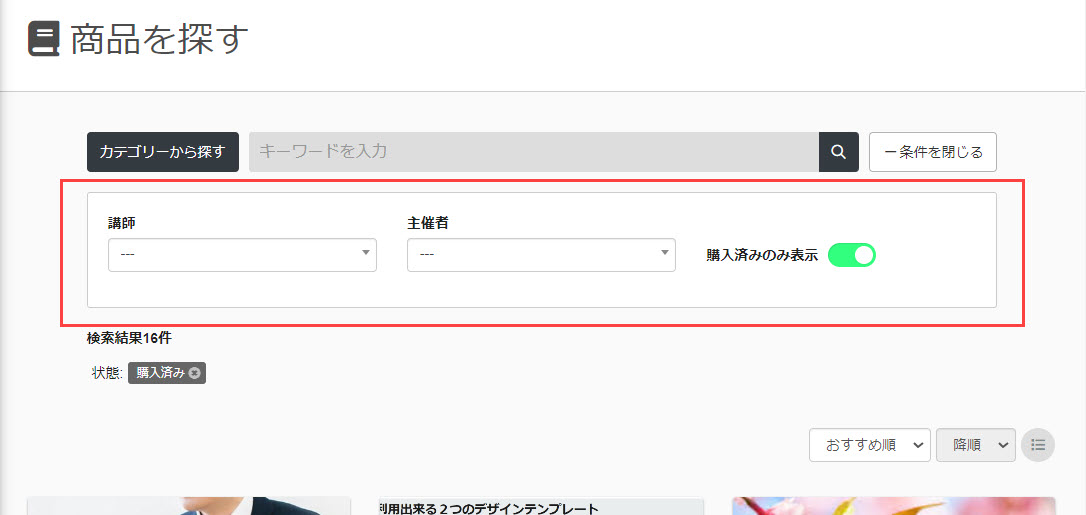
Click "Add condition" in the upper right corner of the screen, and the following selection box will appear.
This is,Search Settings."The items selected in the "Search" section will appear here as search items.
You can narrow down the products that match your criteria by selecting what you want from the "Instructor" or "Organizer" pull-down menu.
Alternatively, the "Show Only Purchased" toggle can be set to On to limit the display to only those items that have already been purchased.
02. About the product detail screen
Selecting an item on the Product List screen will display a detailed screen for that item.
The contents displayed here are as follows
Titles and ratings
The title and subtitle of the product will appear in the upper left corner of the screen.
It also displays the ratings for the product in terms of stars, the number of ratings and the number of students.
You can then share information about this product on X and Facebook via the "SHARE" button.

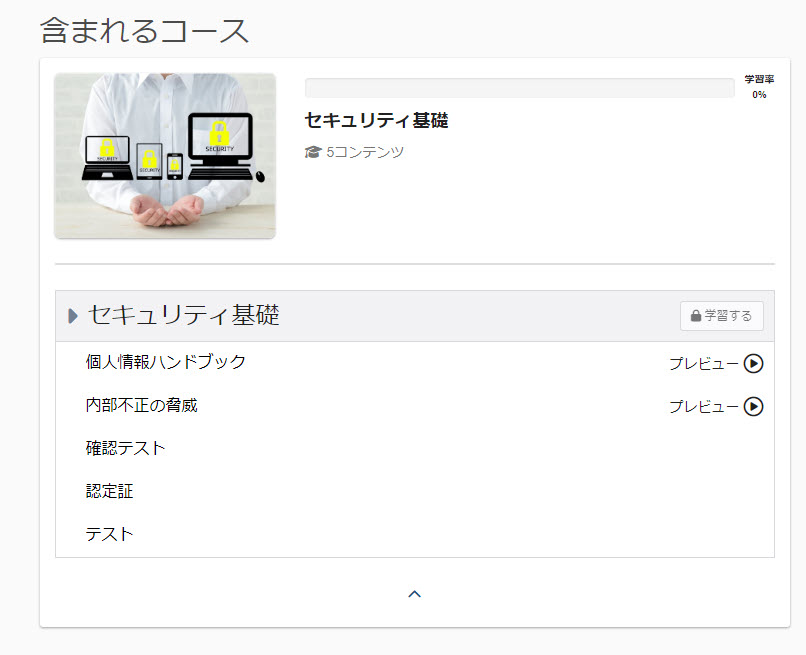
Courses Included
You can check information about the courses included in the product.
In addition,Merchandise ManagementIf you have allowed preview of the content on the screen, "Preview" will be displayed.
Description
A description of the product will be displayed.

review
Ratings for products are displayed in the form of stars, and the number of ratings and the number of participants are also displayed.
In addition, individual learner reviews are displayed.

The learner submits a review via the "Review" button.
In the following pop-up that opens, enter your rating and comments, then click "Review".
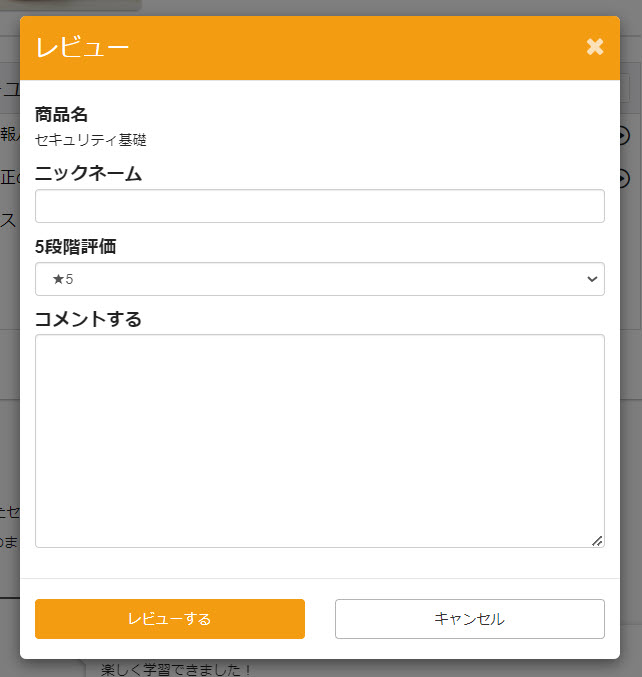
It is also possible to hide reviews.
*For more details, refer to Review.".
Select a Plan
On the right side of the screen, a list of purchase plans set up for the product in question is displayed, and the learner selects the desired one.
For proxy purchases, enter the purchase quantity as well.
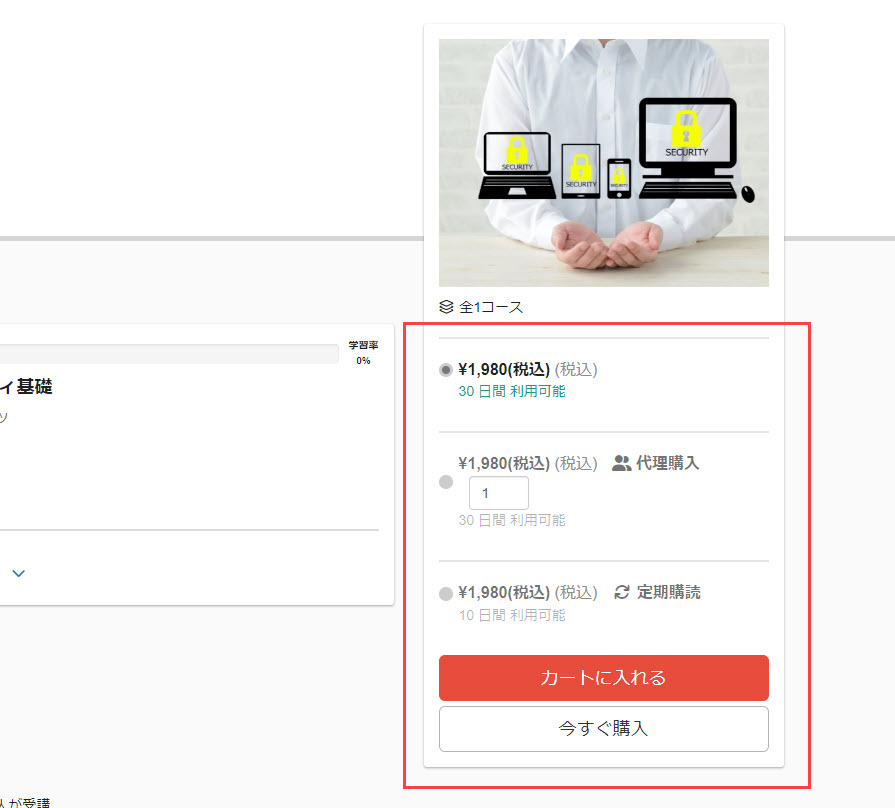
Click "Add to Cart" to continue shopping or "Buy Now" to proceed with the purchase.
It is also possible to set the cart function to not be used.
*For more details, refer to Use of cart functionality.".
03. cart
When you add an item to your cart, the product detail screen will show "✔Included in cart." will be displayed on the product detail screen.
To remove items from your cart, click on the trash can icon.
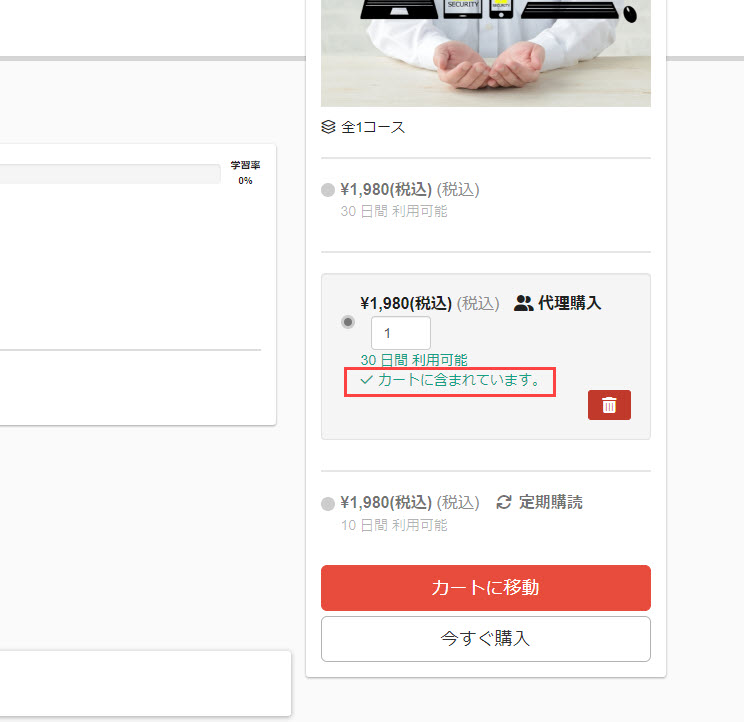
Click "Go to Cart" to see the contents of your cart.
On this screen as well, you can remove items from your cart by clicking on the trash can icon.
In the case of proxy purchases, the purchase quantity can be changed.
After confirming the contents, click "Proceed to Purchase".
Purchase Procedure
Once the selection of products is complete, the purchase process continues.
01.List of purchased products
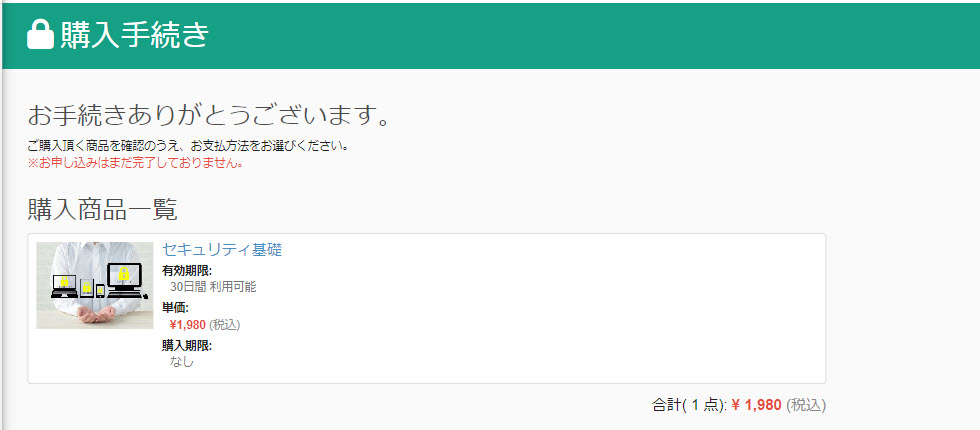
A list of items purchased is displayed at the top of the "Purchase Procedures" screen.
02. Select a payment method
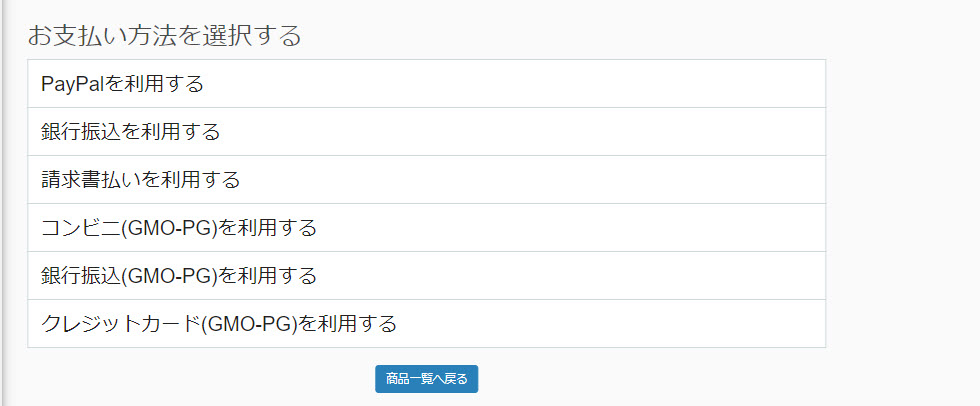
At the bottom of the screen, select a payment method.
*For payment methods,Setup for payment processing.The payment method you set to enable on the screen will be displayed.
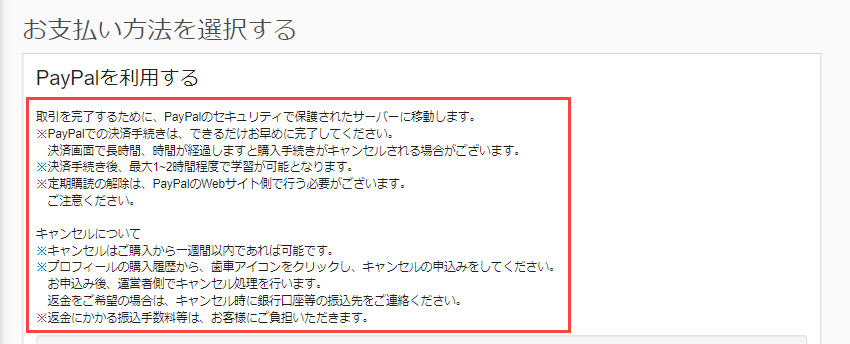
When you click on a payment method, the description and the Specified Commercial Transaction Law notation set in the "Payment Processing Settings" screen will be displayed.
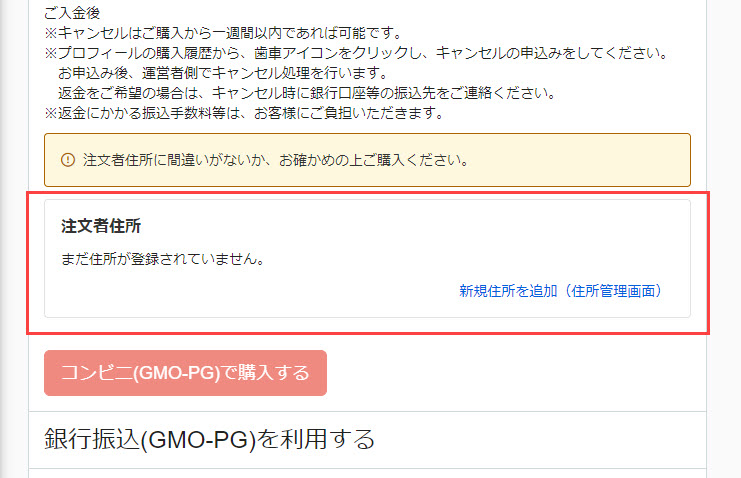
Also, if the use of address registration is enabled on the "Payment Processing Settings" screen, a field for registering an address will appear.
If the address information is not yet registered, the following will be displayed.
Click "Add New Address (Address Management Screen)" to register address information.
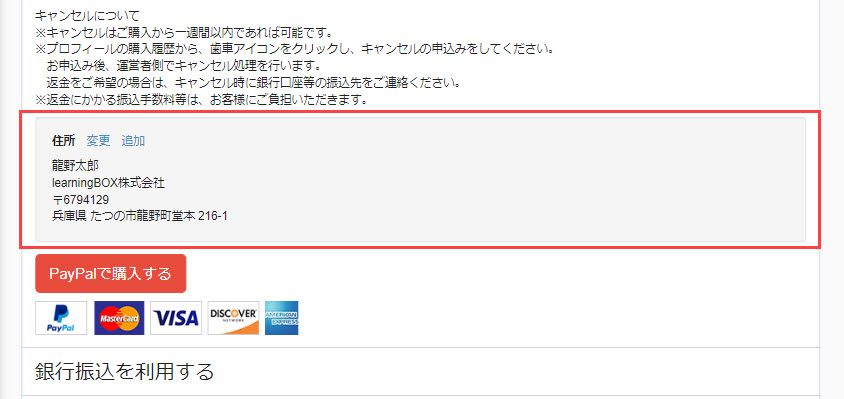
If the address information has already been registered, the default address will be displayed as shown below.
To change this, click "Change".
To register another new address, click "Add".
To select products again, click "Return to Product List".
To complete the purchase of an item, click the "Buy" button for the desired payment method.
03. Purchase Completed
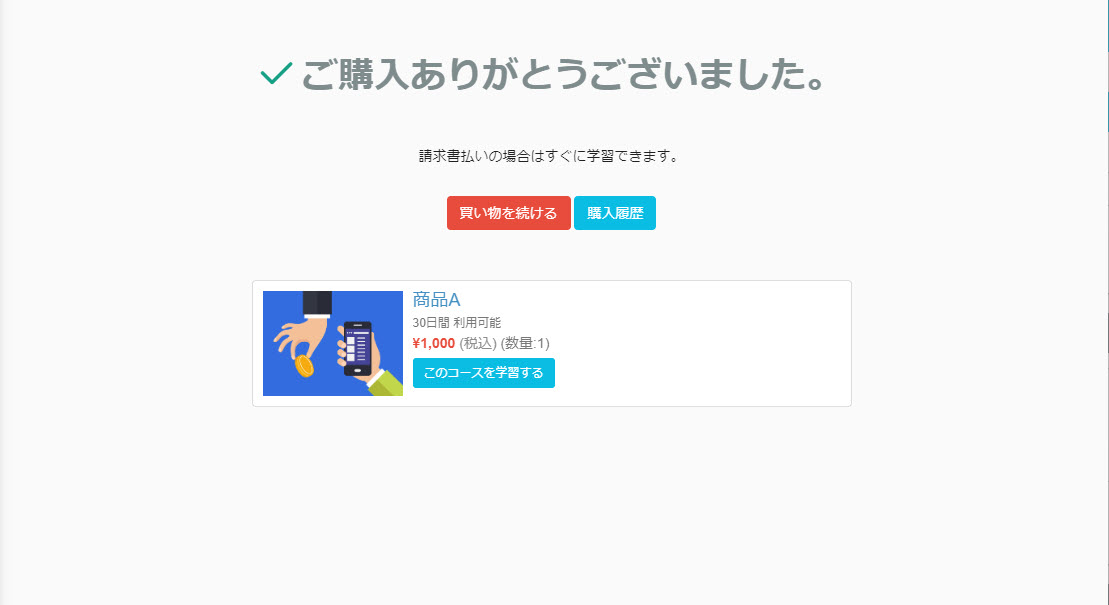
When the purchase is completed, the following screen will appear.
If you still wish to continue shopping, click "Continue Shopping.
Also, to review your order, click on "Purchase History".
Or, if you want to start learning about the product immediately, click on "Learn this course".
