Manage reservations by training
You can manage reservations and attendance for each training.
The setting page has two tabs: "Reservation list" and "Tickets."
*Manage reservations and attendanceOn the "Training" screen, click the "Details" button for each training course to move to the "Manage Reservations by Training Course" screen.
[Training features]
You can build a training program with several courses.
Learners can select and reserve a training course from the list, and take it within the specified period.
Required
Customization option, Management role of Training organizer/Instructor, Reservation/Attendance manager
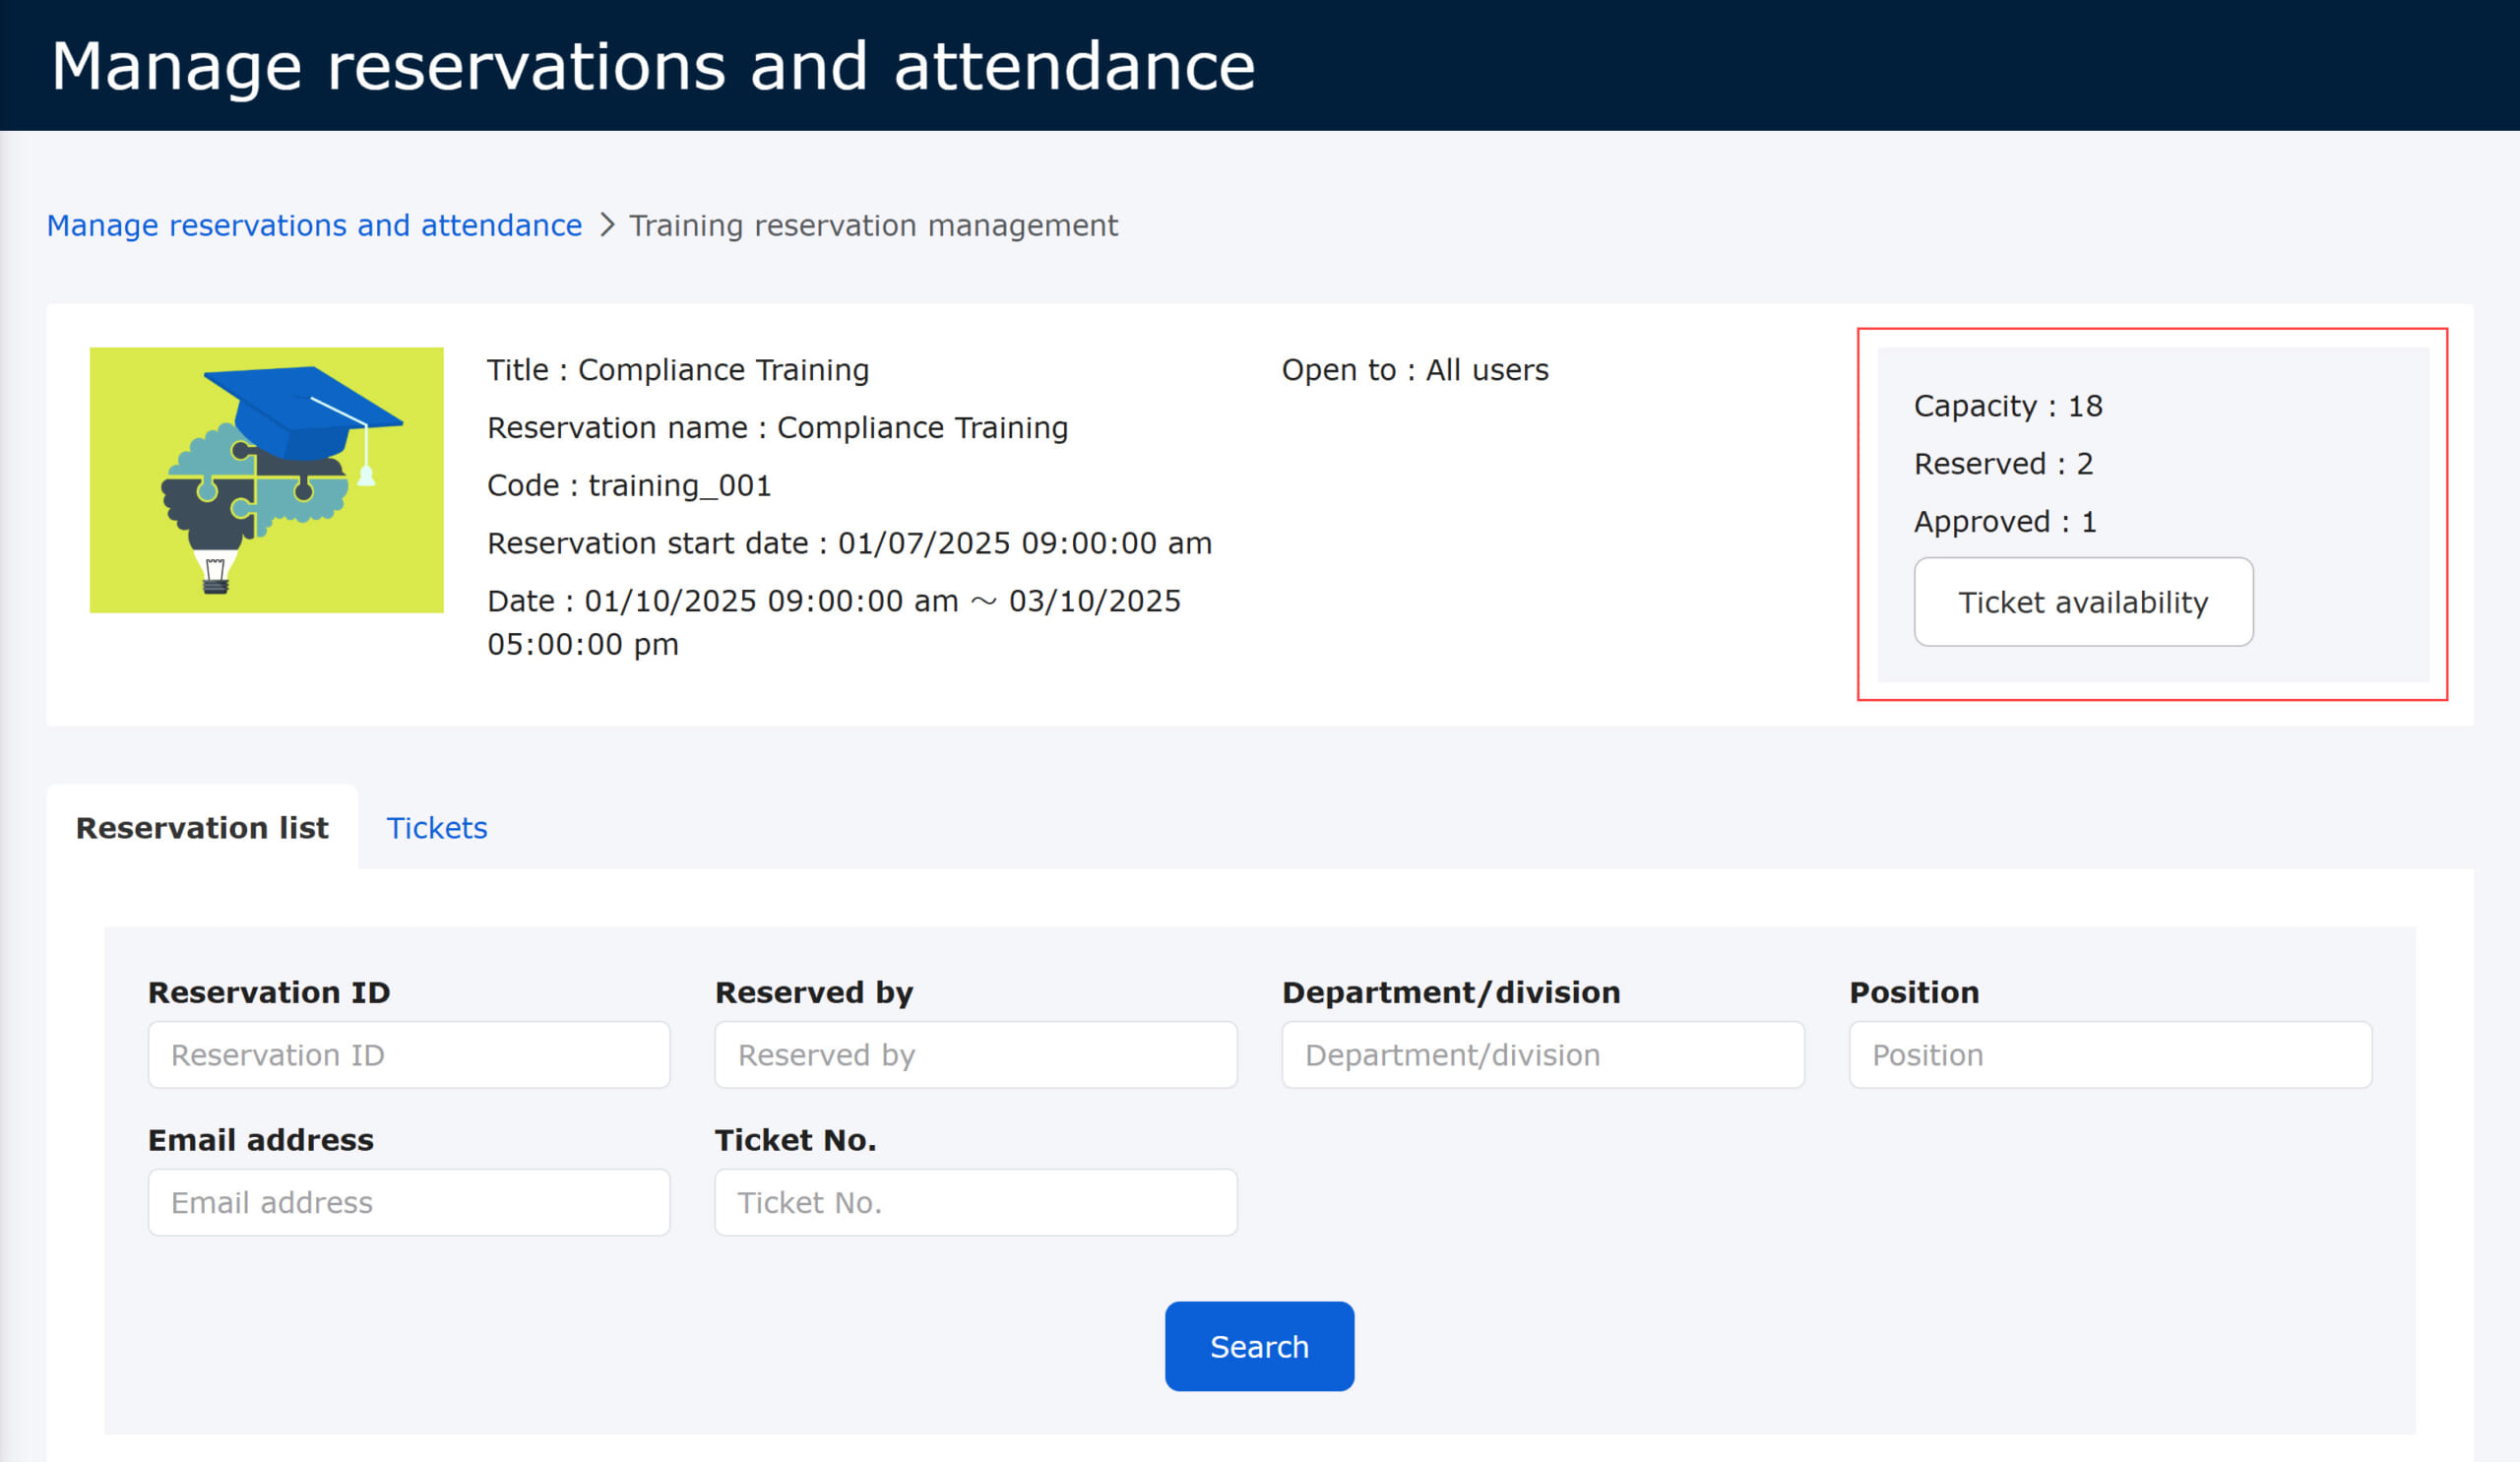
Reservation status
You can check the capacity, number of reservations and approvals in the upper right corner on the page.
To check the available seat at the venue, click on the Ticket availability.
Reservation list
The following explain the operations available on the "Reservation list" tab.
Assigned Reservation managers can also access to the following page.
*For more details, refer to Manage trainingPlease refer to the "Administrator" section of the
Confirm reservation
01. Reservation list
Reservations for the training will be listed.
Depending on the assigned management roles, items displayed will be different.
- Training organizer/Instructor: All reservations will be displayed.
- Reservation managers: Users who belongs to the groups which you are assigned to will be displayed.
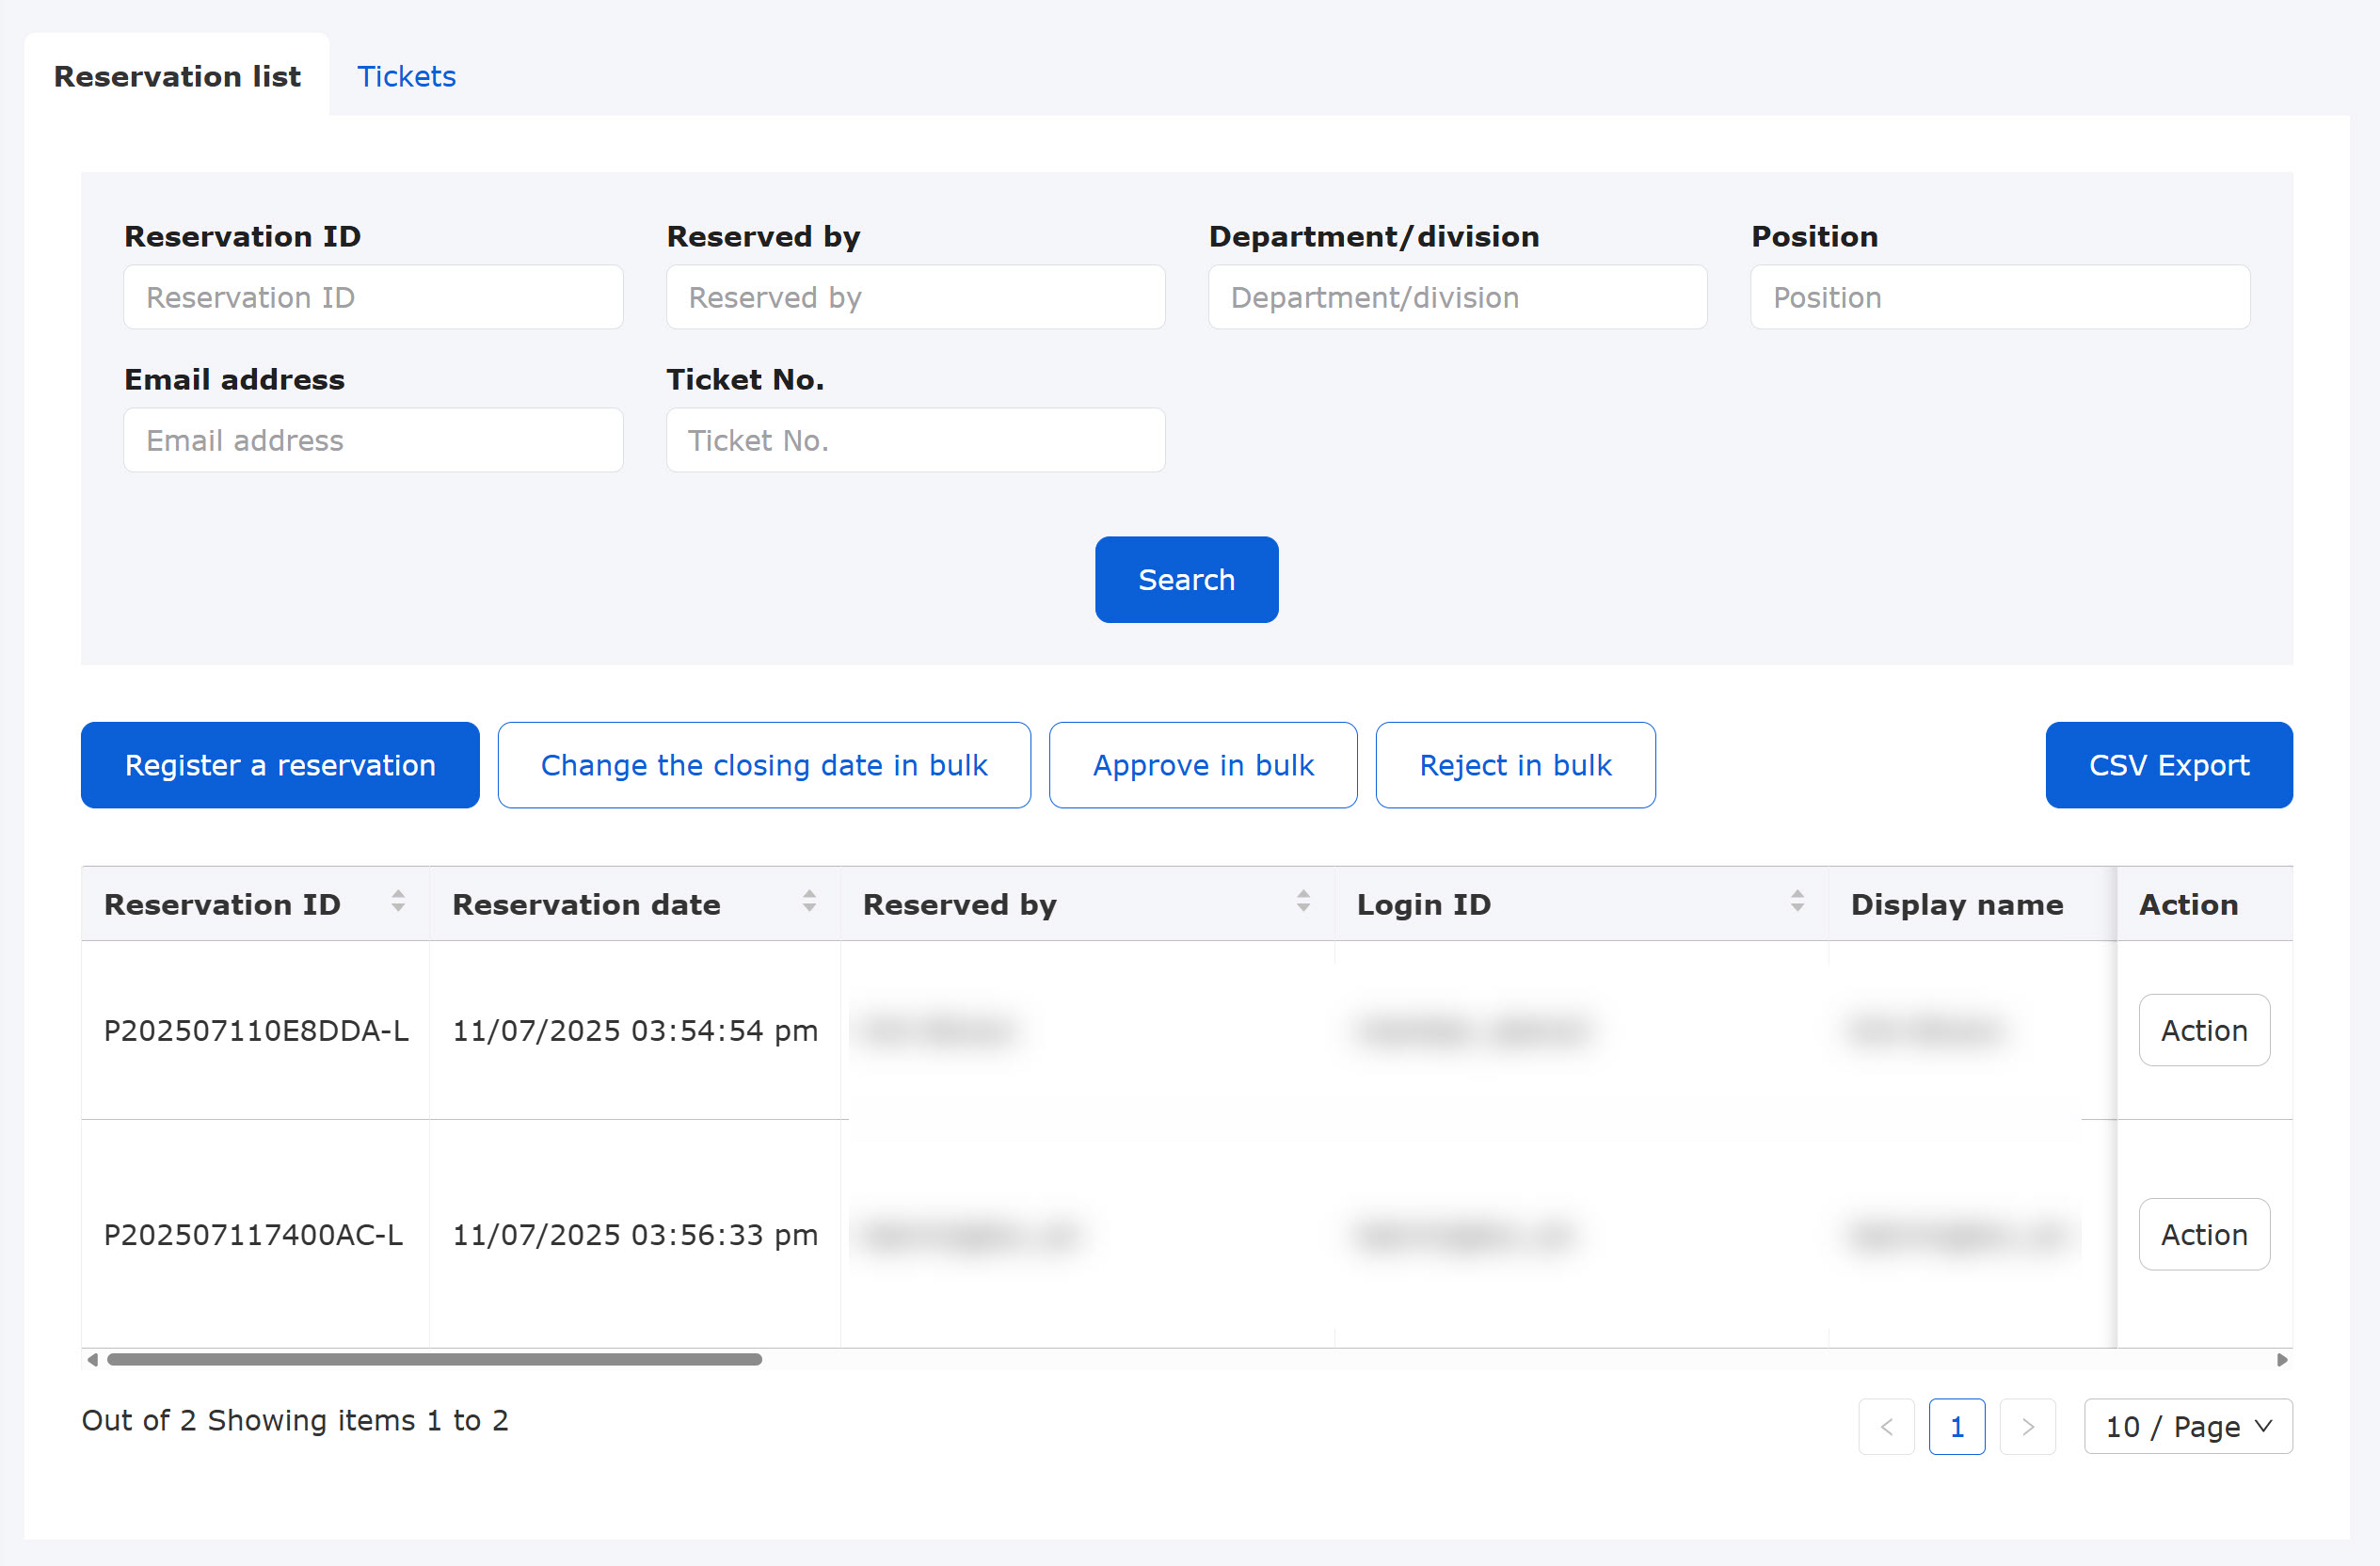
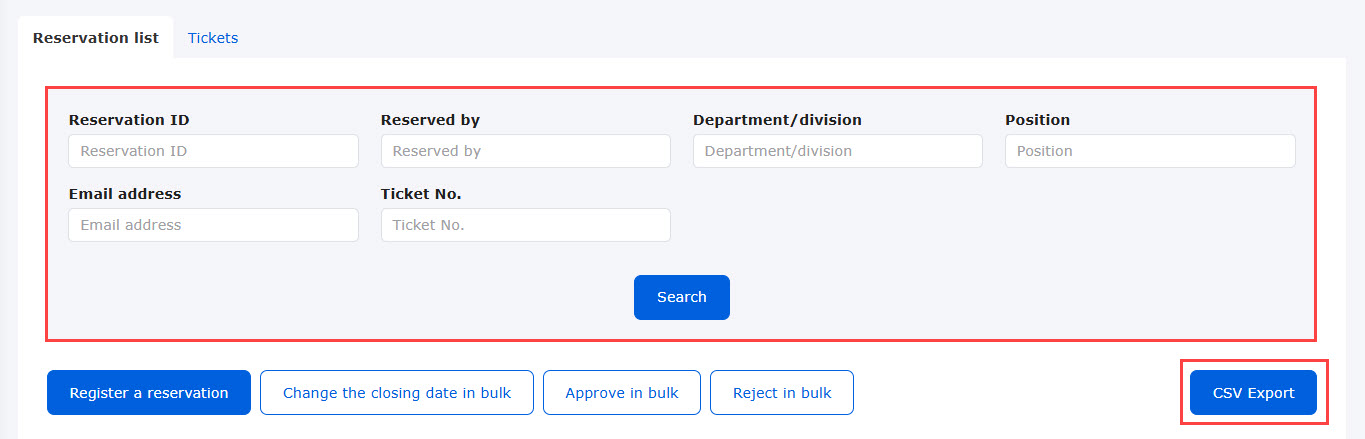
You can search reservations in the search field.
The result can be exported via a CSV file.
Approve/disapprove reservations
You can approve/disapprove reservations.
The following explain two methods.
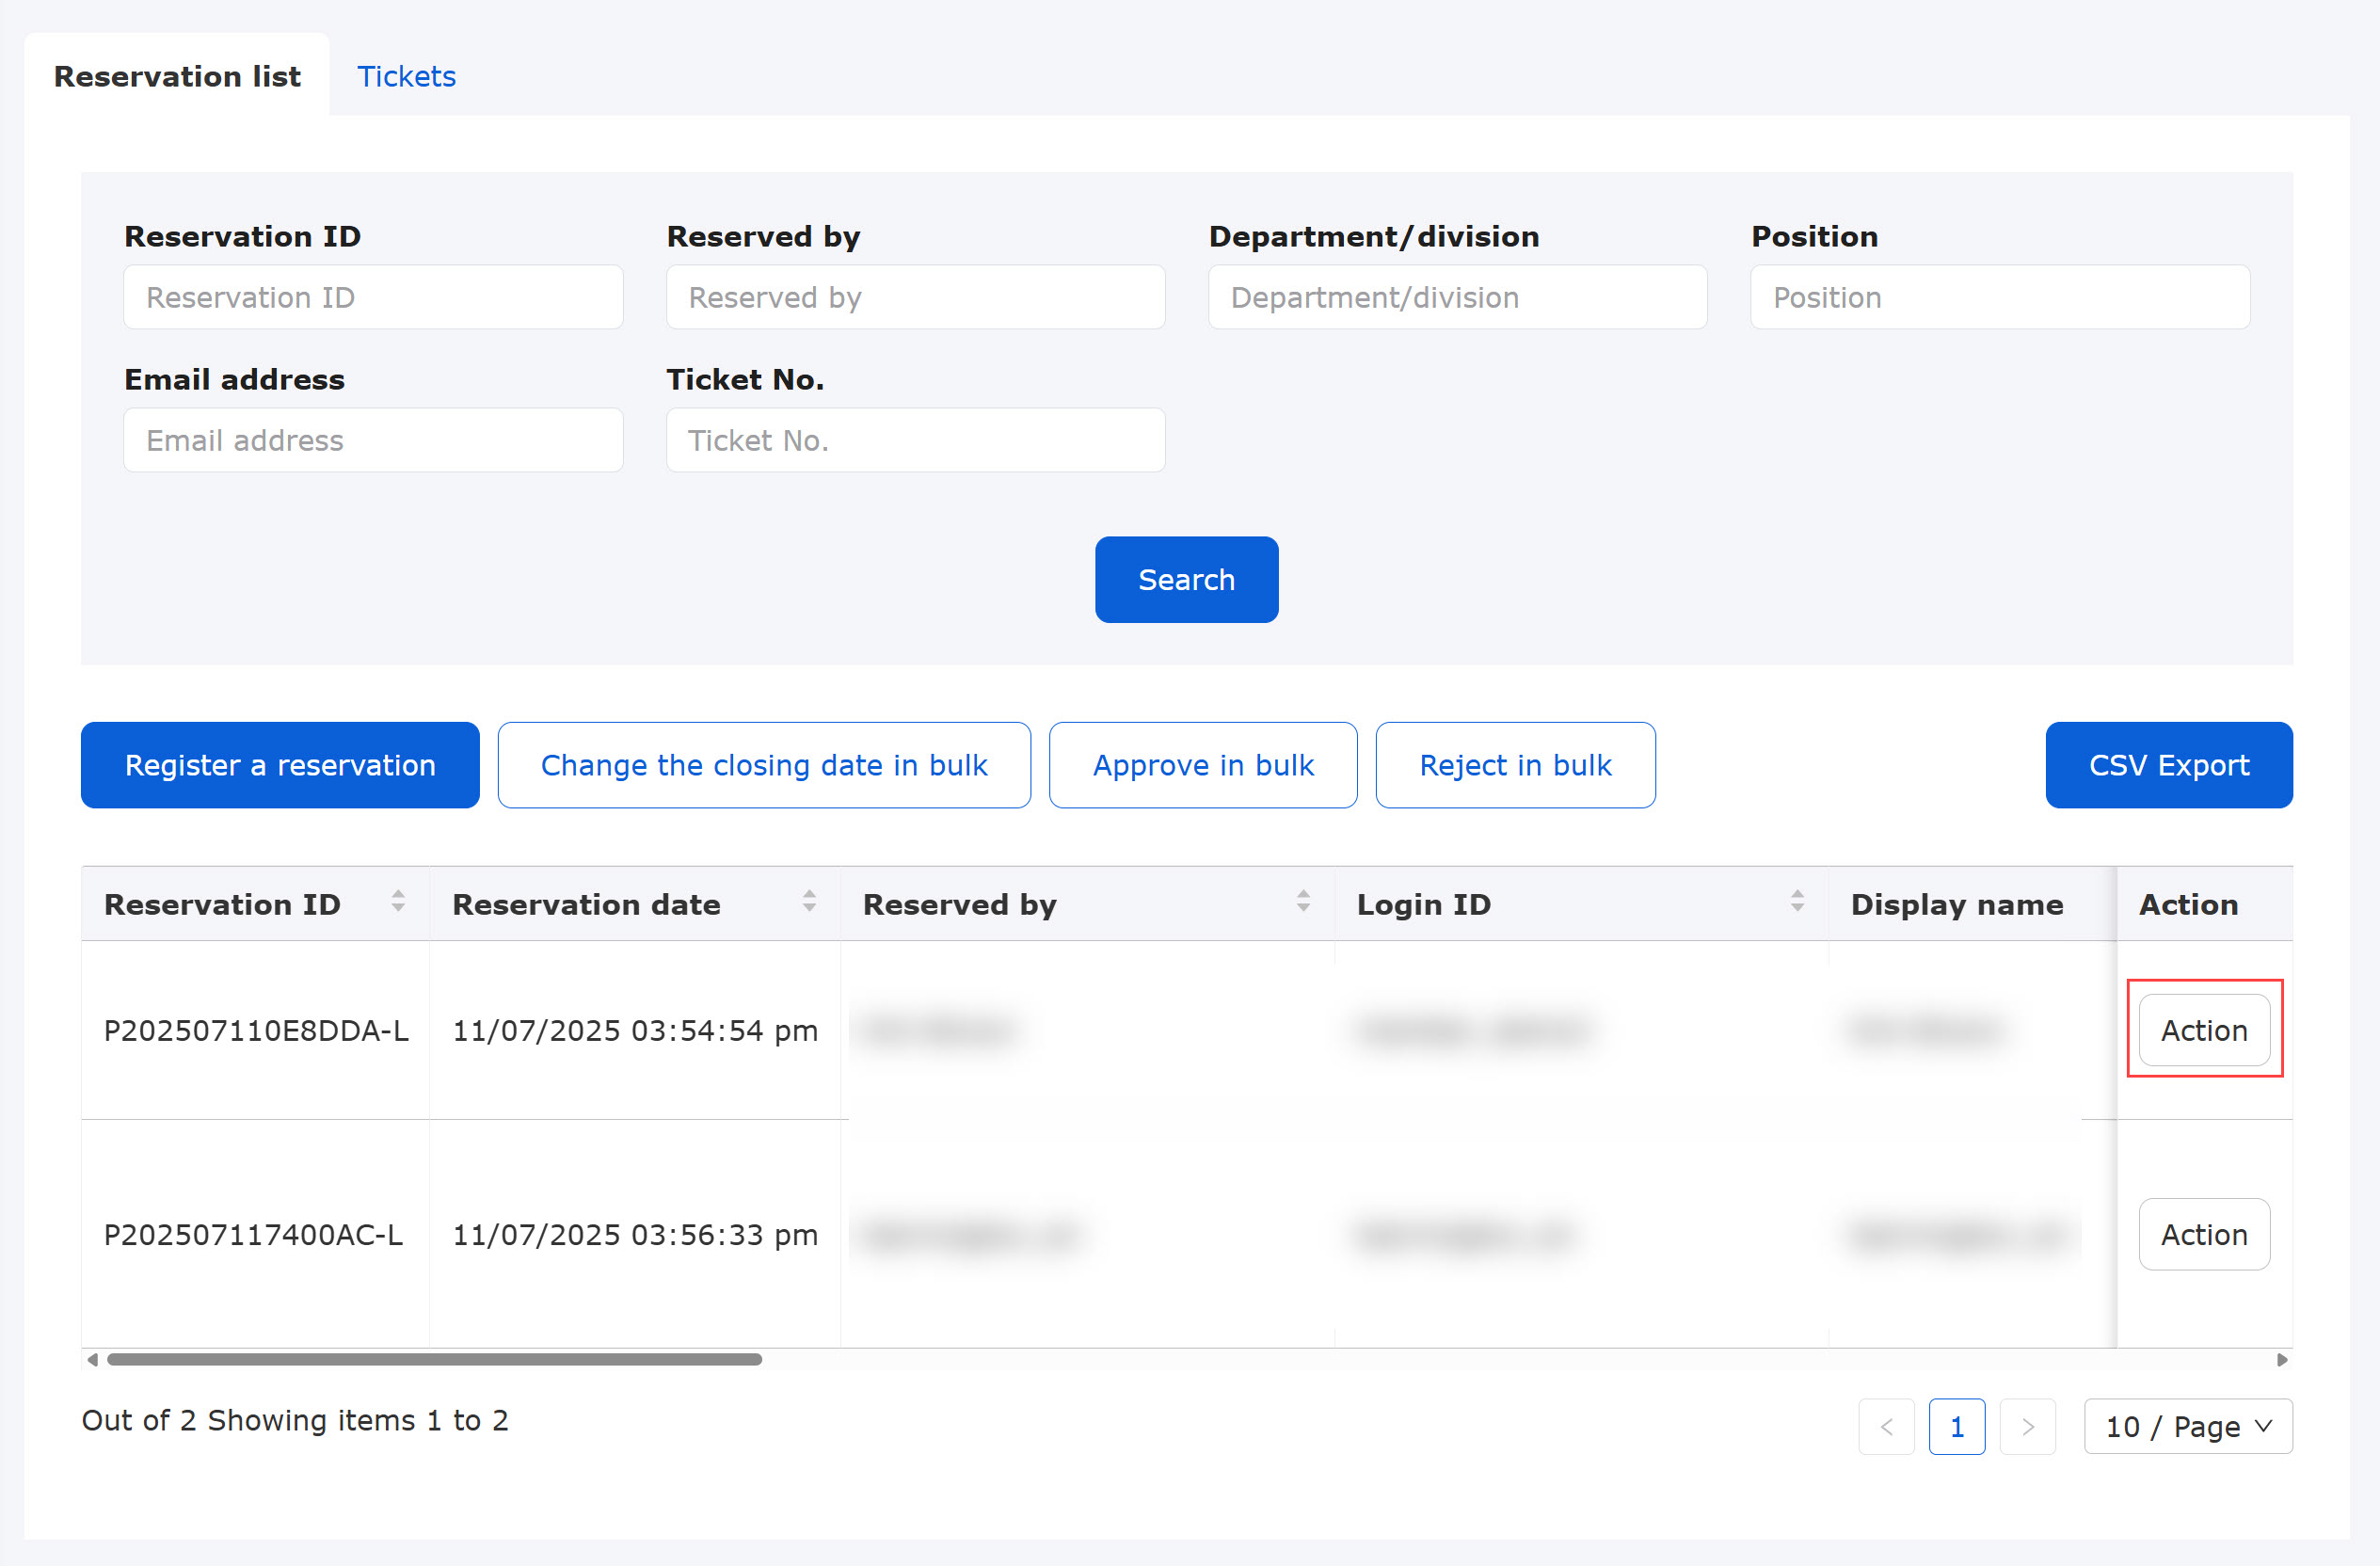
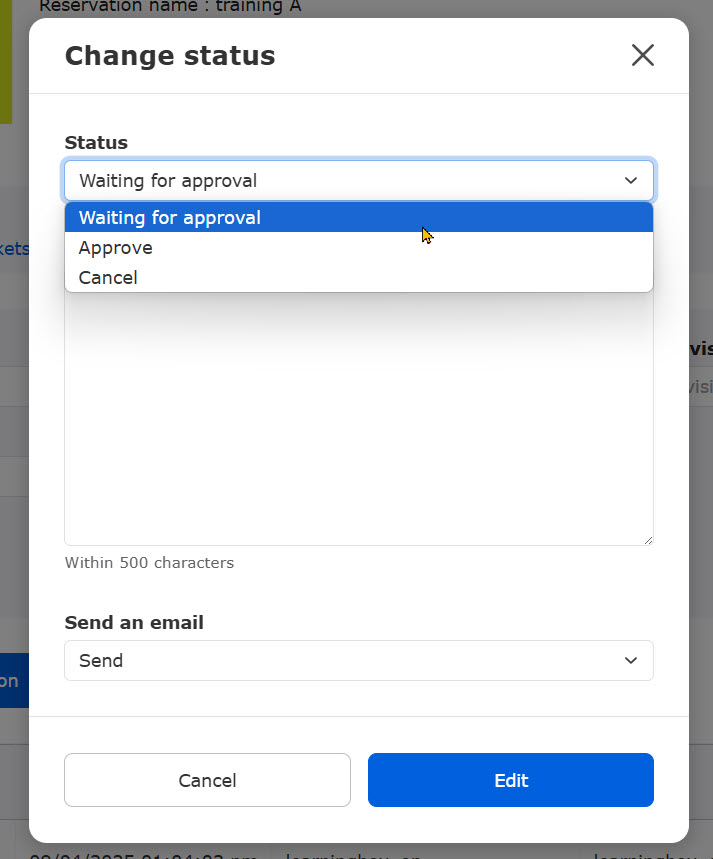
One by one
Click on "Action."
Select one from the list.
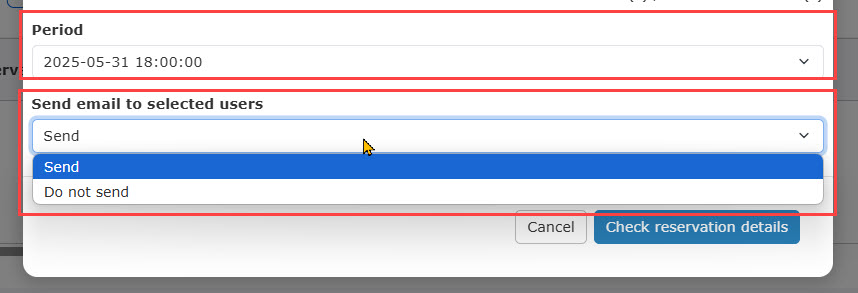
You can enter text if necessary.
If you want to send an email to users, select "Send."
Click "Edit" to finish the setting.
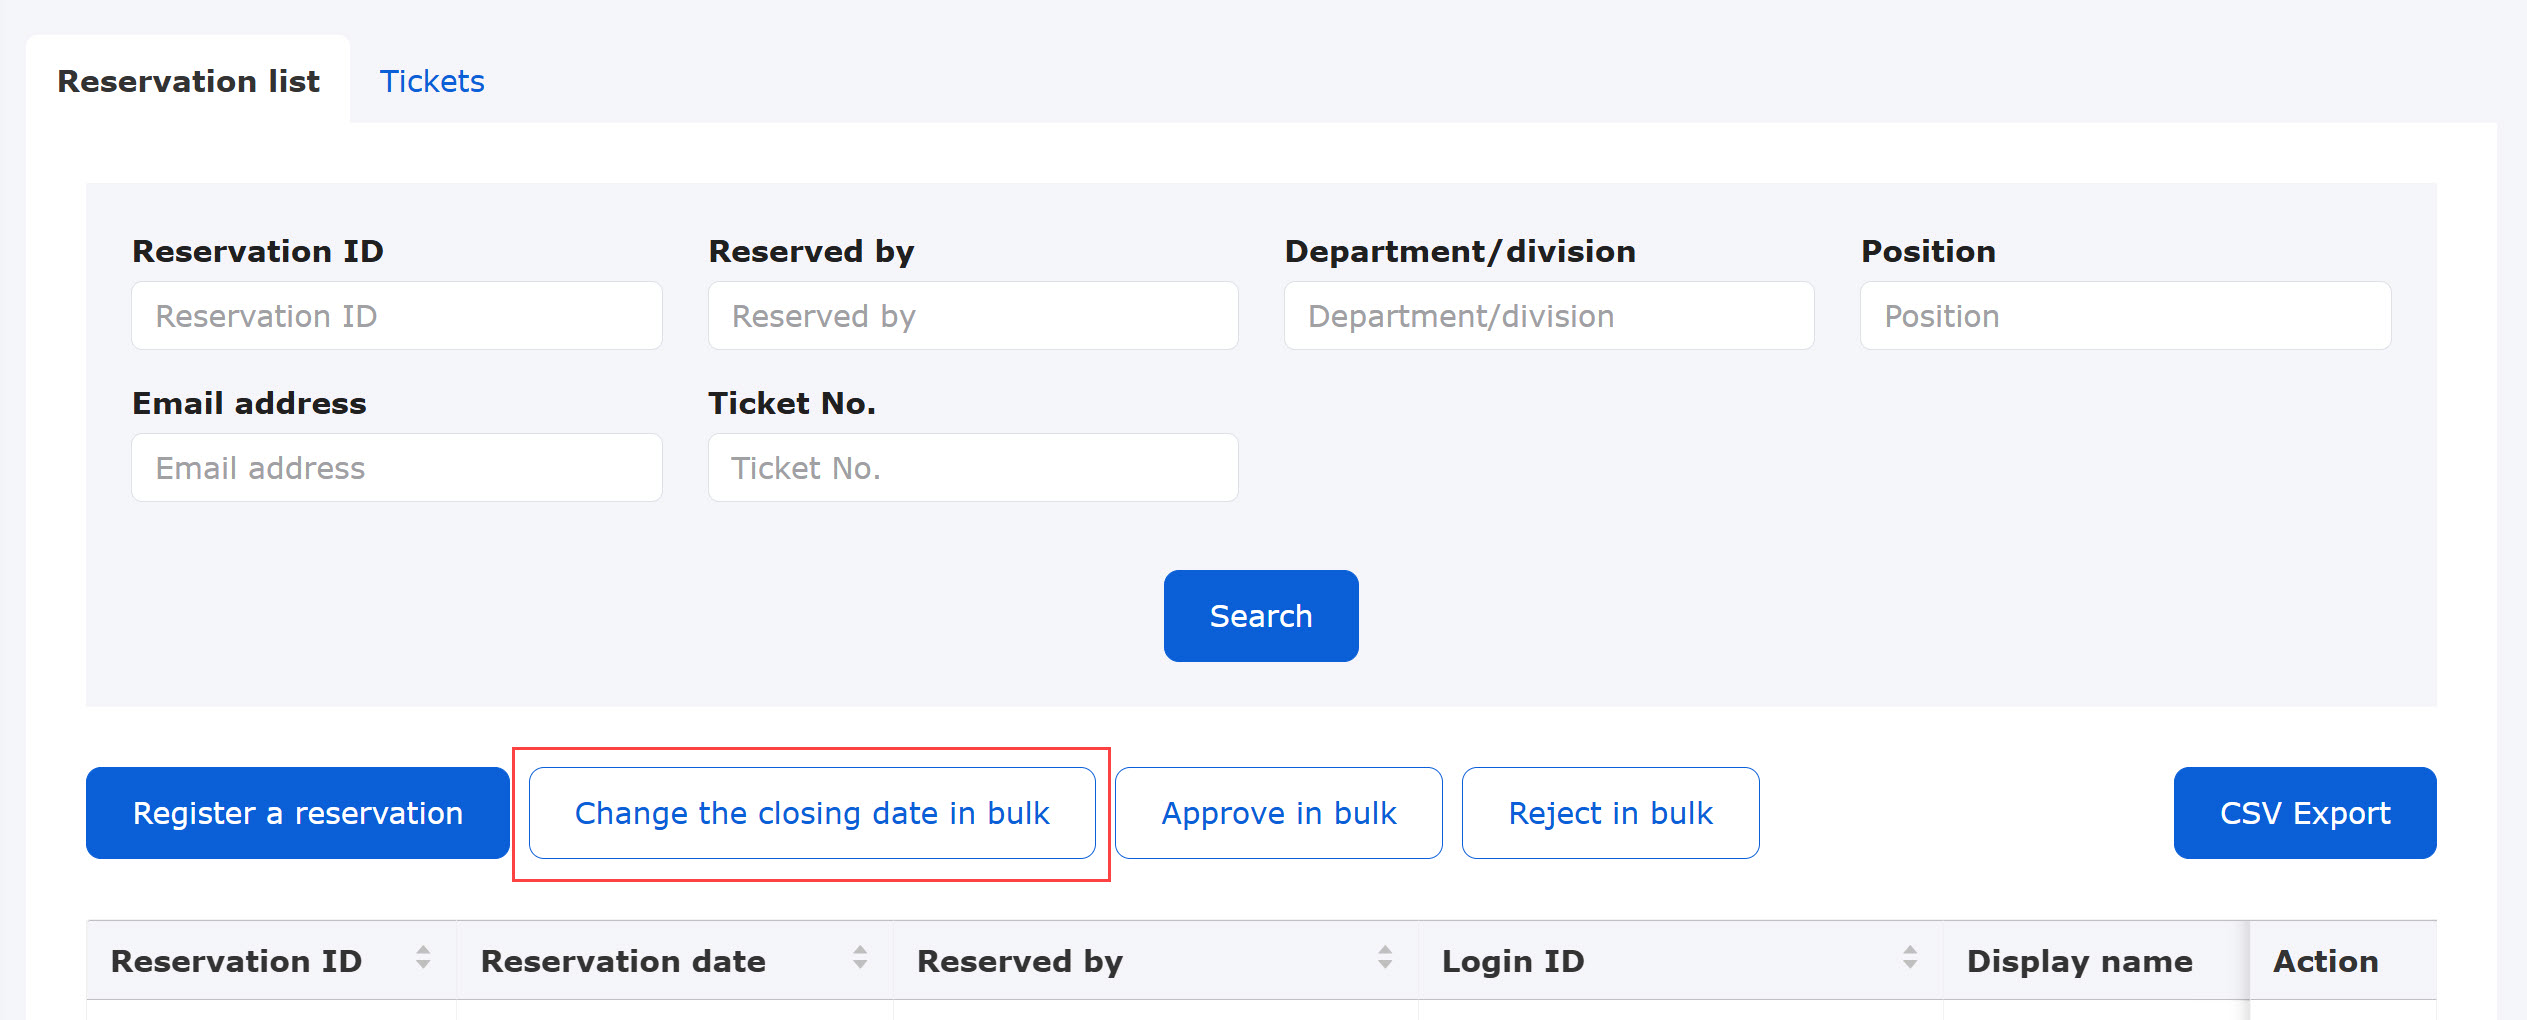
Batch operation
Click "Approve in bulk" or "Reject in bulk."
*When the auto approval is active, the Batch approval/disapproval will not be displayed.

A pop-up window will be displayed.
You can search by name and login ID.
Select users by ticking the boxes.
If you wanto to send an email to users, select "Send" from the list.
Depending on the management roles, the items displayed will be different.
- Stakeholders: all users will be displayed.
- Reservation managers: only groups which you are assigned to will be displayed.
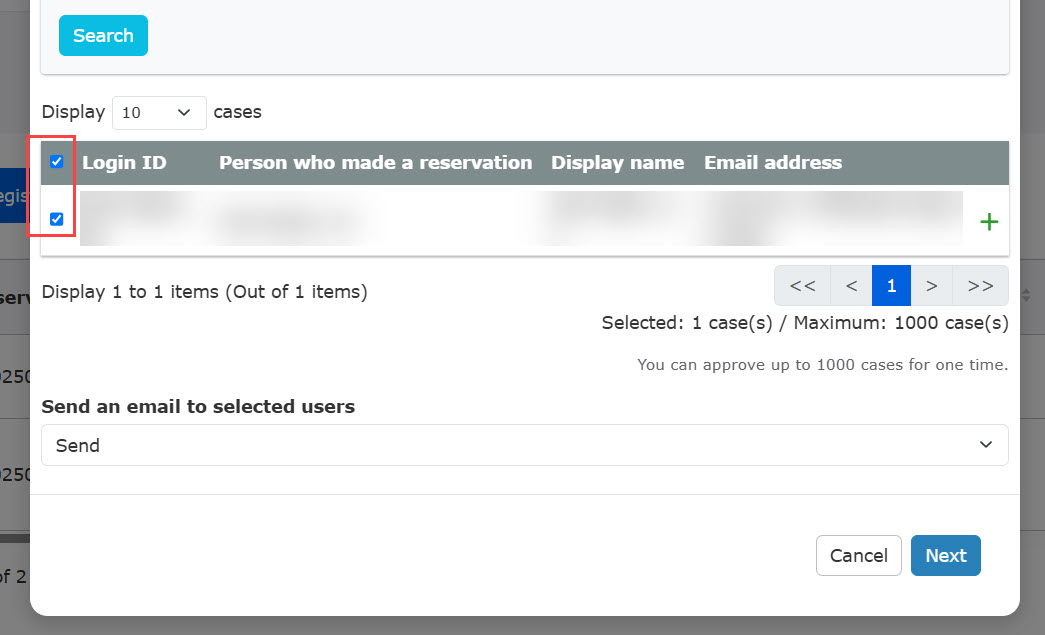
Click "Next."
Make sure the content and click Approve/Reject.
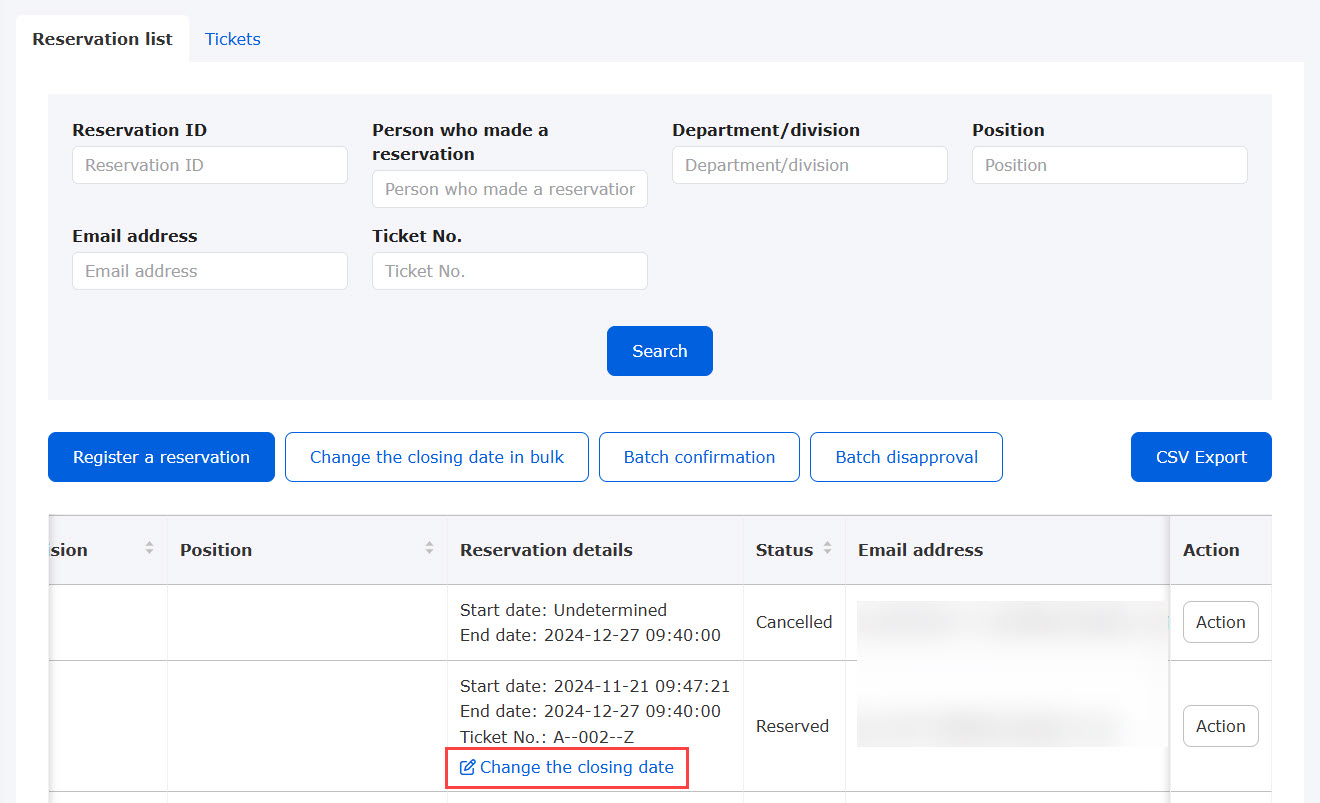
Change the closing date
The closing date of the training can be changed.
The following explain two methods.
*For more information about due dates, please see "Manage trainingPlease refer to "Reservation Classification" in "2.
The closing date must be after the training date.
One by one
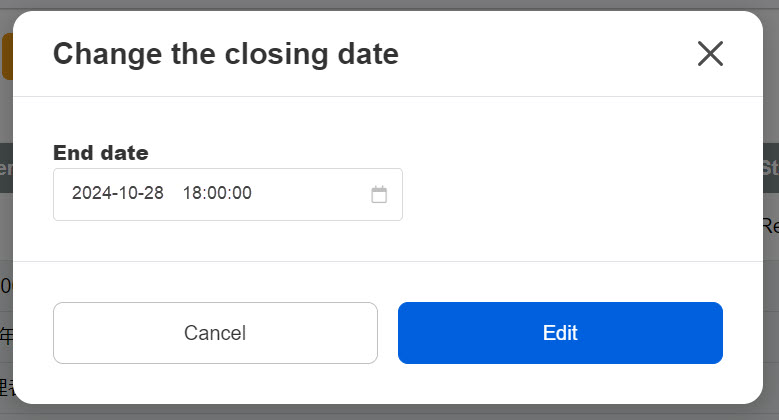
Click on "Change the closing date."
The following window will be displayed.
Click on "Edit."
Batch operation
Click on "Change the closing date in bulk."
The following window will be displayed.
You can search by name and login ID.
Select users by ticking the boxes.
Specify a new closing date.
Depending on the management roles, the items displayed will be different.
- Stakeholders: all users will be displayed.
- Reservation managers: only groups which you are assigned to will be displayed.
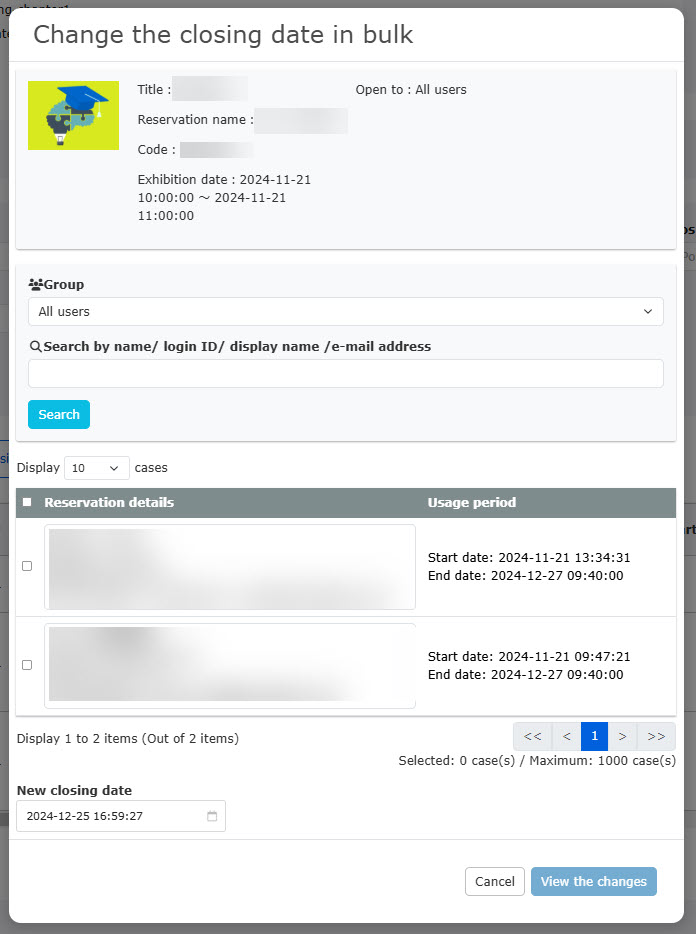
Click "View the changes."
Confirm the contents and click "Change."
Register users
Admin can make reservations specifying users.
When a user makes a reservation, the following will be required:
- Management role of Group manager (Edit/View) and the user must belong to the groups assigned to the training.
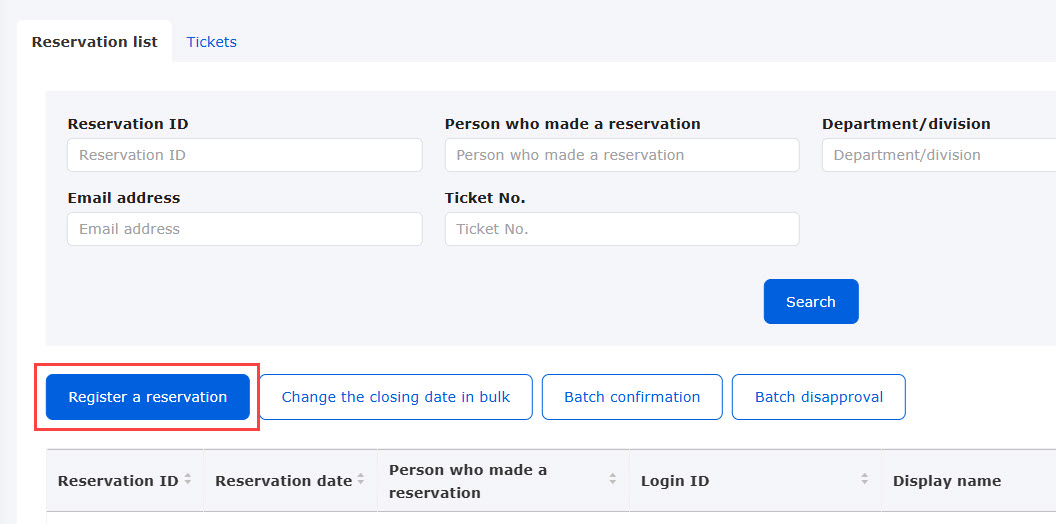
01. Register a reservation
Click on "Register a reservation."
02. Settings
A pop-up window will be displayed.
You can search by name or login ID.
Tick the box(es) in the list to select users to make reservations for the training.
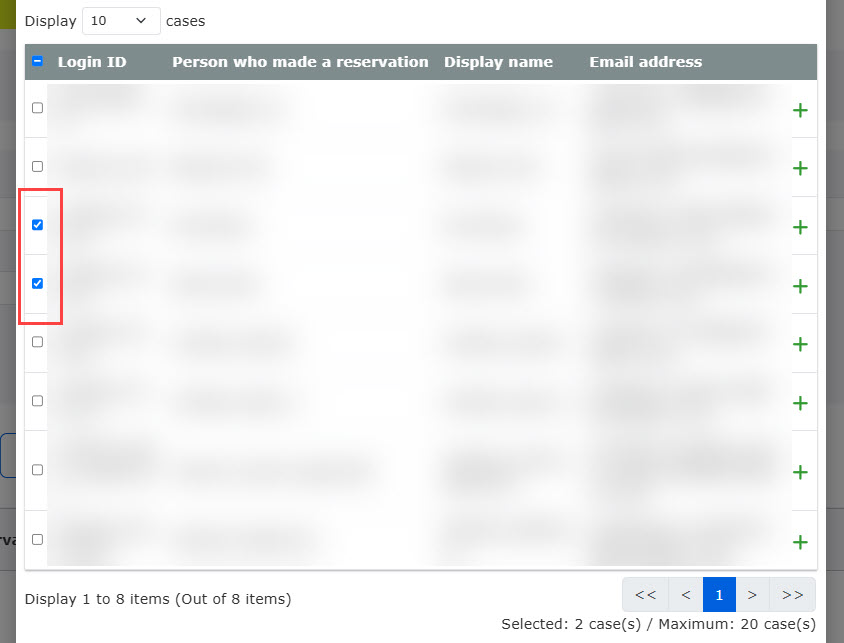
Select the duration. If you wan to send an email to users, select "Send" fom the list.
Click "Confirm the reservation."
Tickets
The following explain the operations available on the "Tickets" tab.
Assigned Reservation managers and Attendance
managers can also access to the Tickets tab.
Note that they can only view the page.
*For more details, refer to Manage trainingPlease refer to the "Administrator" section of the
Confirm ticket
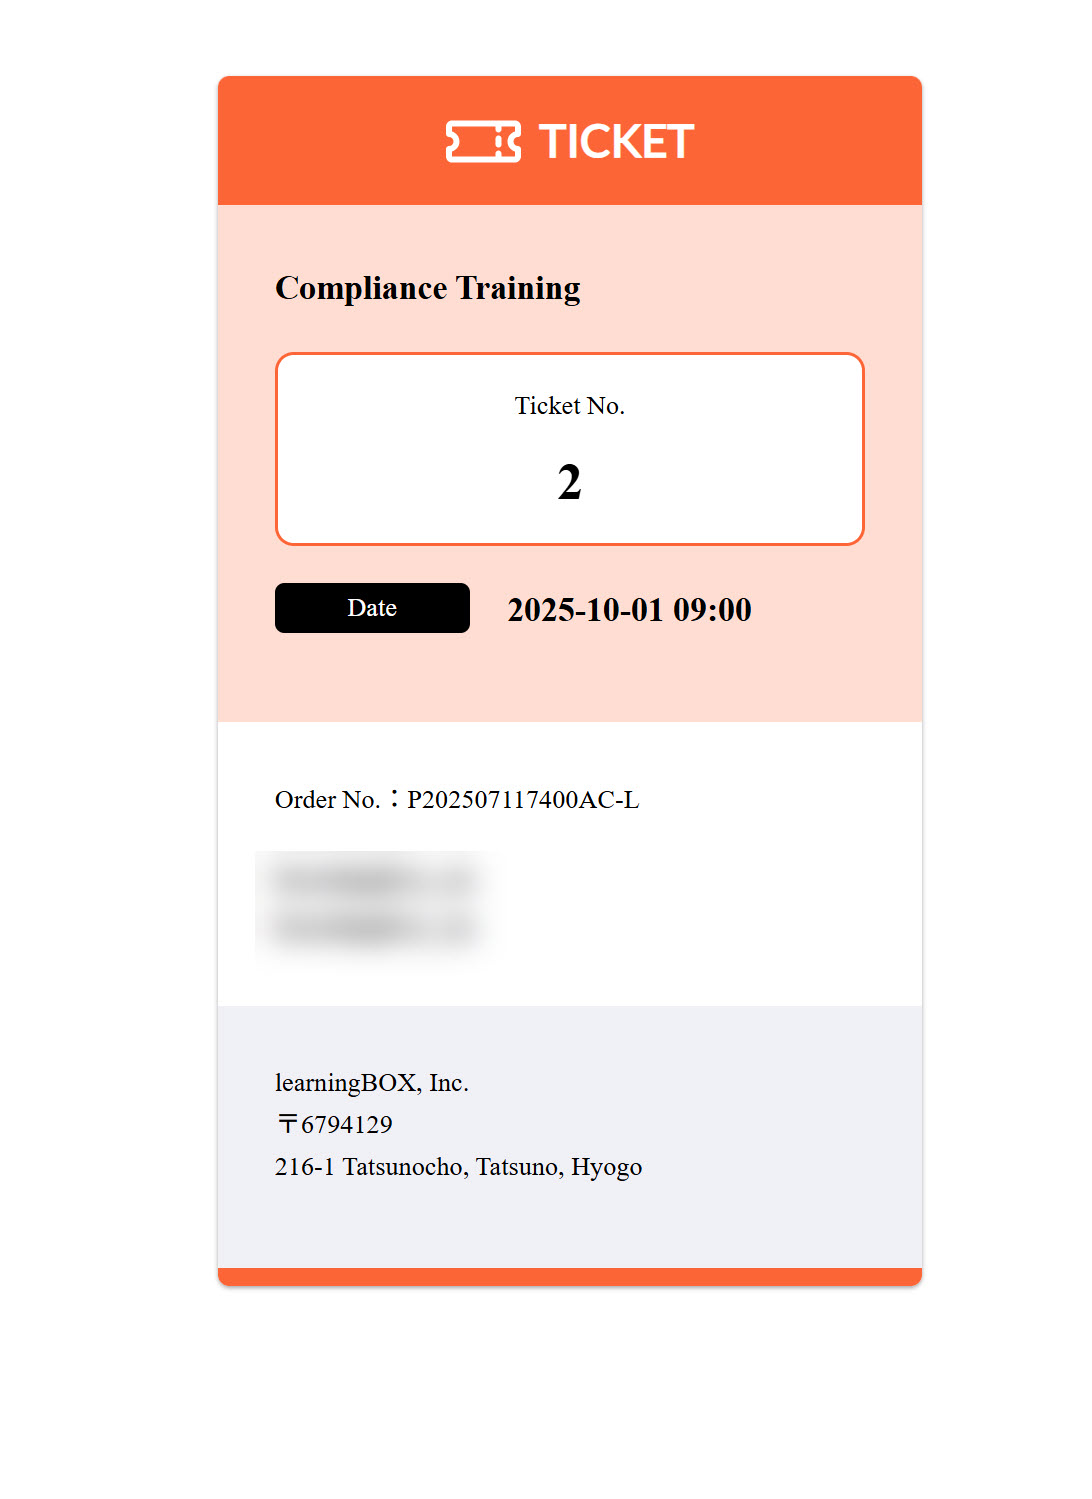
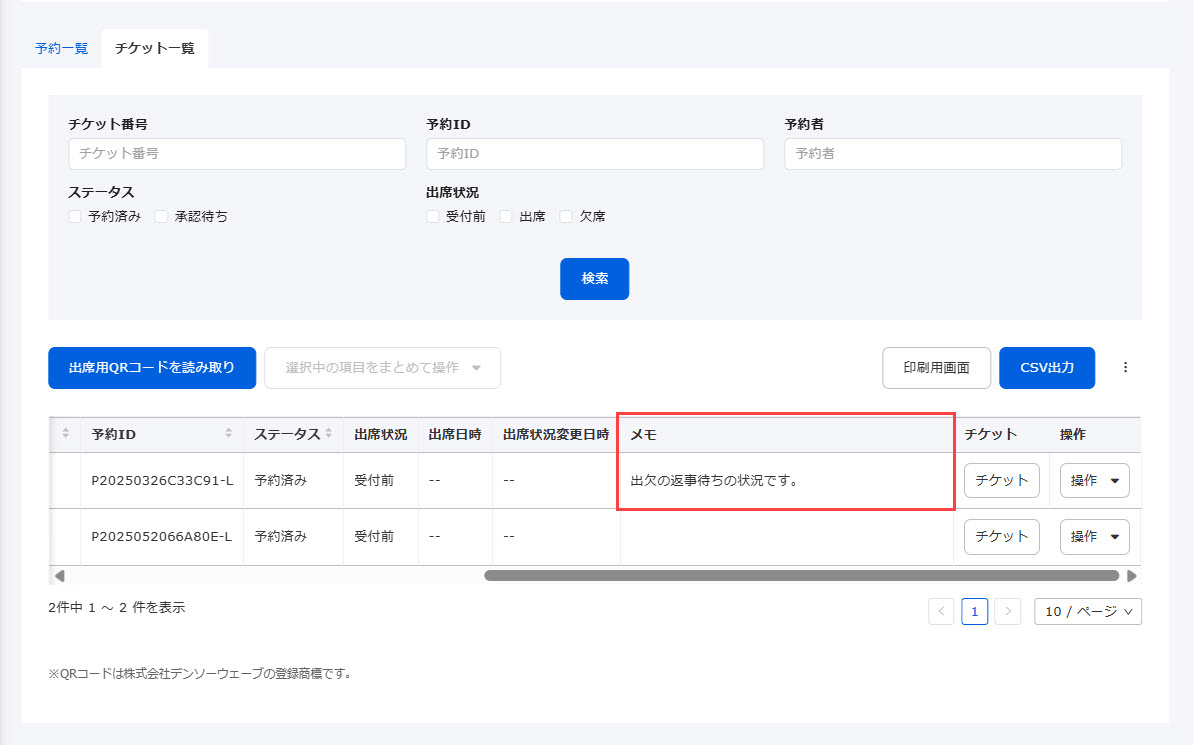
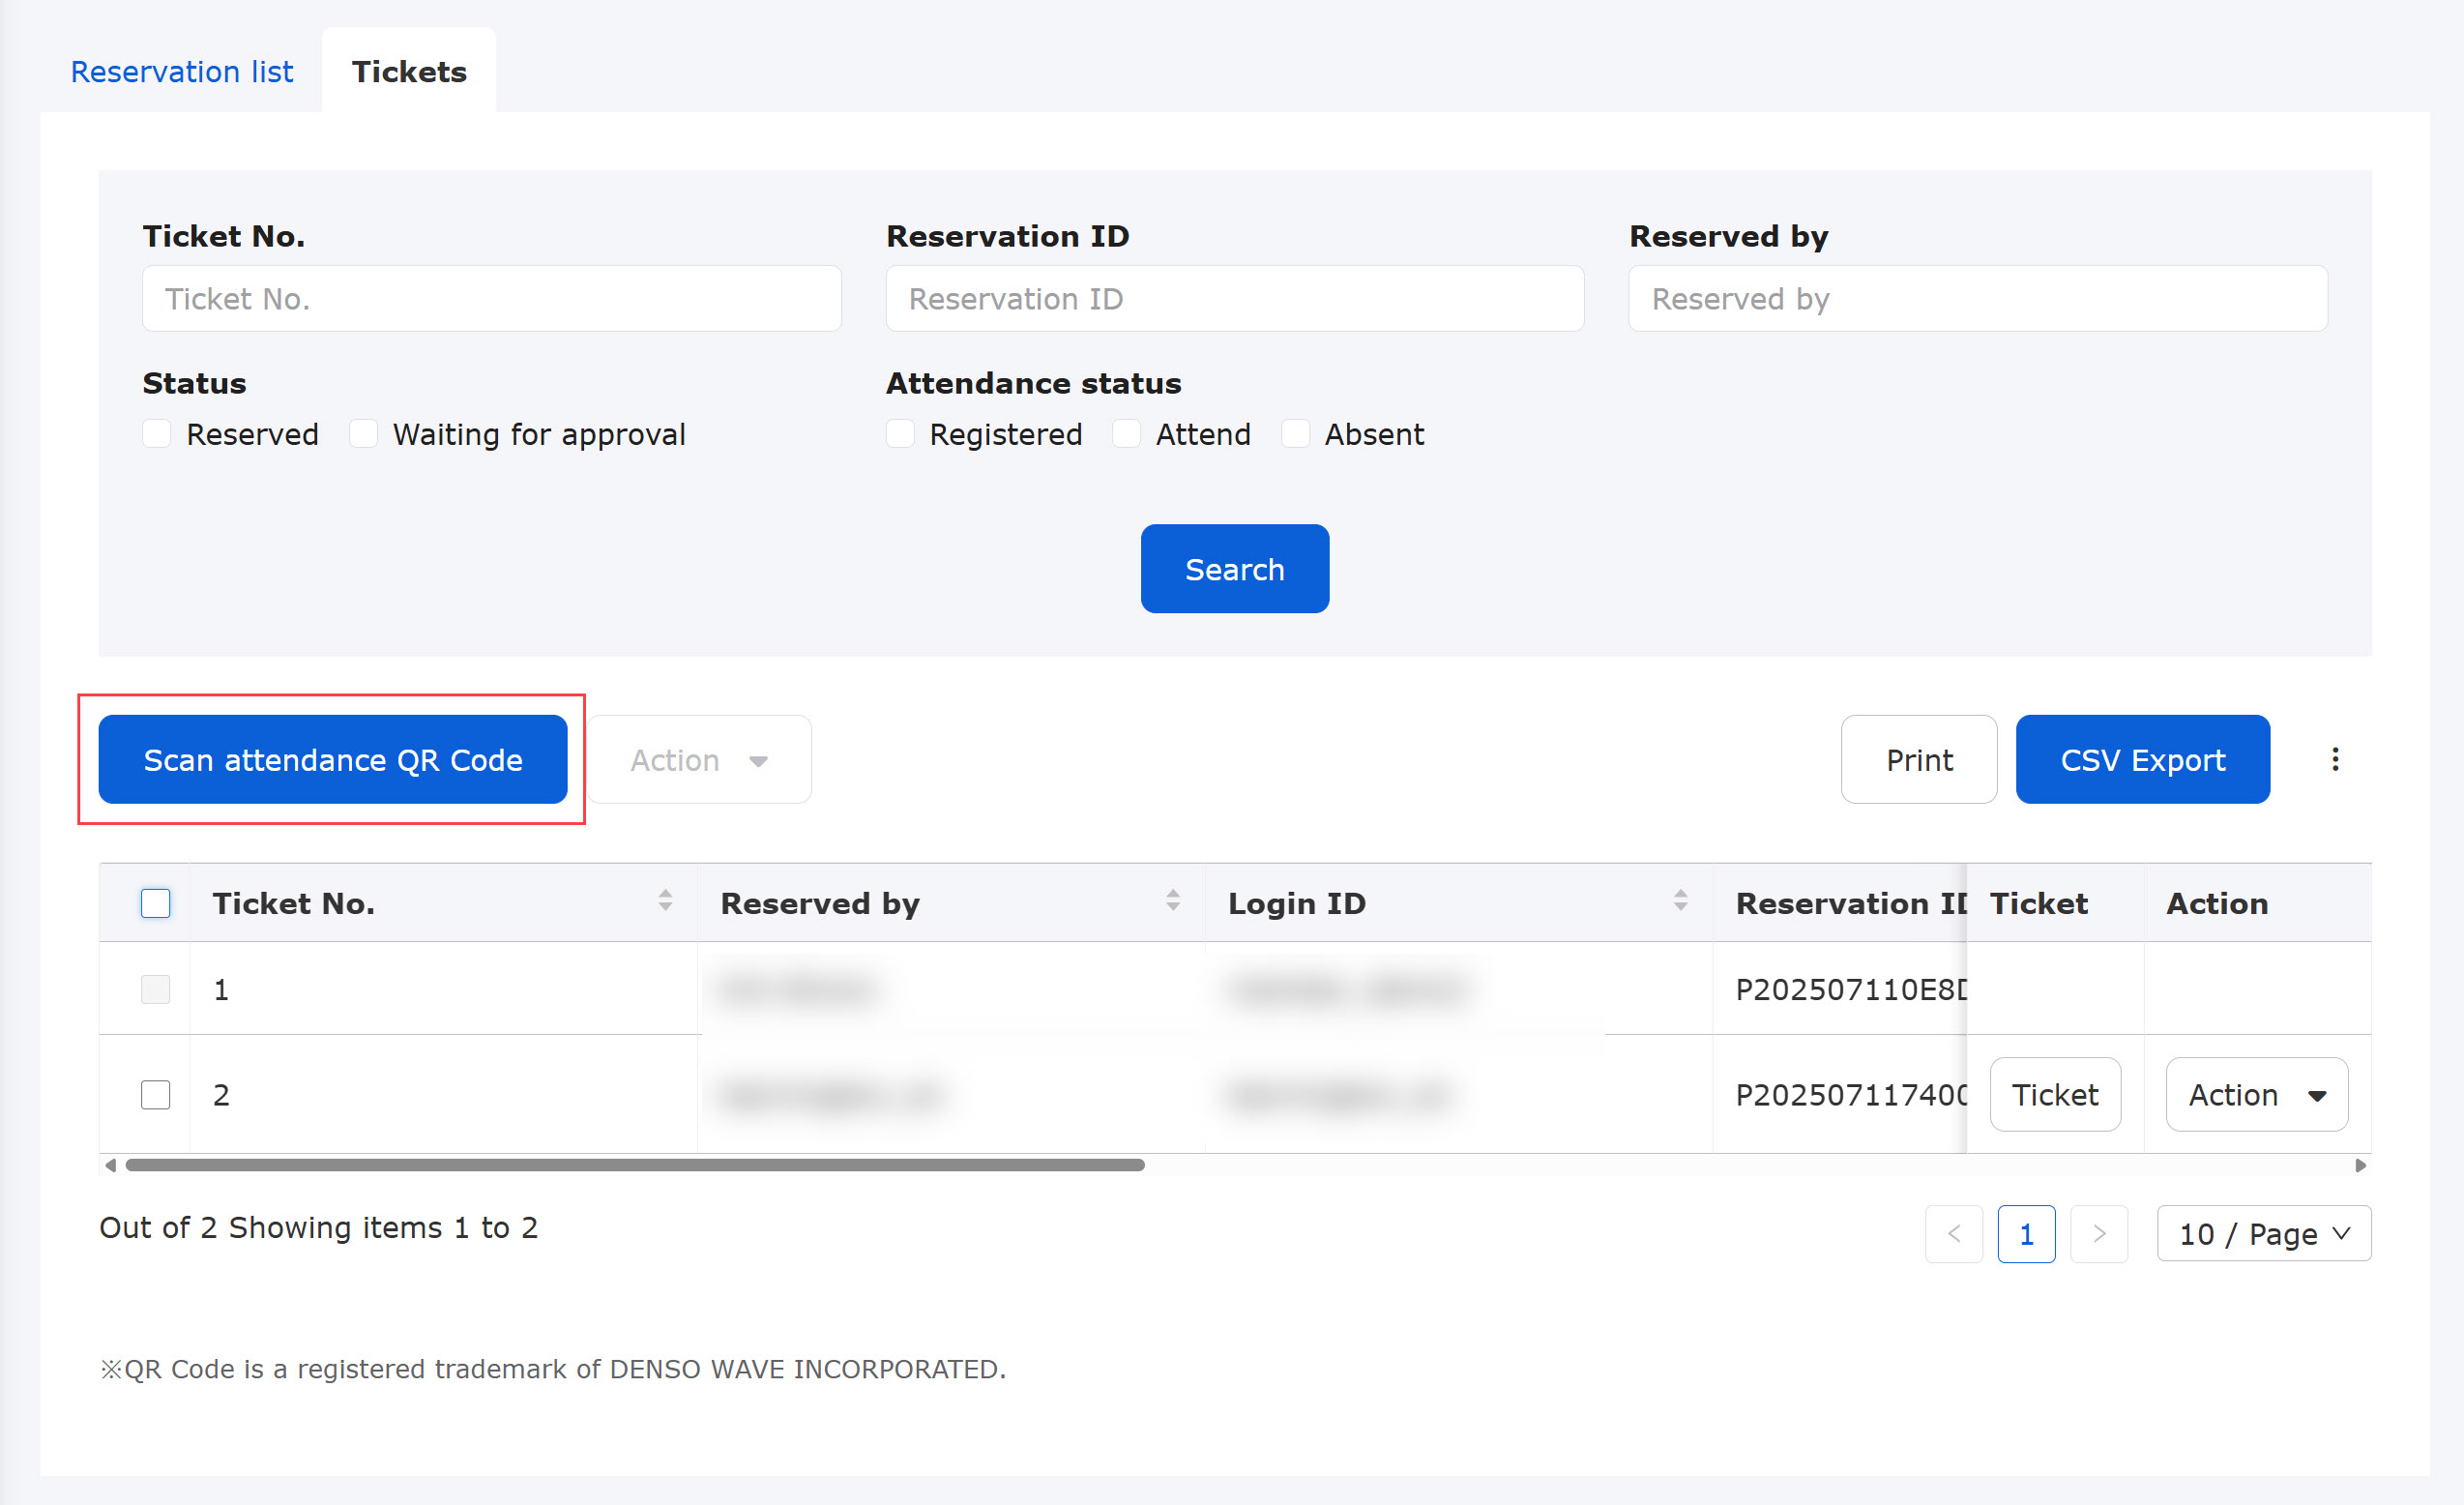
01. Tickets
Tickets for the training will be listed.
Depending on the management roles, the items displayed will be different.
- Training organizer/instructor: All tickets will be displayed
- Reservation/Attendance managers: Users whom you are assigned to as the Group manager (view/edit) will be displayed.
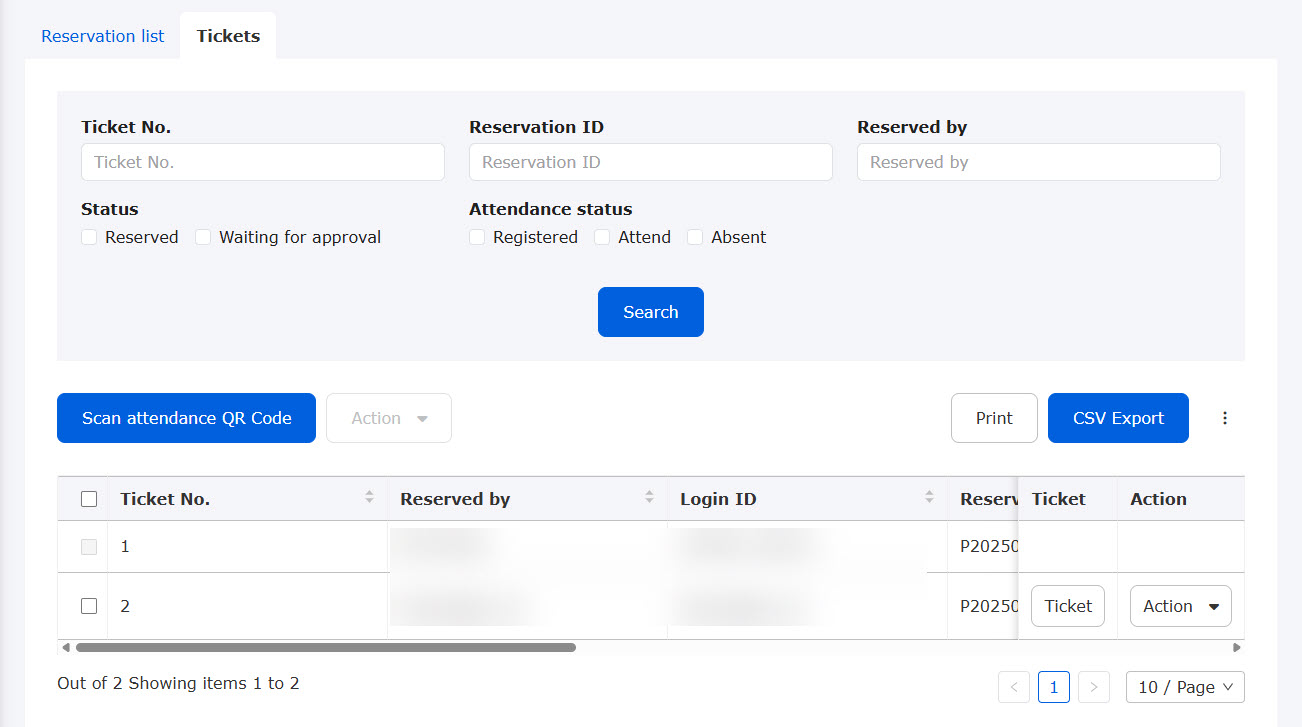
In the search field, you can narrow down the tickets to be displayed by ticket number, reservation ID, or other information.
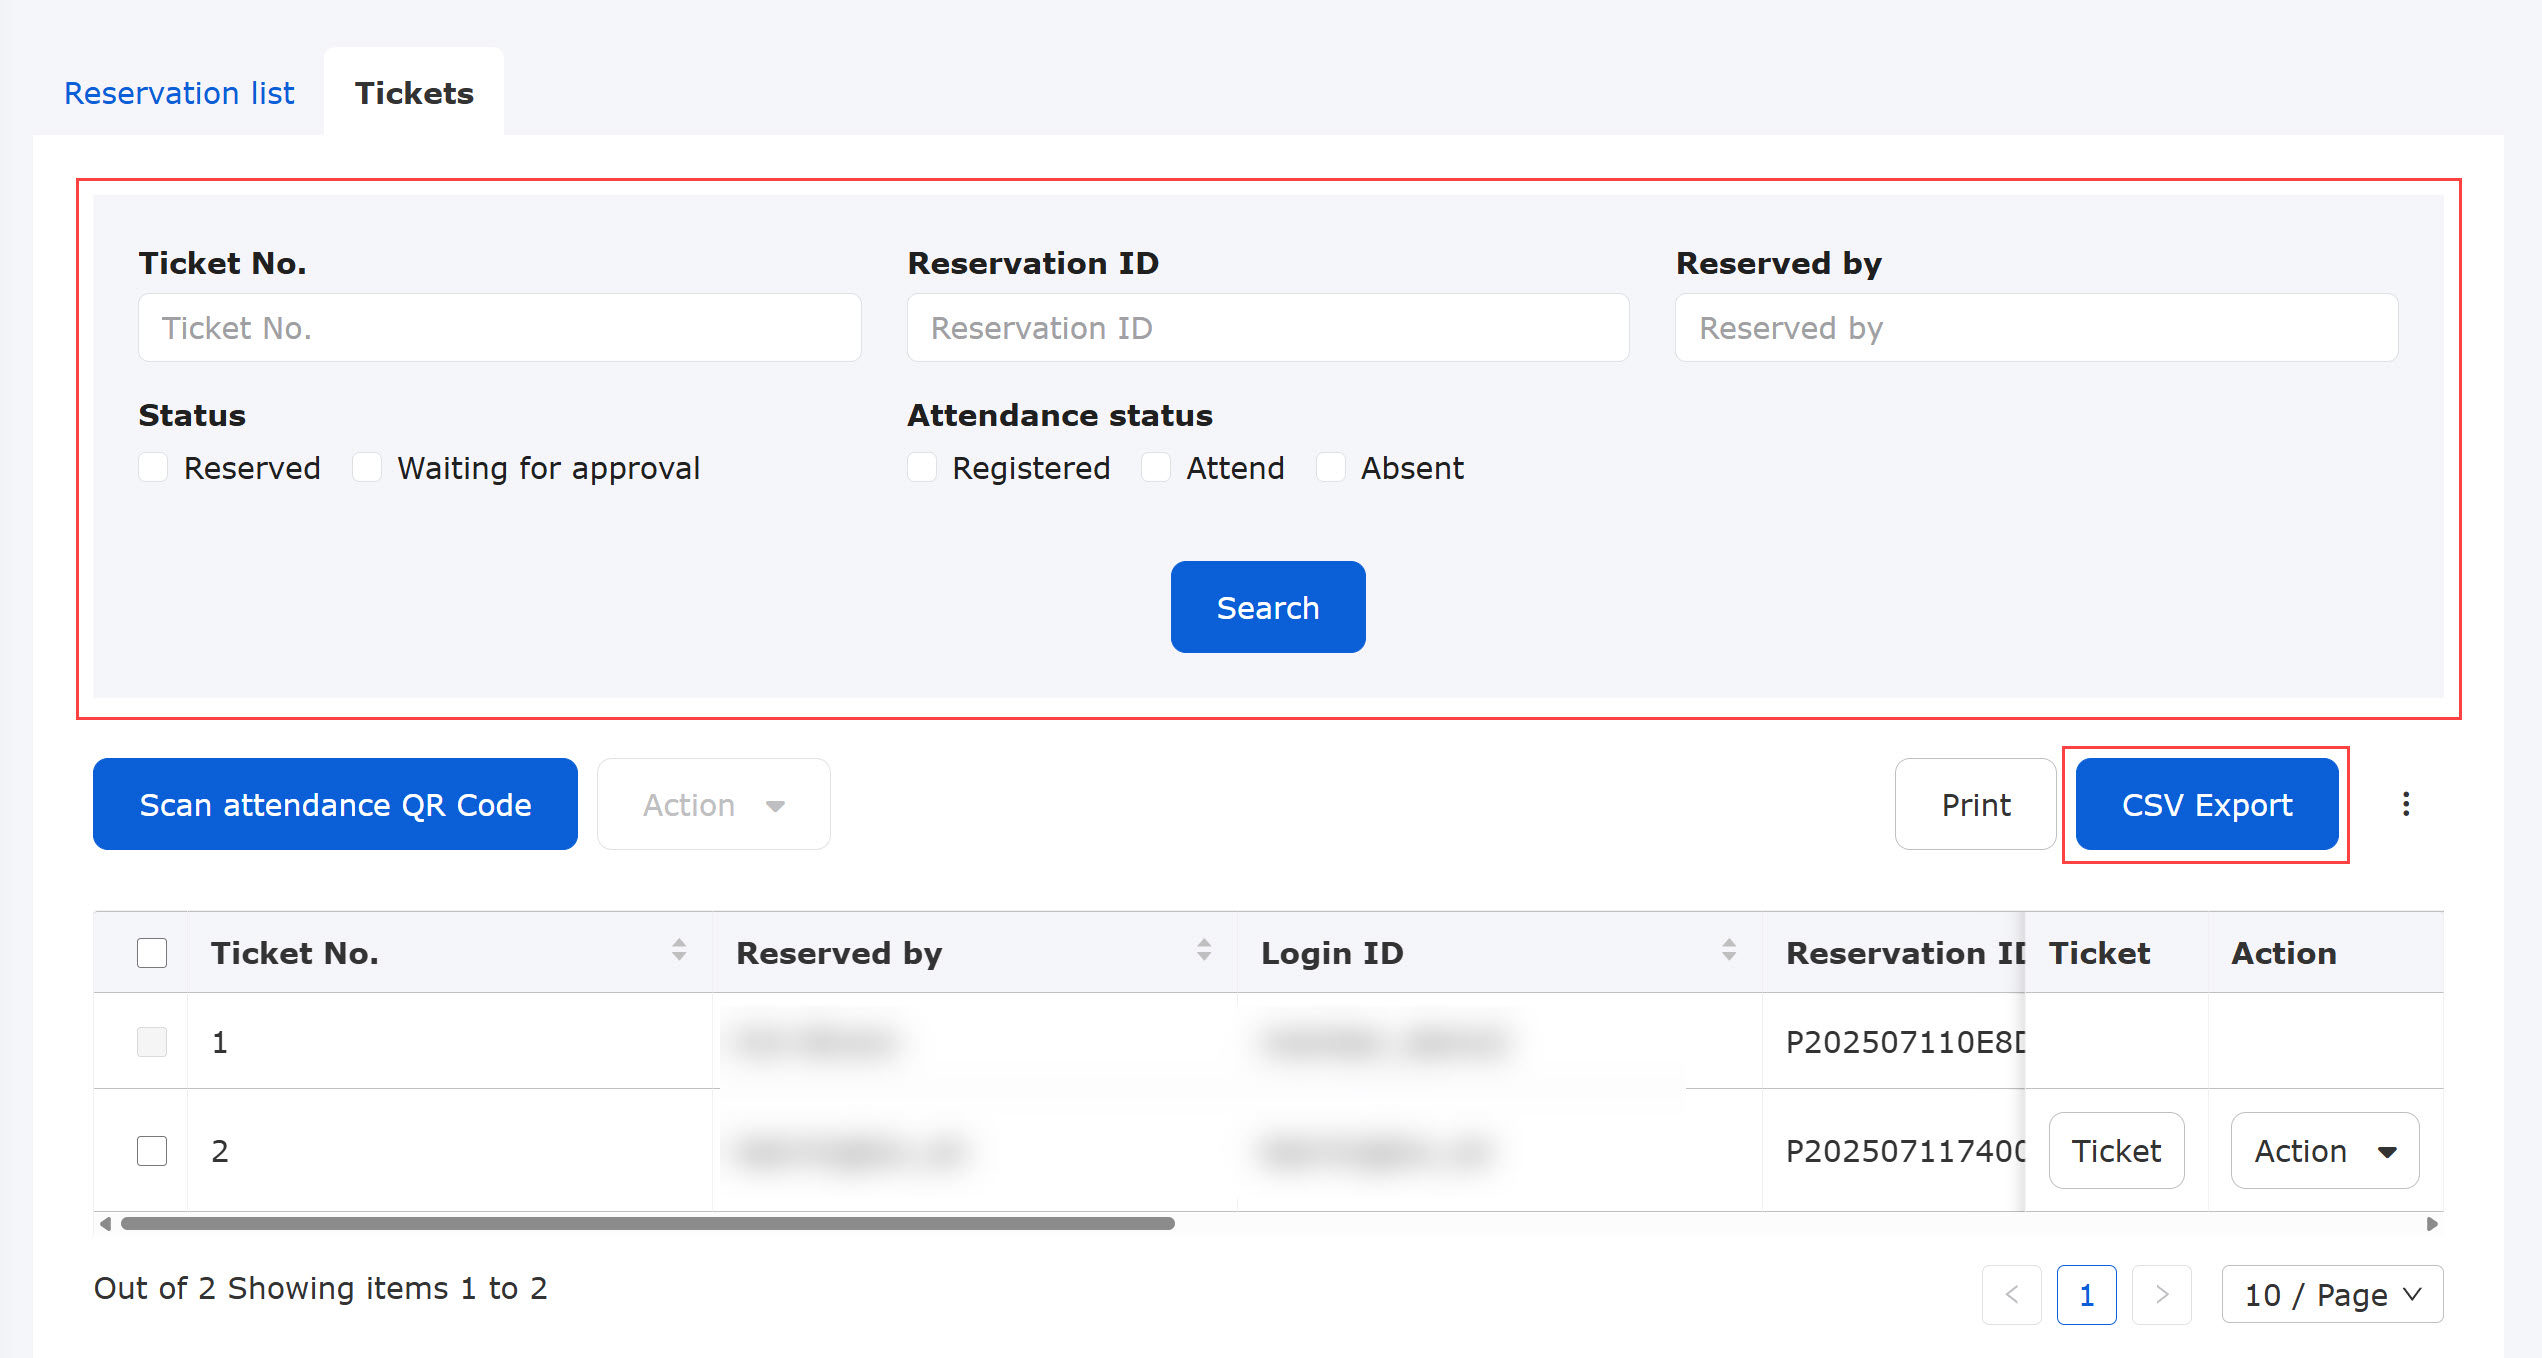
The result can be exported via a CSV file.
02. Confirmation of ticket contents
Click on "Ticket."
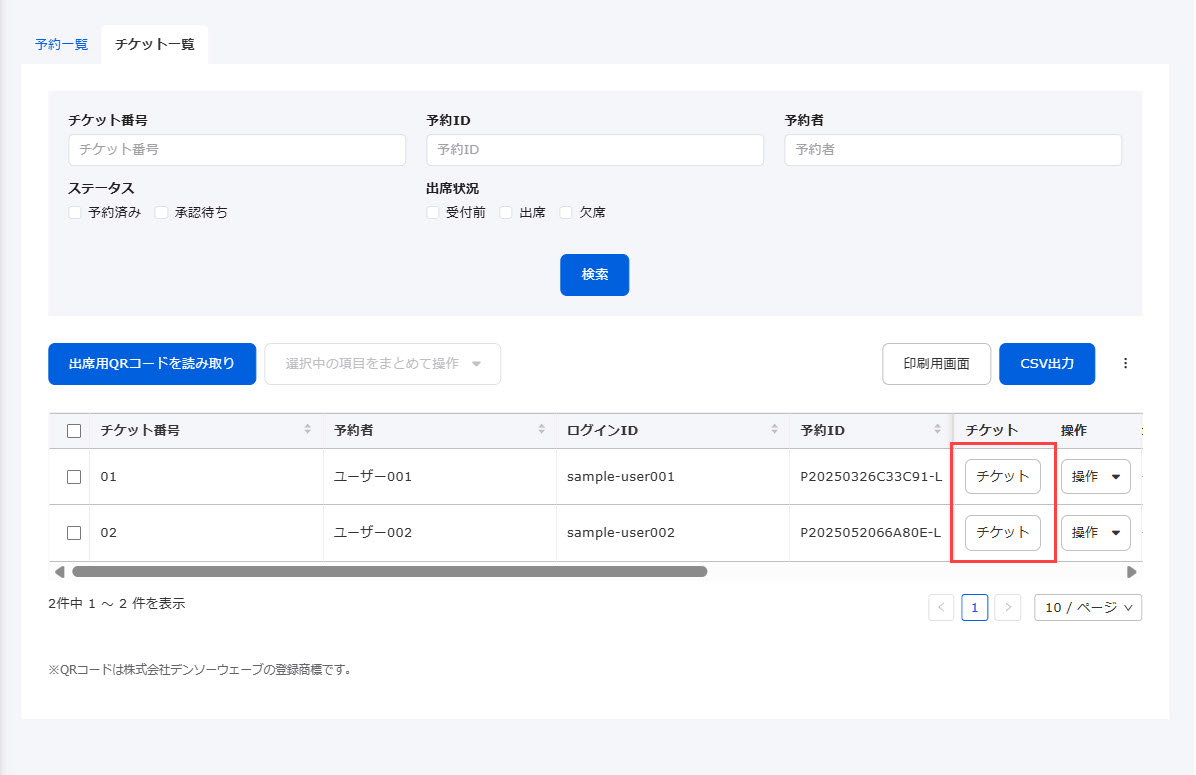
Ticket details will be displayed in another tab.
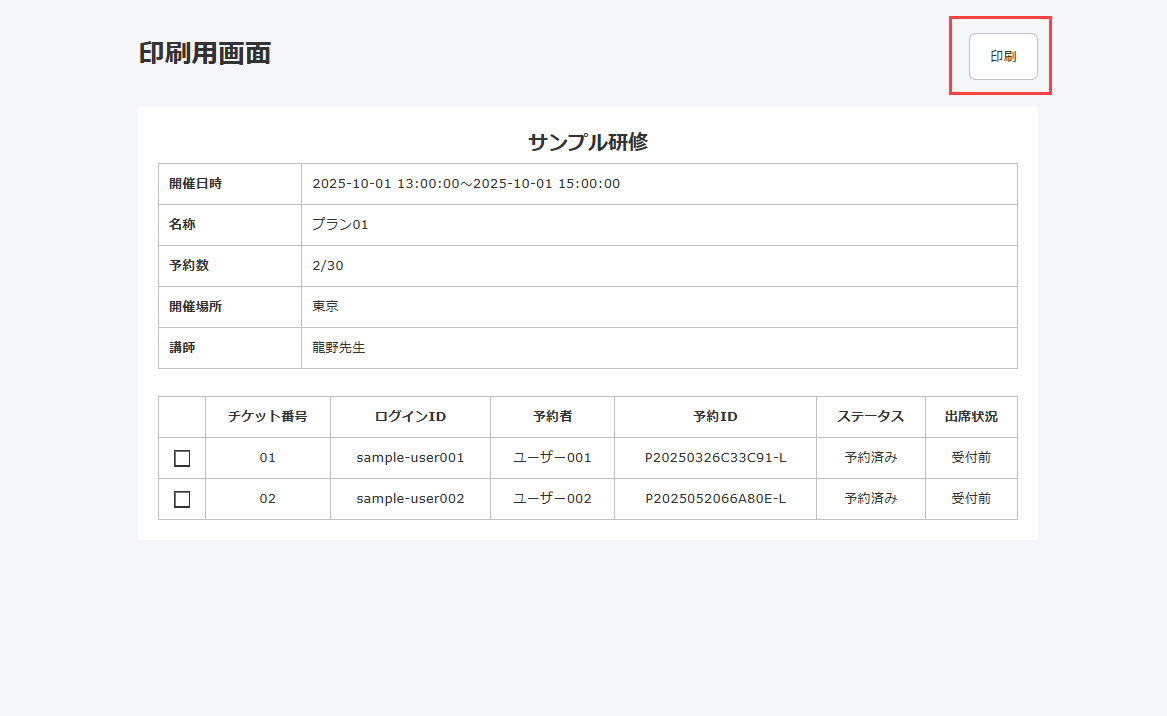
03. Printing a list of tickets
You can preview the ticket list by clicking the button in the red frame.

Click "Print" to print the page.
04. Display Settings
You can select items to be displayed on the ticket list.
Click on the "︙" icon on the right side of the page.
Tick the items you wish to display and save them.
*The settings are saved in the browser and will be applied the next time they are displayed.
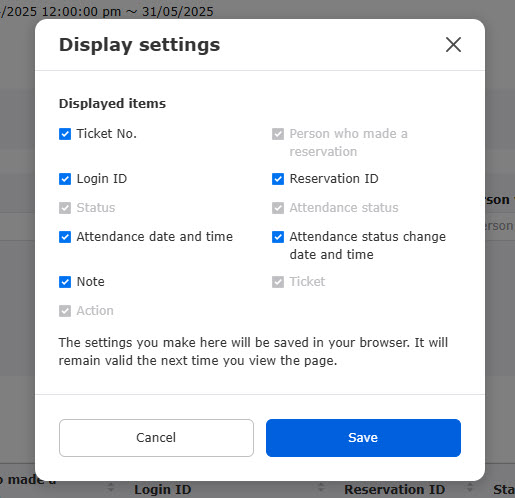
This setting will not be applied to the CSV file.
Manage attendance
You can manage attendance for training.
The following two methods are available:
One by one
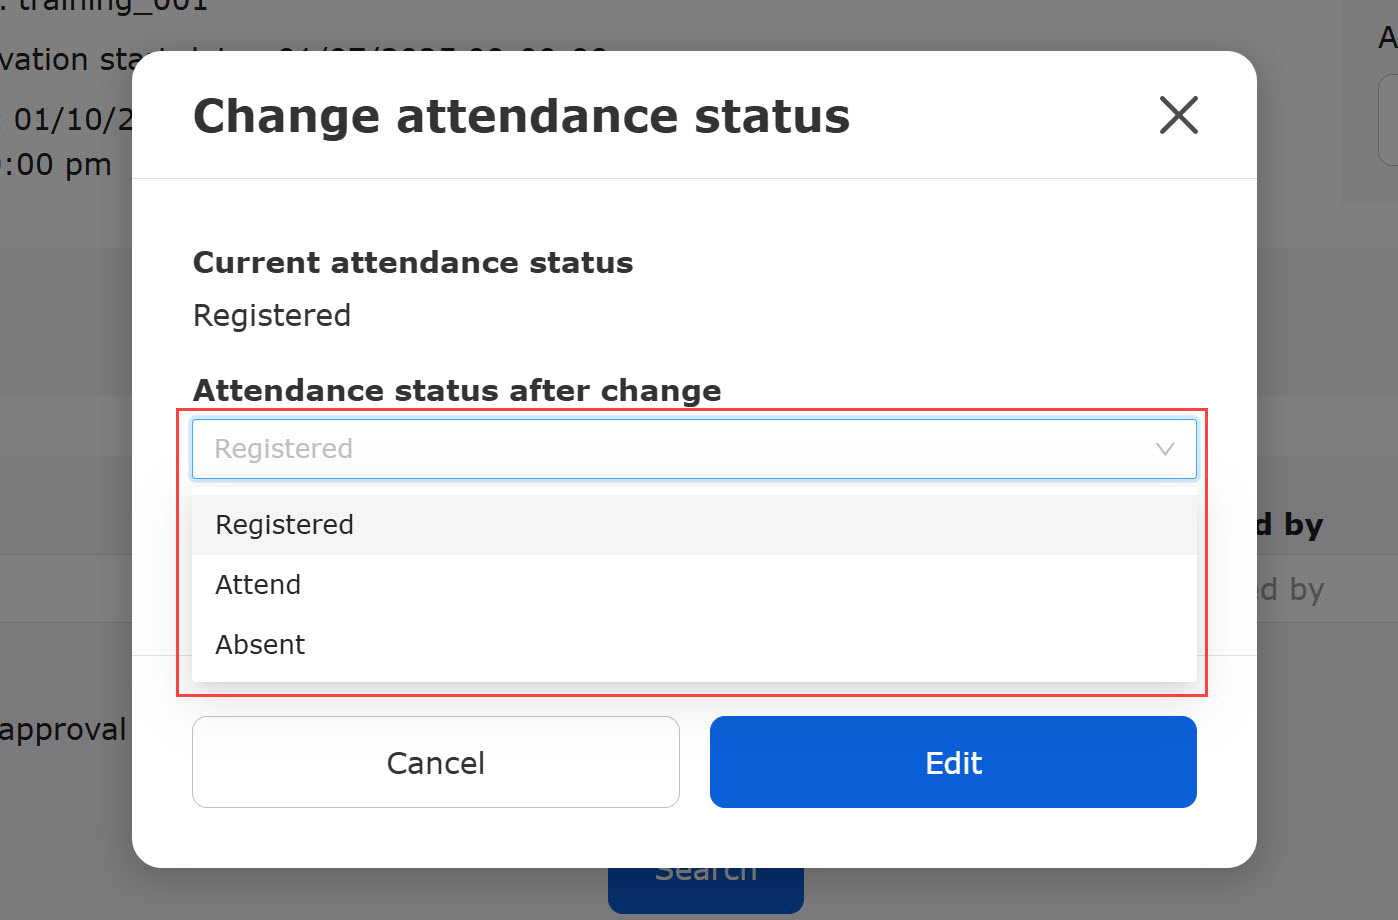
On the "Tickets" tab, click "Action," and select "Change attendance status."
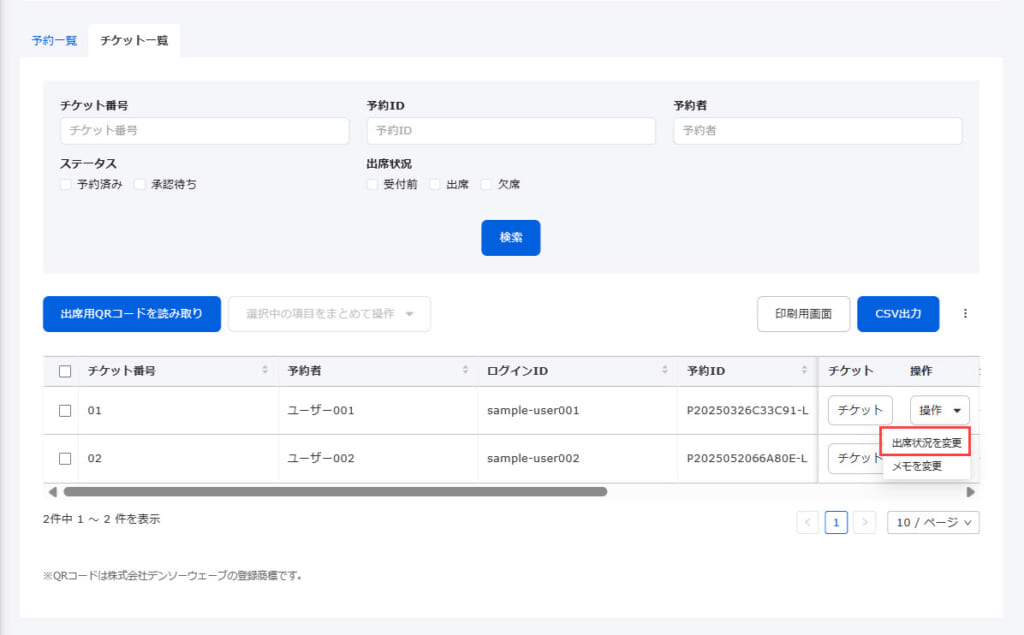
The following window will be displayed.
In this window, you can check the current attendance status.
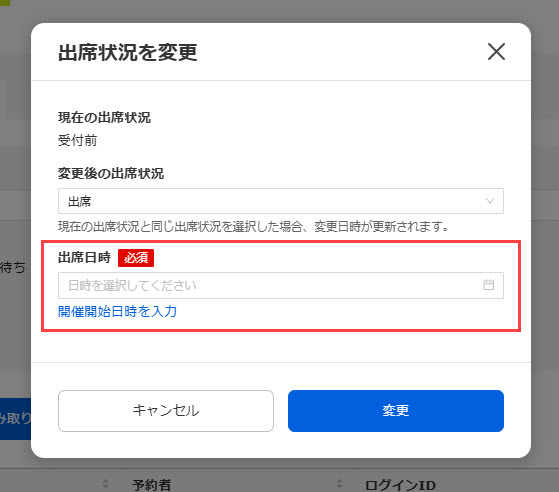
Select an attendance status after change from the list.
When "Attend" is selected, specify the date and time from the calendar.
(*When you click "Enter the start date and time of the training," the start date and time of the training will be automatically entered.)
When all settings are completed, click "Edit."
You can leave a note if necessary.
Click on "Actions" and select "Change note."
The following window will be displayed.
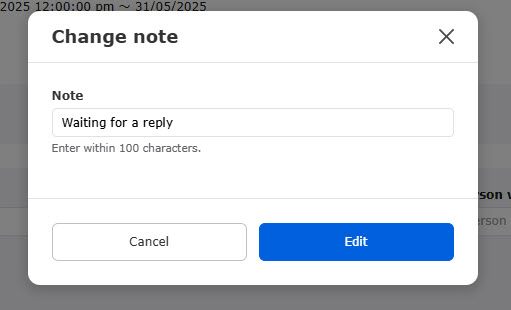
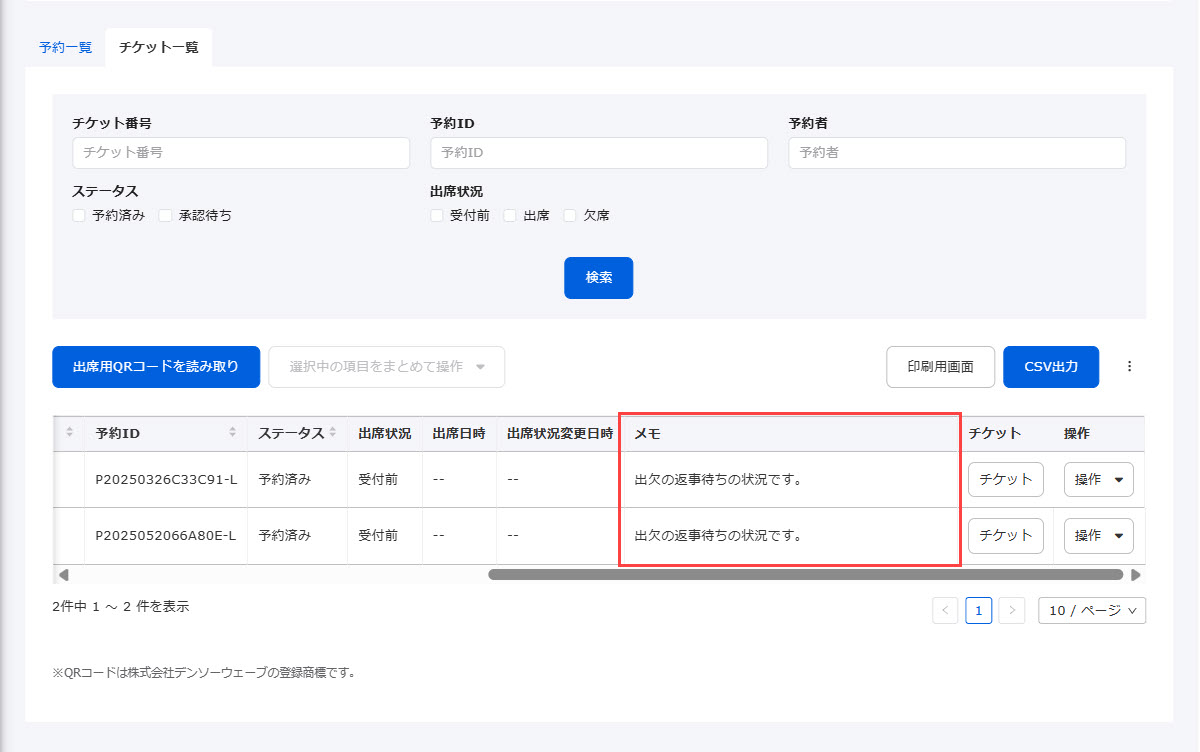
You can review the notes in the note section.
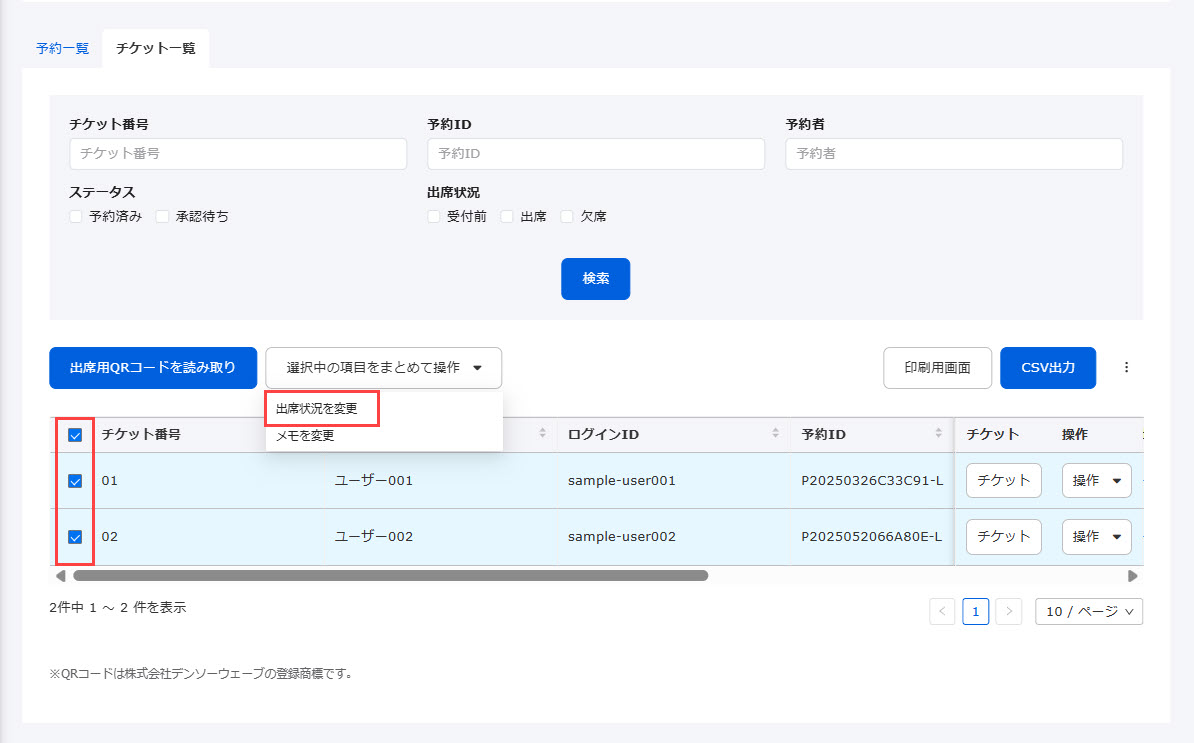
Batch operation
Select items to change the attendance status.
Click "Action" and select "Change attendance status."
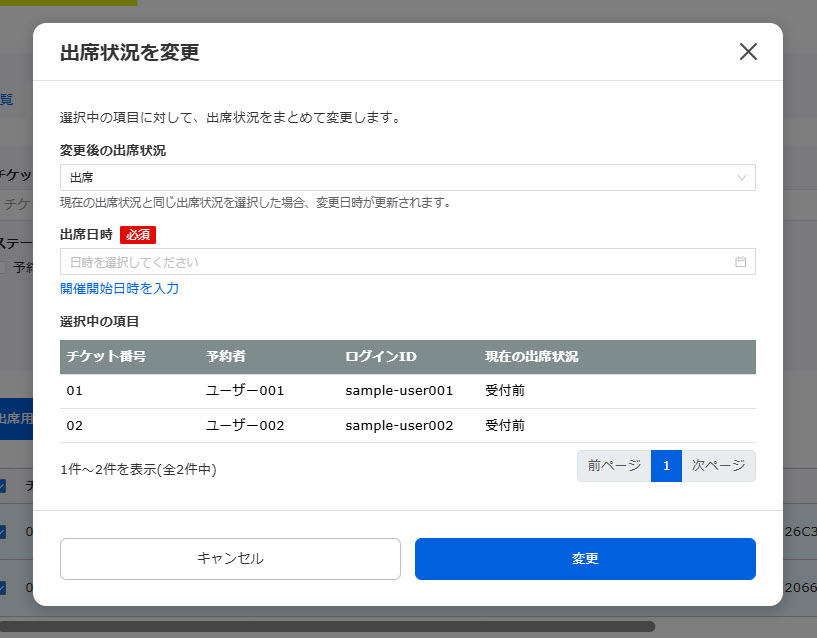
The following window will be displayed.
The attendance status for each ticket will be listed.
Select an attendance status after change from the list.
If you select "Attendance," please specify the date and time of your attendance from the calendar.
(*When you click "Enter the start date and time of the training," the start date and time of the training will be automatically entered.)
When all settings are completed, click "Edit."
You can leave a note if necessary.
Tick the boxes you wish to leave a note on.
Click on "Action" and select "Change note."
The following window will be displayed.
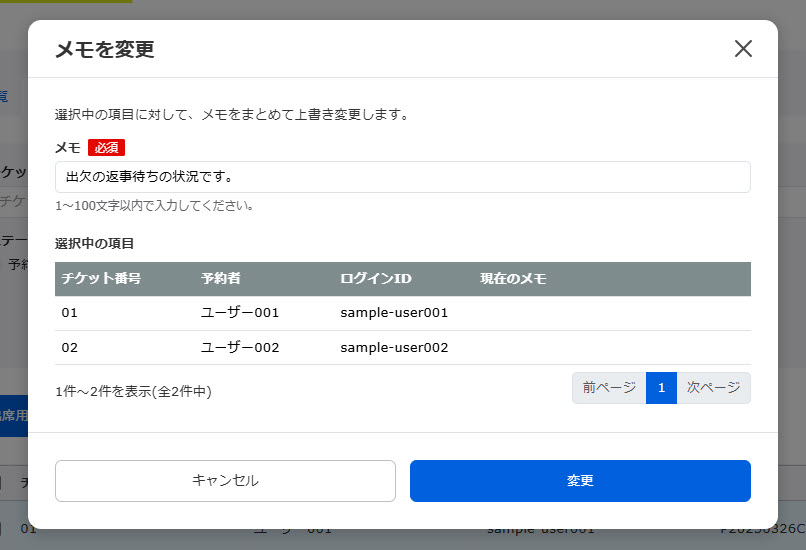
You can review the notes in the note section.
Scan QR code for attendance
When the attendance status is "Registered" or "Absent", the status will be changed to "Attend" by scanning the QR code by the learner.
*If the attendance status has already been "Attend," this action is not available.
▼ Steps
On the Ticket page, click on "Scan attendance QR Code.
The QR code will be displayed.
If the code is successfully scanned, the ticket information will be displayed.
Change the attendance status to Attend.
You can change the camera by clicking the gear icon in the upper right corner of the QR Code scanner.
The selected camera will be applied to the next and subsequent actions.
Action by learners
When learners have reserved a training, they can display the QR Code of the training.
*The QR Code will be displayed when their attendance status is Registered or Absent.
*For more details, refer to Training reservation history (for learners)Please refer to "Displaying QR Codes" in the "QR Code" section.