Manage training
You can create new training programs, duplicate existing ones, and edit program details.
*Select Manage training in the side menu.
What is the Training feature?
Multiple courses can be combined to build a single training program.
This allows learners to select and reserve training courses from the list, and take it within the specified period.
Required
Customization option
*All of the following management roles are required:
- Management role of Group manager (Edit for all users)
- Management role of Content manager (Edit) for all content
Create training
The following two methods are available:
Create one by one
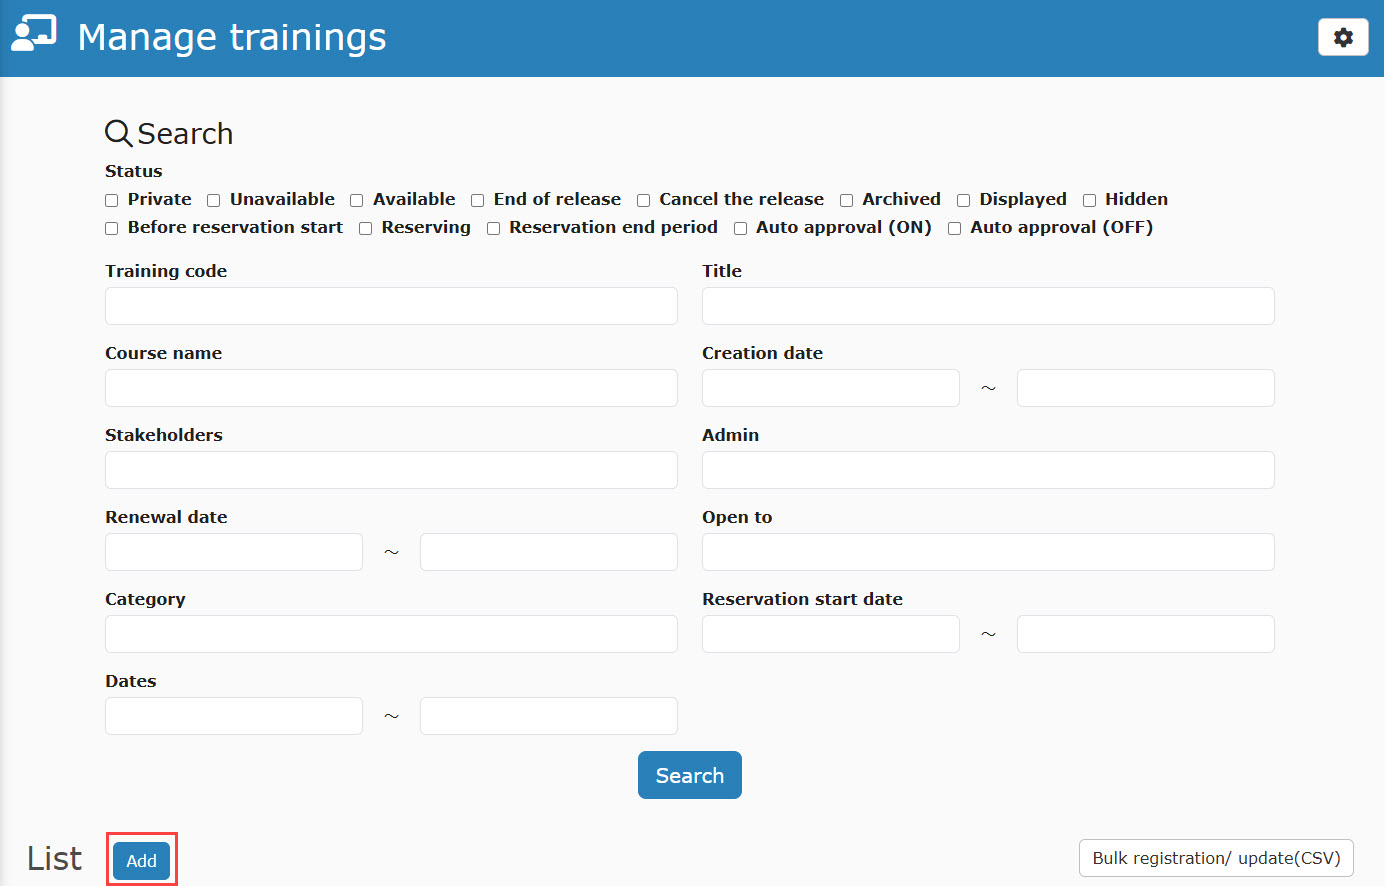
01. Open the form
Click Add to open the creation form.
02. Fill out the form
Enter the training code, title, subtitle and description.
Fields marked with an asterisk (*) are required.

If the Description field is filled out but Description in the list is left blank, the text from Description will be used automatically.
03. Thumbnail & Open Graph (OG) Image
By default, a standard placeholder image is applied as the thumbnail (no OG image is set).
To set a different image, upload a file using the cloud icon or enter a media URL using the link icon.
To remove an image, click the trash can icon.
What is an Open Graph (OG) Image?
An OG image (along with a title, URL, and description) appears in link preview cards when a webpage or article is shared on social media.
It includes the title, URL, description and image.

04. Add a course
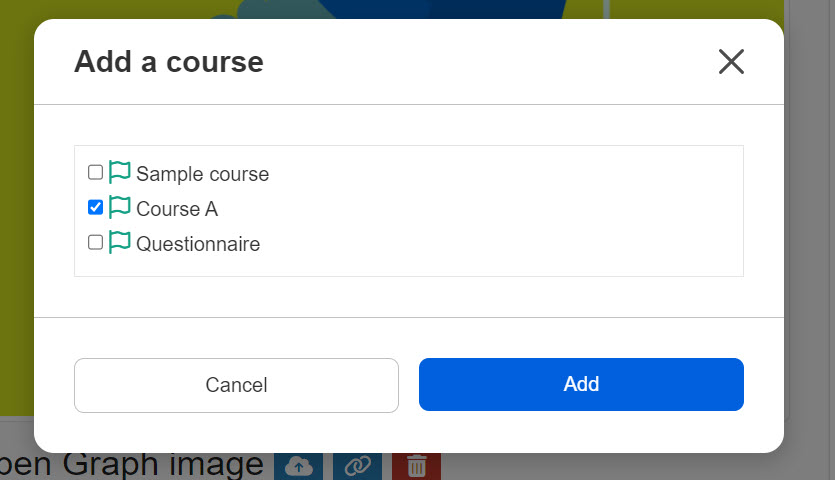
Click the + icon next to Courses to select which courses to include.
Select the target courses and click Add.
*For details on course creation, refer to Course/Folder, Create a course section.
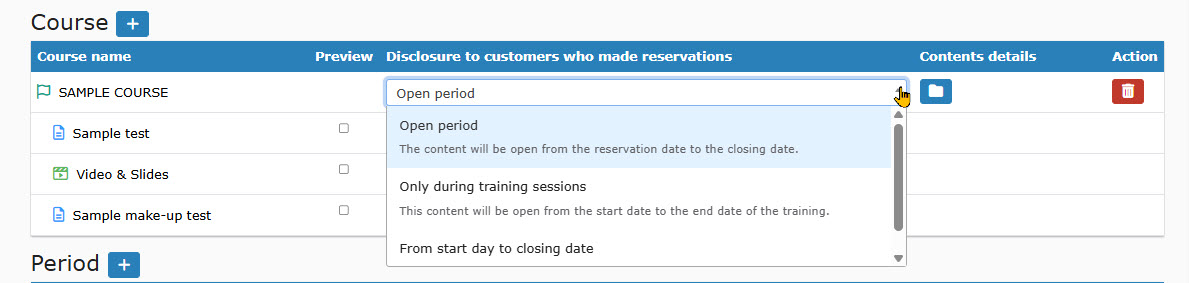
Tick the boxes to allow learners to review the content before registration.
You can select a duration to open the course from the list.
- Open period: The content will be open from the reservation date to the closing date.
- Only during the training sessions: The content will be open from the start date to the end date of the training.
- From start day to closing date: The content will be open from the start date of the training to the closing date.
Click the Content details icon to open the course start page in a new tab, or click the trash can icon to remove a course.
You can remove an added course by clicking the trash can icon.
05. Set capacity and period
Click the + icon next to Capacity and period to add the seating capacity, closing date, etc.
Click Add to finish the settings.
*Leave seating capacity blank for unlimited capacity.
If using tickets, toggle Use ticket to On and configure ticket details.
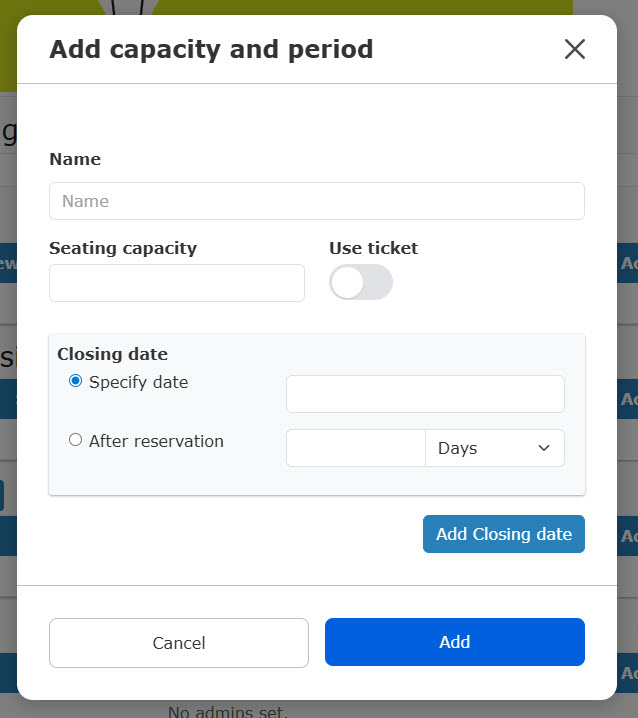
The closing date must be set to a date after the training start date.
If reservations already exist, set the training status to Private before changing the closing date.
06. Select stakeholders
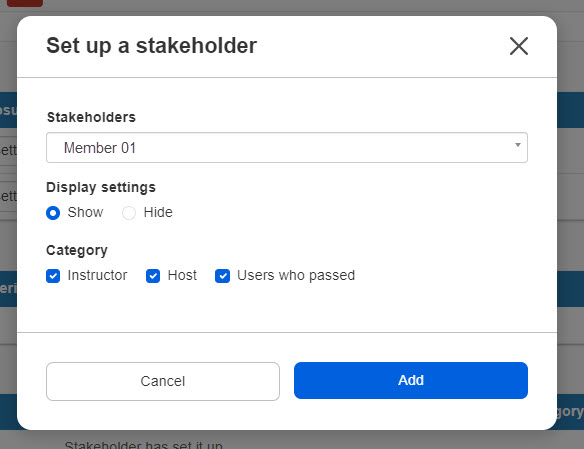
Click the + icon next to Stakeholders and select a stakeholder from the list.
Select items for the Display settings.
*Multiple categories can be selected
*If you set display settings to Hide, stakeholders will only appear on the Search trainings page and the training start page.
For more information about the stakeholders, refer to Manage stakeholders.
07. Admin settings
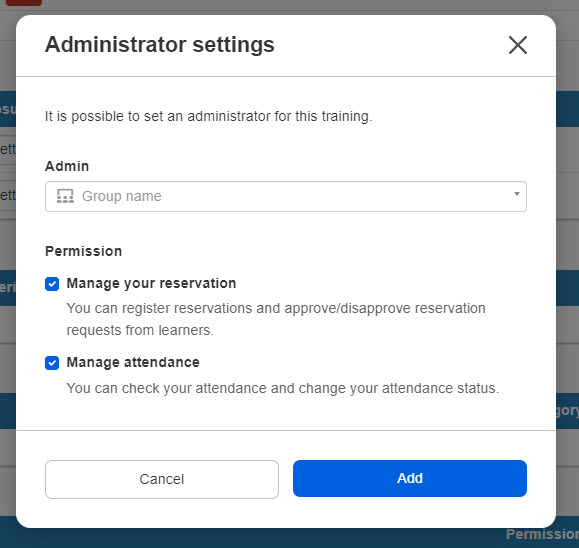
Click the + icon next to Admin, select a group to assign as the training admin, and select their permissions.
Permissions
▼Reservation manager
| Accessible pages | ・Manage reservations and attendance for training sessions ・Manage reservations > Training reservations ・Manage reservations > Tickets |
| Available actions | ・Approval / Batch approval ・Disapproval/ Batch disapproval ・Register reservations ・CSV Export ・Check available numbers |
▼ Manage attendance
| Accessible pages | ・Manage reservations and attendance for training sessions ・Manage reservations > Tickets |
| Available actions | ・Attendance status update ・Batch updates of attendance status ・CSV Export ・Check available numbers ・Scan QR codes for attendance ・Print page ・Display settings |
08. Start date
Set the start date and time for the training.
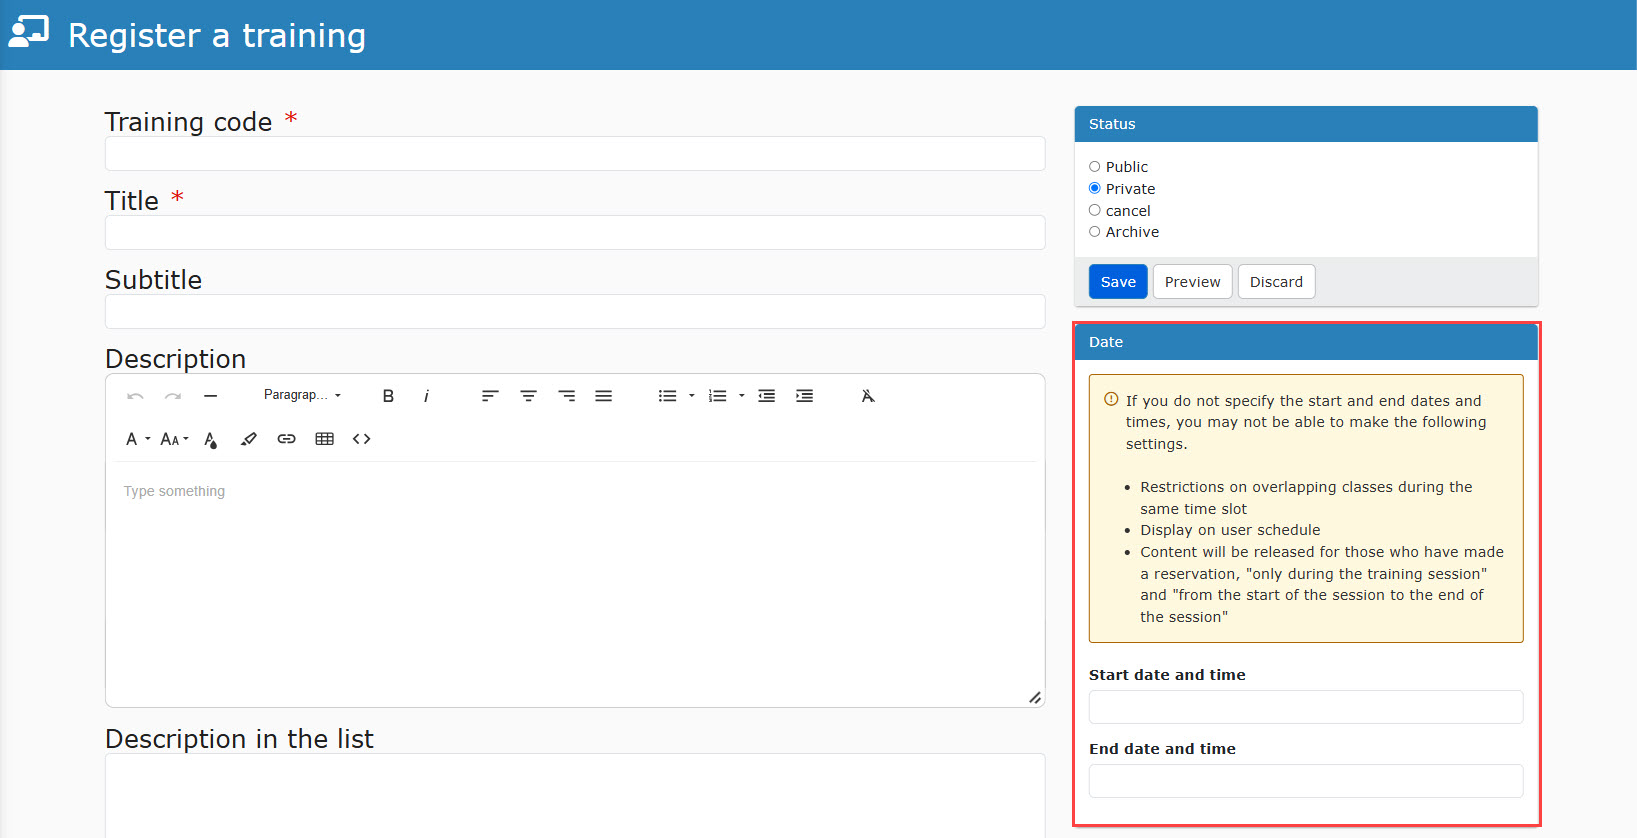
Without a start date, you may not be able to configure the following:
- Limit overlapping bookings for the same time slot
- Display training on the user schedule
- Restrict content access to Training period or Start date to closing date.
When changing the date and time after limiting overlapping reservations for the same time slot, changes can be made only in the following cases:
- When there are no reservations
- There is a reservation and changed date and time does not overlap with another training/seminar reserved (purchased) by the users.
Display on Schedule
Upcoming training displays on the user dashboard schedule if both start and end dates/times are set.
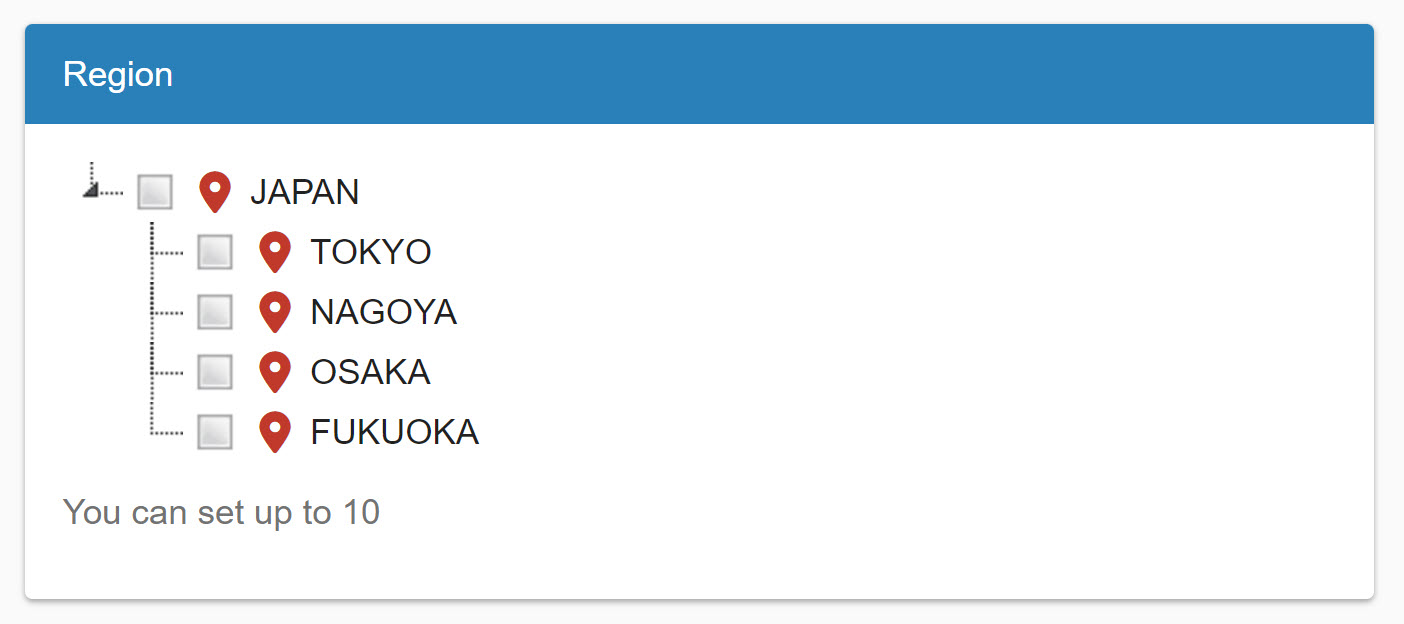
09. Region
You can set the region in which the training will be held.
Select the region (up to 10 can be set).
*For more details on regions, refer to Manage regions.
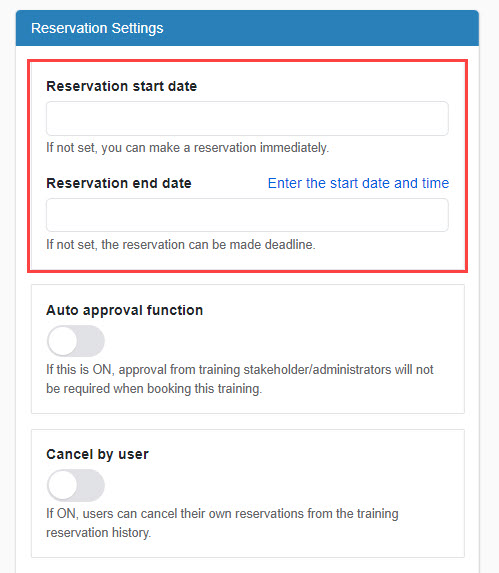
10. Reservation start/end date
You can set the period for which you will accept reservations for training.
Click Enter the start date and time, and the set reservattion start/end date will be automatically entered.
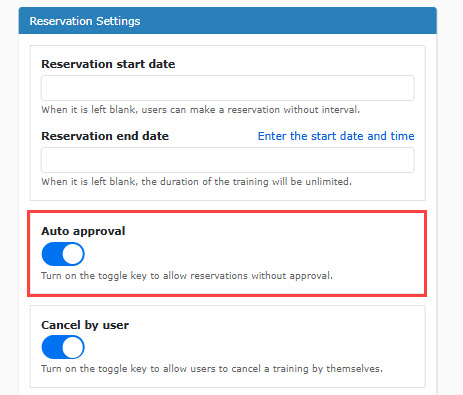
11. Auto approval
You can apply auto approval when the training is reserved.
To use this function, turn on the toggle key.
To approve reservations one by one, turn it off.
12. Cancel by user
Turn on the toggle key to allow users to cancel their own reservations.

13. Limit overlapping reservations
To limit overlapping reservations , turn on the toggle key.

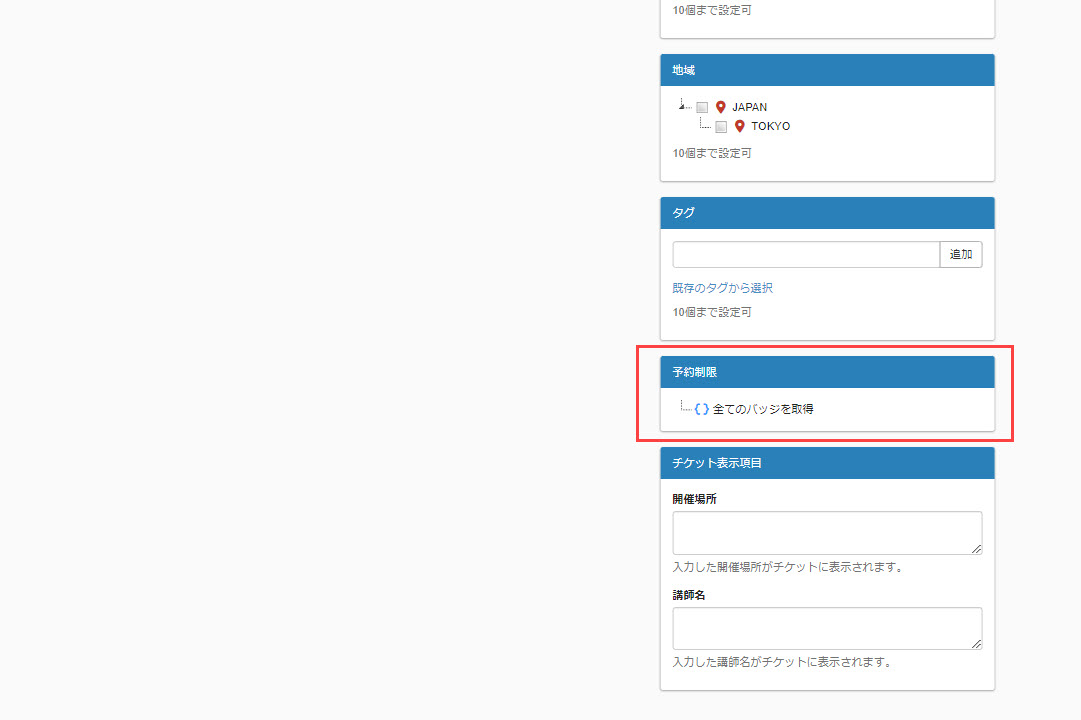
14. Reservation restrictions by badge
Restrict reservations based on badges acquired by the user.
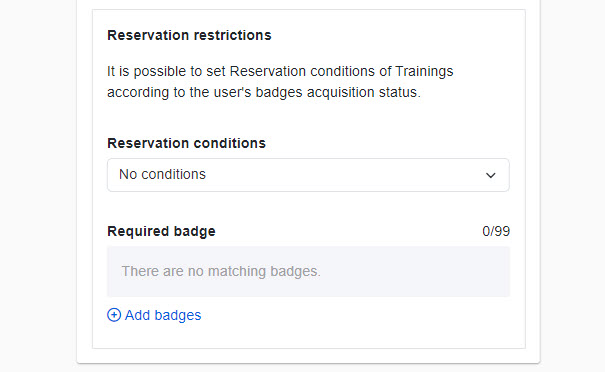
Select one of the following conditions:
- No conditions
- Acquired all eligible badges
- Acquired part of eligible badges
- No eligible badges acquired
- Some eligible badges not acquired
Assign badges:
Click Add badge and select the required badges from the list.
*You can select up to 99 badges.
*For more details on the badges, refer to Manage badges.
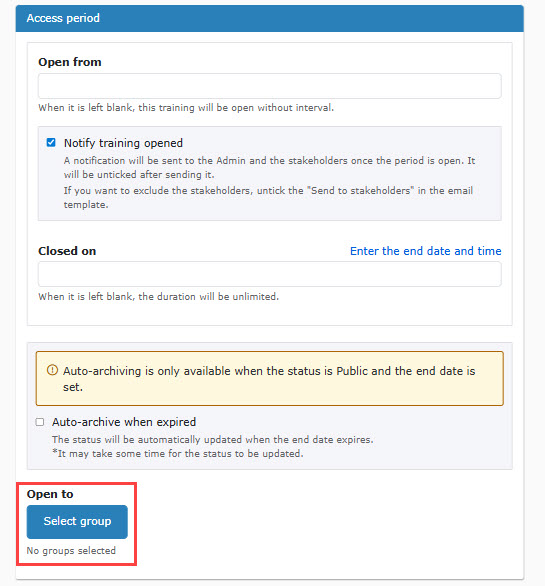
15. Access period
Specify when the training program is visible on the Search trainings page.
Tick Notify training opened to send an alert to admins and stakeholders when the training becomes active.

16. Automatic archiving
Tick the box to automatically archive training once it expires.
The system runs the auto-archive routine once a day.

The following settings are required to use this feature:
- Set the status to Public.
- Set an end date.
Note
When you create a training, a group is created for each individual training.
If the above automatic archiving is set up, the group will also be automatically archived in conjunction with the status of the training.
17. Select groups
Select which groups can access the training.
Click Select group.
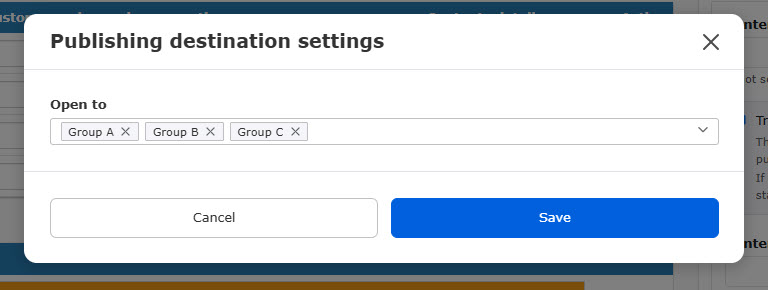
Choose group(s) from the list.
Click Save to finalize.
*A message stating Publishing group has been set will appear after selecting group(s).
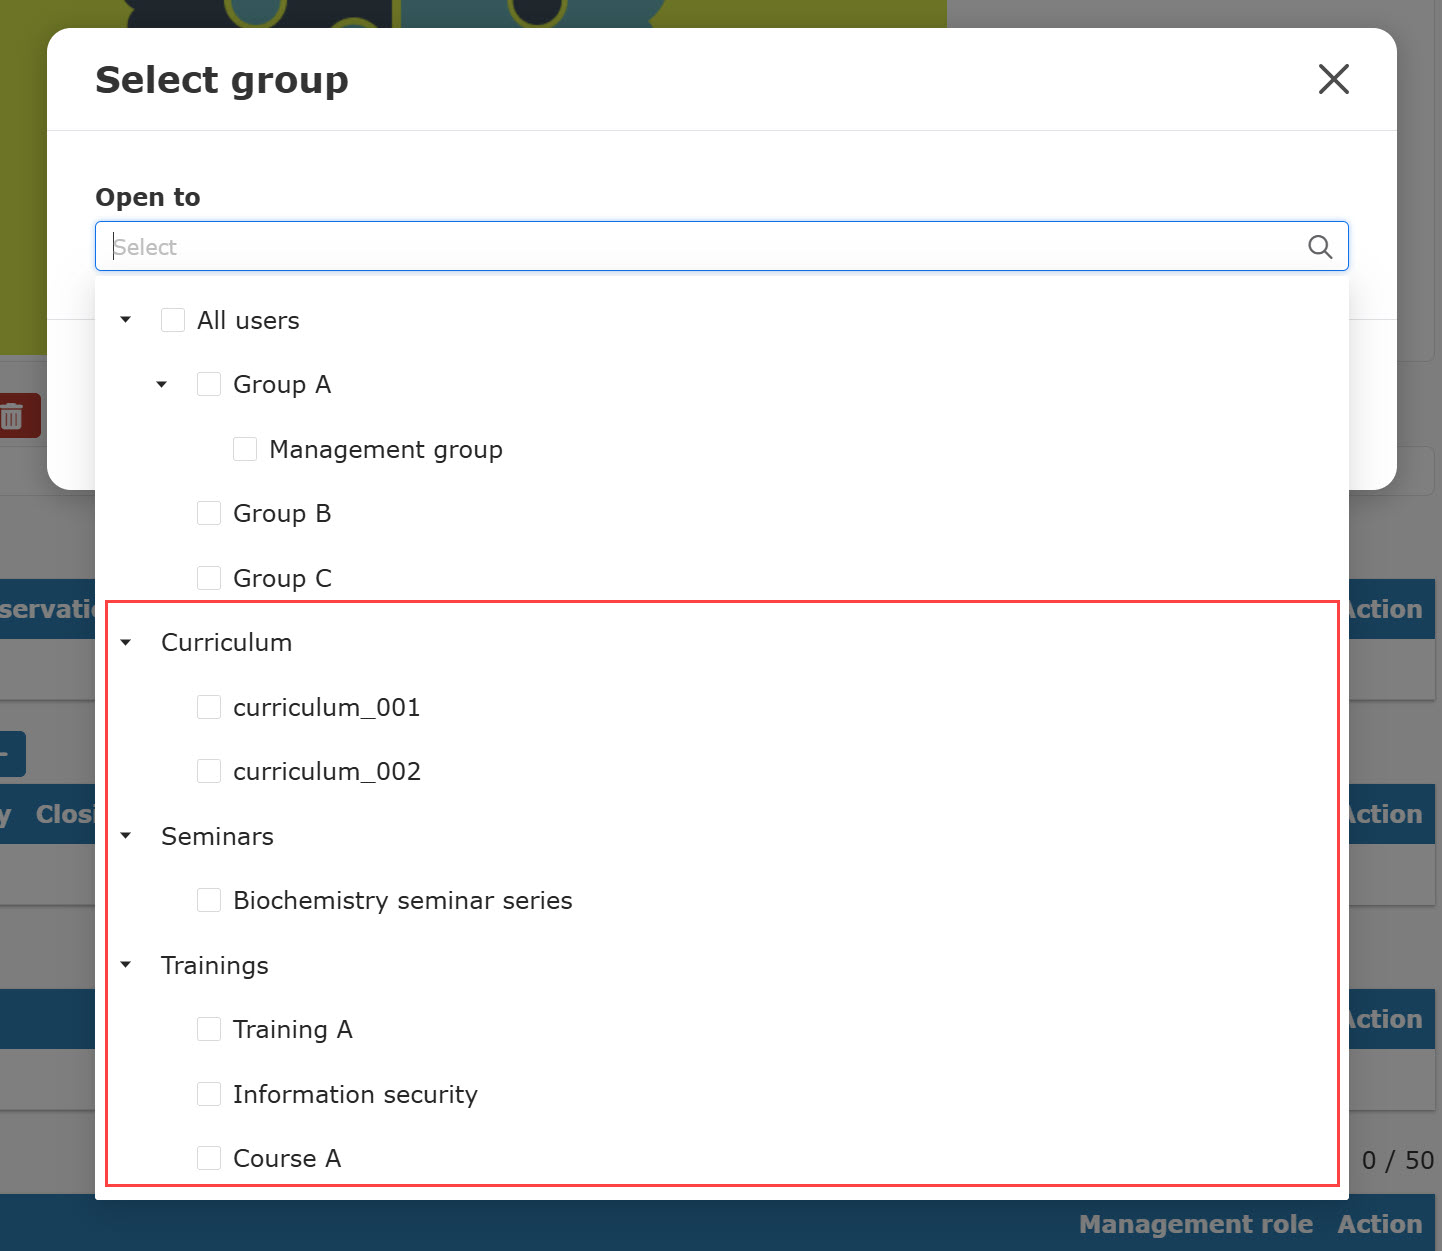
Selecting a parent group automatically selects all of its sub-groups.
Note
Creating a product, seminar, curriculum, or training automatically generates a group.
Selecting these groups allows you to grant access specifically to users enrolled in or purchasing that item.
This allows you to open a training to those who have purchsed a specific seminar.
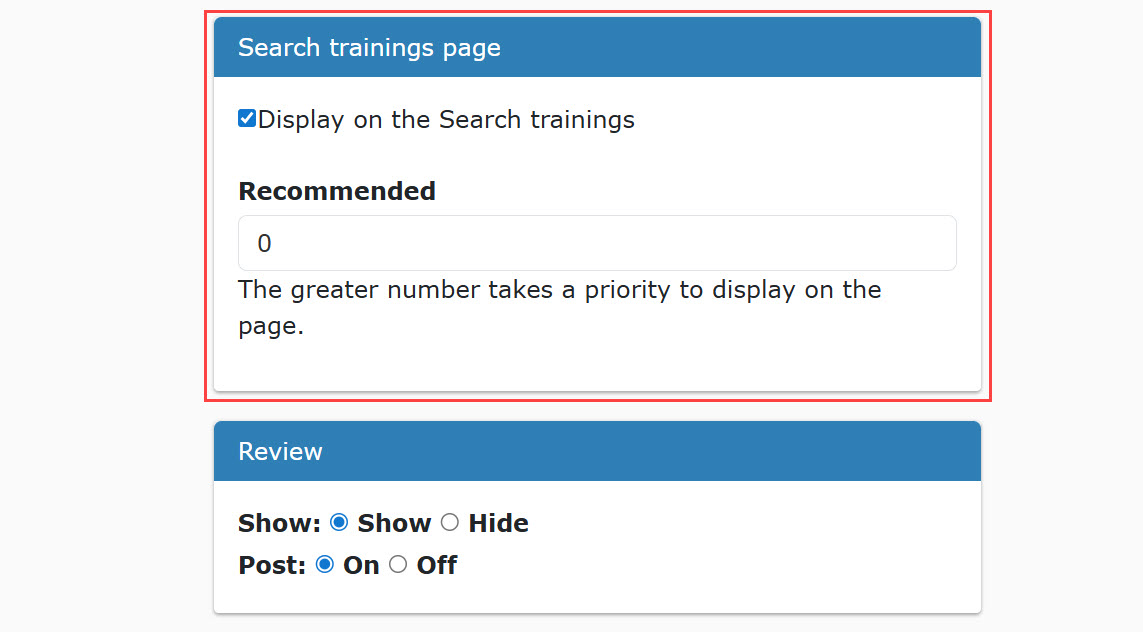
18. Display settings for Search trainings
Tick the box to show the training on the Search trainings page.
You can set a recommendation priority number
Higher numbers appear closer to the top of search results
19. Review
Allow learners to view and post reviews on learningBOX.
Select your preferred option for each.
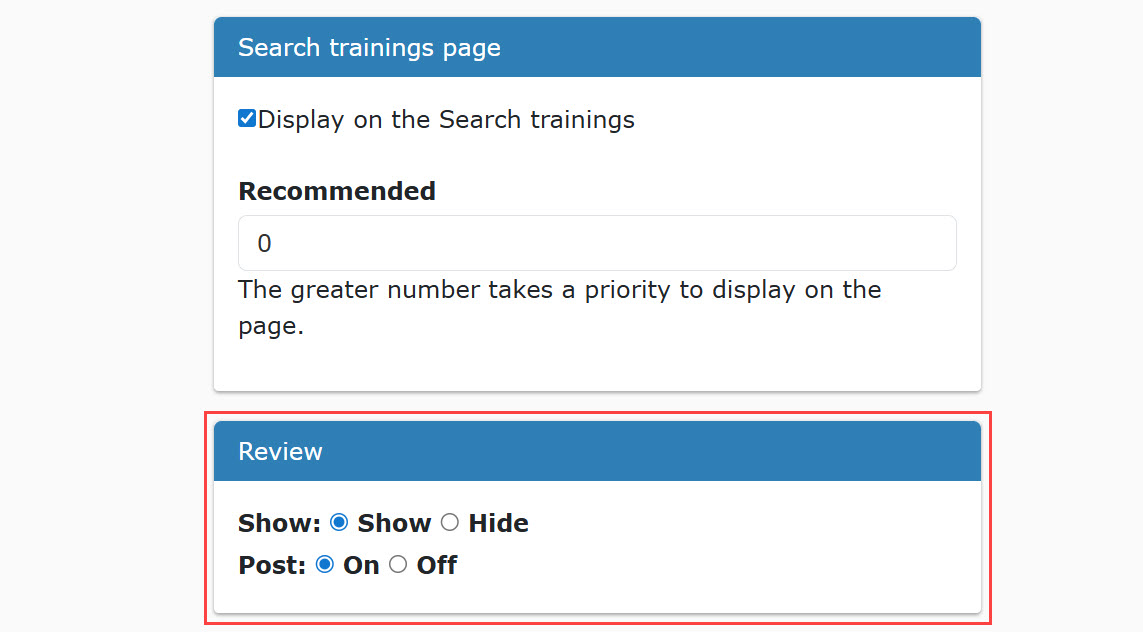
- Learner reviews will be displayed on the training start page.
- Be sure to set Enable the review feature to On in the Basic training settings.
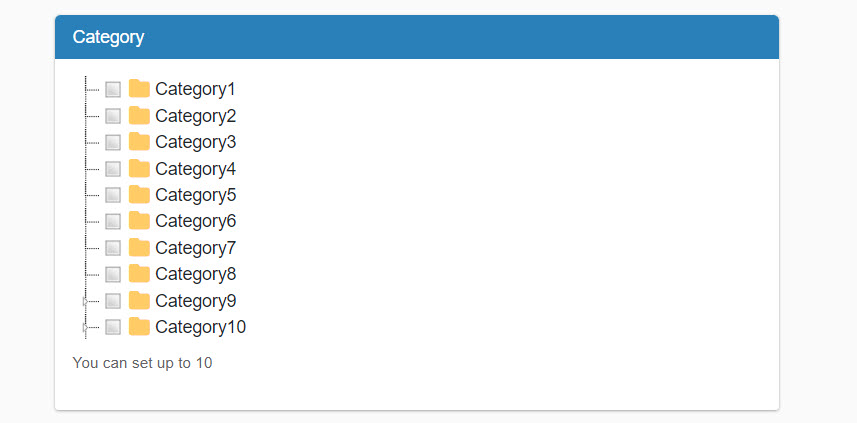
20. Category settings
You can set categories for training.
Categories you set will be utilized in the Search trainings page.
Select categories you want to add.
*Up to 10 categories are selectable.
*For more details on categories, refer to Categories.
21. Tag settings
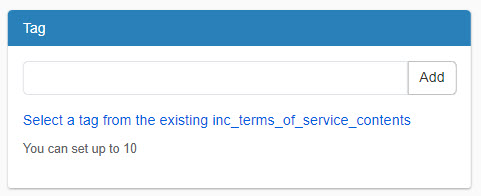
Tags can be set for the training.
They will be utilized in the Search trainings page.
To create a new tag, enter a tag name and click Add.
When you want to use existing tags, click on Select existing tag.
*Up to 10 tags can be set.
*For more details on tags, refer to Manage tags.
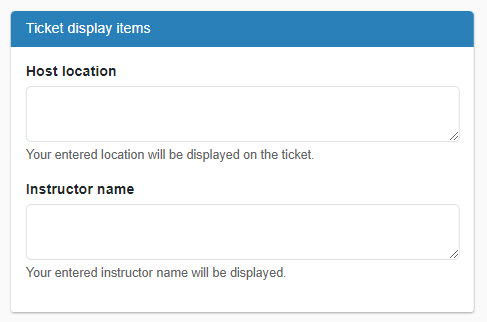
22. Ticket display item settings
The location and instructor name can be displayed on a ticket.
If you wish to display the items, fill out the form.
23. Save/Preview
Select the status and click Save.
Click Preview to view the learner's training start page.
To cancel changes, click Discard.
*When archived, the training will not be displayed on the Manage trainings page nor Search trainings page.
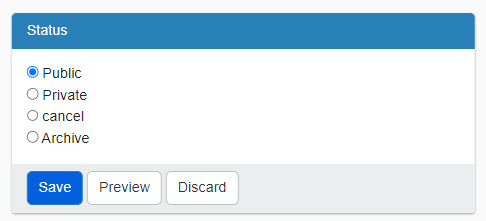
- No changes will be made to the assignment of learners if the status of archived training is Reserved.
- To search archived training, select Archived in the search window on the Manage trainings.
Note
When you create a training, a group is created for each individual training.
When training is archived, assigned groups are also automatically archived, and vice versa.
Create in batch
01.Download CSV
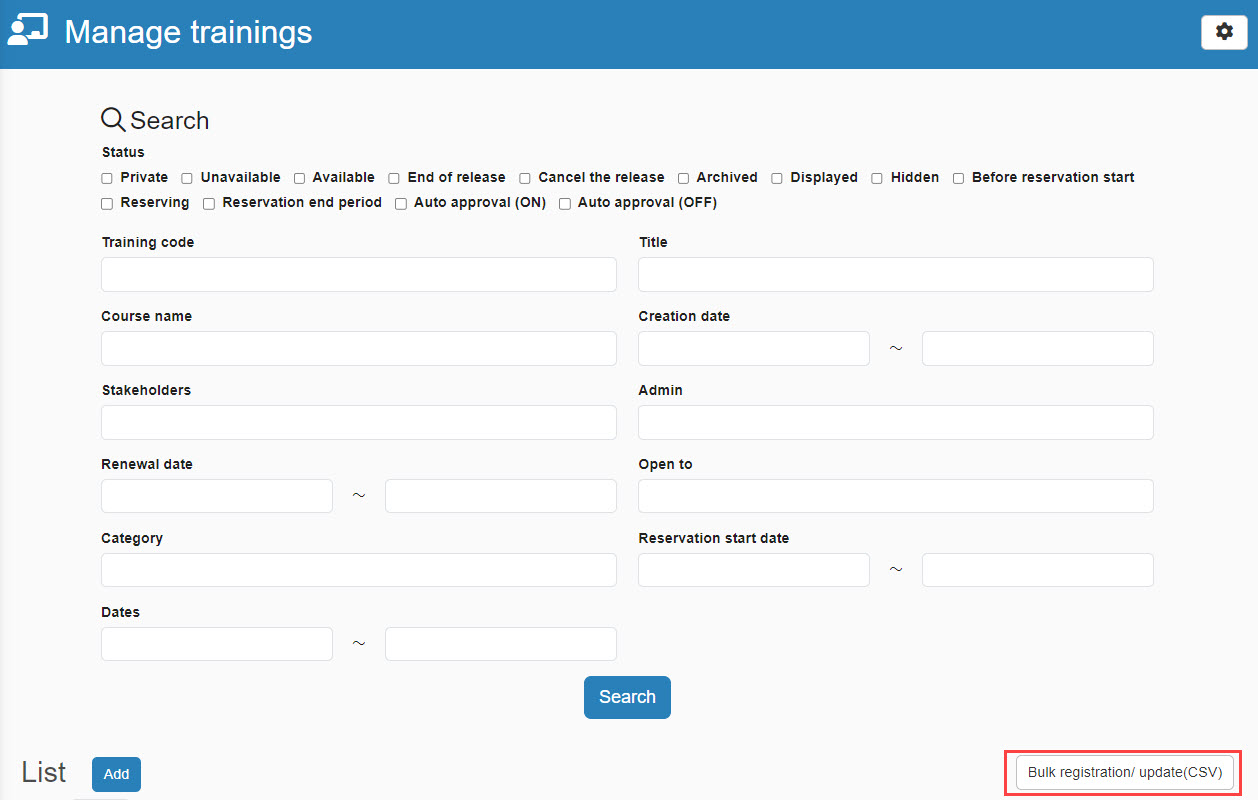
You can download the information about the training.
Click Bulk registration/update (CSV).
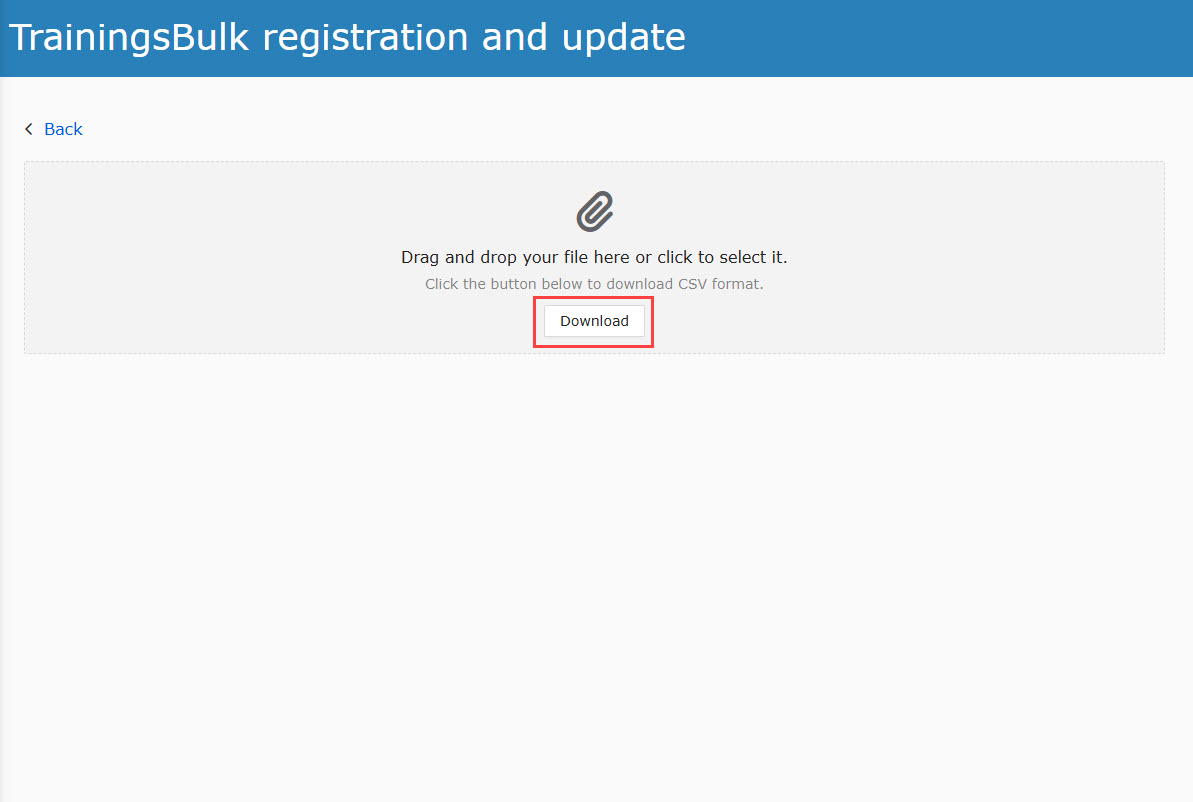
Click Download.
02. Edit CSV file
The downloaded CSV includes the training information items.
Enter one training program per row.
A sample record is provided on line 2 for reference.
Each item and rule to enter
Refer to the downloadable PDF guide for specific field requirements and formatting rules.
For each item above, refer to Create one by one.
03. Upload CSV file
Upload the created CSV file to learningBOX.
Drag and drop your file into the upload zone or click to select the file.
If the uploaded content is incomplete, an error message will be displayed.
Correct the content and re-upload the file if necessary.
Click the trash can icon to reselect the file.
The following fields are required to fill out.
- Training code
- Status
- Title
The closing date must be set to a date after the training start date.
When changing the date and time after limiting overlapping reservations for the same time slot, changes can be made only in the following cases:
- When there are no reservations
- When there are reservations & the changed date/time does not overlap with other training/seminars
Even if automatic archiving is enabled, it will not execute if the status is set to anything other than Published or if the expiration date/time has not been set.
Update duration
When updating the duration, the training status must be Private.
Note that if multiple duration have already been set, you cannot specify a duration for update.
The results will vary depending on the settings.
e.g.) Adding a new duration C to a training program that already has durations A and B
- When durations A and B are already reserved and cannot be deleted: there will be three durations—A, B, and C.
- When durations A and B can be deleted: A and B will be removed, and C will become the only duration for the training.
Review/edit training
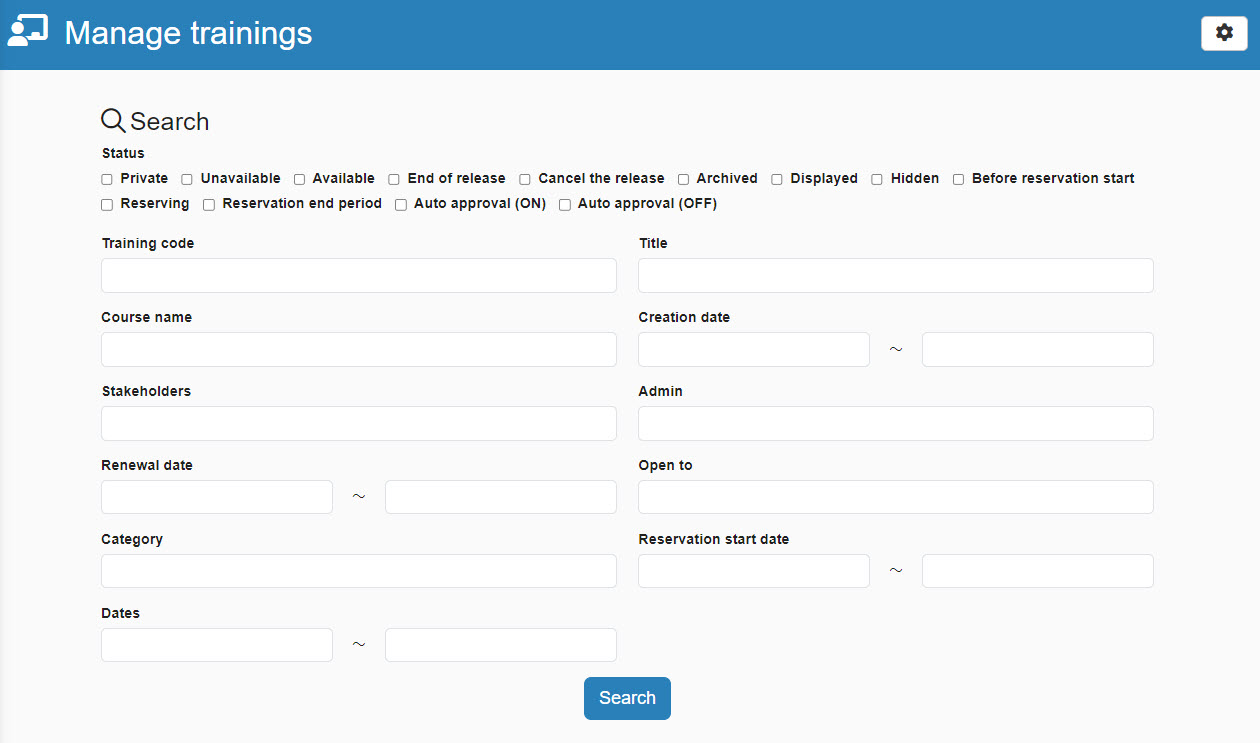
01. Search training
Users can search trainings at the top of the page.
02. List of training
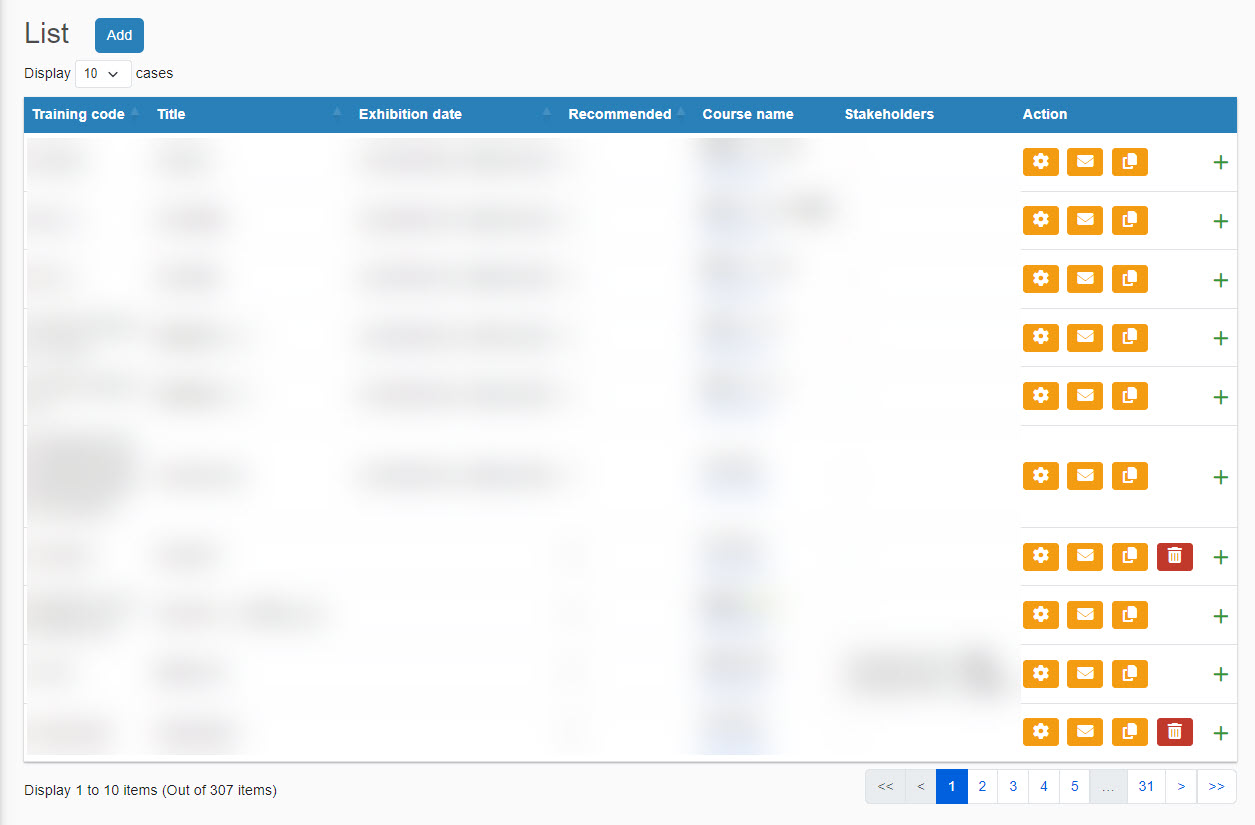
The search results will appear below the search field.
The list includes training titles, recommendation rankings, course details, and more.
03. Edit menu
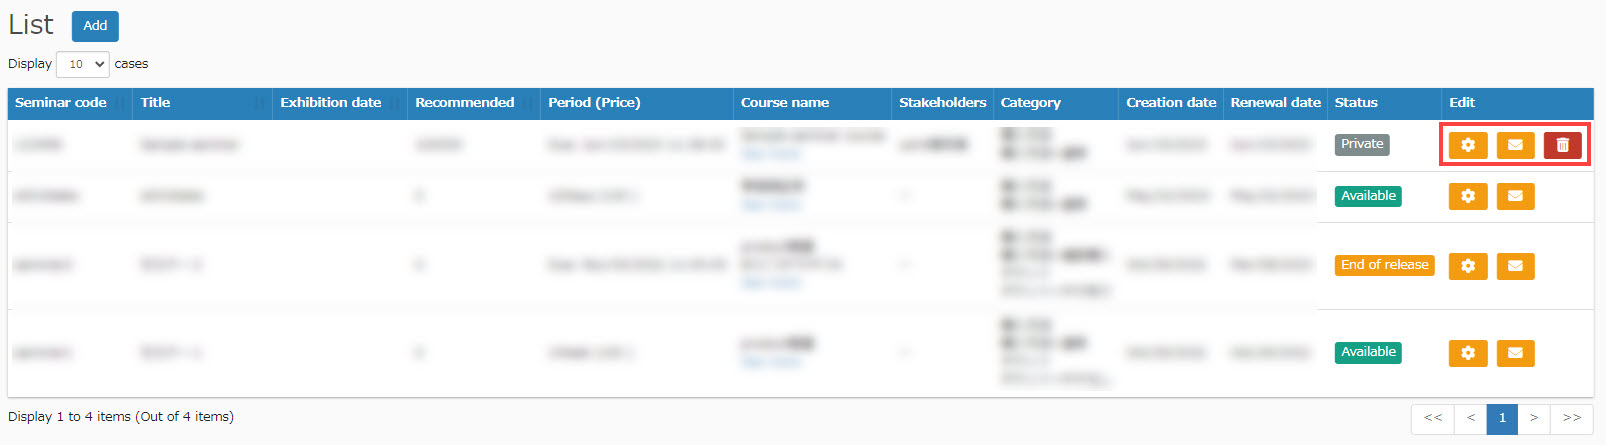
Several icons are displayed to the right of each training item.
・Gear icon: edit the training settings
・Envelope icon: edit the email sent to the admins and stakeholders
・Paper icon: duplicate the training program
・Trash can icon: delete the training program