Manage reservations

You can manage your training reservations.
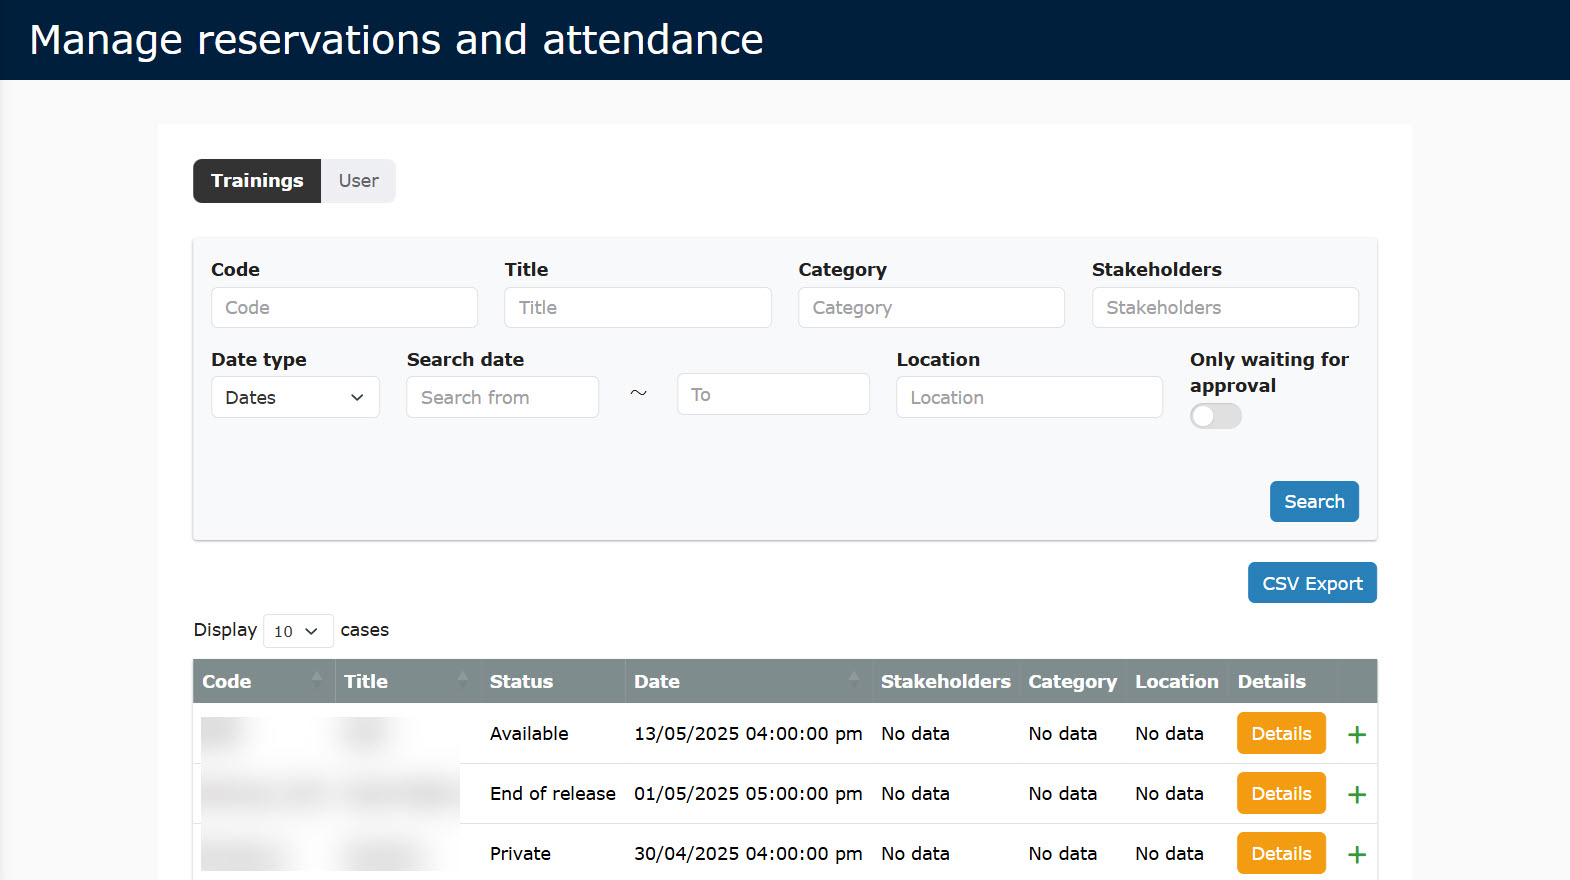
*Select "Training" > "Manage reservation (for stake holders)" from the side menu.

What you can do with the training functions
You can build a training program with several courses.
Learners can select and reserve a training course from the list, and take it within the specified period.

Required

Customization options, training organizer/instructor, and reservation/attendance management privileges

Contents

Confirmation of all reservations

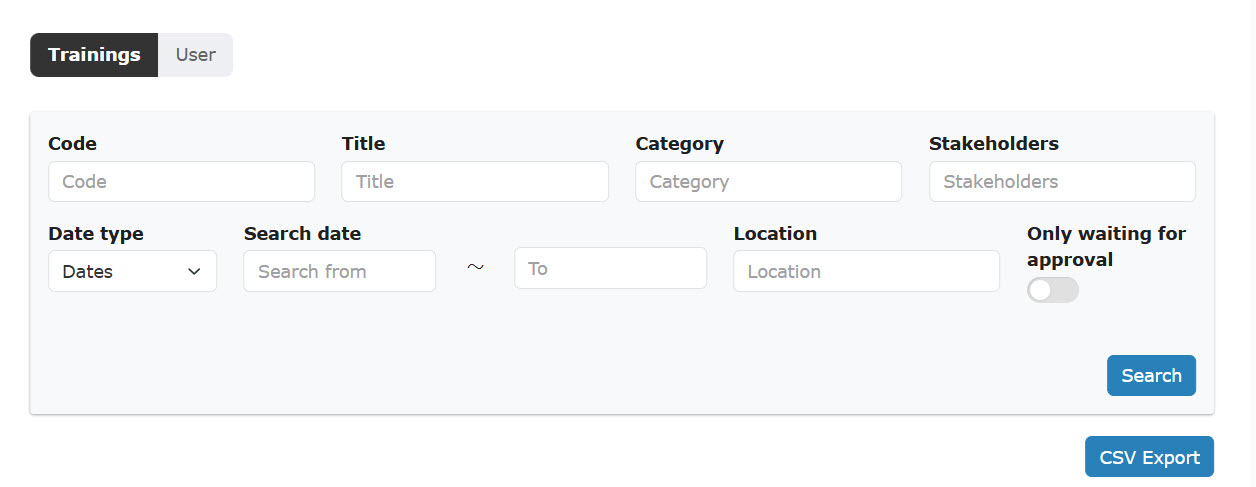
01. Search training

Go to the search field.
Select the items to search.

Note

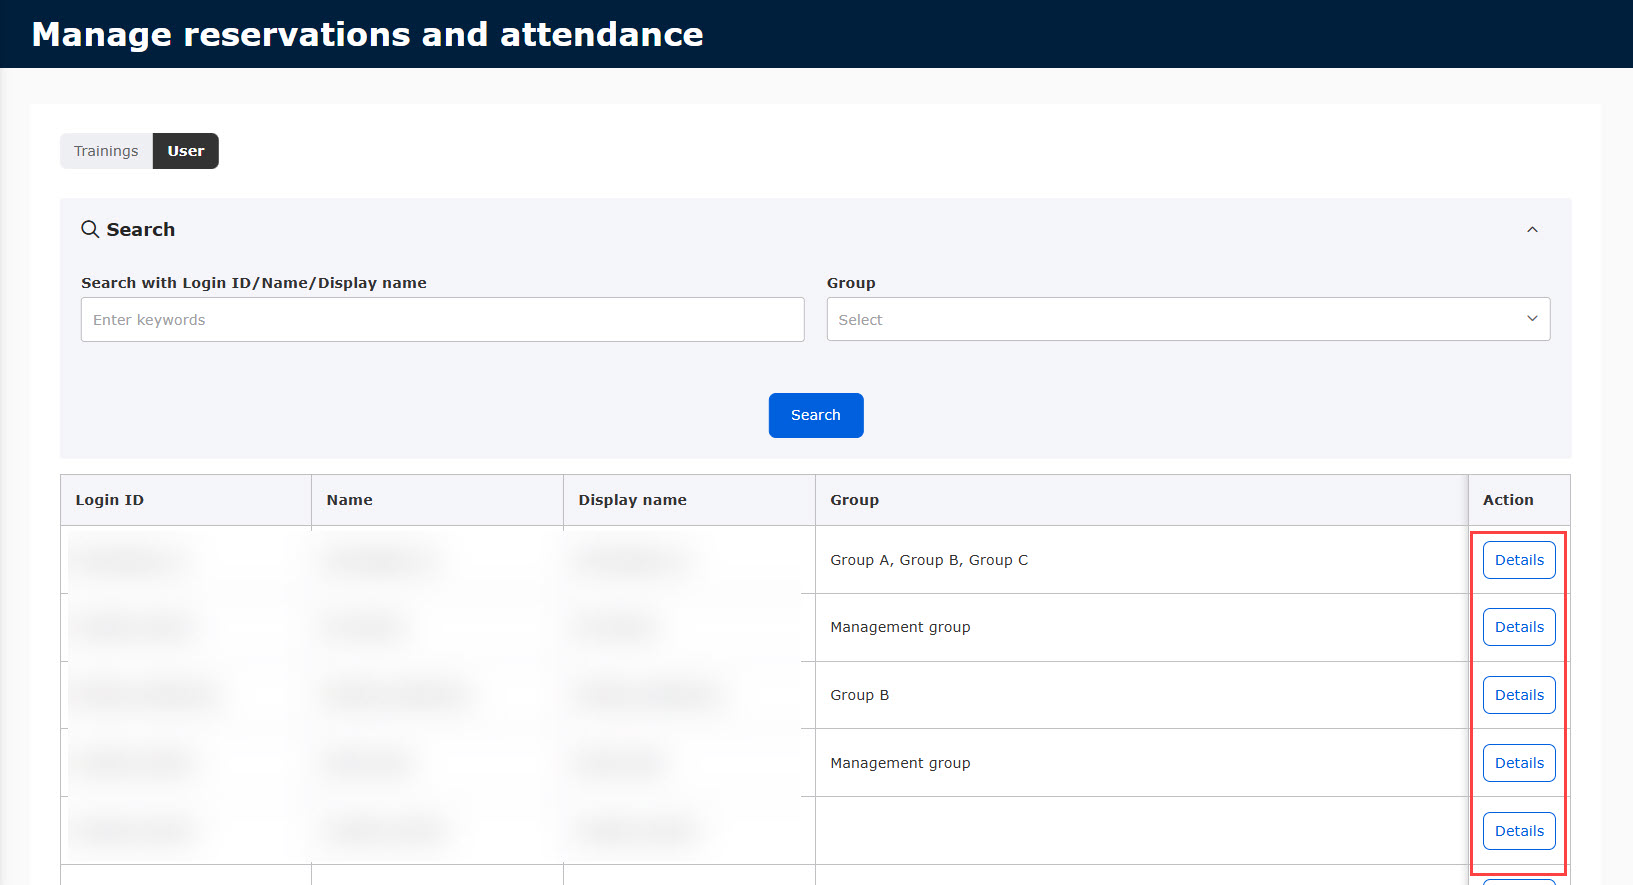
Owner-managers will see all trainings and non-owner-managers will see only relevant trainings.

02. List of training

Matched training will be listed.
*The information can be exported by clicking on the "Export CSV file."

Management of reservations per training

01. Open the reservation list screen

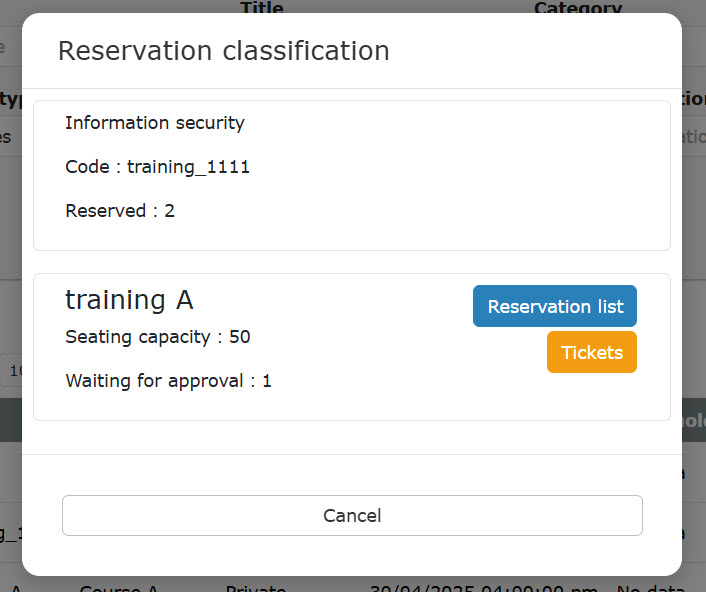
On the "Reservation Management (For Related Persons)" screen, click the "Details" button for each training course to open the following pop-up window.
Please click here "Reservation List".
You will then see the "Reservation List" screen, where you can check the status of reservations for each training.

Note

In addition to the training organizer/instructor, users who have been set to "Reservation Management Authority" for each training can access the "Reservation List" screen.
*For more details, refer to Training Management.Please refer to the "Administrator" section of the

02. Check reservation status

In the upper right corner of the screen, you can see the total number of available training appointments / number of training appointments / number of appointments approved.
You can also click on "Check Availability Number" to check the availability of seats for training at the venue.

03. Search Reservations

You can narrow down the reservations to be displayed based on information such as the reservation ID and the person who made the reservation.

04. List of reservations

Reservations that match the 03 search criteria are listed at the bottom of the screen.
*The information can be exported by clicking on the "Export CSV file."

Note

The subjects displayed differ between the training organizer/instructor and the person with administrative authority for reservations.

  • Training Organizer/Instructor: All reservations will be displayed.
  • Reservation Management Authorities: Only users who are subject to group management editing/viewing privileges among reservation holders will be displayed.

Approval / disapproval of reservations

You can approve/disapprove training appointments.
There are two ways to do this: individually or in a lump sum.

How to do it individually

Click on the gear icon to the right of the target reservation.

The following pop-up will open. Please select the desired content from the status pull-down menu.
You can utilize the remarks field as needed.
You can also choose whether or not to notify reservation holders by e-mail.
Click "Edit" to finish the settings.

How to do it all at once

Click "Batch Approval" or "Batch Non-Approval.
*The "Batch Approval/Batch Non-Approval" button will not appear if the "Automatic Approval Function" of the training program is enabled.

The "Batch Approval/Batch Non-Approval" pop-up will open.
Users can be narrowed down by name or login ID.
Target users will be listed at the bottom of the screen, so please tick the appropriate user.
At the same time, select from the pull-down menu whether or not to send an email to the target audience.

Note

The display targets are different for related parties and reservation management authorities.

  • Related parties: all users are displayed
  • Reservation Management Authority: Only groups subject to Group Management Edit/View Authority will be displayed.

After completing the settings, click "Confirm Approver / Confirm Non-Approver".
Please confirm your approval or disapproval after reviewing the contents.

Change of end date and time

The date and time of a training session can be changed by the user.
There are two ways to do this: individually or in a lump sum.
*For more information about due dates, please contact us.Training Management.Please refer to the "Period" section of the

Note

The end date and time of use must be a date and time that is farther in the future than the date and time of the event.

How to do it individually

Click on "Change End Date and Time" in the reservation details of the target reservation.

The following window will be shown.
Click on the "End of Use Date and Time" field to display the calendar, specify a new date and time, and click "Change.

How to do it all at once

Click on "Change End of Use Date and Time in Bulk".

The following window will be shown.
Users can be narrowed down by name or login ID.
Target users will be listed at the bottom of the screen, so please tick the appropriate user.
Click on the "End date and time of use after change" field to display the calendar and specify a new date and time.

Note

The display targets are different for related parties and reservation management authorities.

  • Related parties: all users are displayed
  • Reservation Management Authority: Only groups subject to Group Management Edit/View Authority will be displayed.


When settings are complete, click "Confirm Changes".
Please confirm the contents and confirm the change.

Registration of the person making the reservation

The administrator can also designate users to confirm training reservations.

Note

When a user performs an operation, the conditions for the groups that can be selected are as follows

  • Groups that are subject to the operator's group management editing/viewing privileges and that are set as the public destinations for the training.

01. Open the reservation registration screen.

Click on "Register Reservations."

02. setting

The "Reservations Registration" pop-up will open.
Users can also be narrowed down by name or login ID.
Users will be listed at the bottom of the screen, so please tick the users for whom you would like to book training.

Select the period of availability of the training and select from the pull-down menu whether or not you would like to send an email to the target audience.

After completing the settings, click "Confirm Reservation Details.
Please confirm your registration after checking the details.

Management of attendance per training

Attendance can be managed on a training-by-training basis.

Ticket Confirmation

01. Open Ticket List screen

On the "Reservation Management (For Related Parties)" screen, click the "Details" button for the target training.
In the pop-up that opens, click on "Ticket List.

Note

In addition to the training organizer/instructor, other users who have been set to have "attendance management authority" for each training can access the "Ticket List" screen.
*For more details, refer to Training Management.Please refer to the "Administrator" section of the

02. Ticket Search

You can narrow down the tickets to be displayed by ticket number, reservation ID, or other information.

03. Listing of tickets

Tickets matching the 02 search criteria will be listed at the bottom of the screen.
*The information can be exported by clicking on the "Export CSV file."

04. Confirmation of ticket contents

Click on the ticket icon in the list.

Ticket details will be displayed in another tab.

05. Printing a list of tickets

First, click the "Screen for Print" button to display the pre-print confirmation screen of the displayed list of tickets.

The contents can be printed from the "Print" button on the opened screen.

Attendance Management

You can manage training attendance.
There are two ways to do this: individually or in batches.
 

How to do it individually

On the "Ticket List" screen, click the gear icon to the right of the ticket in question and select "Change Attendance Status.

The following window will be shown.
You can check "Current Attendance."
Please select your preference from the "Attendance after change" pull-down menu.
Click "Edit" to finish the settings.

Check!

For each ticket, a "memo" is available if there is content to be kept as a record.
Click on the gear icon for each ticket and select "Change Memo".
The following window will be shown.

Click the "+" icon on each ticket to see the notes you have left.

How to do it all at once

First, please tick the subject you wish to change the attendance status of.
Then click on "Collective action on selected items" and select "Change attendance".

The following window will be shown.
The "Current Attendance" for each ticket is listed.
Please select your preference from the "Attendance after change" pull-down menu.
Click "Edit" to finish the settings.

Check!

If there is content to be kept as a record for multiple tickets, a "memo" is available.
First, please tick the subject you wish to leave a note on.
Then click on "Collectively work on the selected items" and select "Change Memo".
The following window will be shown.

Click the "+" icon on each ticket to see the notes you have left.

Read QR for attendance

When the attendance status is "not yet accepted" or "absent", the status can be changed to "present" by reading the QR presented by the learner.
*If the attendance status is "present", the operation is not available.

▼ Procedure

On the "Ticket List" screen, click on "Read QR for Attendance.

A screen for reading QR will appear.
If the QR is successfully scanned, "Ticket Order Information" will be displayed.
Clicking "Change to Attendance" will change the status of your attendance.

memo

You can change the camera by clicking the gear icon in the upper right corner of the QR reading screen.
The selected camera information will be carried over to the next and subsequent operations.


Operation on the learner's side

Learners who have reserved a training can view the QR of the training whose attendance status is "Not Accepted" or "Absent" on their own screen.
*For more details, refer to Training Reservation History (Learner Side)"Please refer to "Displaying QR" in the following section.

Contents