Questionnaire
You can create unique questionnaires to collect user feedback.
Anonymous quesionnaires are also available.
Create questionnaire
01. Create a course
First, create a course in the Manage contents.
*For details on creating a course, refer to Course/Folder.
02. Open the creation form
Click on the course you created.
In the upper left corner of the page, select + Create new > Questionnaire > Create.
03. Settings
Each item at the top of the creation form is for the overall settings.
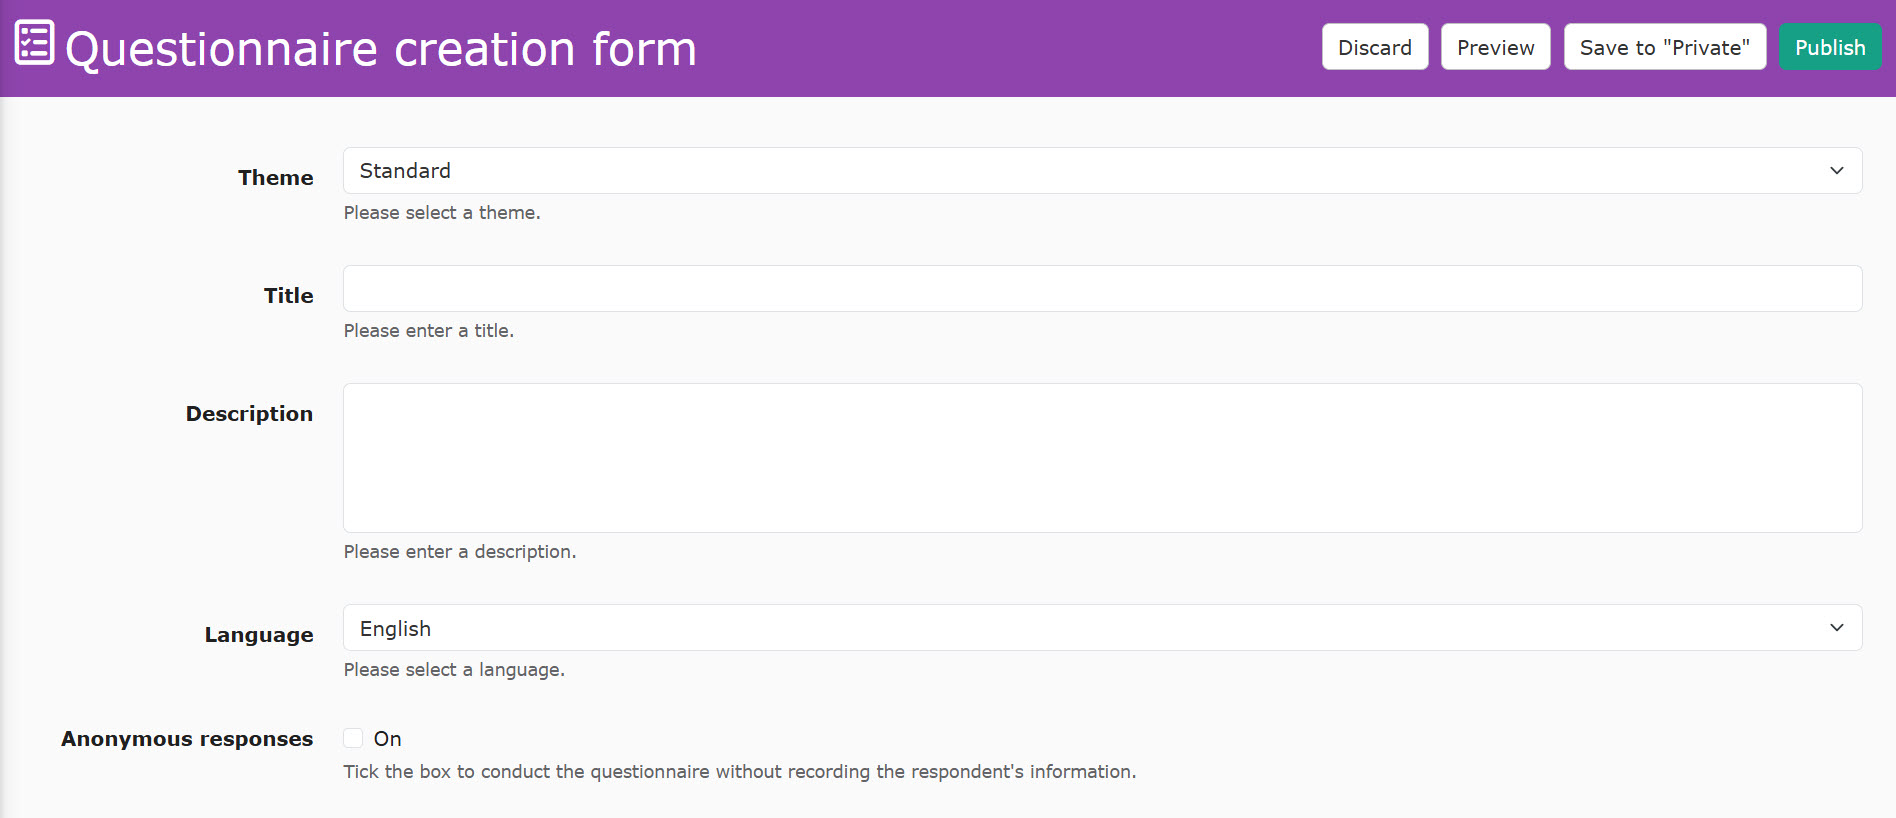
- Theme
- Title
- Description
- Language
- Anonymous response
04. Add questions
Next, fill in the form.
The following explains each item.
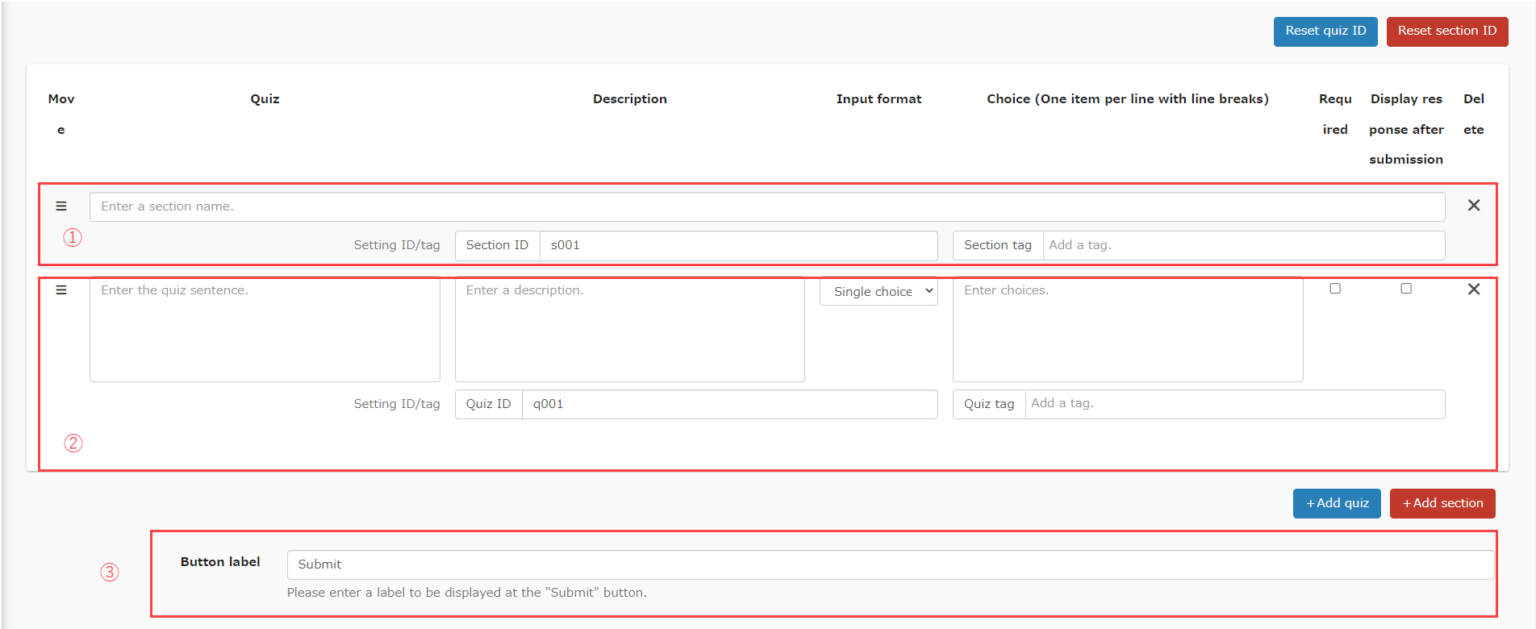
1. Section
Enter a section name.
To add a section, click on +Add section.
Drag and drop the section to move it with the hamburger icon .
*For more details about the section ID/tag, refer to Set ID/tag/choice number.
2. Questions
Enter question text in the left field.
In the second column from the left, enter a description.
Select a question format from the list.
In the fourth column, enter the answer choices when either Single choice/Multiple choices/List is selected.
Tick the box when the question is required to answer.
When Display response after submission is ticked, the user's answer will be displayed in the next session.
To add a question, click on +Add question.
*For more details about the section ID/tag, refer to Set ID/tag/choice number.
3. Button text
The button text for submission can be edited.
05. Save
Select one from the following:
- Publish: Publish to assigned users once it is saved
- Save to Private: The content will be saved, but other users cannot view it.
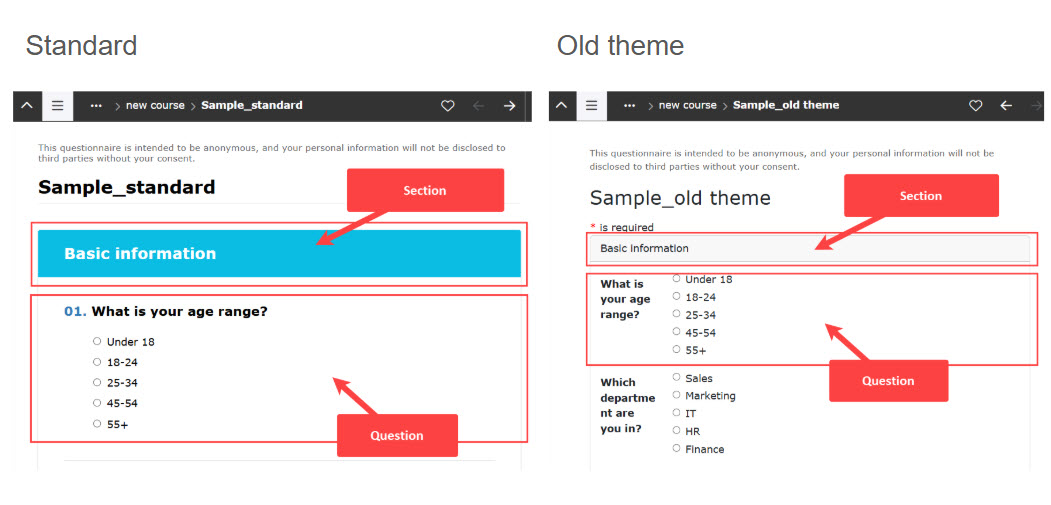
User interface
There are two themes as shown below.
When you select the anonymous responses, a notification will be displayed on the top of the screen informing users that their personal information will not be disclosed to third parties.
Note
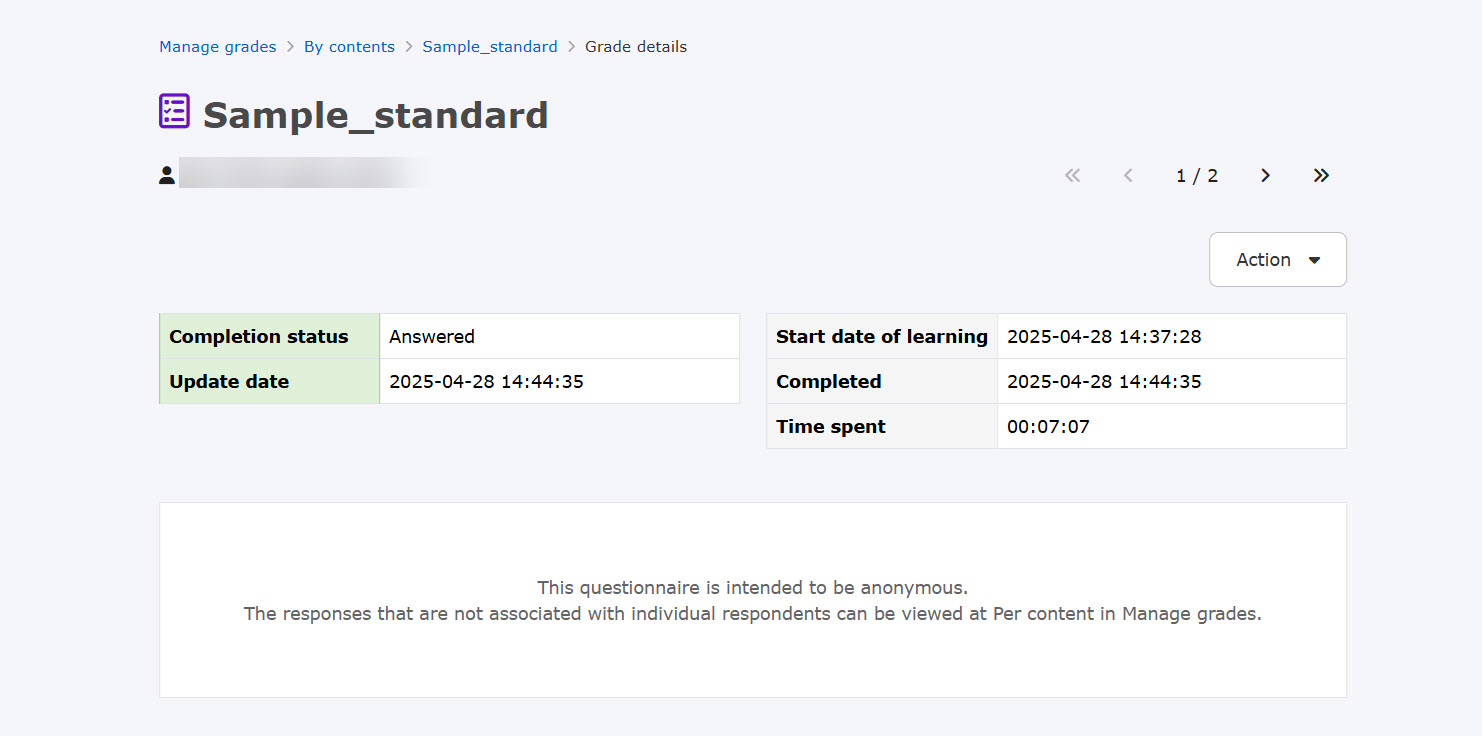
Anonymous responses can only be viewed by the respondent themselves.
When the admin opens each user's grade details in the List or By content tab in Manage grades, the responses will not be displayed, and only the submission status can be viewed.
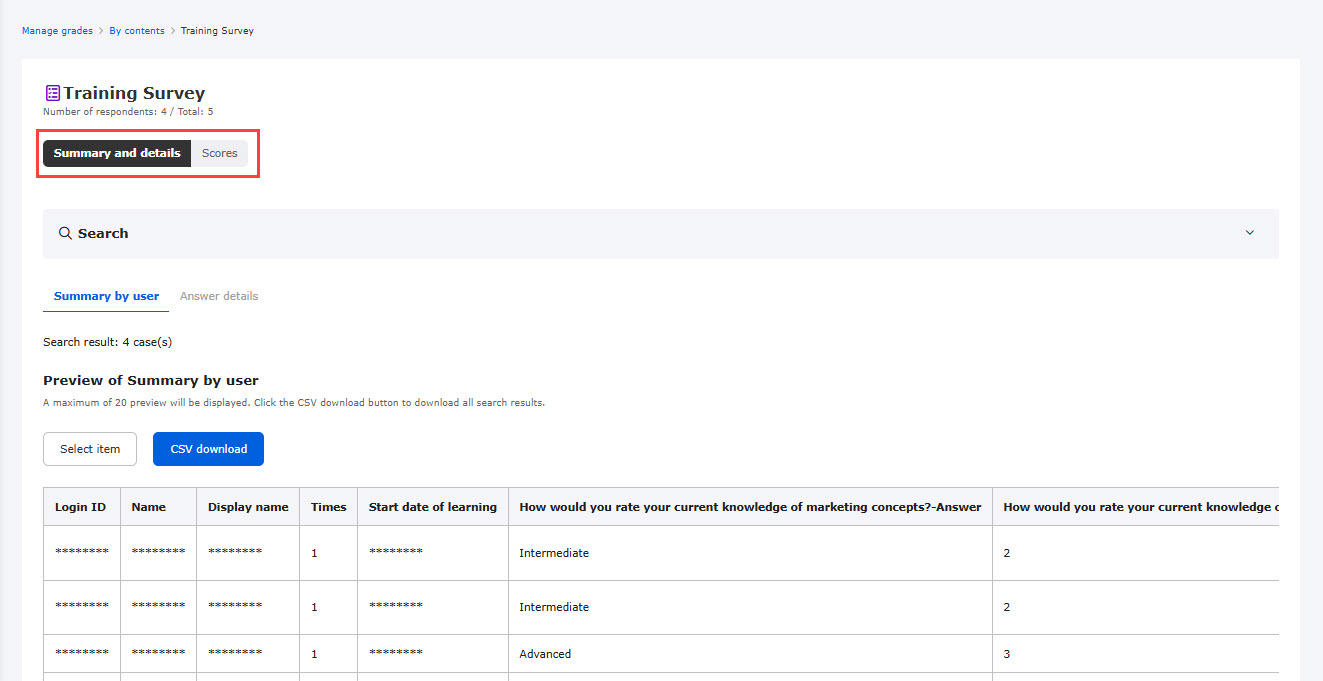
The content of anonymous responses can be viewd in a list.
Click By content in Manage grades and select a questionnaire from the list.
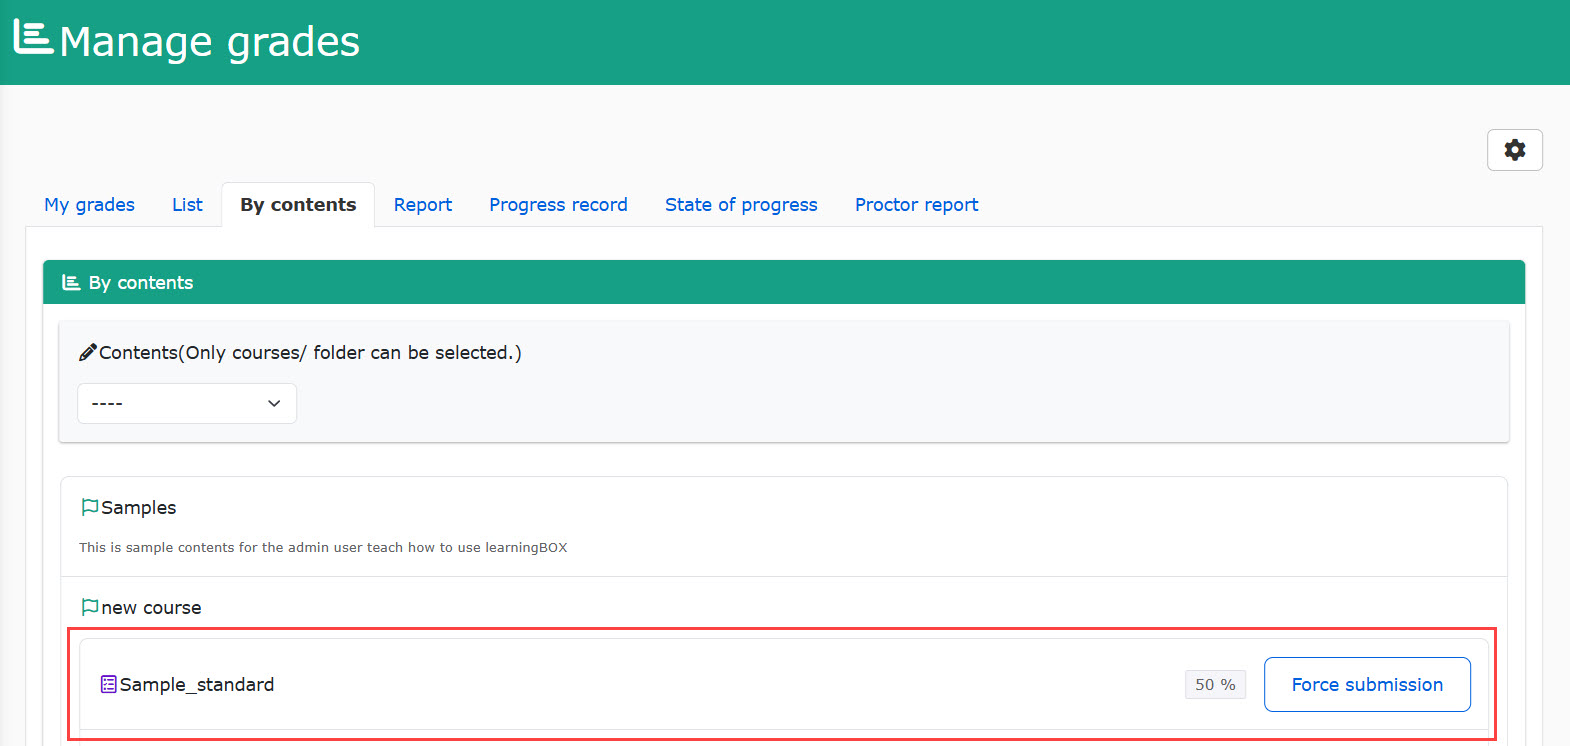
Click the Summary and details tab.
The responses of all respondents will be listed anonymously.
To export the data, click CSV download.
*For more details, refer to By contents.
Upload questionnaire
You can upload a zip file created and downloaded with the Questionnaire creation form and an html file.
*For more information on how to create the file as an html file, refer to Create/upload a questionnaire from an html file.
01. Create a course
First, create a course in the Manage contents.
*For details on creating a course, refer to Course/Folder.
02. Go to Upload questionnaire
Click on the course you created.
In the upper left corner of the page, select + Create new > Questionnaire > Upload file.
03. Settings

Enter a title.
Upload a file from Choose File.
If you wish to make the questionnaire anonymous, select Anonymous responses and save the settings.
Anonymous responses cannot be set for html-formatted questionnaires.
Download questionnaire
The created questionnaire can be downloaded.
Select Manage contents in the side menu.
Right-click on the target questionnaire or select the ︙ icon > Download.
It will be downloaded in zip format.
Re-upload questionnaire
Re-uploading allows you to overwrite the questionnaire that you have created.
Select Manage contents in the side menu.
Right-click on the target questionnaire or select the ︙ icon > Re-upload.
Anonymous responses
You can make a questionnaire anonymous by selecting Anonymous responses.
*If you do not tick the box, the questionnaire will be a normal one.
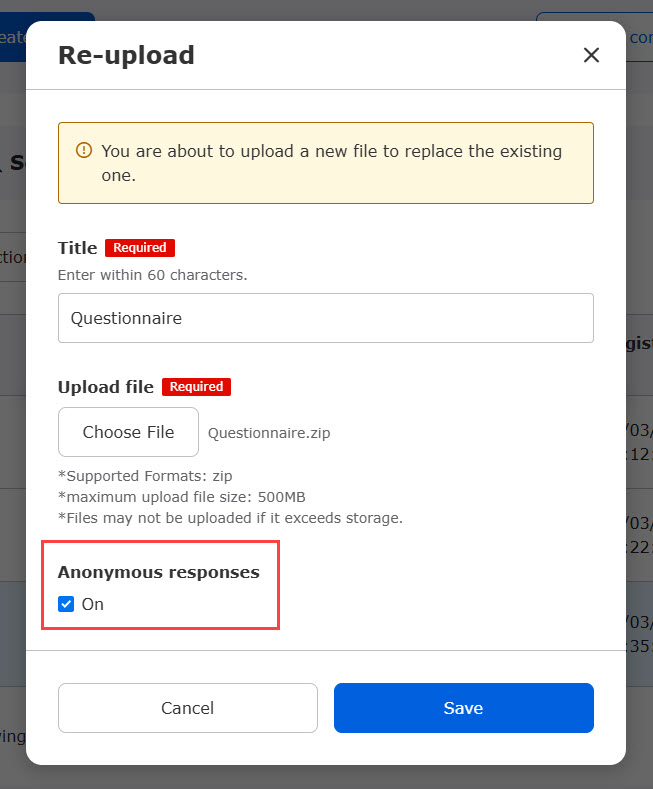
Anonymous responses cannot be set for html-formatted questionnaires.
Edit questionnaire
Select Manage contents in the side menu.
Right click on the target questionnaire or select the ︙ icon > Edit.
To edit the content, refer to Create questionnaire.