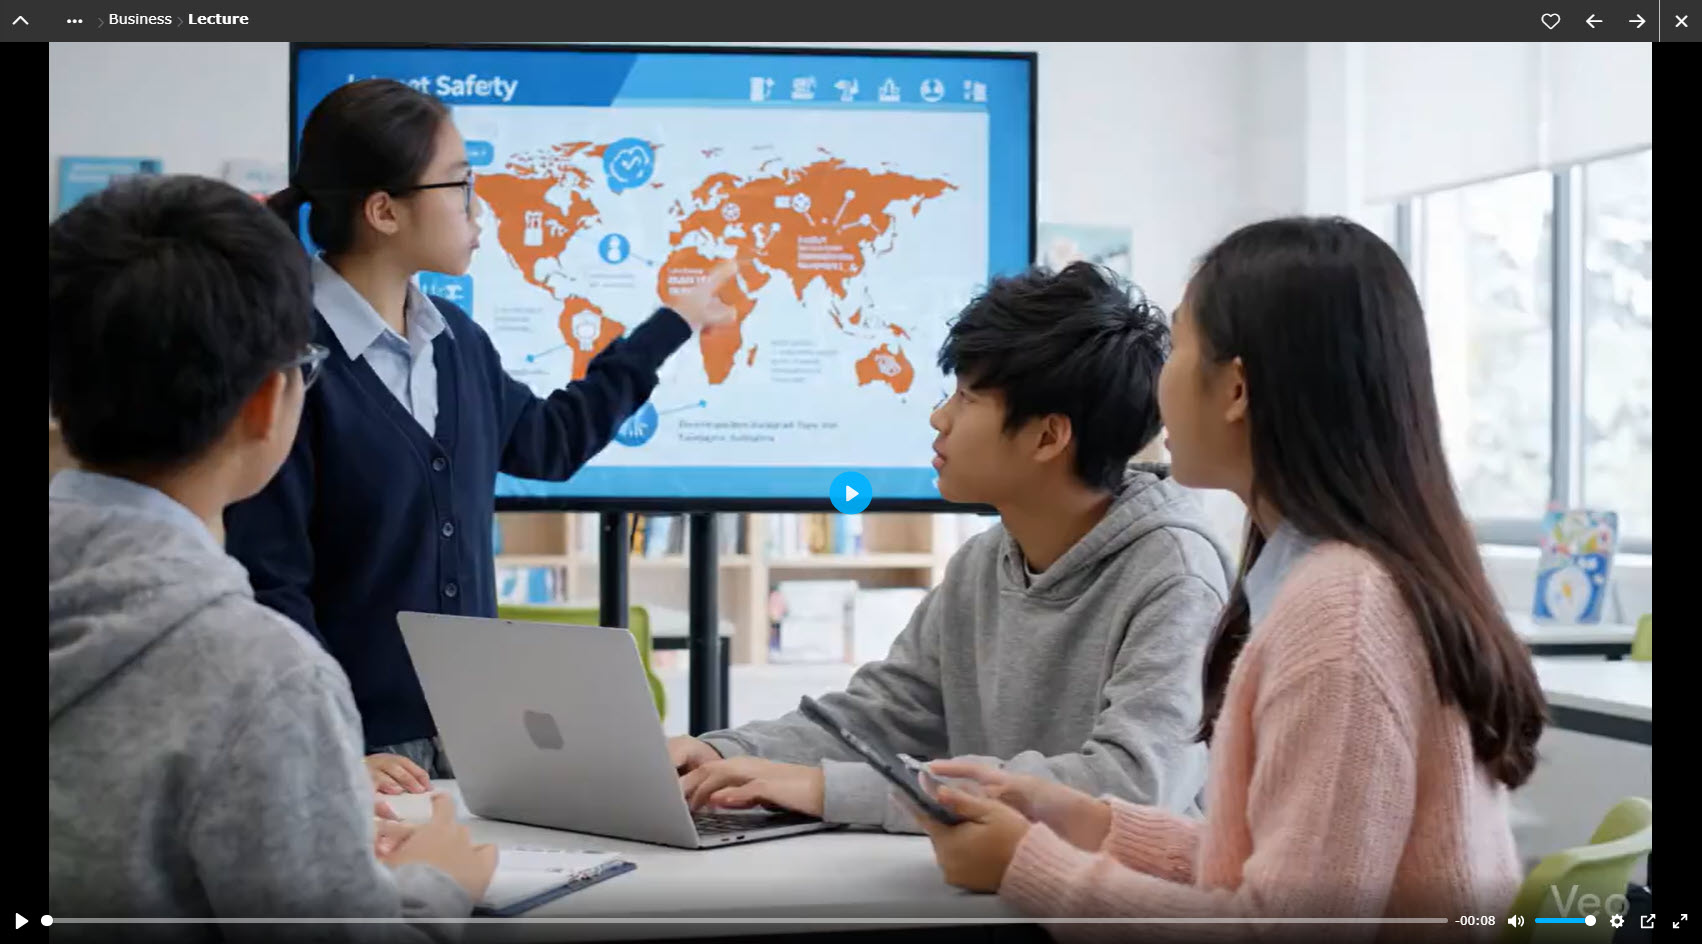
Bulk video upload
Multiple video items can be uploaded at once.
Required
Management role of Content manager (Edit)
Supported file types:
mp4, avi, mov, mpeg, mpg, mkv, wmv, webm
Upload video
01. Create a course
First, create a course in the Manage contents.
*For details on course creation, refer to Course/Folder.
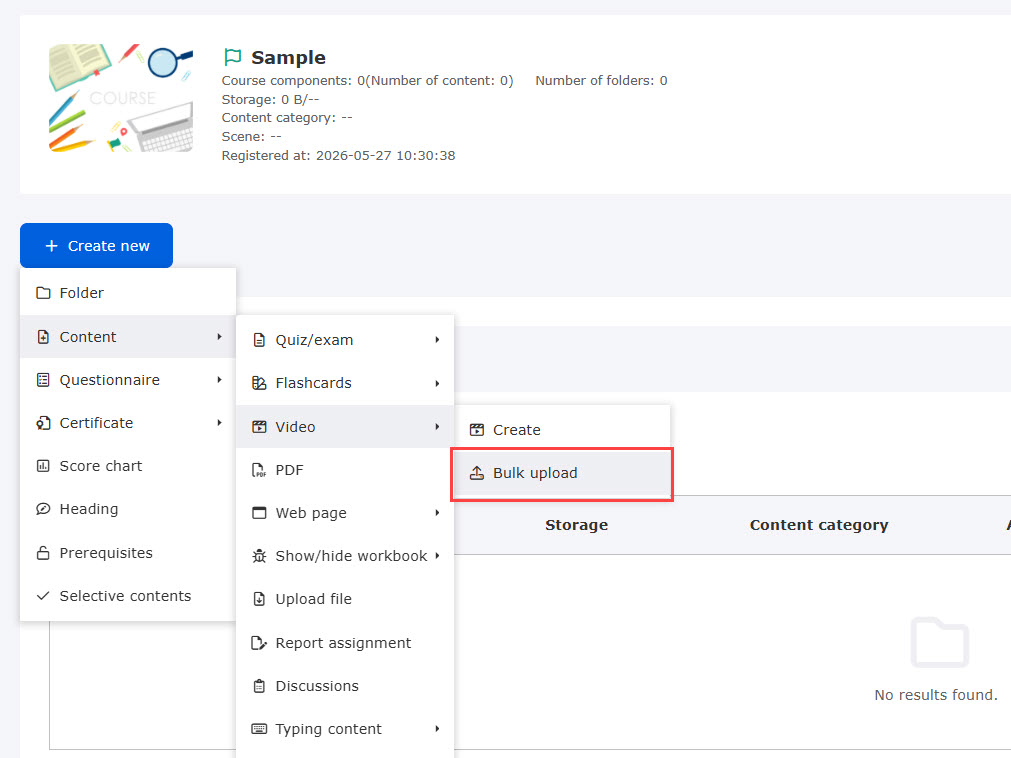
02. Open the video upload page
Click on the course you created.
Select "+ Create new" > "Content" > "Video" > "Bulk upload".
03. Choose video files
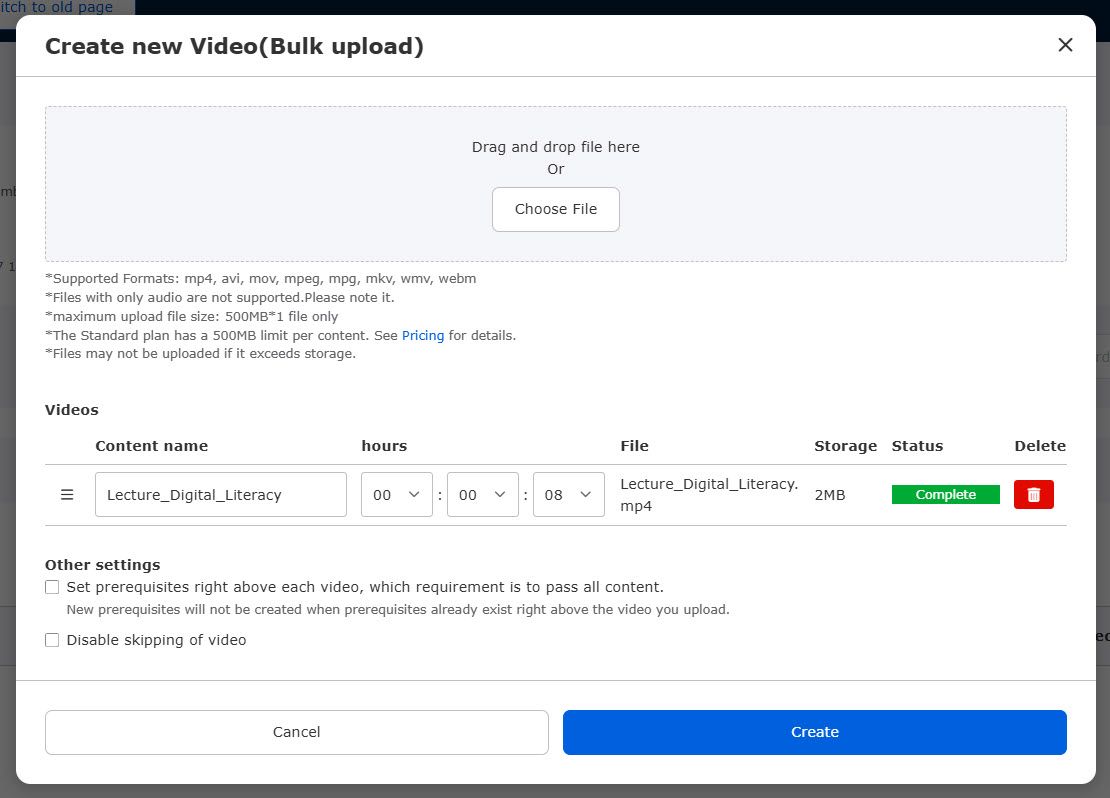
Click "Choose File" to select the video files you want to upload.
Multiple video files can be selected.
04. Other settings
Configure the following two settings:
▼Set prerequisites right above each video, which requirement is to pass all content
Tick the box if you want to require learners to pass all content created before each video in the same course or folder before they can start watching it.
▼Disable skipping of video
Tick the box if you do not want users to skip ahead during video playback.
Save your changes once all settings are complete.
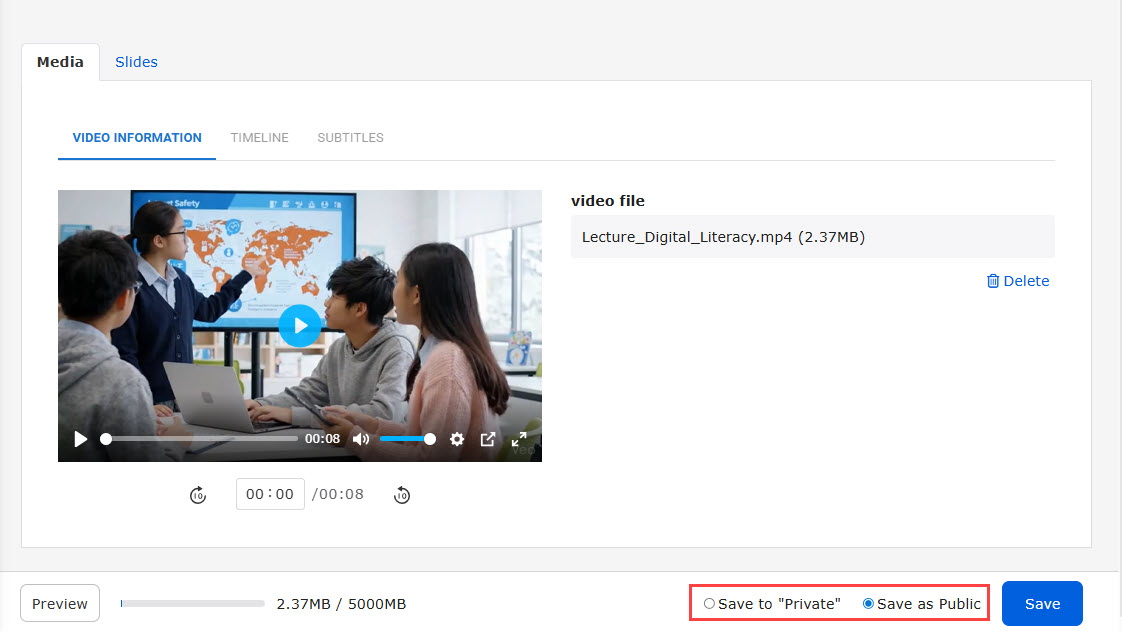
Access level
When the video player is set to [MOVIE-3.0] or later, "Access level" will not appear in the menu list displayed by clicking the "︙" icon of the created content.
Select "Save to Private" or "Sace as Public" in the form.
*For video shortcuts, "Access level" will appear in the Edit menu.
User interface
The following is the learner's page.
The playback bar will be shown or hidden according to the settings.
The video quality and playback speed can be selected from the gear icon, and picture-in-picture and full-screen switching are also available.
*For more details, refer to Basic video settings.
If a user stops watching a video partway through, playback will resume from where they left off the next time they open it.