Manage curricula
You can manage your curriculum by creating new curricula, duplicating curricula, and making detailed edits to the content.
*Open by selecting "Curriculum Functions" > "Curriculum Management" in the side menu.
What is Curriculum?
A combination of several already created courses of study, selected to allow for planning according to the objectives and stages of study
Required
Customization
*All of the following management roles
- Group manager (Edit for all users)
- Management role of Content manager (Edit for all content)
Curriculum development
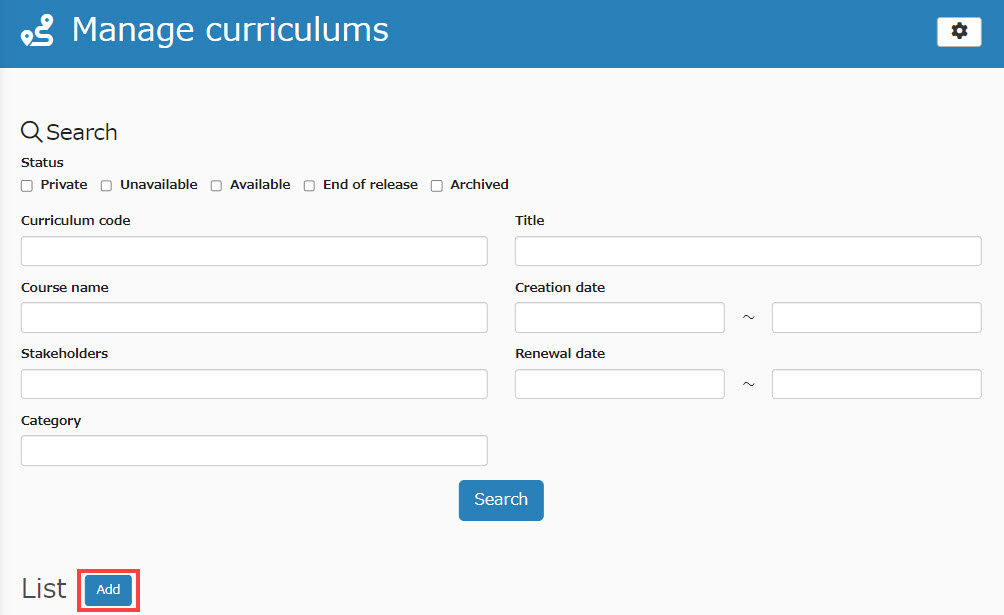
01. Go to the registration form
Click on "Add."
02. Enter items
Enter curriculum code, title, subtitle, and description.
Fields marked with "*" are required.
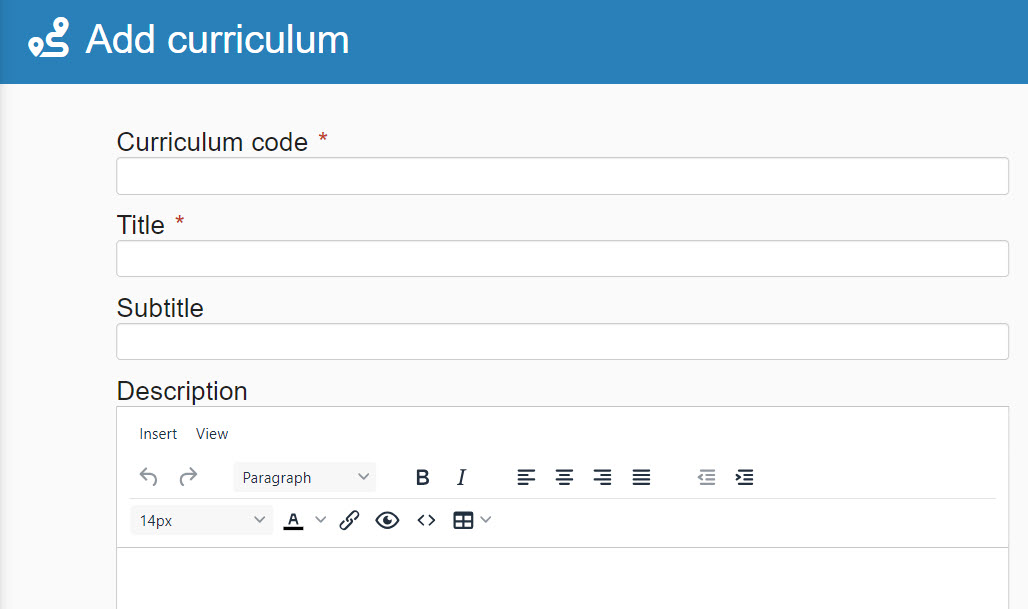
When the "Description" is set and "Description in the list" is left blank, the content set in "Description" will be displayed.
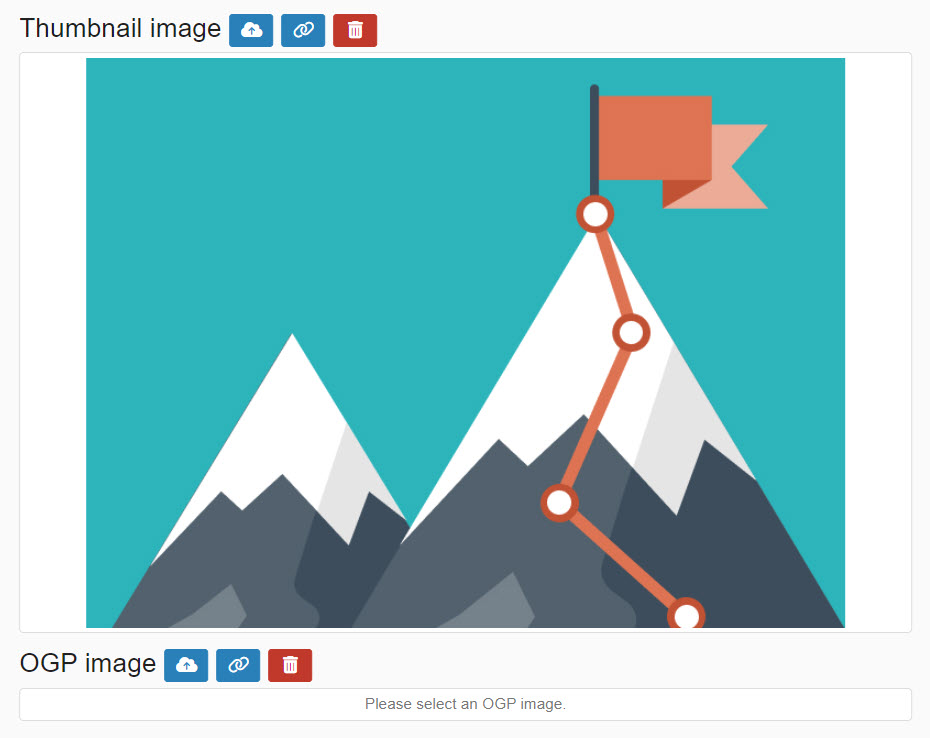
03. Thumbnail/Open Graph Image
The default image is applied to the thumbnail image. (Open Graph Image is not set)
To set an original image, upload a file from the cloud icon or specify a media URL from the link icon.
*To delete, click on the trash can icon.
[What is Open Graph Image?]
Open Graph Image is displayed when a URL including a website or an article is shared on social media.
It includes the title, URL, description and image.
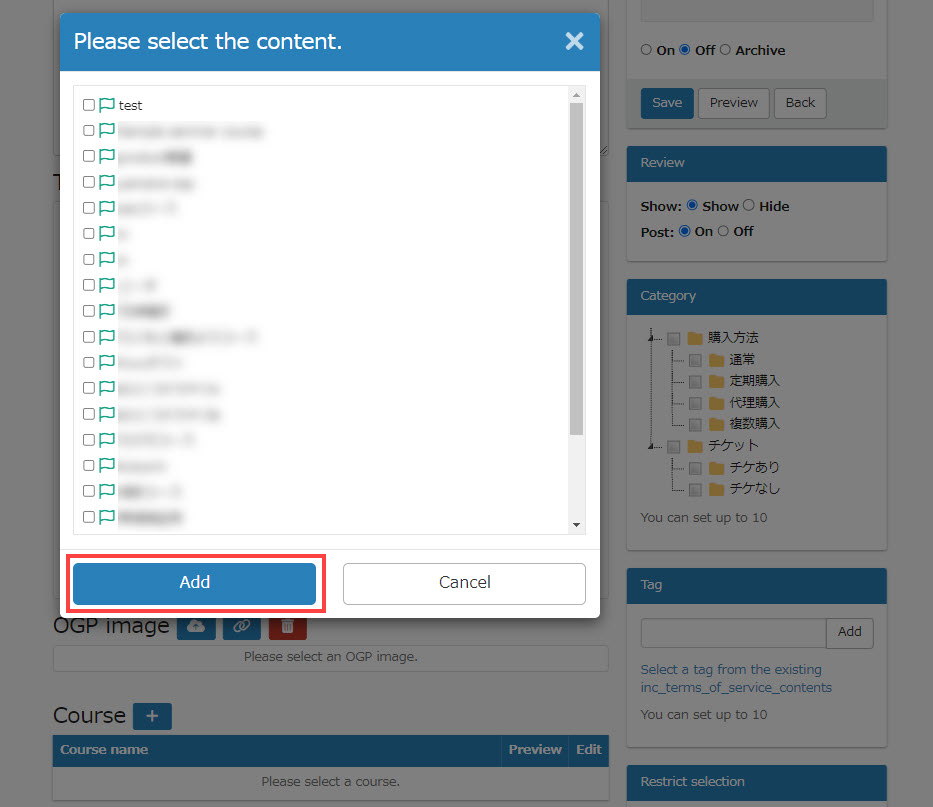
04. Add a course
Click on the "+" icon next to "Courses" and select the courses you wish to include in your curriculum.
Tick the courses you wish to add and click "Add."
By ticking the "Preview" box to the right of the content you have added, you can allow learners to view a preview of the content before selecting it on the curriculum details page.
*For more details on creating a course, refer to Courses/Folders, "Create a course."
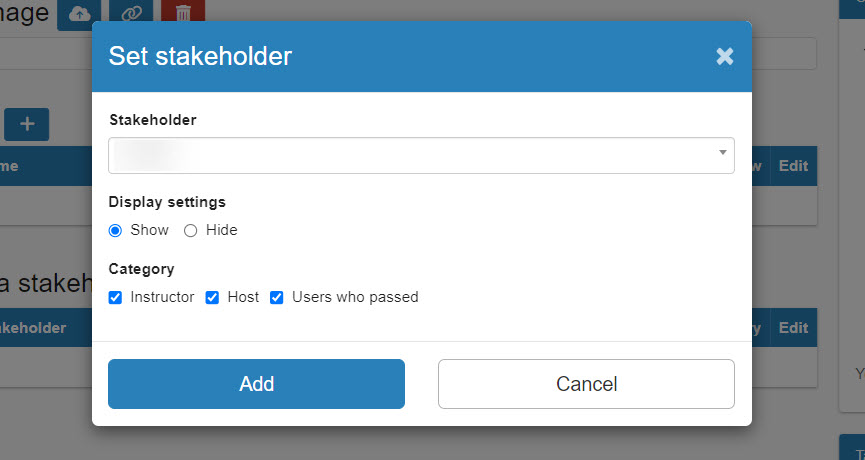
05. Setup of related parties
Click on the "+" icon next to "Stakeholders" and select stakeholders from the list.
Next, please tick the desired items for "Display Settings" and "Type".
You can select multiple items on the Category.
*If you set "Display Settings" to "Do not display", it is applied only to the list of "Find Curriculum" screen and the curriculum details screen.
06. Setting Selection Restrictions by Badge
Curriculum selection restrictions can be set based on the user's badge acquisition status.
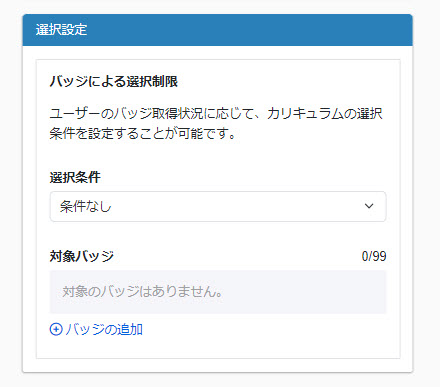
First, please select your preference from the following five options in the "Selection Criteria" pull-down menu.
- No conditions
- All eligible badges have been obtained
- Some eligible badges have already been earned
- Not acquired all target badges
- Some target badges have not been obtained
Specify the target badge.
Click on "Add badges" and tick the badges you want to add. *Up to 99 badges are selectable.
*For more details about badges, refer to Manage badges.
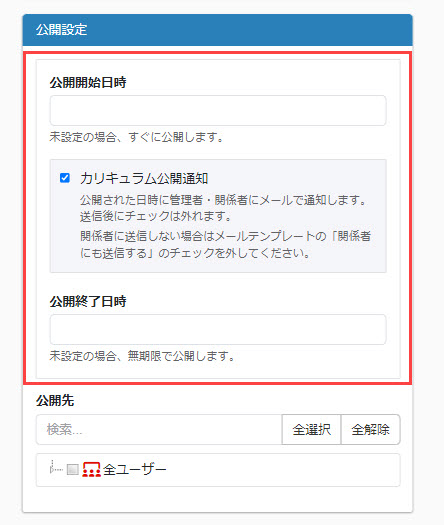
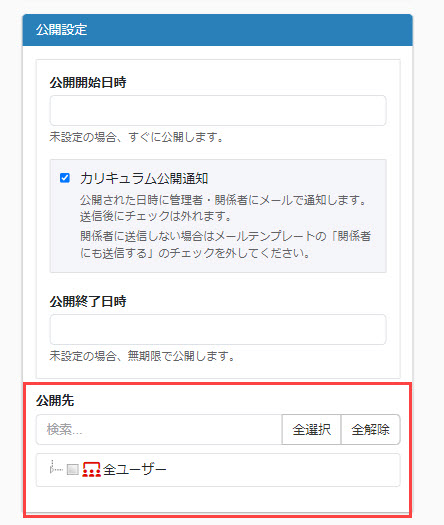
08. Settings related to publication period
You can set the period of time to publish on the "Find Curriculum" screen.
In addition, if you tick the "Curriculum Publication Notification" box, the administrator and other interested parties will be notified by e-mail when the curriculum is published.
09. Settings for publication
Please select where you would like to publish your curriculum (multiple selections allowed).
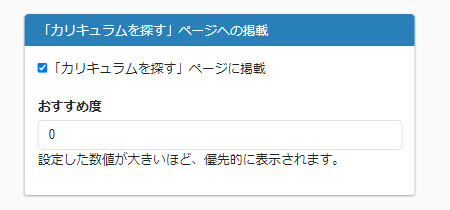
10. Settings related to listing on the "Find Curriculum" page
If you wish to list the relevant curriculum on the "Find Curriculum" screen, please tick the box.
You can also set curriculum recommendations.
The higher this number is, the higher it will appear in the list on the "Find Curriculum" screen.
11. Review Setup
You can set whether to display customer reviews and whether to allow posts on social media.
Please tick the one you prefer.
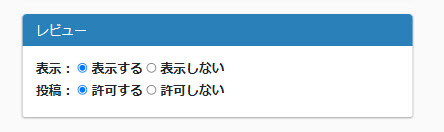
- Submitted reviews will appear on the Curriculum Details screen
- Please be sure to set "Use review function" to On in the basic curriculum function settings.
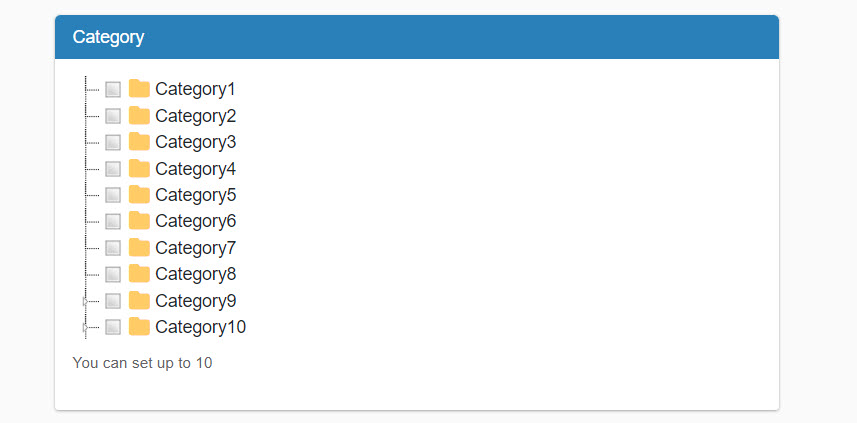
12. Category settings
You can set up categories in your curriculum.
Categories can be set up for use when searching for curriculum.
Select categories you wany to add to the training. *Up to 10 categories are selectable.
*For more details about the categories, refer to Manage categories.
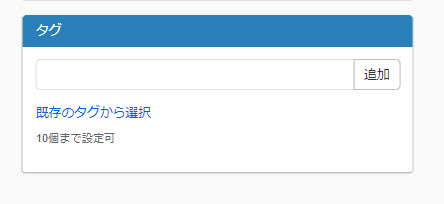
13. Tag settings
You can set tags for your curriculum.
Tags can be set to be used when searching for curriculum on the "Find Curriculum" screen.
To create a new tag, enter a tag name and click "Add."
When you want to use existing tags, click on "Select existing tag."
*Up to 10 tags can be set.
*For more details about tags, refer to Manage tags.
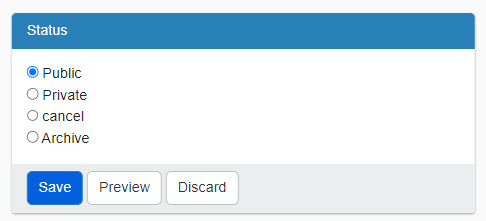
14. Save/Preview
Select the status and click "Save."
Click "Preview" to see a preview of the curriculum details screen.
Click "Discard and Return" to return to the "Curriculum Management" screen.
*When archived, it will be hidden in the "Curriculum Management" screen and "Find Curriculum" screen.
- No changes will be made to the assignments of learners whose archived curriculum has been "selected".
- You can narrow down the list by putting ✓ in "Archived" in the "Curriculum Management" screen.
Curriculum review/editing
01. Go to Manage trainings
In the side menu, select "Curriculum Functions" > "Curriculum Management".
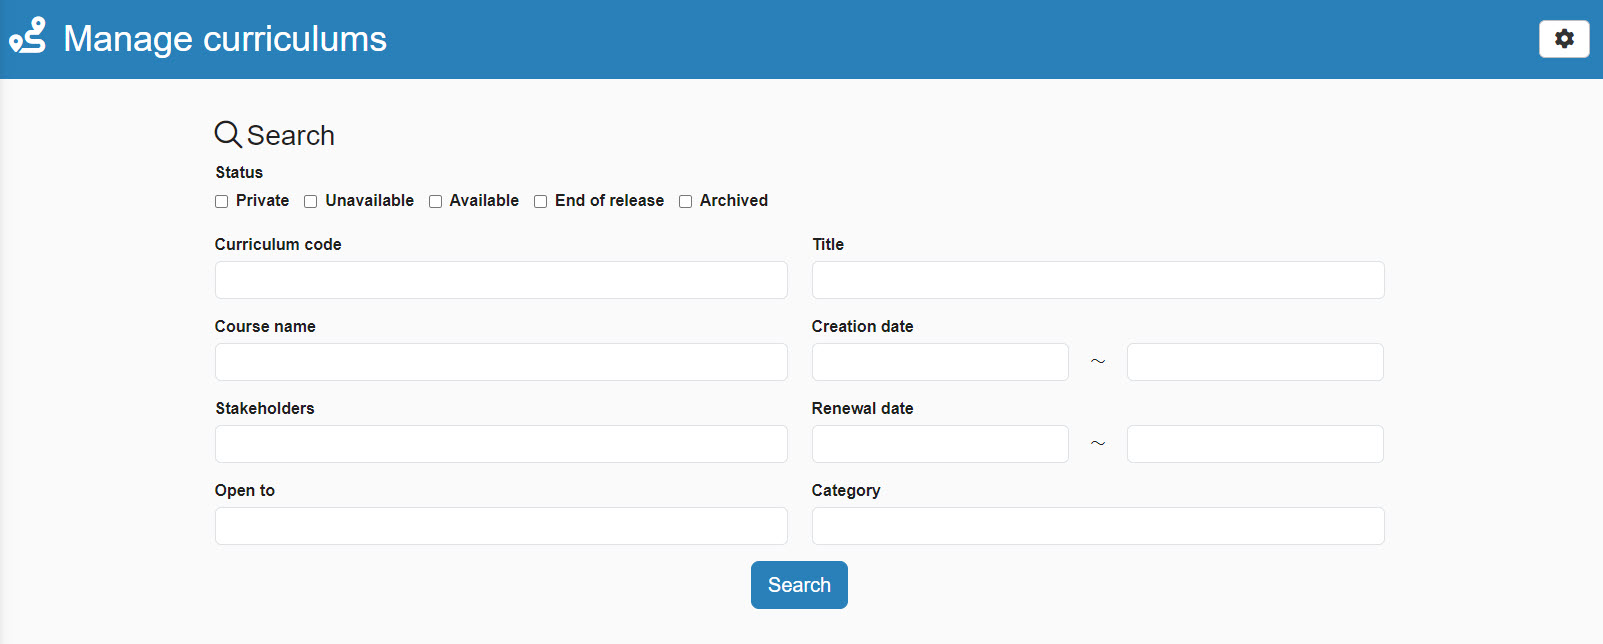
02. Curriculum Search
At the top of the "Curriculum Management" screen, you can search for curricula you have created based on information such as status and title.
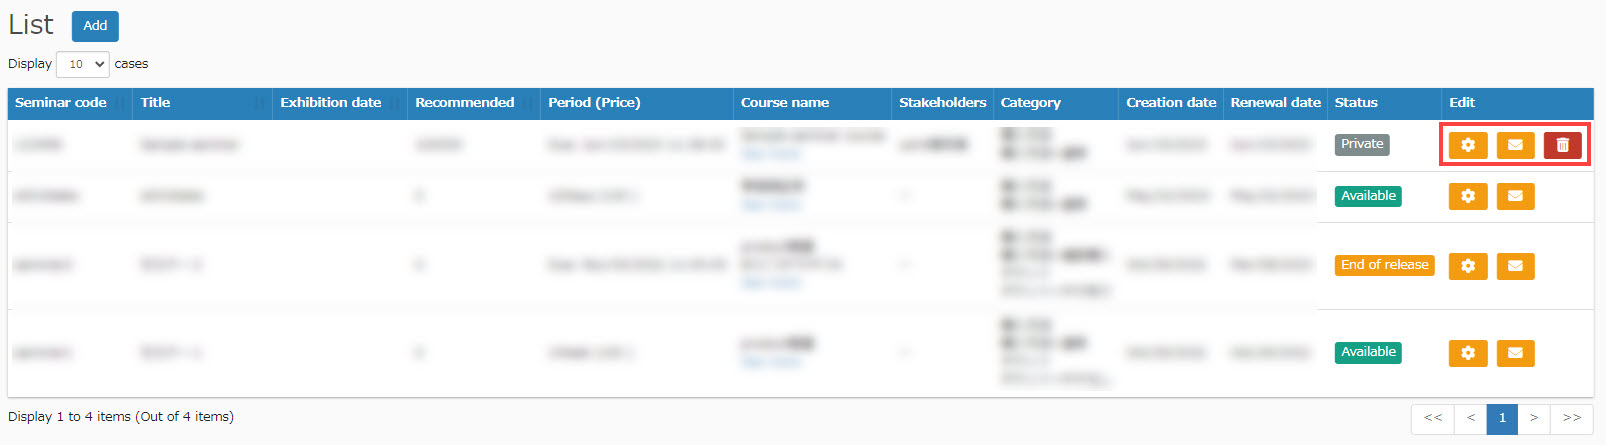
03. Curriculum Listing
Curriculums that match the search criteria are listed at the bottom of the "Curriculum Management" screen.
Here you will find information on each curriculum title, recommendations, course name, etc.
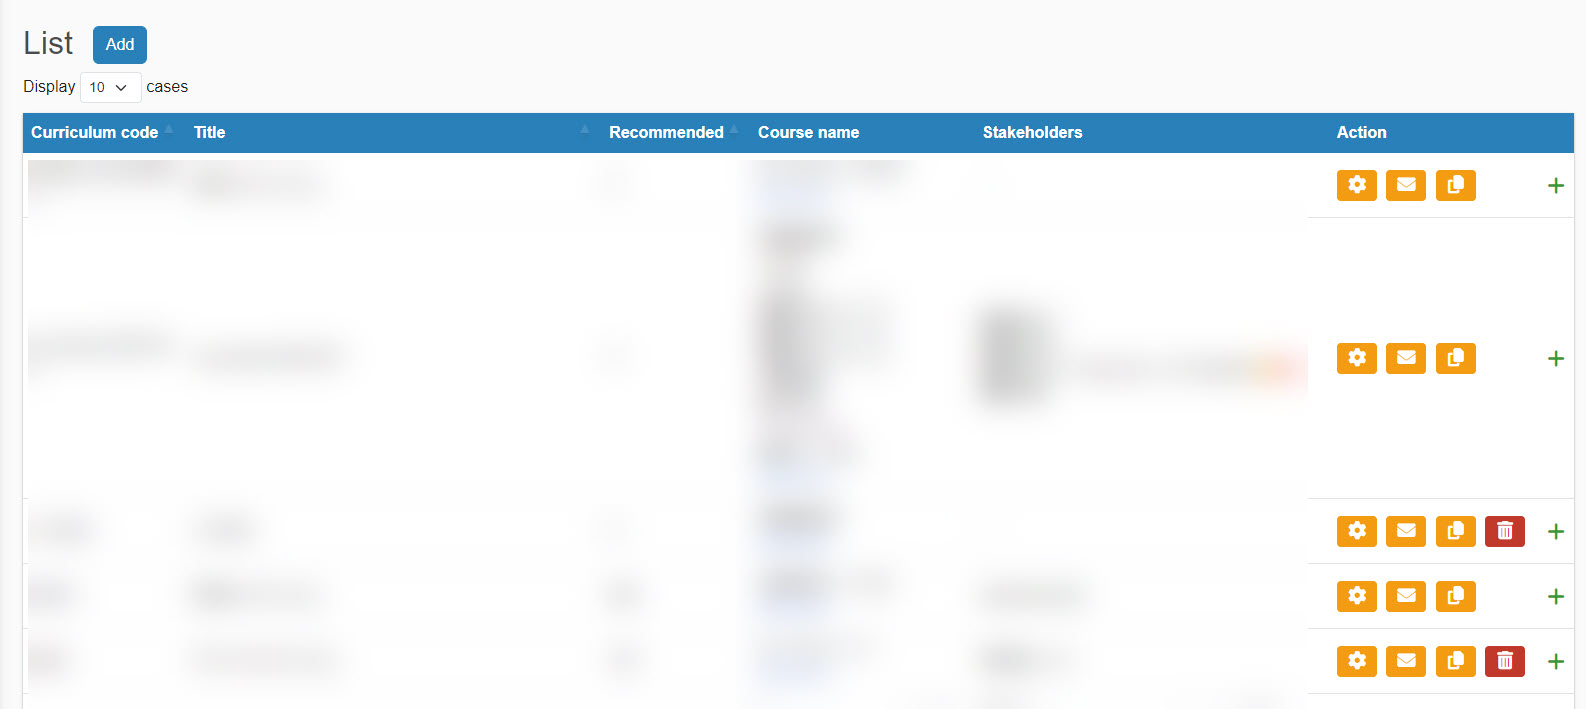
04. Edit Menu
To the right of each curriculum are a series of menu icons that can be edited.
- Gear icon: You can edit the content of the curriculum
- Email icon: allows you to edit the email to be sent to the administrator/constituents
- Copy icon: allows you to duplicate the curriculum
- Trash can icon: Curriculum can be deleted