Manage curricula
You can manage curricula, such as duplicating and editing the content.
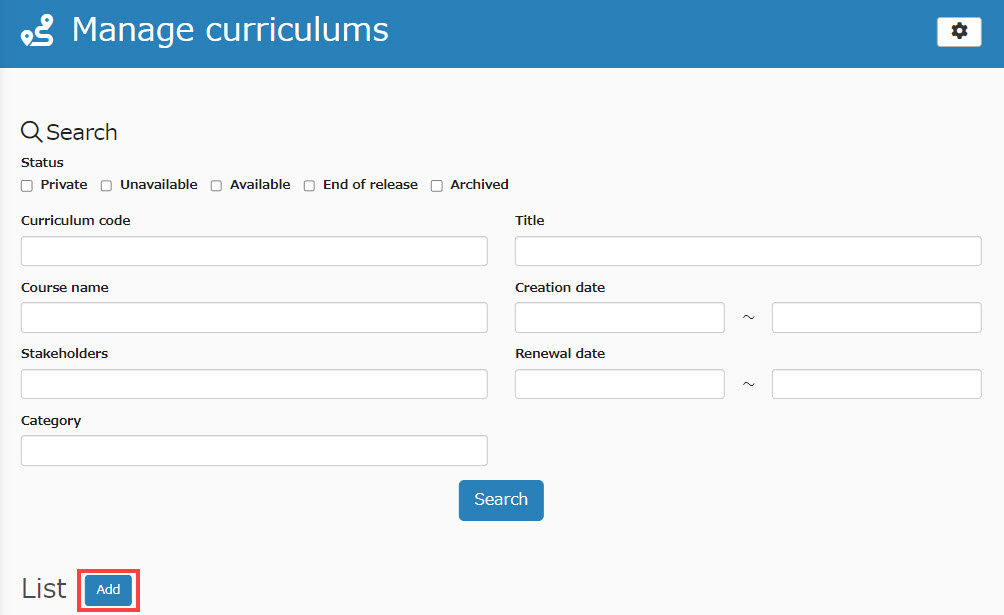
*Select "Manage Curricula" from the side menu.
What is Curriculum?
With the curriculum feature, courses which you have created can be combined according to the objectives.
Required
Customization
*All of the following management roles are required:
- Management role of Group manager (Edit for all users)
- Management role of Content manager (Edit for all content)
Curriculum development
01. Go to the registration form
Click on "Add."
02. Fill in the form
Enter curriculum code, title, subtitle, and description.
Fields marked with "*" are mandatory.
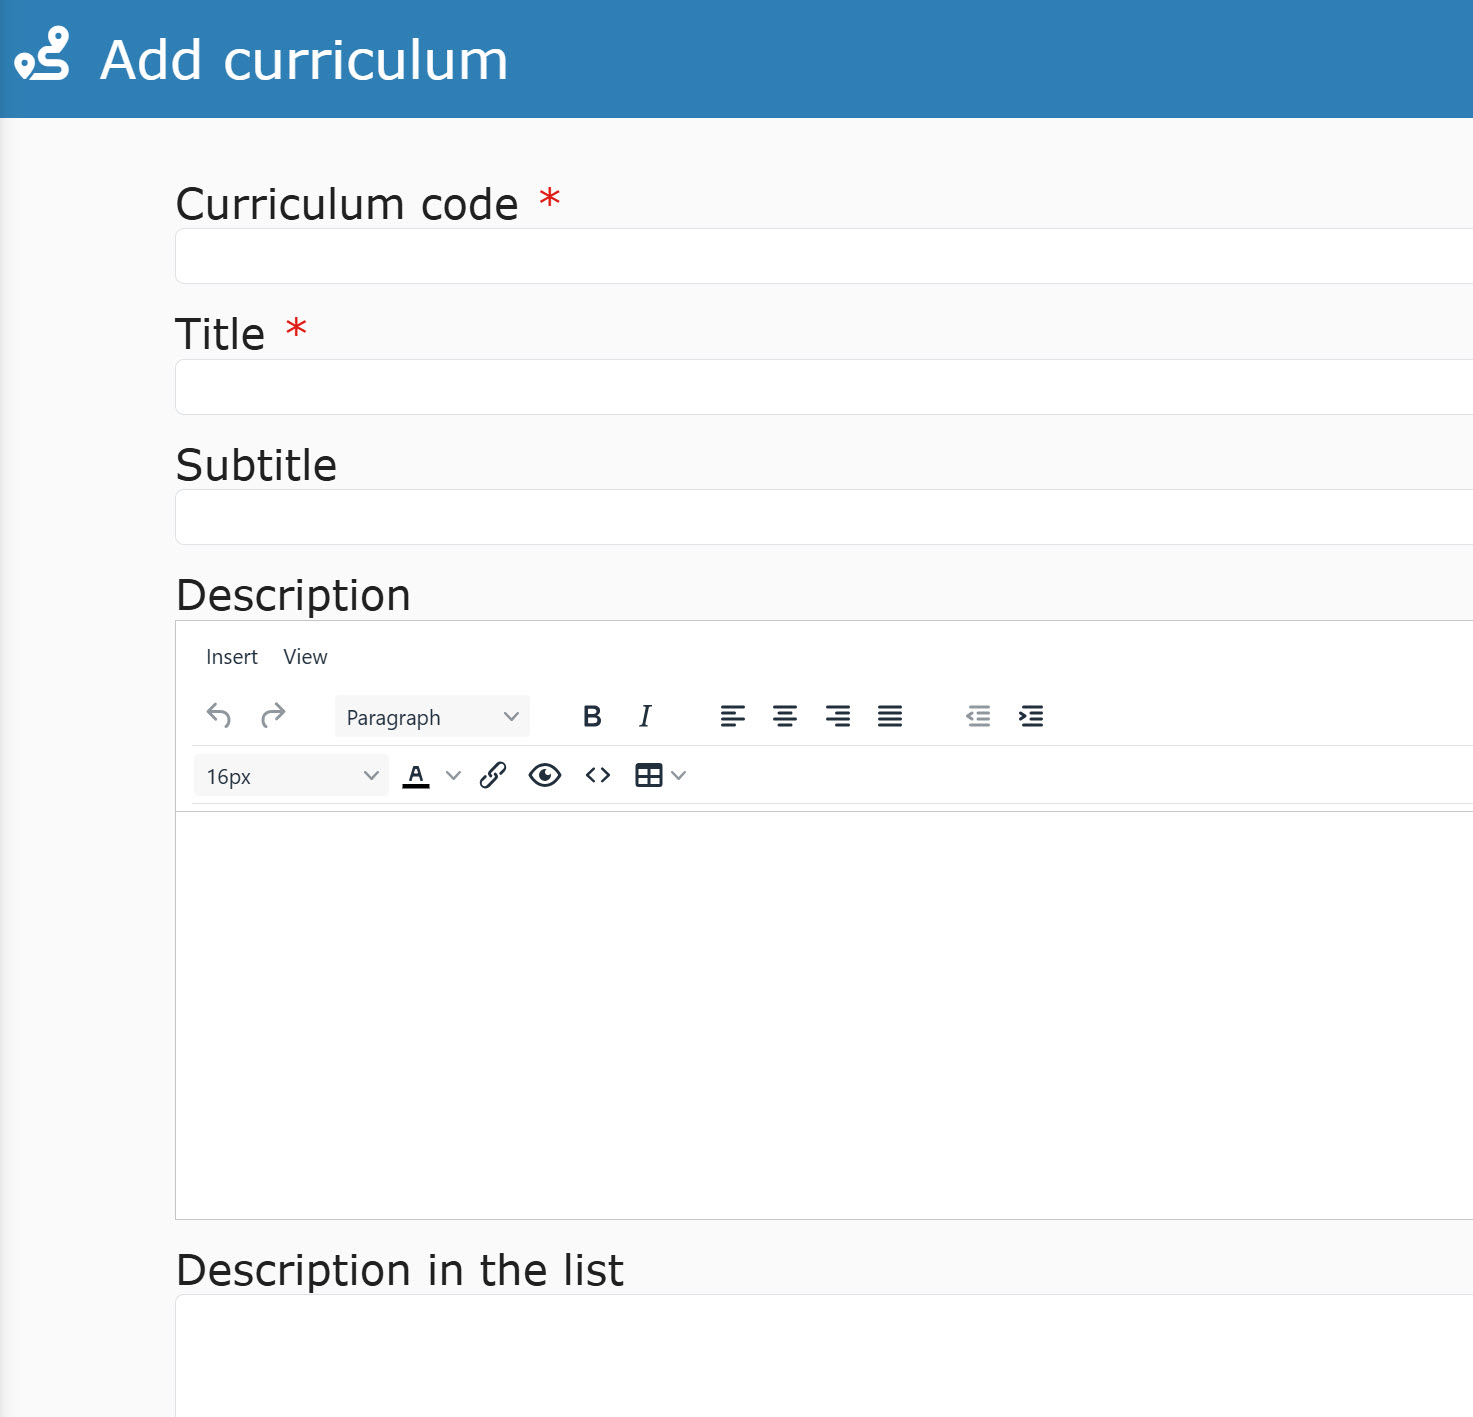
When the "Description" is set and "Description in the list" is left blank, the content set in the Description will be displayed.
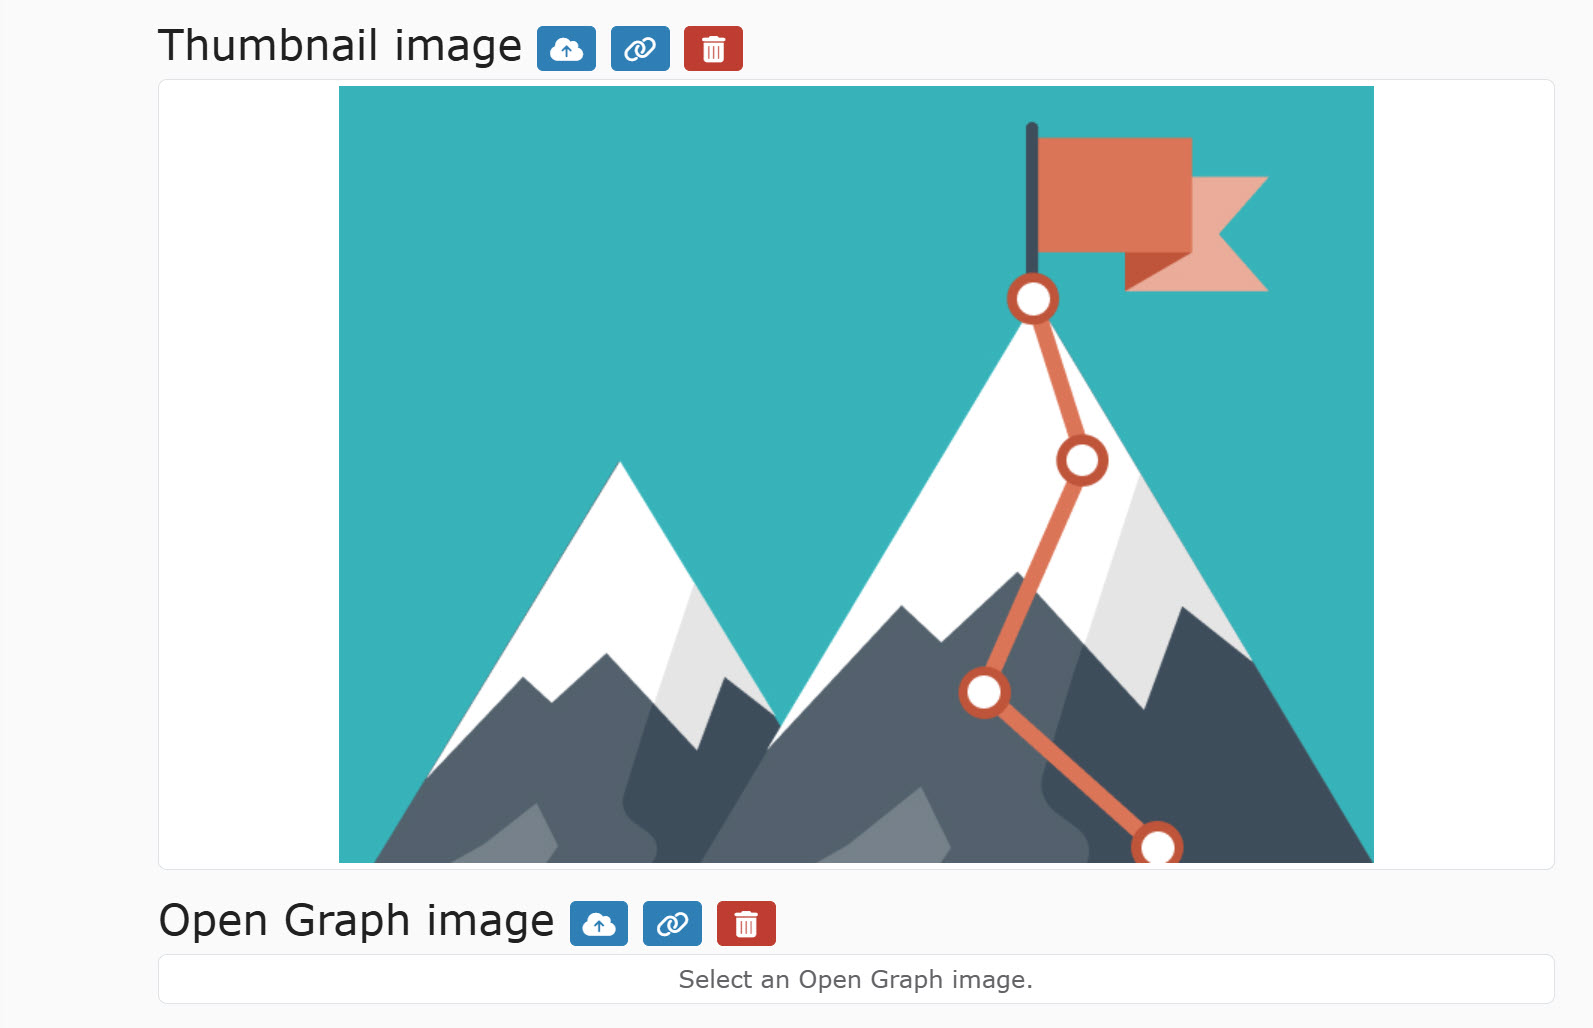
03. Thumbnail/Open Graph Image
The default image is applied to the thumbnail image. (Open Graph image is not set)
To set another image, upload a file from the cloud icon or specify a media URL from the link icon.
*To delete, click on the trash can icon.
[What is Open Graph Image?]
Open Graph image is displayed when a URL including a website or an article is shared on social media.
It includes the title, URL, description and image.
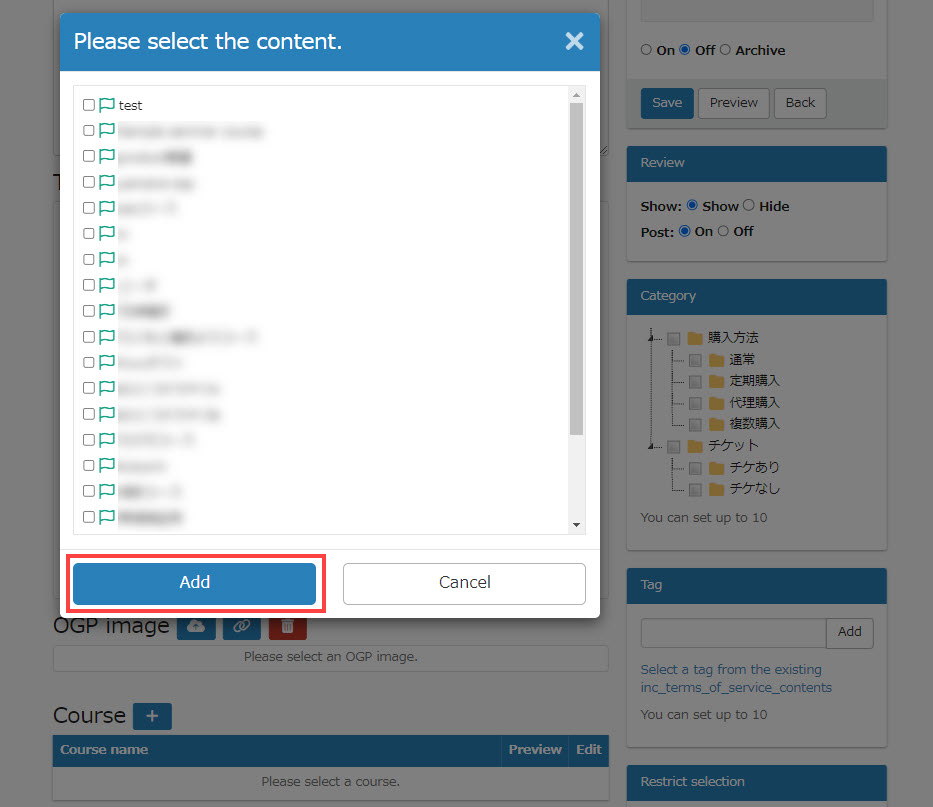
04. Add a course
Click on the "+" icon next to "Courses" and select the courses you wish to include in the curriculum.
Tick the courses you wish to add and click "Add."
By ticking the "Preview" box to the right of the content you have added, you can allow learners to view a preview of the content before selecting it.
*For more details, refer to Course/Folder, Create a course section.
05. Stakeholders
Click on the "+" icon next to "Stakeholders" and select stakeholders from the list.
Select items for the Display settings and the Category.
You can select multiple items on the Category.
*If you select "Hide" for the Dispay settings, it will be applied to the "Search curriculum" page and the start page of the curriculum.

06. Required badge
Conditions can be set with badges acquired by users.
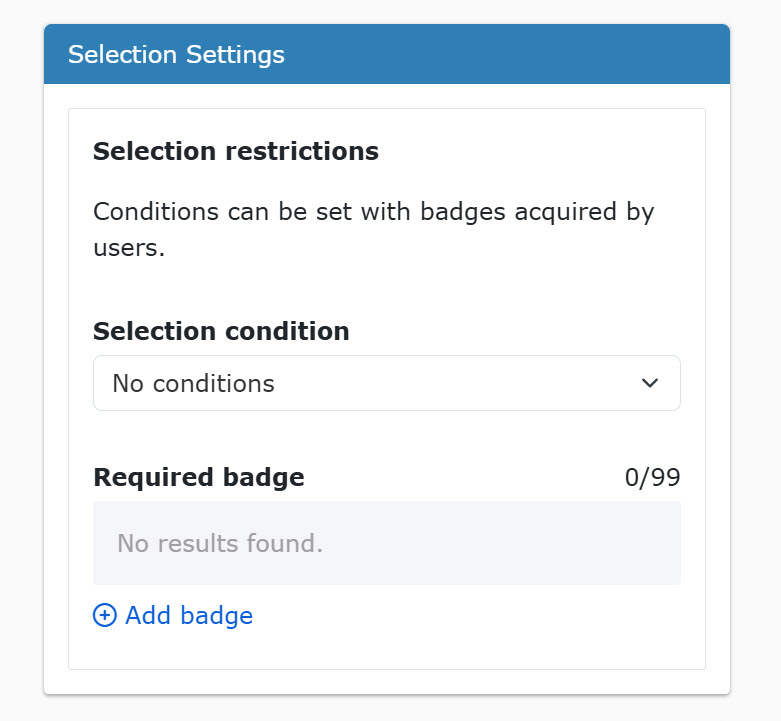
Select an item from the following:
- No conditions
- Acquired all eligible badges
- Acquired part of eligible badges
- No eligible badges acquired
- Some eligible badges not acquired
Next, select badge(s) for the requirement.
Click on "Add badge" and select the badges you want to add.
*Up to 99 badges are selectable.
*For more details on the badges, refer to Manage badges.
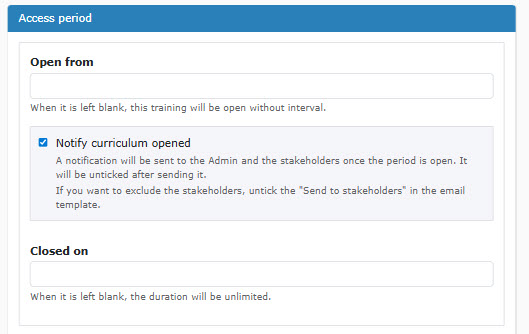
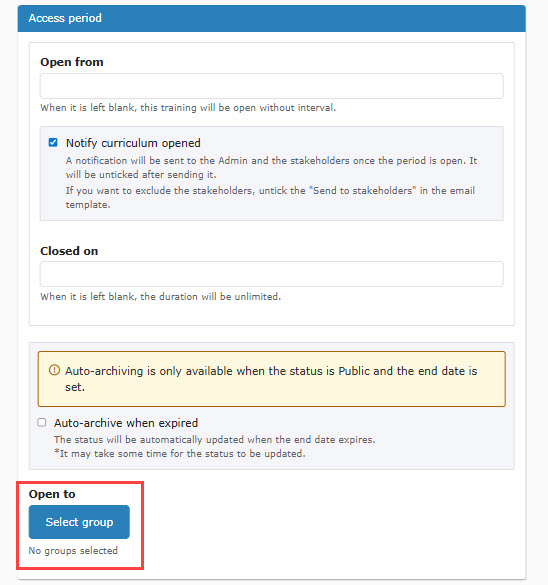
07. Settings for Publication Period
You can set the period to open on the "Search curriculum" page.
In addition, if you tick the "Notify me when curriculum is published" box, the administrator and other interested parties will be notified by e-mail when the curriculum is published.
08. Settings for automatic archiving
You can choose whether to automatically archive the curriculum when it is no longer open to the public.
If you wish to archive, please tick the "Automatically archive at the end of publication" box.
The system will automatically do this once a day after the end date and time of publication.
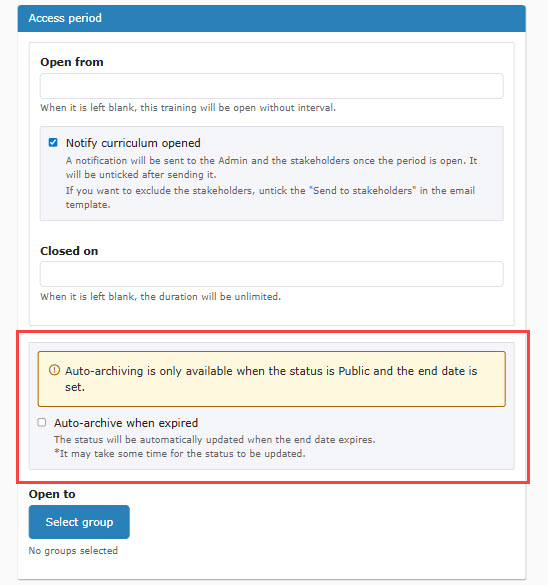
The following settings are required to use this service.
- Set status to "Public
- Set the publication end date and time
Note
Once a curriculum is created, groups are created for each individual curriculum.
If the above automatic archiving is set up, the group will also be automatically archived in conjunction with the status of the curriculum.
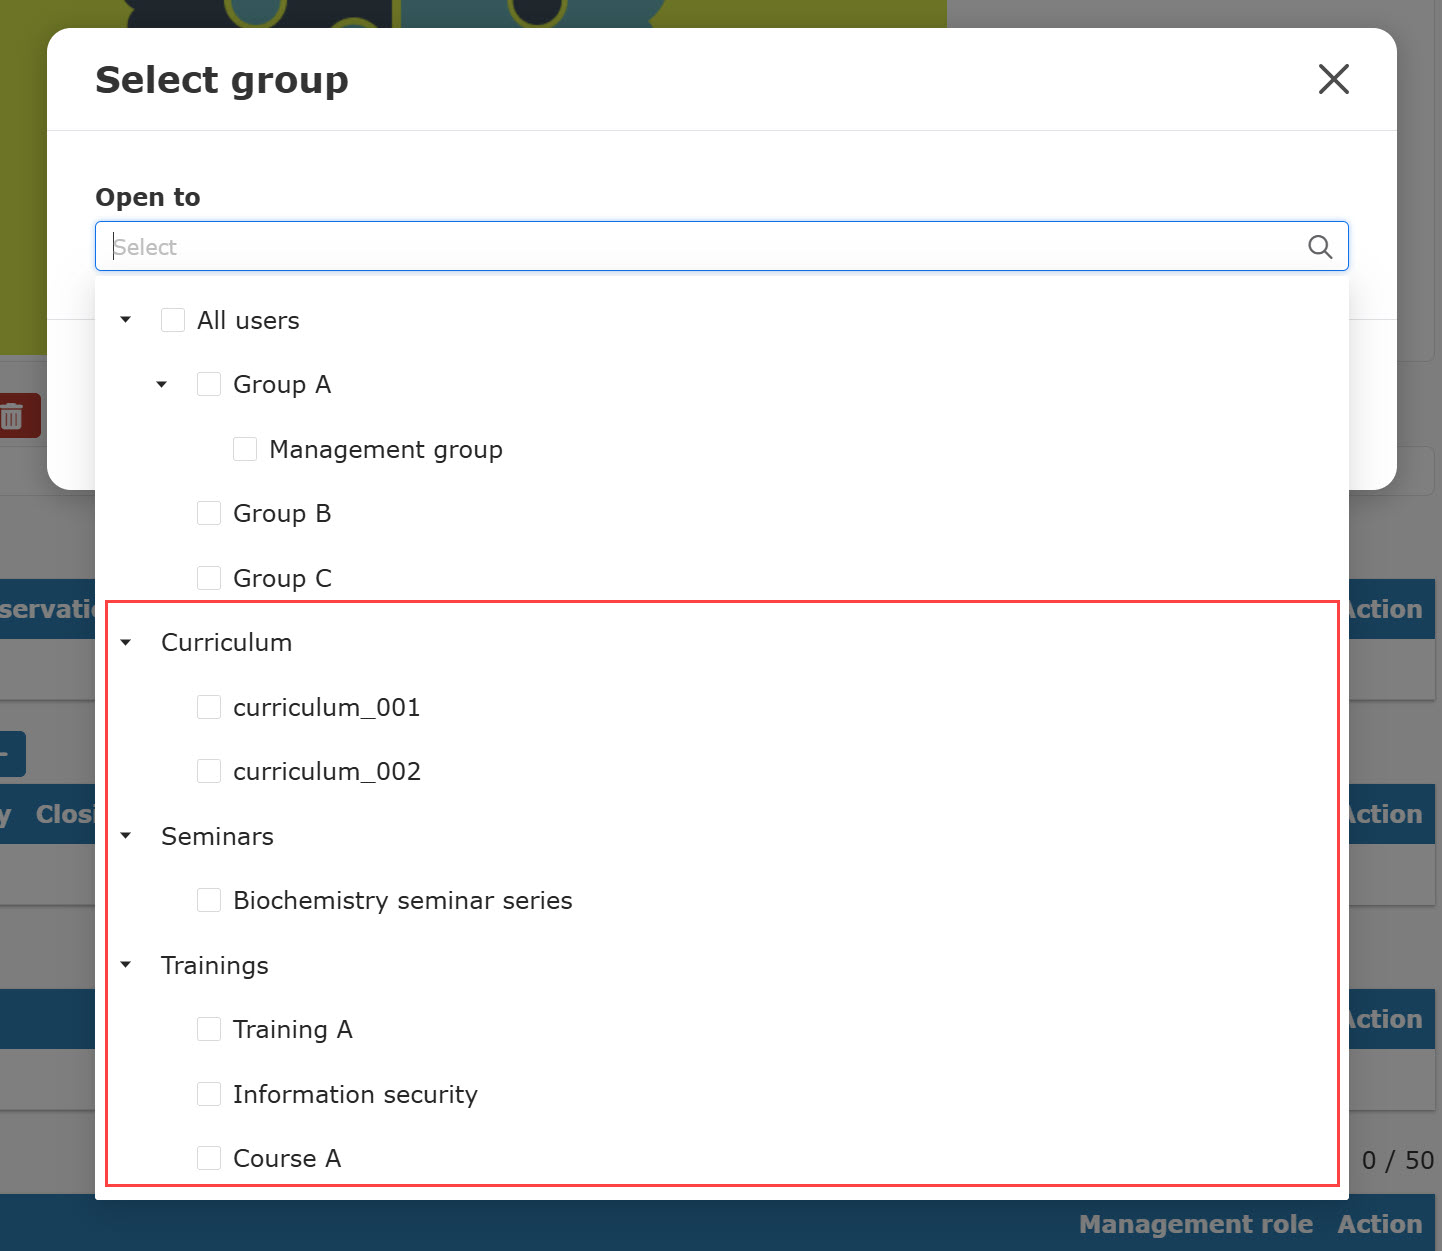
09. Select group
Select group(s) which you would like to open the curriculum to.
Click on "Select group."
Select group(s) from the list.
Save the settings.
*"Publishing group has been set" will be displayed after selecting group(s).
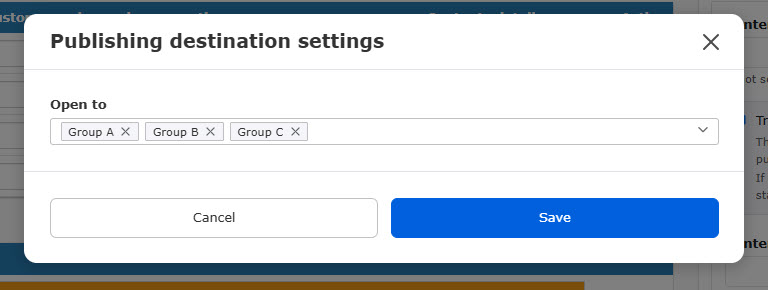
In a hierarchical group, selecting the upper group automatically selects the lower groups as well.
Note
When you create a product/seminar/curriculum/training, a group will be automatically created for each product or seminar.
These groups can be selected to assign a product or seminar.
This allows to open a curriculum to users who have purchased a specific seminar.
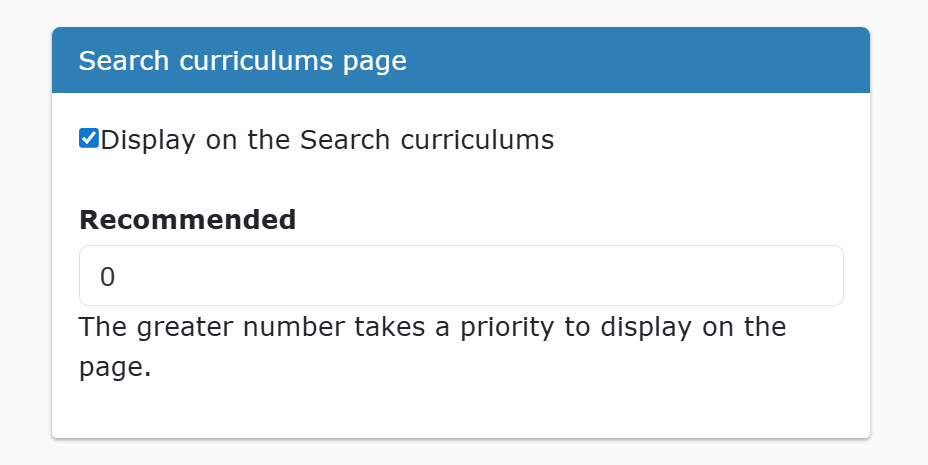
10. Search curriculum page
Tick the box to display the curriculum on the "Search curriculum" page.
You can also set recommendations.
The grater number will make the curriculum place higher position on the "Search curriculum" page.
11. Review
You can set whether to display reviews and whether to allow posts on learningBOX.
Select one respectively.
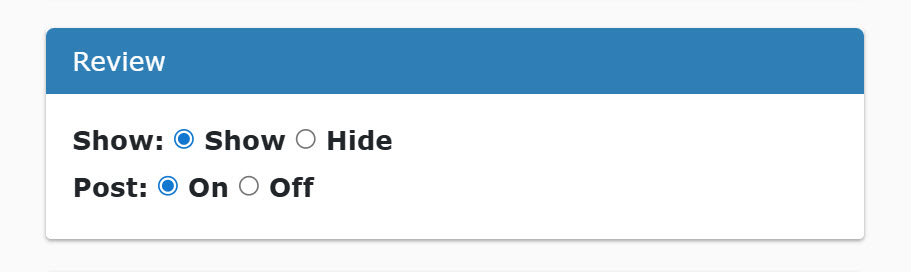
- Submitted reviews will appear on the start page of the Curriculum.
- Be sure to activate "Enable the review function" in the Curriculum basic settings.
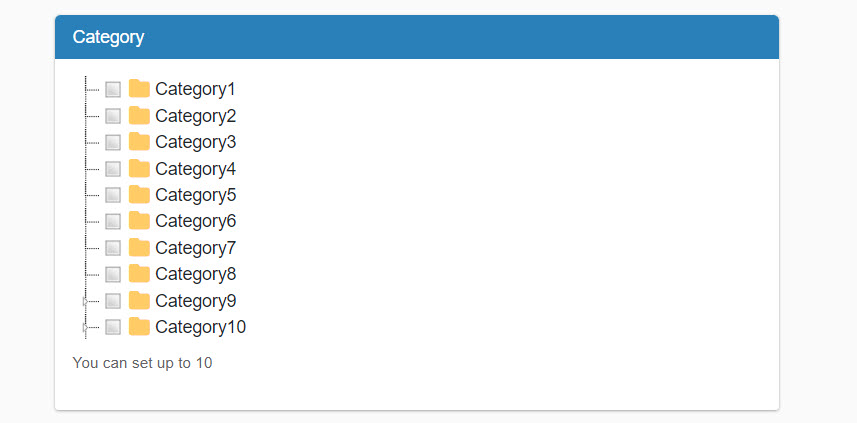
12. Category settings
You can set up categories in a curriculum.
Categories will be used when searching for curriculum.
Select categories you wany to add.
*Up to 10 categories are selectable.
*For more details on the category, refer to Categories.
13. Tag
Tags can be set for the curriculum.
The tags you set will help learners to search the curriculum on the "Search curriculum" page.
To create a new tag, enter a tag name and click "Add."
When you want to use existing tags, click on "Select existing tag."
*Up to 10 tags can be set.
*For more details about tags, refer to Manage tags.

14. Save/Preview
Select the status and click "Save."
To preview the curriculum, cllick on "Preview."
Clicking "Discard" allows you to go back to the "Manage curriculum" page.
*When archived, it will be hidden in the "Manage curriculum" and the "Search curriculum" page.
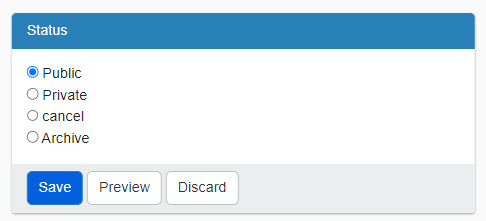
- No changes will be made to the assignments of learners whose archived curriculum has been selected.
- Archived curricula can be searched on the top of the "Manage curriculum" page.
Note
Once a curriculum is created, groups are created for each individual curriculum.
In conjunction with the status of the above curriculum, groups are also automatically archived or unarchived.
Curriculum review/editing
01. Curriculum Search
The search field at the top of the page helps you find curricula according to the conditions.
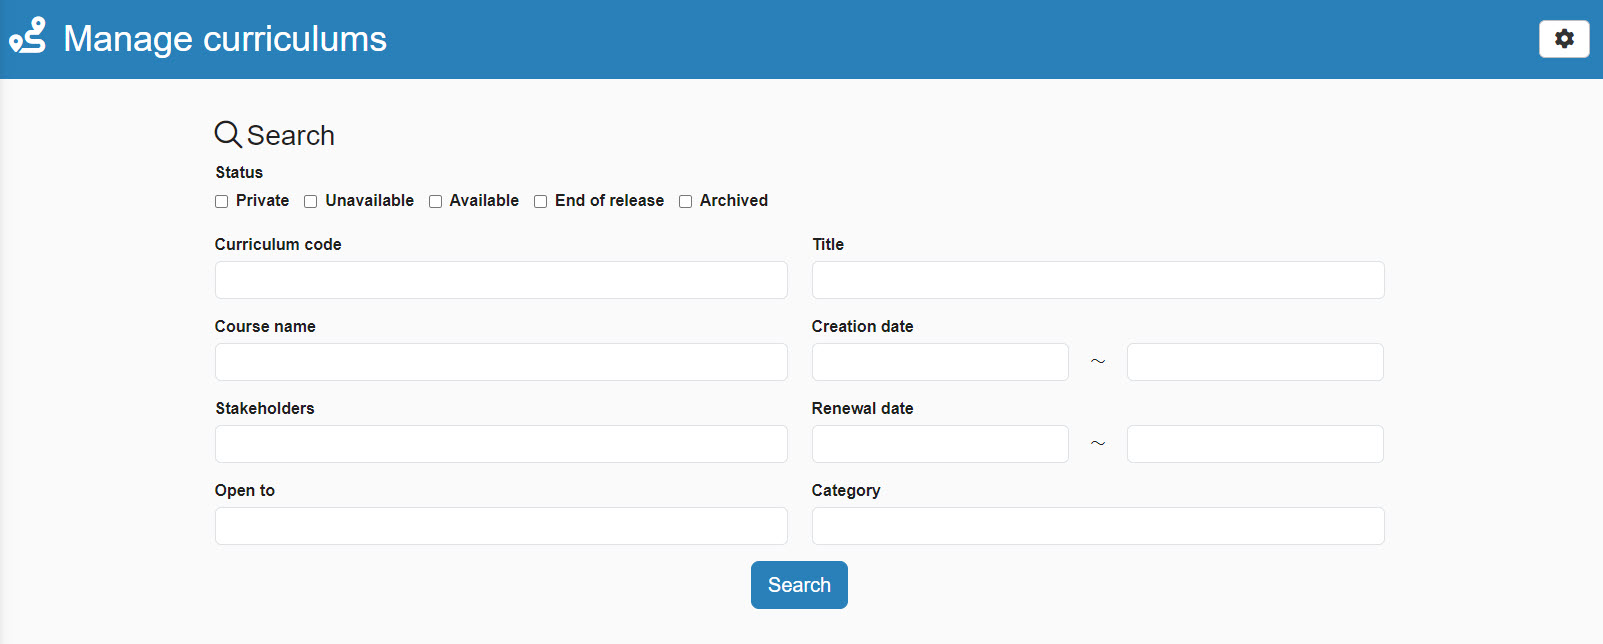
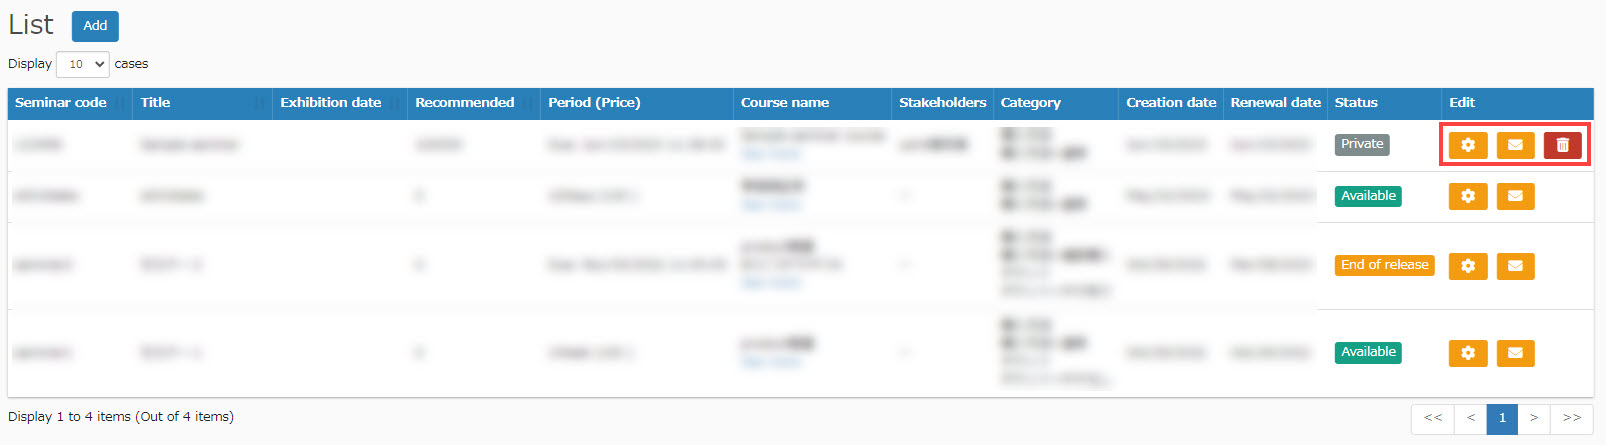
02. Curriculum Listing
The result will be displayed under the search field.
The details of each curriculum will be listed.
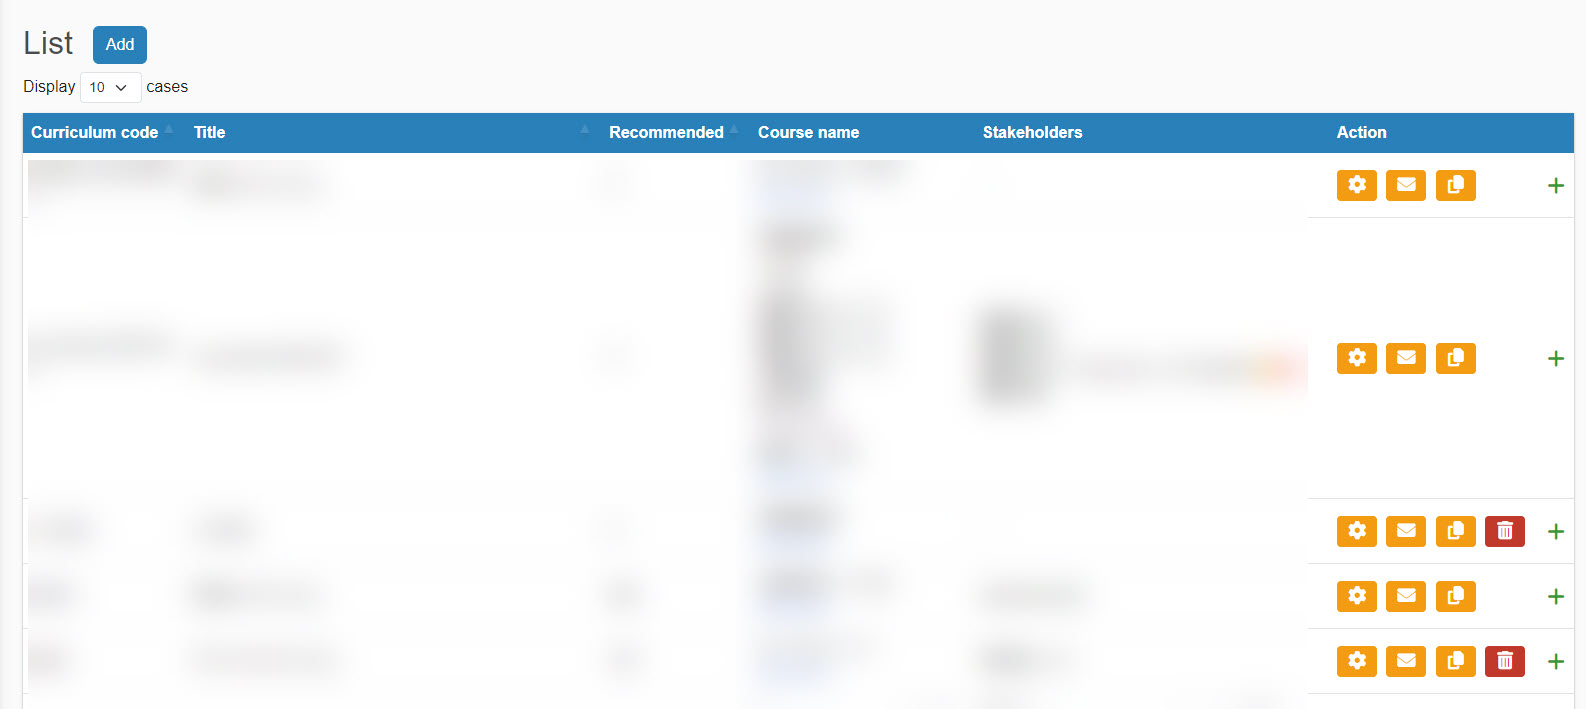
03. Edit menu
The following icons will be displayed on each curriculum:
- Gear icon: edit the content of the curriculum
- Email icon: edit the email to be sent to the Admin and stakeholders
- Paper icon: duplicate the curriculum
- Trash can icon: delete