
Reservations & attendance (for learners)
Learners can manage their own training reservations and attendance.
This page explains the three tabs in the page: Reservation change, Reservation status and Attendance status.
What is the Training feature?
Multiple courses can be combined to build a single training program.
This allows learners to select and reserve training courses from the list, and take it within the specified period.
Required
Customization option
If you entered into a customization contract prior to January 21, 2026 (Ver. 4.1), you will need to change the menu name under Manage menu within the Site customizer.
Changes to the side/header menu of the learningBOX 4.1 series
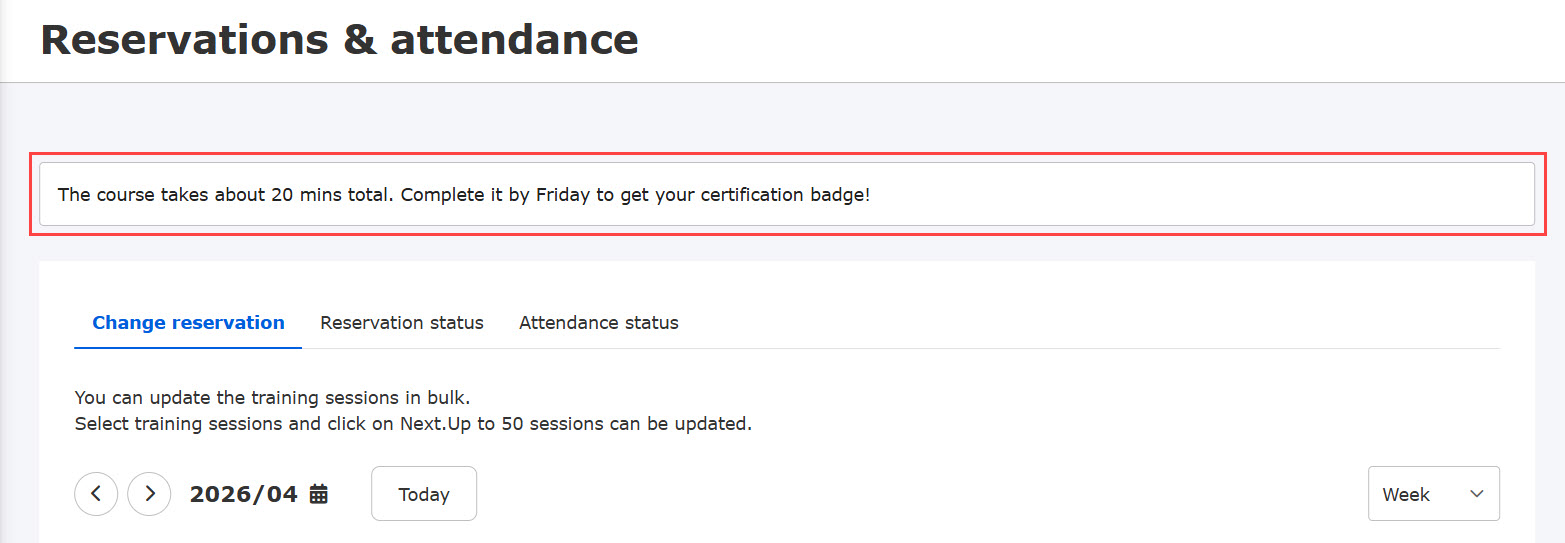
Important notices for learners can be displayed at the top of the "Training reservations and attendance" page.
These notices are placed in all tabs.
For the settings, refer to Basic settings, "Message for learners" section.
Change reservation
Learners can check the current schedule and reserve/cancel all available trainings at once.
The following explain the steps to update a reservatioin.
- Select a training session on the calendar
- Add the training to the list of reservation updates
- Update in bulk
01. Calendar
To open a calendar, select "Change reservation" tab.
You can switch the view mode by week, day or list.
Also, the <> icons allows to move between pages.
To select a specific date, click on the calender icon.
Click "Today" to move back to today's page.
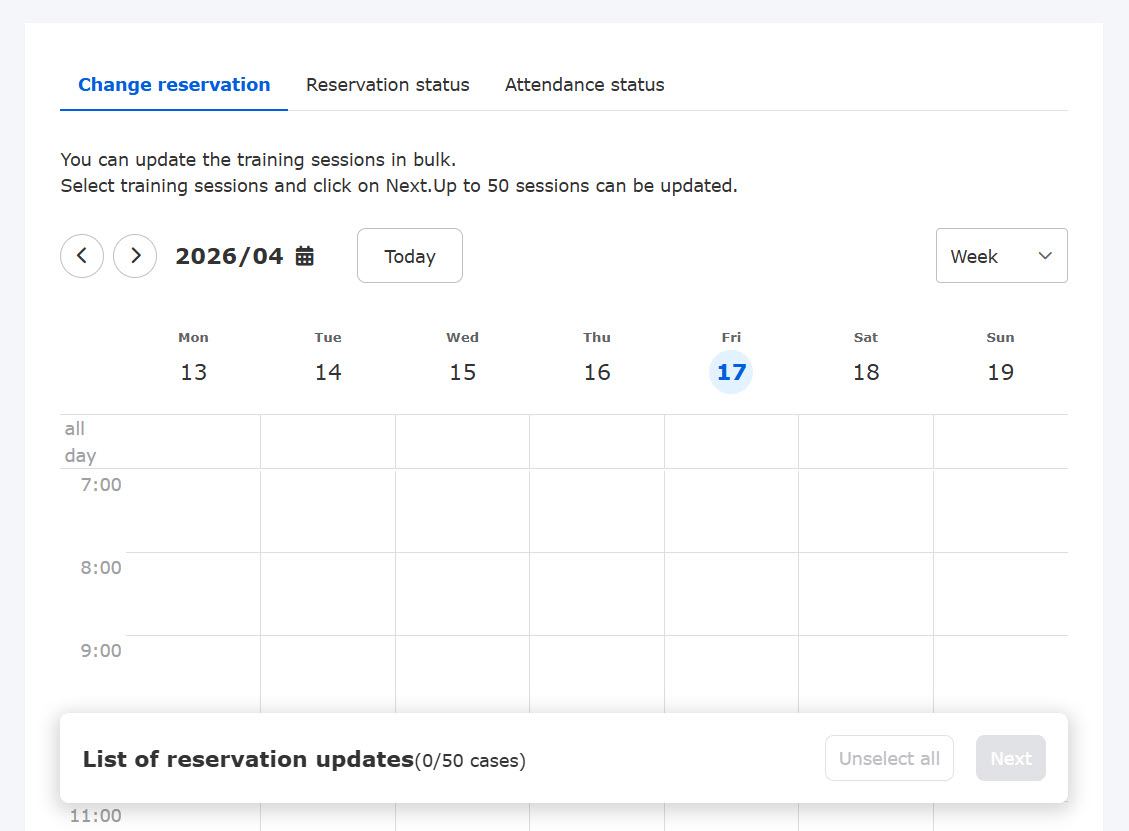
You can limit the time slots displayed on the calendar, and exclude Saturdays and Sundays.
For the settings, refer to Schedule.
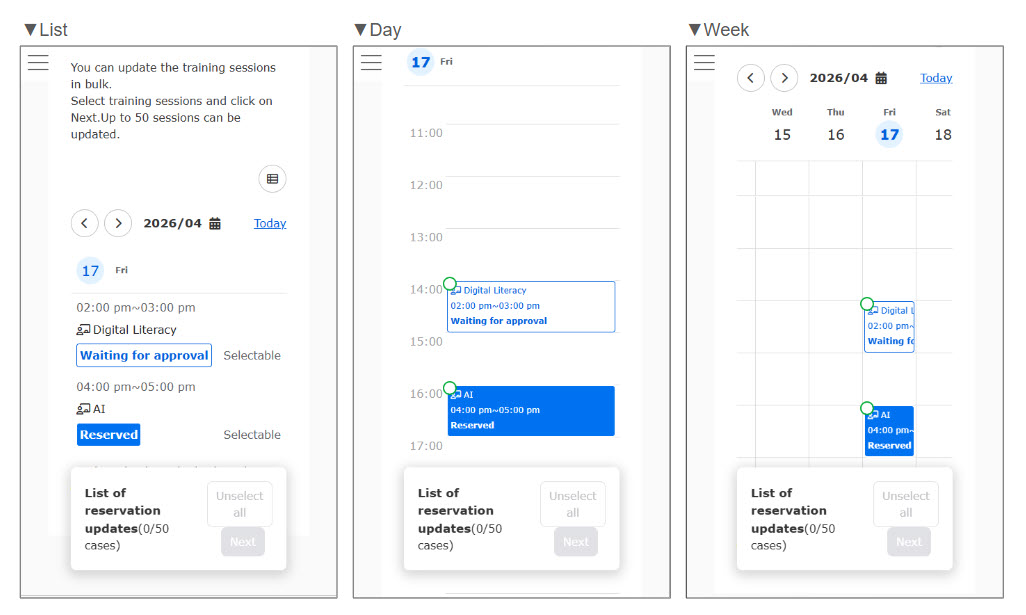
For smart phones, the interface will be like as follow:
By default, they are displayed in a list.
02. Display training
The calendar displays training sessions that are currently open to the learner, pending approval, or already scheduled.
Attendance status, if any, will be displayed along with the status.
*Attendance status will be displayed when a ticket is set to the training.
If either the start date or end date has not been set to a training session, it will not appear on the calendar.

Multi-day training
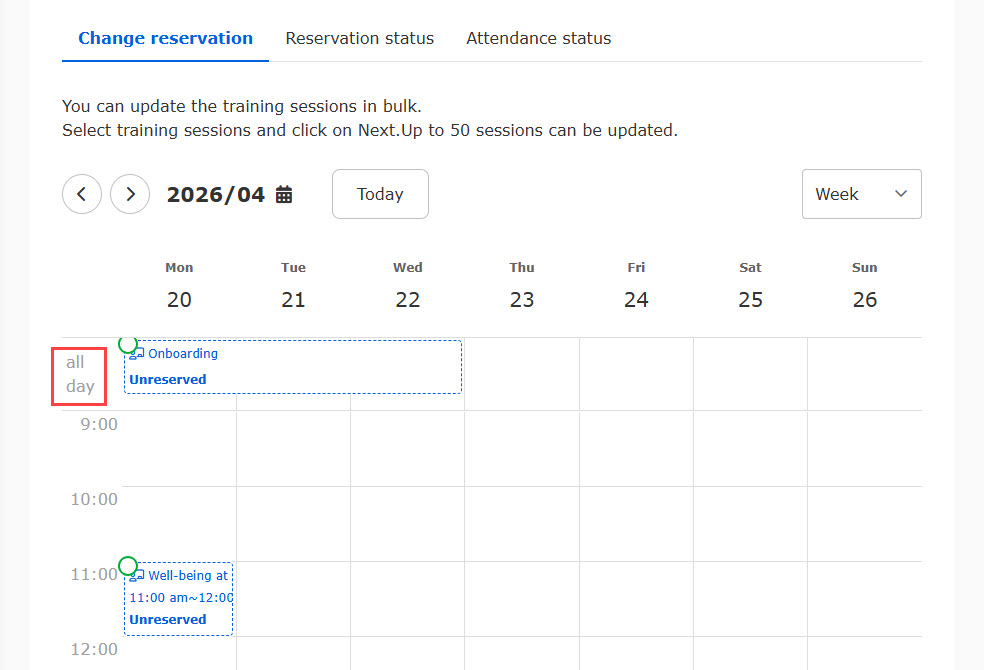
For the multi-day training, the appearance will be as shown below.
e.g.) Onboarding is held from April 20 (Monday) 11:00 - April 22nd (Wednesday) 12:00
▼ Weekly
It will appear in the "all day" row from April 20th to 22nd.
▼ Daily
It will appear in the "all day" row from April 20th to 22nd.
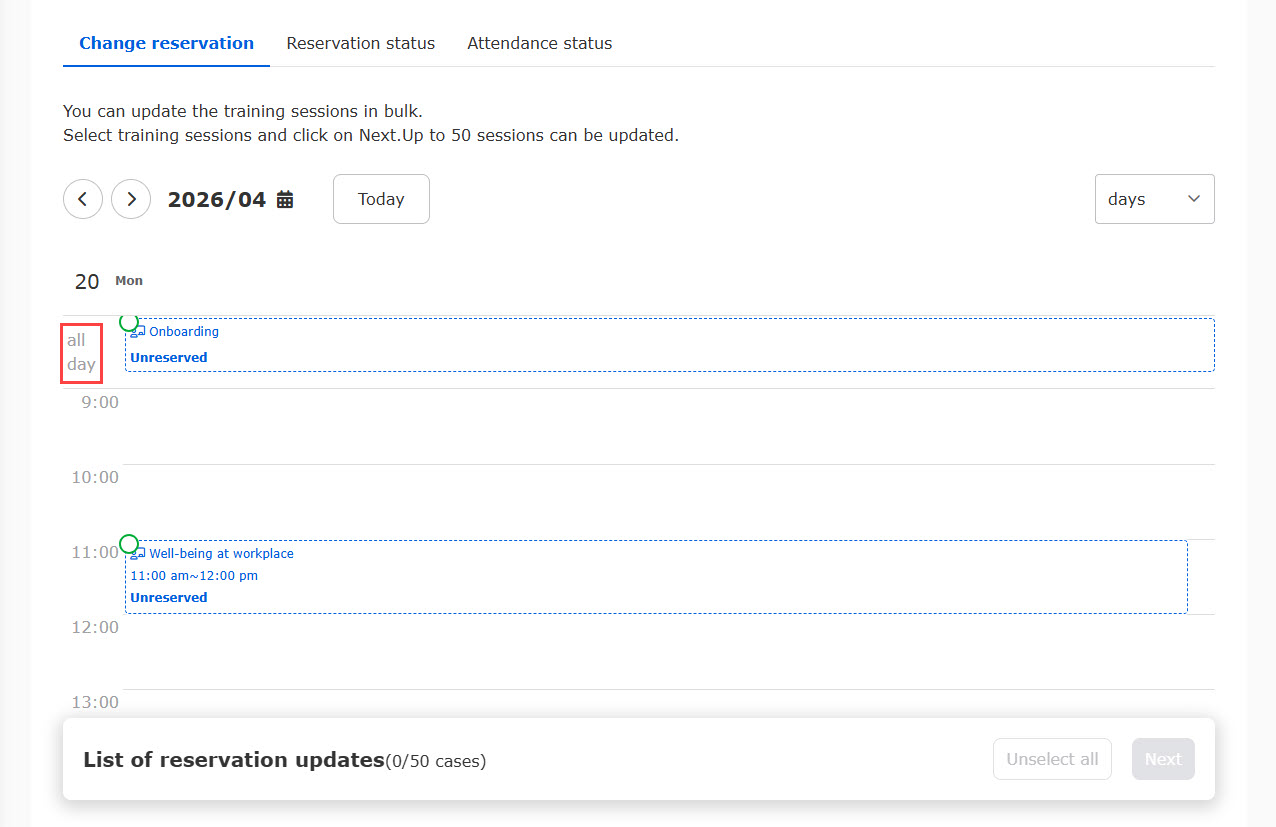
▼ List
It will be displayed from April 20th to 22nd as follows:

Unavailable training
Learners cannot reserve training in the following cases:
- No vacant seat
- Overlapping reservations are limited + Multiple training with the settings exists during the same time slot + one of the training has already been reserved.
- Outside of the reservation period
Other items on the calendar:
In addition to trainings, the calendar displays the following panels:
*Only training sessions can be updated.
The following items will not be displayed on the calendar when:
- The start date or end date of the seminar is not set
- Seminars which is not purchased
- Timetable set in the Schedule function
03. Add to the list of reservation updates
Click on a training in the calendar, and a pop-up window will be displayed.
You can add training sessions up to 50 cases to the list of reservation updates.
When the training status is the same, you can select multiple training sessions.
The following table shows each status before and after the reservation updates.
| Before update | After update |
|---|---|
| Unreserved | Waiting for approval (*When auto-approval disabled) Reserved (*When auto-approval enabled) |
| Waiting for approval | Cancel |
| Reserved | Cancel |
The following trainings cannot be rescheduled by the learner.
- Training with attendance status of "Attend" or "Absent"
- Training which cannot be canceled with the status of "Reserved" or "Waiting for approval"
▼When the status is Unreserved
Confirm the content and click "Add to the list of reservation updates."
If there are multiple items, select one from the pull-down menu.

▼When the status is Waiting for approval or Reserved
Read the content and click "Add to the list of reservation updates."

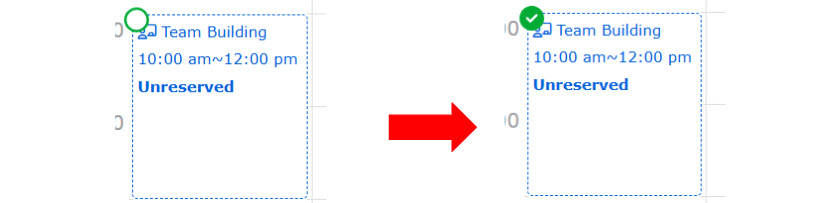
When you add a training to the list, the training wil be ticked on the calender.
04. Unselect from the list of reservation updates
Click on the panel you have added to the rescheduling list, then click "Remove from List" in the pop-up that opens.
Or, you can click on "Unselect all" at the bottom of the page.
Once removed from the list, the ✔ icon will no longer appear in the panel on the calendar.
05. Preview reservation updates
Click "Next" at the bottom to preview the content.
To remove from the list, click "Unselect" to the right of each reservation.
To unselect all items, click "Unselect all."
If the status is "Unreserved" and multiple capacity and closing dates have been set, the content can be edited from "Edit."

The Status column shows the status before and after the change.
If the status before the change is “Unreserved,” the status after the change will be "Waiting for approval" or "Reserved" depending on the auto-approval settings.
To receive an notification email regarding the reservation changes, tick the box under the status section.
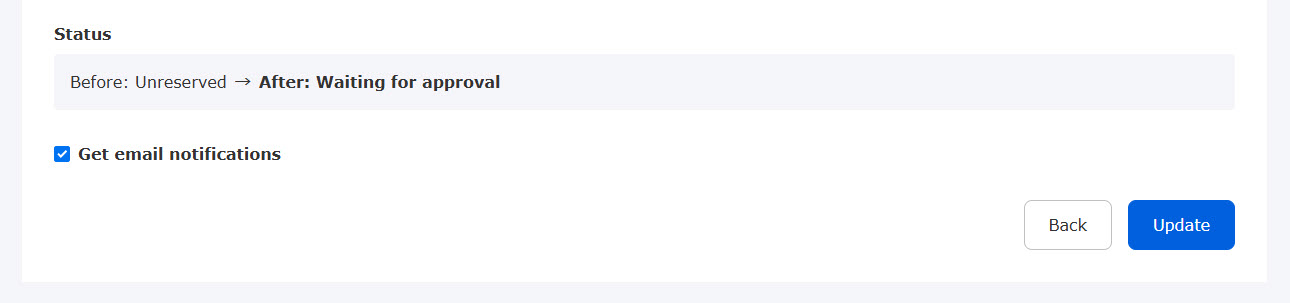
Click on "Back" to move back to the calender.
To confirm the reservation change, click "Update."
When the changes are successfully updated, the result will be displayed as shown below.

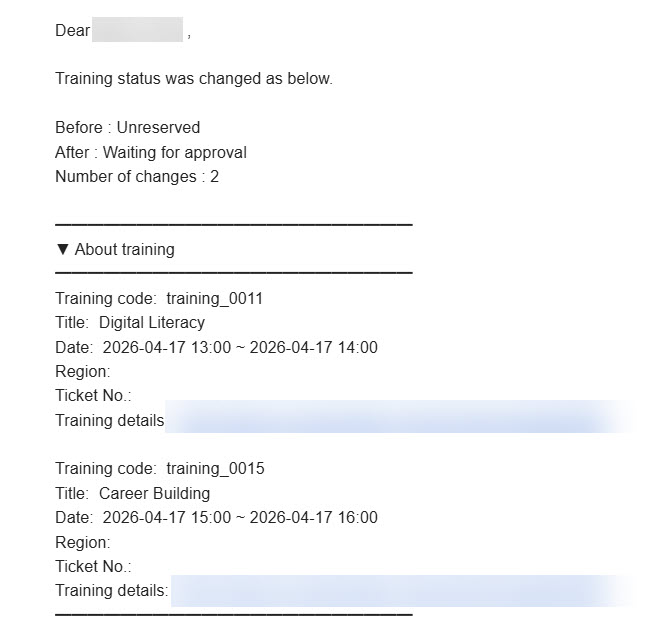
Notification of training reservation change
When a reservation is changed, you can send a notification to the learner.
The e-mail will include the status before/after the change and the number of changes made.
Also, updated information will be listed.
*For more details on how to edit the template, refer to Email settings - Training function.
The check box of "Get email notifications" will not appear when:
- Email settings does not allow "Training reservation change"
- Input field settings does not allow to use email address
- learner's e-mail address has no value
Reservation status
The learner's reservations will be listed.
01. List of reservations
Go to the "Reservation status" tab.
The details of each training will be listed.
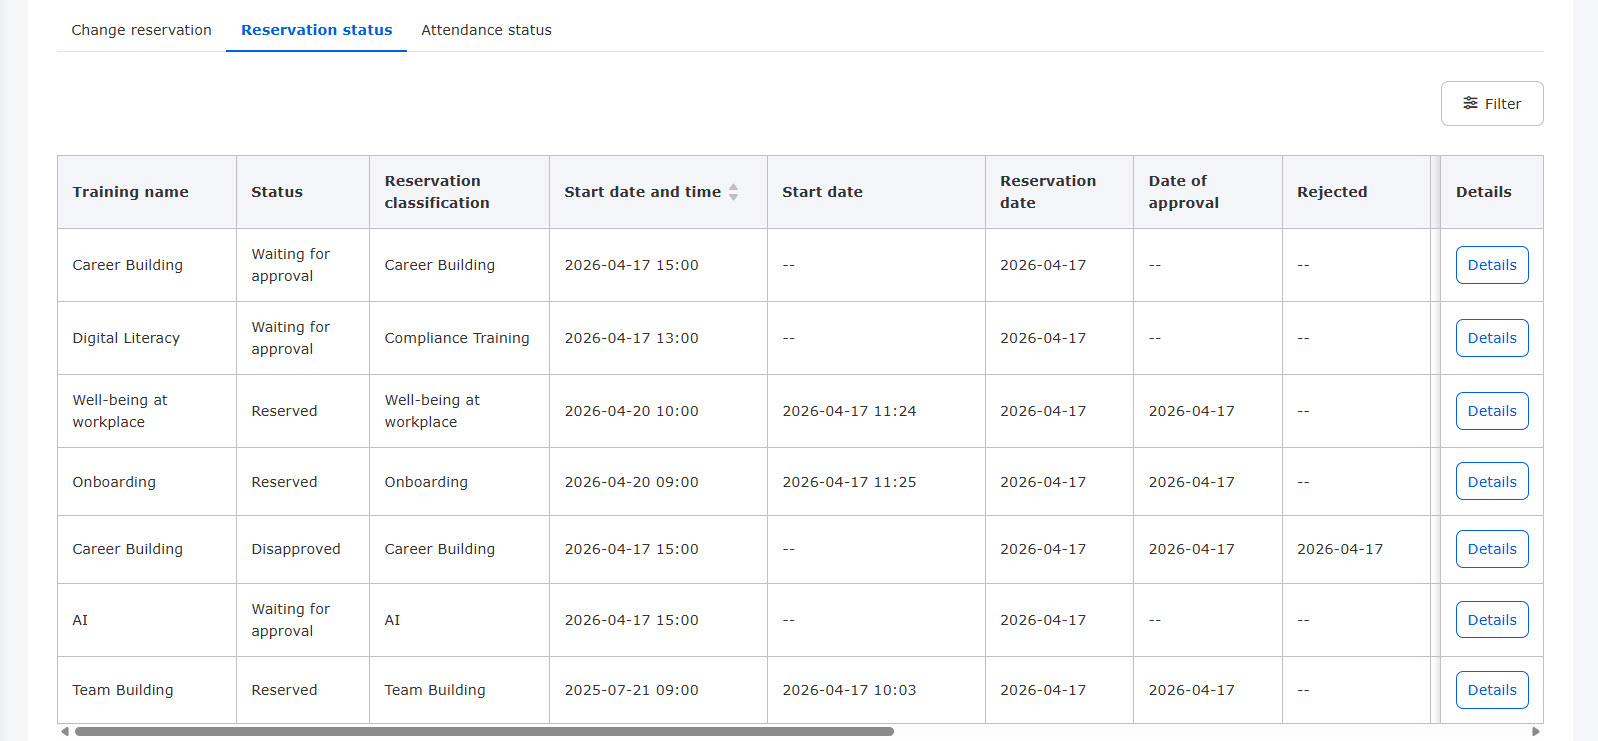
For smartphones, only the following items will be displayed in this tab.
- Training name
- Status
- Reservation classification
- Start date and time
- Action
- Details
Clicking on "Details" will display the other items in a new tab.
You can filter training sessions by clicking on the Filter icon.
Tick "Show archives" to view archived training sessions.

02. Confirmation of details
Clicking on "Details" to view training details.
To move back to the previous page, click "Back."

03. Cancel reservation
Click "Cancel" to cancel the training.
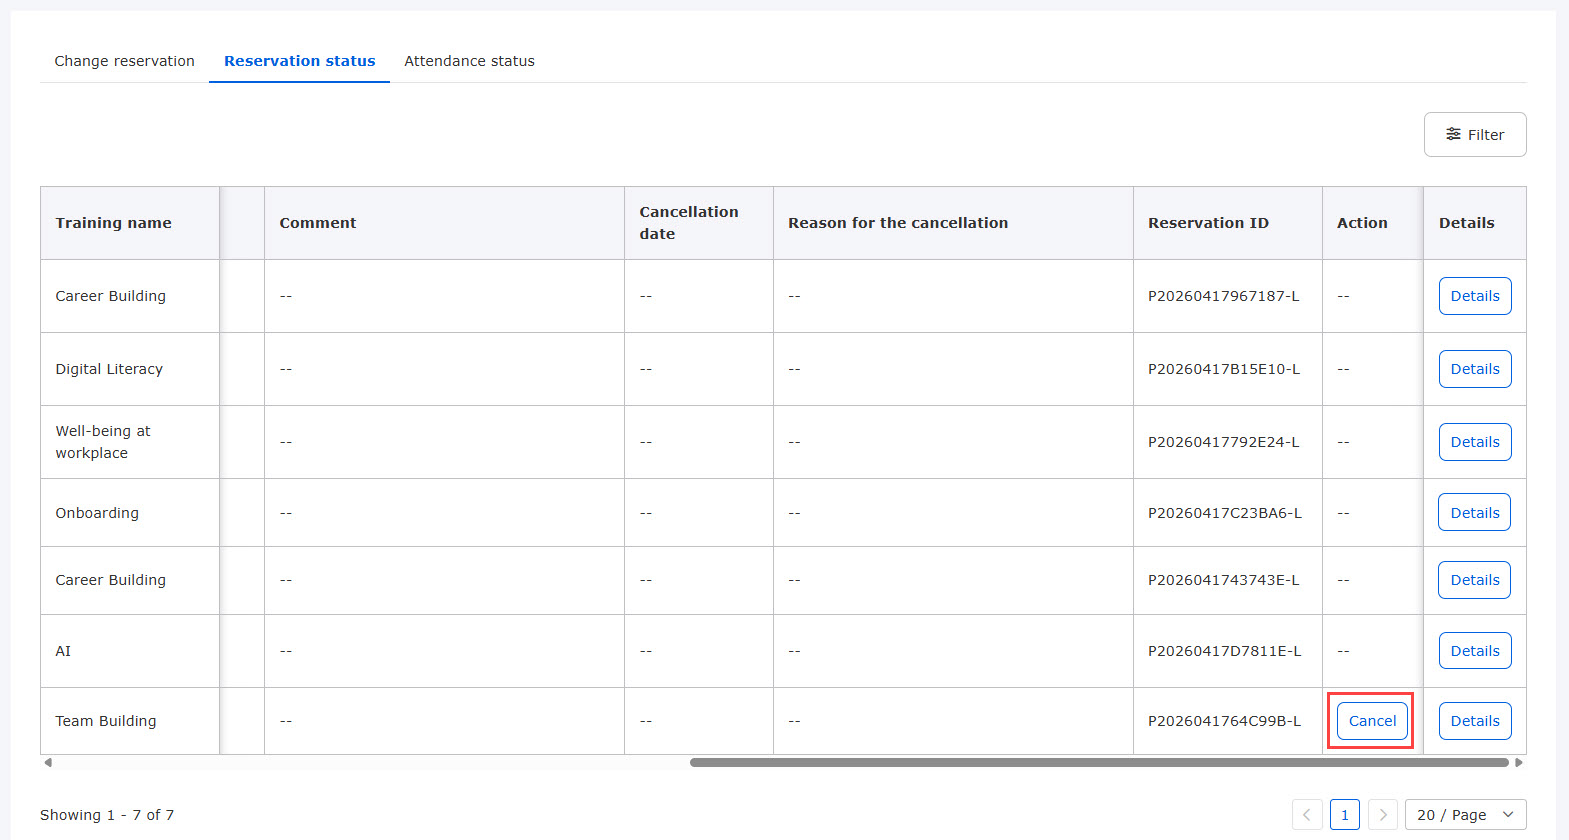
The following pop-up will appear when you click "Cancel."
Enter the reason for cancellation and click "Update."

When a training is canceled, Notification of training reservation change will be sent to the learner.
Attendance status
The learner's attendance status will be listed.
01. List of attendance status
Select the "Attendance status" tab.
Attendance status and more details will be listed.
*Only reserved training sessions will be displayed.
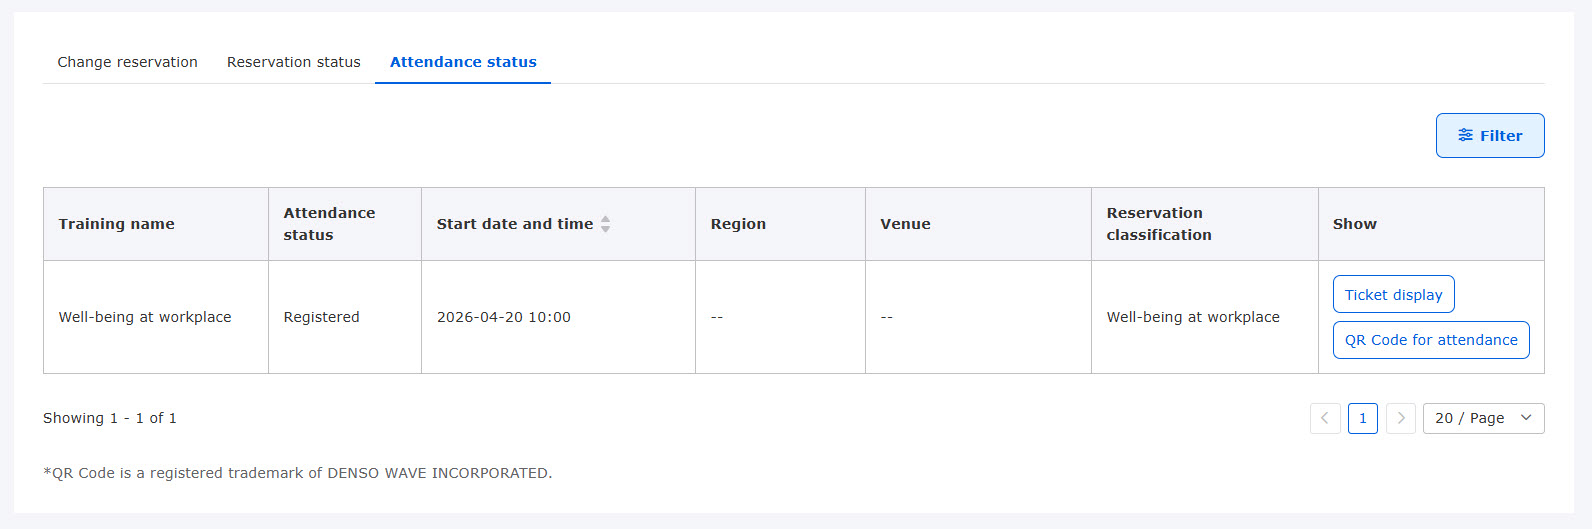
On a smartphone, the "Show" item appears to the right of the "Training name."
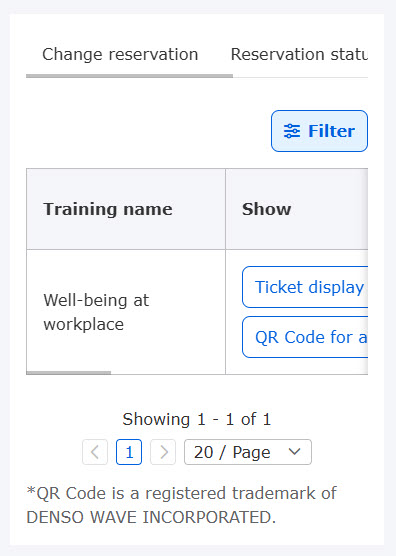
You can filter training sessions by clicking on "Filter."
Tick "Show archives" to view archived training sessions.

02. Ticket display
Click on "Ticket display" to view the ticket in a new tab.

03. QR Code
Click on the "QR Code attendance" to display a QR Code.
The organizer can scan the code for attendance on site.

The QR Code will not be displayed when the attendance status is Attend.
To display the code, the status must be "Registered" or "Absent."