Gear icon on Manage users
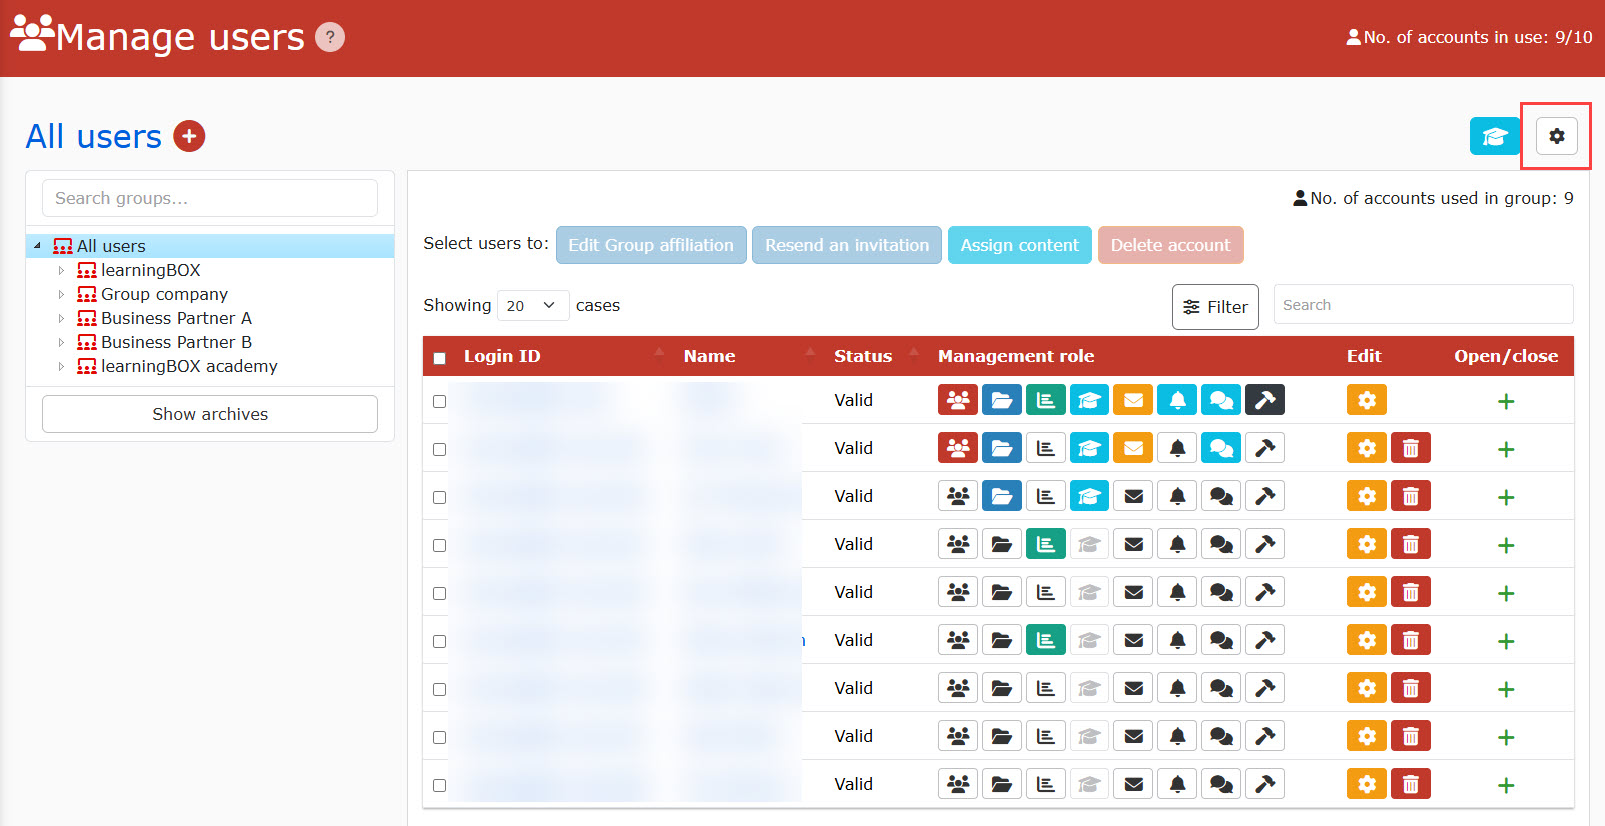
This section describes the role of the gear icon in the Manage users.
User list display settings
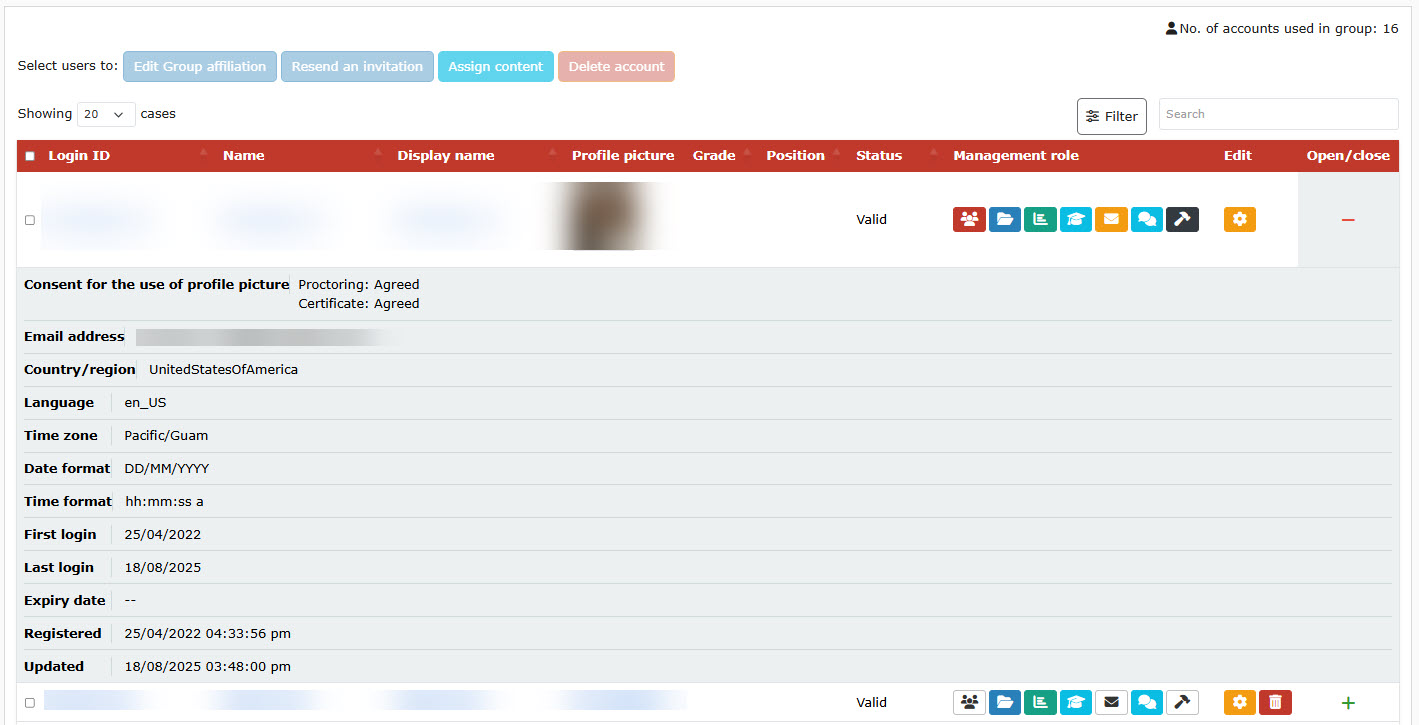
Items displayed in the list of users can be customized.
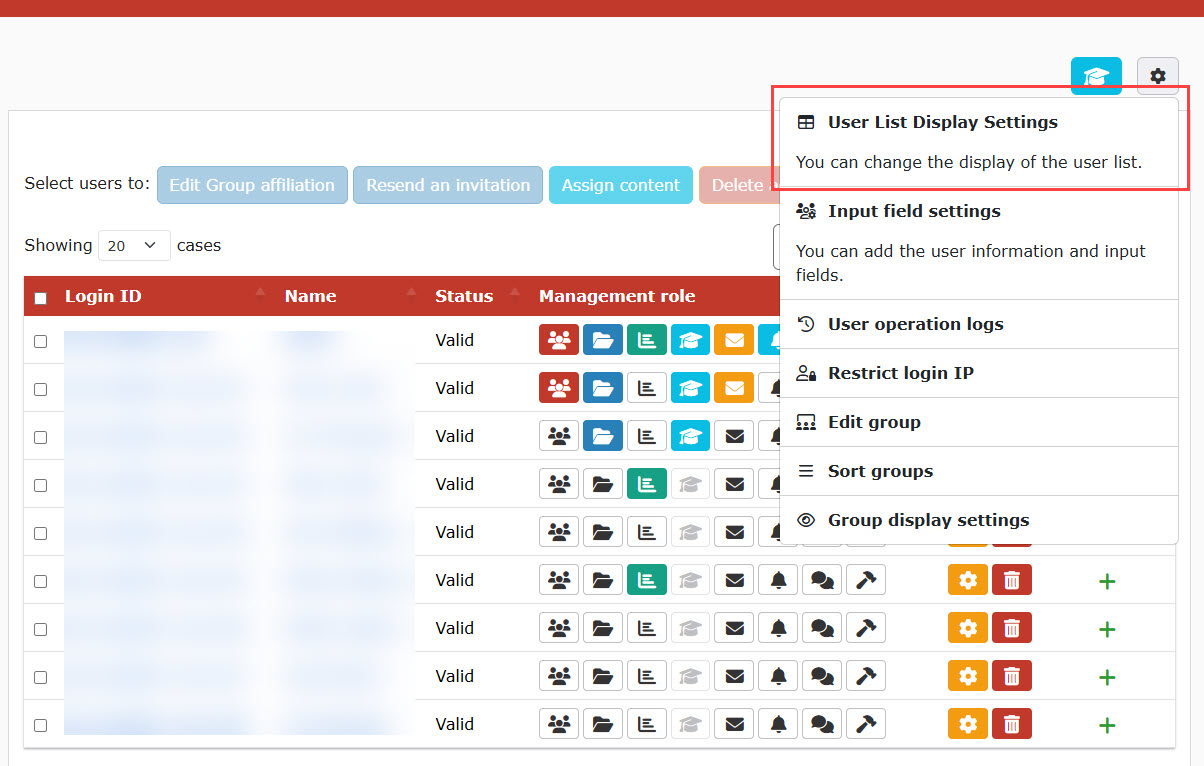
01. Go to user list display settings
Click the gear icon in the Manage users > "User List Display Settings"
02. Select items to be displayed
Tick the items to display in the list of users.
Save the settings.
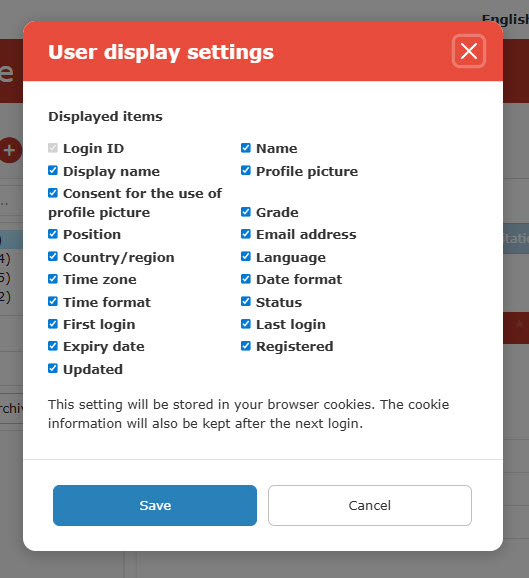
- Depending on the screen size, selected items may not be displayed on the interface.
- Items will be displayed when you unselect unnecessary items or change the size of the screen.
03. Open/close display items
Click the "+" icon in the "Open/close" column to show the details.
Input field settings
Click the gear icon in the Manage users > "Input field settings."
Manage user settings will be displayed.
The following explains the four tabs in the page.
▼ Input field settings
You can customize the items displayed on the user registration page.
*For more details, refer to Input field settings.
▼Account sign-up field settings
You can customize the items displayed when the profile is changed.
*For more details, refer to Account sign-up field settings.
▼ Account sign-up settings
You can allow learners to unsubscribe by themselves.
*For more details, refer to Account sign-up settings.
▼Login settings
You can customize the permissions regarding login such as Terms and Conditions, password change, user information and more.
*For more details, refer to Login settings.
Access log
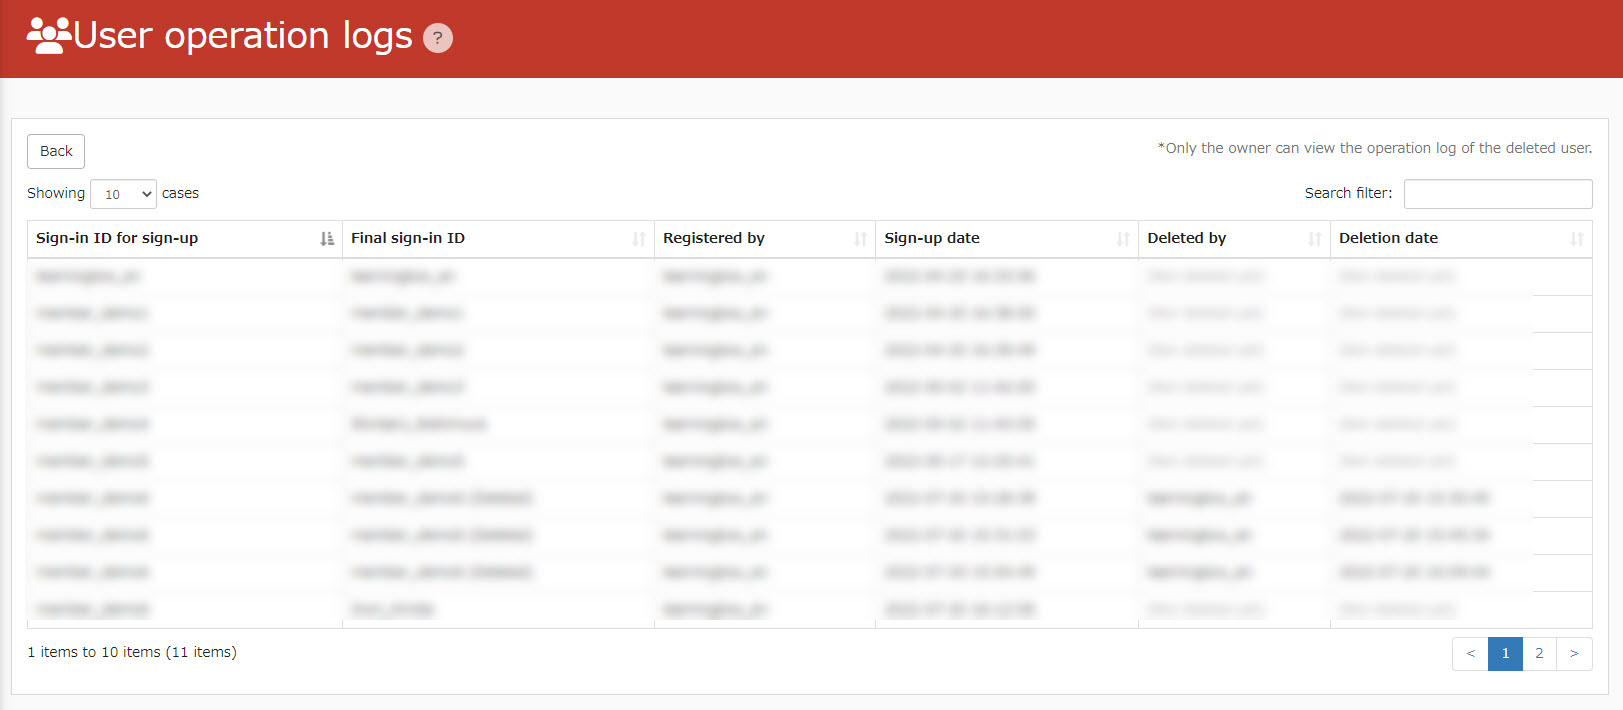
User registration, deteletion and more information will be recorded.
Required
Management role of Group manager + Co-admin
01. Go to Operation log
Click the gear icon in the Manage users > "User operation logs"
The following page will be displayed.
IP restrictions
Required
Management role of Group manager + Co-admin
*Users with the management role of Co-admin can access the following page from the System settings > "Manage IP Restrictions" in the side menu.
When you want to access the page from the Manage users, the role of Group manager will be required.
01. Go to Manage IP restrictions
Click the gear icon in the Manage users > "Restrict login IP."
*For more information about the content, please see "Manage IP restrictions.
Edit group
You can edit or delete each group from the list of groups.
01. Edit group
Click the gear icon in the Manage users > "Edit group."
02. Menu
The following icons are available.
▼ Assign content
Content can be assigned to groups.
*For more details, refer to Assign content to group.
▼ Edit group
You can edit the group information.
*For more details, refer to Edit group.
▼ Archive group
Groups can be archived.
*For more details, refer to Archive group.
▼ Delete group
Groups can be deleted.
*For more details, refer to Delete group.
Sort groups
Groups can be sorted in any order.
*For more details, refer to Sort groups.
Group display settings
The group display settings allow you to set the following items:
- Show expanded group structure
- Show the number of users in each group
*For more details, refer to Group display settings.
Profile picture approval requests
Approval requests of profile picture will be listed, and the approvers can approve/reject them.
*For more details, refer to Profile picture approval requests.