
Display settings
View detailed course information and manage content within courses.
*This page opens when you click a course on the Manage content page.
Required
Management role of Content manager (Edit/View)
Create content
01. Available content types
Click + Create new in the upper-left corner of the screen.

Folder
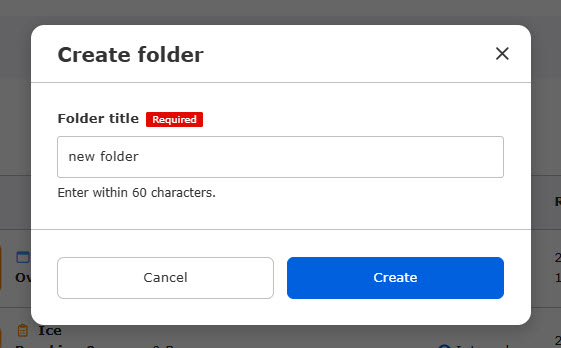
Create a new folder to organize all content within a course.
When you click, the pop-up shown below will appear; please enter a folder name and save it.
Content
You can create content such as quizzes/exams, PDFs, videos, etc.
Select the content type you wish to create.
- For more information about quizzes and exams, refer to Quizzes/exams.
- For details on other content, refer to Content other than quizzes/exams.
Questionnaire
You can create unique questionnaires to collect user feedback.
*For more details, refer to Questionnaire.
Certificate
Issue certificates to verify that learners completed content or passed an exam.
*For more details, refer to Certificate.
Gradebook
Link content created in quizzes/exams and personality test to the gradebook.
Linking to the gradebook enables detailed result analysis to track scoring trends and learner traits.
*For more details, refer to Gradebook.
Heading
Insert headings to structure and organize your course.
*For more details, refer to Heading.
Prerequisites
Set requirements that learners must fulfill to unlock subsequent content.
Example: Award a certificate only to learners who pass the exam.
*For more details, refer to Prerequisites.
Set up selective content
Allow learners to choose from multiple content options.
*For more details, refer to Selective contents.
02. Content list
The created content items are listed.
You can also view the file size and registration date for each content item.
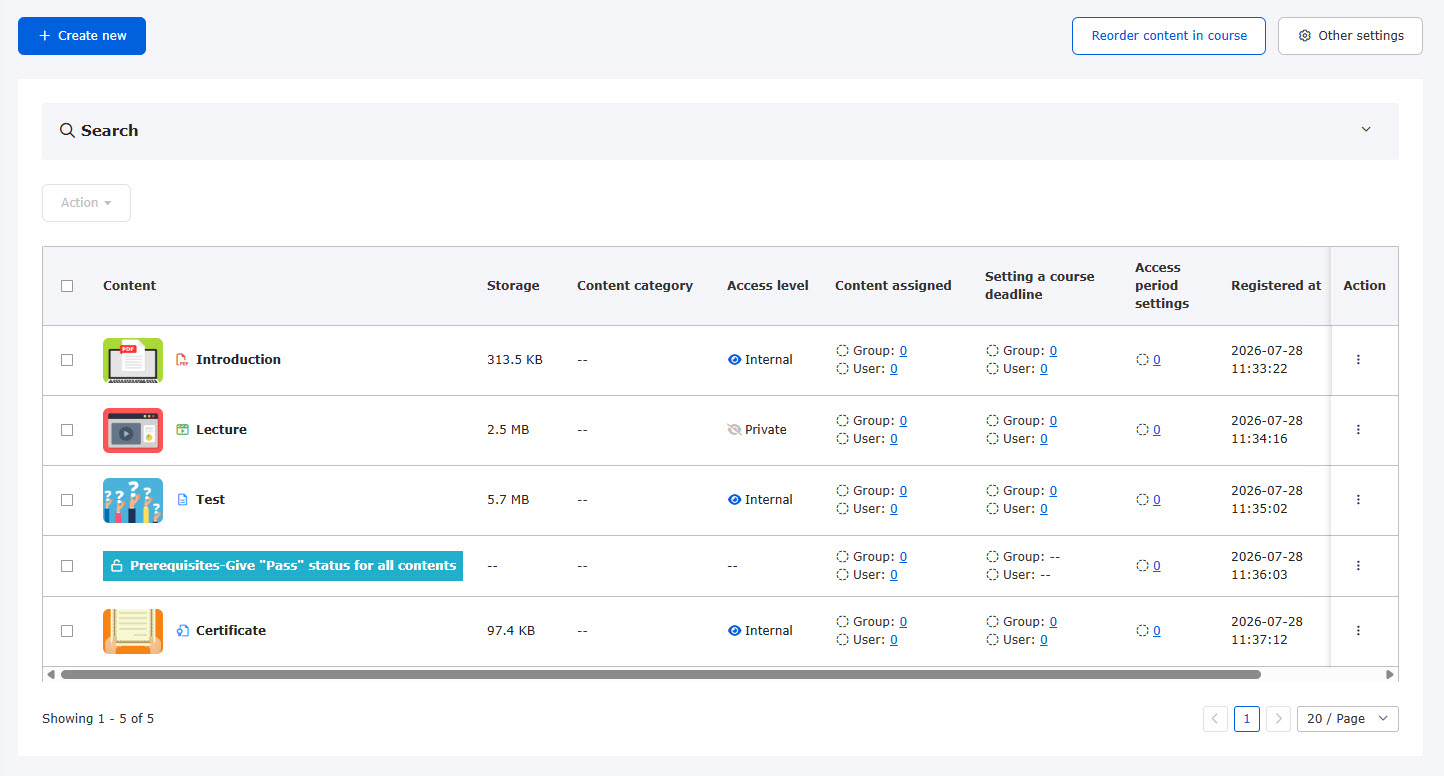
Use Search at the top of the screen to filter displayed content by specific criteria.
*For more details on the content categories, refer to Manage content categories.
To learn more about interlocking content, Interlocking content.

03. Course details
Key information, such as total content count and course file size, appears at the top of the course details page.
You can also edit basic course information from the ︙ icon on the right.

04. Manage access
Clicking Manage access at the top of the page takes you to the Manage content assignment can be accessed from Manage access.
From here, you can view, add, or edit settings for Content assignment / Deadlines / Access period organized by content, group, or user.

Edit
01.Checking Assignments, Deadlines, and Access periods
On the content list page, review the status of content assignment, Deadline, and Access period settings configured for each content item.
Required
Content manager (Assign)
The number of settings is displayed by group and by user.
*Settings regarding the Access period can only be configured for groups.
Note that if this setting is enabled, a green checkmark will appear.

Clicking each number opens the Assign / Deadline / Access period tab on the Buld actions page underManage content assignment, with the selected course already applied.

02. Action
Click the ⋮ icon to the right of any content item to open the Edit menu.
*For more details, refer to Edit content.

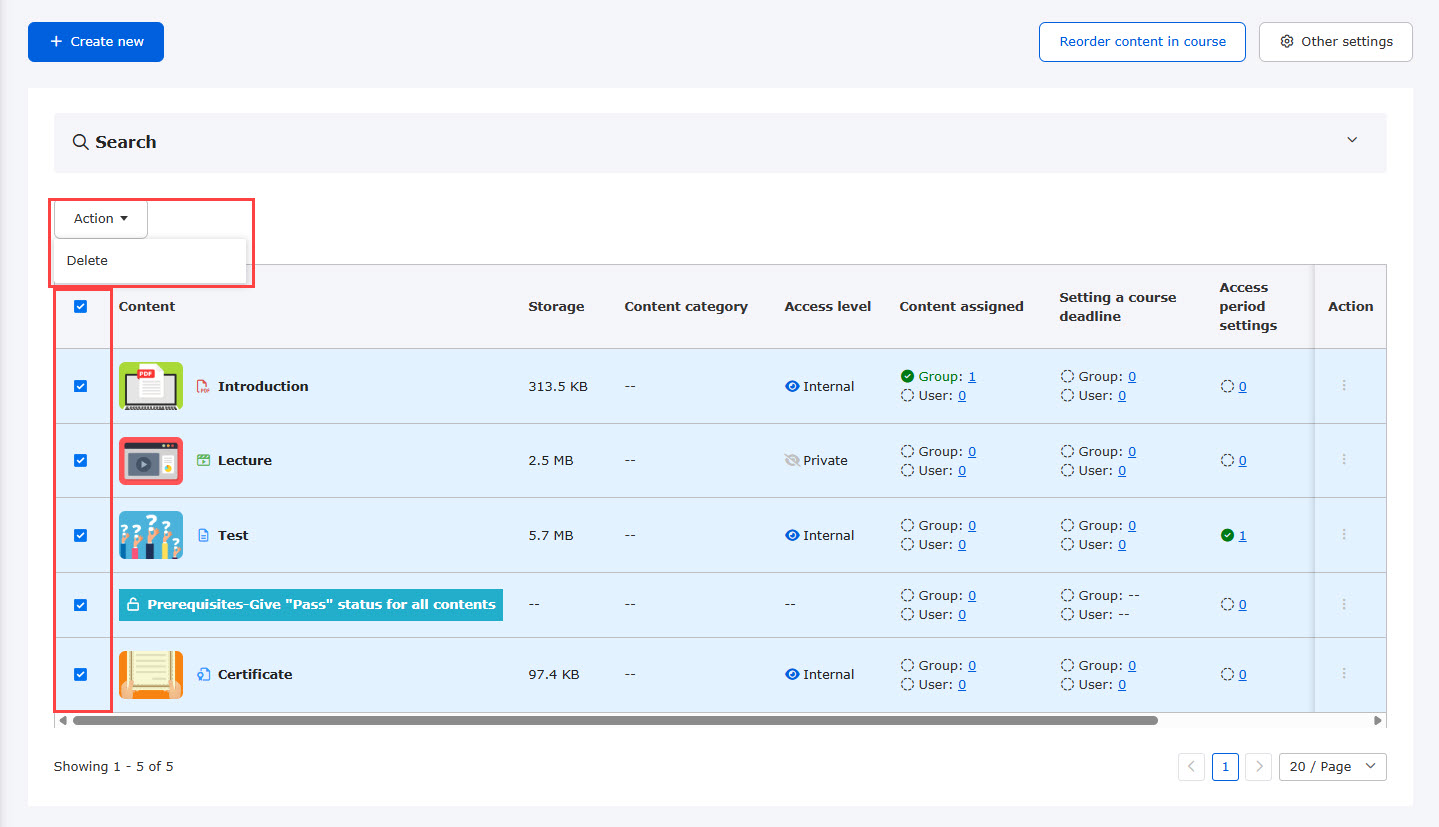
03. Bulk deletion
Delete multiple content items at once by checking the box next to each item and selecting Action > Delete.
Reorder course content
01. Open course details
Click Reorder content in course in the upper-right corner of the screen.

02. How to reorder courses
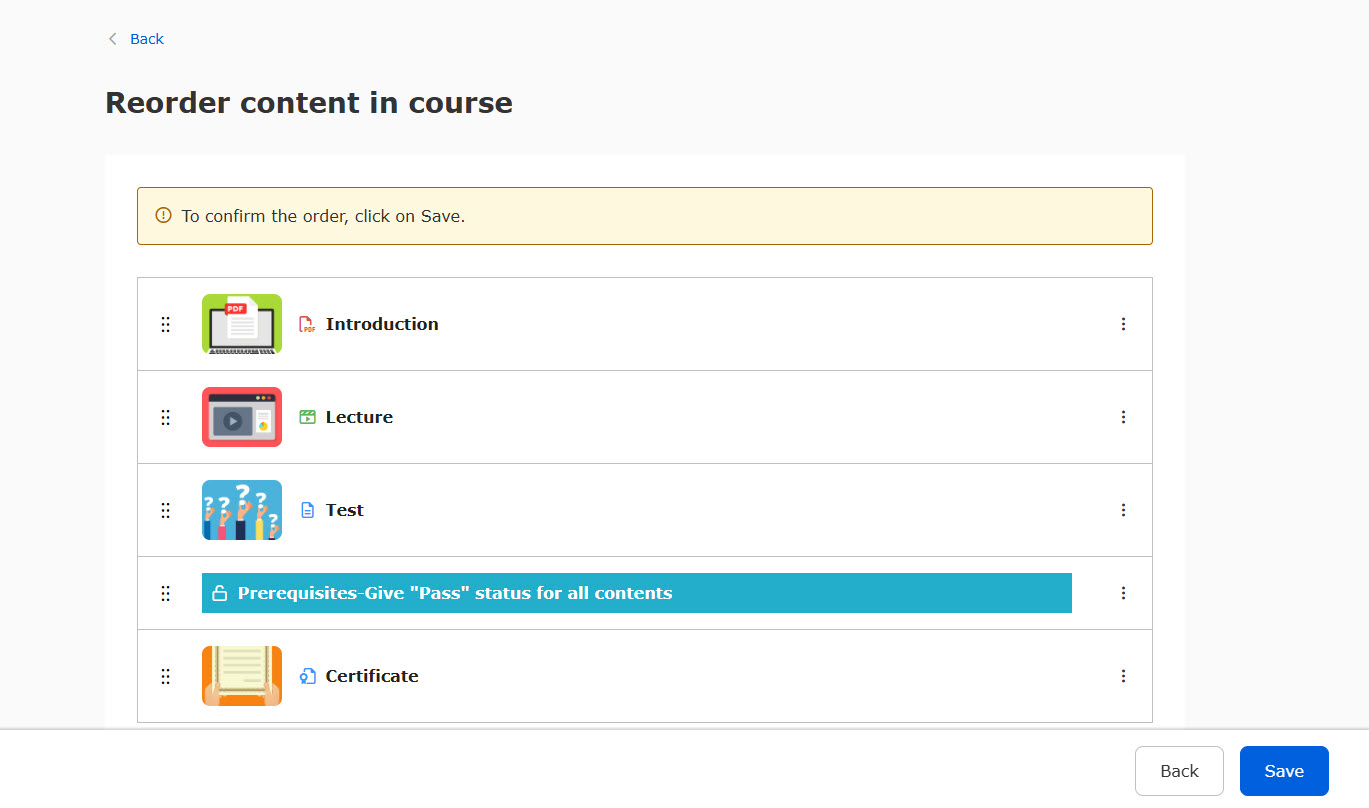
The following page will appear.
Drag and drop content items using the ⋮⋮ icon.
Use the ⋮ icon to move an item directly to the top or bottom.
Click Save to apply the new order.
Click Back to go back to the course details.
Other settings
Click Other settings in the upper-right corner of the screen to open the following menu.
*For more details, refer to Other settings.
